• Welcome to The Truck Stop! We see you haven't REGISTERED yet.

    Your truck knowledge is missing!
    • Registration is FREE , all we need is your birthday and email. (We don't share ANY data with ANYONE)
    • We have tons of knowledge here for your diesel truck!
    • Post your own topics and reply to existing threads to help others out!
    • NO ADS! The site is fully functional and ad free!
    CLICK HERE TO REGISTER!

    Problems registering? Click here to contact us!

    Already registered, but need a PASSWORD RESET? CLICK HERE TO RESET YOUR PASSWORD!

Rebuilding a GEP Engine

so i can't just buy a box with 10 std sized bearings in it ......

You can't necessarily say until you've measured the crank & then it's still somewhat an opinion/subjective in how picky you want to be. Here are the factory spec oil clearance service ranges for mains 1 thru 5. The rear main tolerance is a little looser.

If I recall correctly, Heath said in the article about the LSR engine that they aim for both rod & main clearances at 0.0018 - 0.0023". I set mine a bit looser than that. Hadn't seen his article & there's often a few hp in slightly looser oil clearances. If I had it to go again, I'd prolly set the clearances a bit more toward the tight end of the spectrum as the article said Heath does.

0.0018 - 0.0033 0.0018 - 0.0033 0.0018 - 0.0033 0.0018 - 0.0033 0.0022 - 0.0037

Would be nice to know what GM's original assembly spec allowance was? "select fit" can be done both to arrive at a tighter tolerance range, or to allow using a wider tolerance range of available parts w/ fewer cranks/blocks rejected or having to be remachined into spec. In consideration of the main cracking issues, etc., it's not easy to have supreme confidence GM went "select fit" primarily because of their tremendous concern for ultimate precision/consistency/accuracy.
 
Last edited:
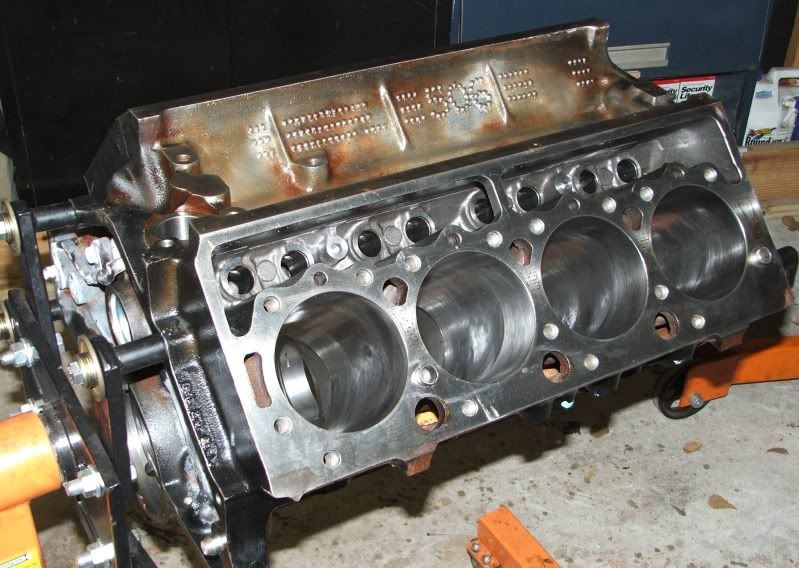
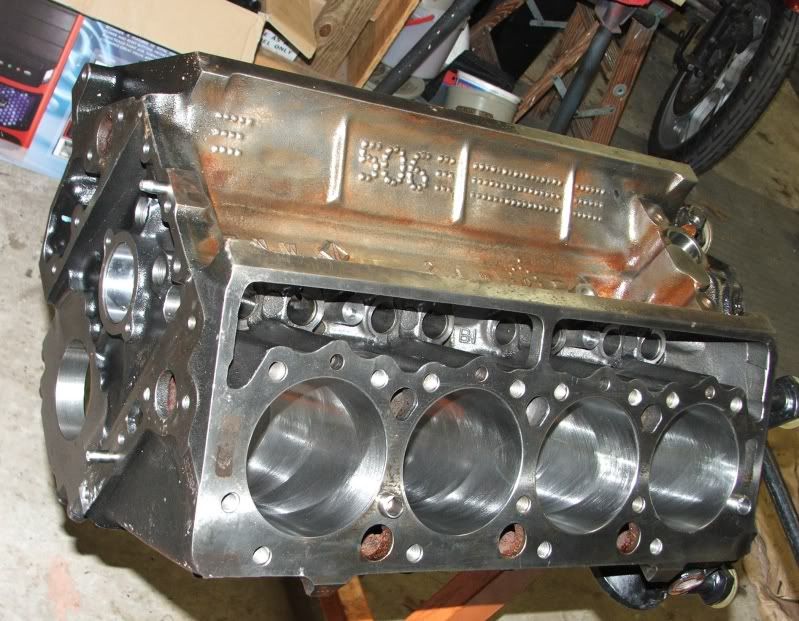
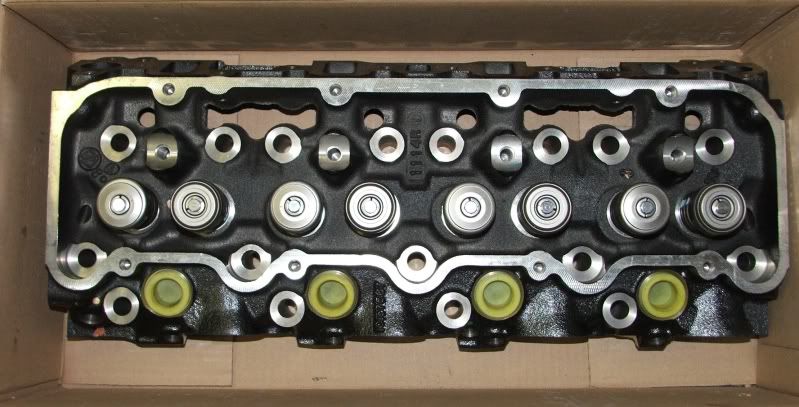
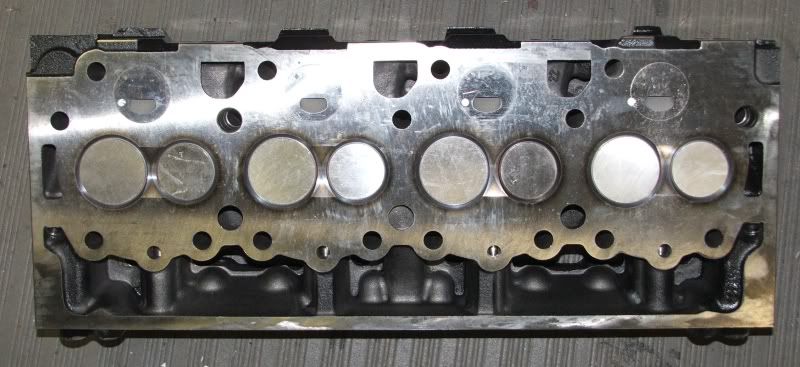
Not much to report, but I got the block back from the machine shop today. It was bored 20 over. The deck was fine, so still standard height deck. I had it hot tanked and new cam bearings installed as well. The pistons are Mahle with .010 reduced deck height. This should reduce the compression ratio about 1 point, I'm shooting for 20-20.5:1. My new heads came today as well and they look very nice. That's it for now, I hope to get the block cleaned and primered this weekend. Still undecided about the engine color, but I'm leaning towards Detroit Alpine Green.

Blockbored-1.jpg

BlockBored2.jpg

Here is the block, just back from the machine shop

NewHead2.jpg

The new heads, fresh from AMG. 1114R date code indicates it was cast Nov. 14, 2009.

Newhead1.jpg

These heads have Diamond precups.
 
I would have thought that the hot tanking would have gotten rid of more of the rust in the valley. Other than that lookin good. It's looking like you will have your's together before I have mine done.
 
the old formula hot tank would have but the new enviromently friendly crap is just that crap.

You got that right - its better than nothing but not like the old stuff. They can shot blast it but I don't like that as I don't think you can get rid of all the shot beads. In fact, I know of an engine (not mine) that seized up and they found loose shot beads in the engine when it was torn down.
 
if you have a garage and all the grease is gone from the engine you can dip it yourself at home. I will try to find my notes but I dipped my own axles for the Land Cruiser at home to remove the rust..... just need a tub, battery charger, water, and a catalyst.
 
Good looking iron, Bobbie. IF you tear down the heads (I say, IF) be sure and photograph those ports and bowl areas. I wonder if they are cast any better than GM stuff? The pics I've seen of the GM castings make me wonder how these poor 6.5's run as good as they DO...
 
I have drained and flushed the cooling system on an older vehicle and added a washing soda water mix and run it for awhile. It does a fairly good job of cleaning.

This cannot be done if any part is aluminum
, this would cause a chemical reaction.
 
I have drained and flushed the cooling system on an older vehicle and added a washing soda water mix and run it for awhile. It does a fairly good job of cleaning.

This cannot be done if any part is aluminum
, this would cause a chemical reaction.


it would eat the aluminum...... if you have cam bearings in you should remove them before dipping your block in washing soda, or soda ash....

I guess for your cooling system you could use a bucket to bypass the radiator and remove the heater core from the circuit.
 
I vote for gloss black paint on everything but the valve covers. The covers need to be whatever color you desire. Trust me, an entire red, cat yellow, or whatever block in color can't really be seen with all the old accessories on it. Valve covers can be seen.

All my signature engines are black with bust 'r cherry red valve covers. ):h
I have to disagree with that. Black makes the engine disappear into the engine compartment. Black is almost impossible to keep clean looking. Black makes it very hard to track down a leak if[when] it happens. I paint all the accessories and their brackets.I'll let you guess what color is my favorite
 

Attachments

  • IMG_0188_1_1.JPG
    IMG_0188_1_1.JPG
    47 KB · Views: 51
  • IMG_0255_11.JPG
    IMG_0255_11.JPG
    51.8 KB · Views: 56
What's it look like installed?

That's a LOT of work to detail one out, been there.

Looks good though.
 
You guys might like this. When I rebuilt mine what I did to clean the parts was throw every thing that would fit in a big crawfish boiler. Added 50% Purple Power to water. Brought it up to a raging boil for 20 minutes.
Those parts came out perfectly clean, I was impressed.
My pot is big enough to do the heads but not the block.
You can do all the plastic parts, wire harness.... just about anything.
It is so nice to work with clean parts:smile5:
The pot won't be good for shrimp anymore:nonod:
 
Here you go. If it weren't for the bright intake on the black engine ,you wouldn't see it.
 

Attachments

  • IMG_0195_3.JPG
    IMG_0195_3.JPG
    44.3 KB · Views: 40
  • IMG_0350_7.jpg
    IMG_0350_7.jpg
    46.4 KB · Views: 45
You guys might like this. When I rebuilt mine what I did to clean the parts was throw every thing that would fit in a big crawfish boiler. Added 50% Purple Power to water. Brought it up to a raging boil for 20 minutes.
Those parts came out perfectly clean, I was impressed.
My pot is big enough to do the heads but not the block.
You can do all the plastic parts, wire harness.... just about anything.
It is so nice to work with clean parts:smile5:
The pot won't be good for shrimp anymore:nonod:

dang it.:mad2: i now remember you or maybe someone else saying that in annother thread a while back to bad all the parts are cleaned and painted now. still got all the nast bolts and stuff to clean tho deffinetly going to put them in some sort of basket and use your method!! i remember reading it and thinging to my self remember that it could come in handy some day! guess i forgot:mad2::mad2:
 
Had a problem with the cam bearings. The oil holes were not oriented properly and they didn't have a notch in the front like they should. I now have a box of Clevite cam bearings with a notch in #1. I'll have them installed with the oil holes oriented at 4:00, which is per the military manual. The machine shop has the balancing done, so when i take the block back I can get the internals.
 
dang it.:mad2: i now remember you or maybe someone else saying that in annother thread a while back to bad all the parts are cleaned and painted now. still got all the nast bolts and stuff to clean tho deffinetly going to put them in some sort of basket and use your method!! i remember reading it and thinging to my self remember that it could come in handy some day! guess i forgot:mad2::mad2:

You will like the results, some parts like timing gears, push rod.... came out so sqeeky clean i had to oil them to keep them from rusting.

I also used this method to clean the inside of a diesel fuel tank that was nasty. Filled it up 1/4 way with water and purple power. Let it come to a boil. make sure the direct heat is applied to an area that has water on the inside, if you put the buner on an area that is not covered on the inside by water it can burn/discolor the tank, the one I did was painted and burned a small area of the paint off.
 
Someone mentioned trying to seal head studs-

I havent rebuilt a chevy diesel yet but on all the chevy gas engines I have rebuilt or swapped heads I coat the head bolt threads with Permatex 2 and never had a coolant leak.

The stuff is sticky and nasty and I have never had anything leak that I used it on and I bet it will seal those head studs.
 
Back
Top