• Welcome to The Truck Stop! We see you haven't REGISTERED yet.

    Your truck knowledge is missing!
    • Registration is FREE , all we need is your birthday and email. (We don't share ANY data with ANYONE)
    • We have tons of knowledge here for your diesel truck!
    • Post your own topics and reply to existing threads to help others out!
    • NO ADS! The site is fully functional and ad free!
    CLICK HERE TO REGISTER!

    Problems registering? Click here to contact us!

    Already registered, but need a PASSWORD RESET? CLICK HERE TO RESET YOUR PASSWORD!

What did you do with your GMT400 today...or yesterday....

Dbrannon,

While we were discussing decals I figured I’d show the type of decal I’m having made for another engine I’m rebuilding.I know this isn’t GMT400 info I’m about to show but I’m having 4 of these decals made locally for my 1981 350 diesel rebuild.I think these will look great on the chrome valve covers.About 1” wide and 4” long.

Sorry bout the derail.Anyway back to GMT400 discussions🍻IMG_4521.jpeg
 
Dbrannon,

I know this isn’t GMT400 info I’m about to show but I’m having 4 of these decals made locally for my 1981 350 diesel rebuild.I think these will look great on the chrome valve covers.About 1” wide and 4” long.

Sorry bout the derail.Anyway back to GMT400 discussions🍻View attachment 83746
Nice! LOL I'm already thinking in my head if that can be made on the machine and change the numbers for our 6.5's iirc its 396 or something like that. that would sure make someone turn their head to the side seeing a sticker like that on the drivers valve cover!!
 
what's this talk about a Dakota dashboard! LOL I know your talking about the digital dash thing. But the thought sparked me to look at some random pics of a Dodge Dakota dash layout.... interestingly it's funny that just looking at the pics online, the shape and layout of just about the whole dash can be made to fit in our GMT400's without a whole lot of modifications. maybe even the seats and other items too!

Ya I know I'm wishing too much LOL.

View attachment 83742
More along the lines of this one:
1696342409304.png
 
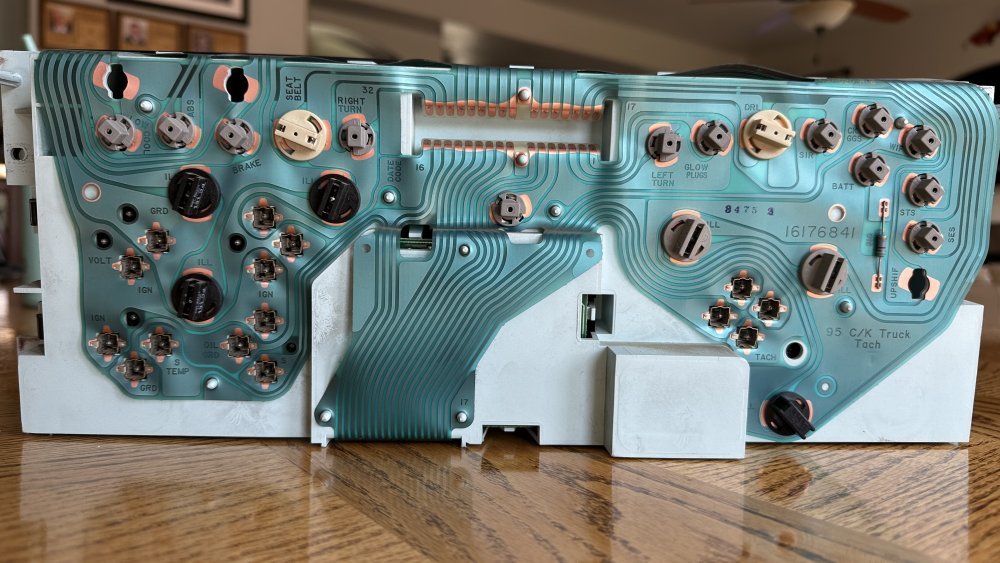
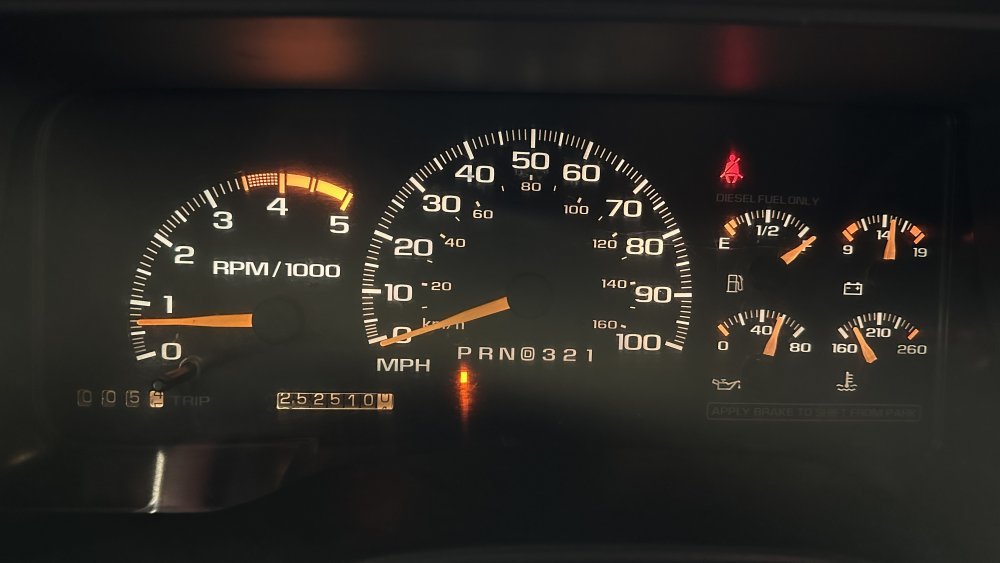
Took longer than it should but, got the LED bulbs to work In the instrument panel. Old 194 bulbs are soldered into the T10 socket and tried to use the ones from the cheap blue LED kit. Key word is cheap and, as a result, some of them wouldn’t work and were seemingly damaging the circuit board’s contact patches. Thankfully, that wasn’t the case but….
IMG_8288.jpeg
Before taking things apart

So, I ordered OEM units from Amazon and there things went even more wonky. Order 1 socket, get it today. Order two or more…NEXT WEEK! Ended up going to the stealership and the OEM units (which Amazon incorrectly states won’t fit a 96) work perfectly. Fortunately, the smaller #74 bulbs aren’t soldered into the T5 sockets so I was able to reuse the originals.

Old bulbs dim and yellowish.
IMG_8256.jpeg

New bulbs are “Cool White” in the 6500K temp. range. Crisp, Clear and pretty much the blue hue I was going for.
IMG_8310.jpeg
FWIW, I went back to incandecant bulbs for the Glow Plugs, High Beam and SeatBelt warning. Those didn’t work right with LEDs.
And, the most important thing is that the bulbs do, in fact, dim quite nicely.
I replaced the bulbs in the HVAC controller too. Looks real good. T3 bulbs and sockets, hopefully, for the door lock and window buttons and more #194s for the 4x4 floor shifter are next.
 
Last edited:
Took longer than it should but, got the LED bulbs to work In the instrument panel. Old 194 bulbs are soldered into the T10 socket and tried to use the ones from the cheap blue LED kit. Key word is cheap and, as a result, some of them wouldn’t work and were seemingly damaging the circuit board’s contact patches. Thankfully, that wasn’t the case but….
View attachment 83816
Before taking things apart

So, I ordered OEM units from Amazon and there things went even more wonky. Order 1 socket, get it today. Order two or more…NEXT WEEK! Ended up going to the stealership and the OEM units (which Amazon incorrectly states won’t fit a 96) work perfectly. Fortunately, the smaller #74 bulbs aren’t soldered into the T5 sockets so I was able to reuse the originals.

Old bulbs dim and yellowish.
View attachment 83815

New bulbs are “Cool White” in the 6500K temp. range. Crisp, Clear and pretty much the blue hue I was going for.
View attachment 83814
FWIW, I went back to incandecant bulbs for the Glow Plugs, High Beam and SeatBelt warning. Those didn’t work right with LEDs.
And, the most important thing is that the bulbs do, in fact, dim quite nicely.
I replaced the bulbs in the HVAC controller too. Looks real good. T3 bulbs and sockets, hopefully, for the door lock and window buttons and more #194s for the 4x4 floor shifter are next.
Not clear exactly what you did here. Did you get OEM LED bulbs from the dealership?

P.S. the OEM gauge cluster looks way better than the Dakota digital.
 
Yes, just the T10 Sockets.
1696523911039.png

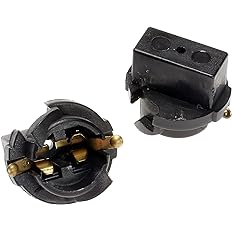
ACDelco Professional LS130 Multi-Purpose Lamp Socket OEM part # 88860432​

As mentioned, the 1996 OEM 196 bulbs were soldered in to the T10 sockets. Even after getting them out the socket was useless because there aren't contacts for the newer bulb designs, only on the edges outside edge of the blade. Only a car manufacturer's accounting department would opt for that design.

Agreed about the Instrument Clusters' new look. Very pleasing.
 
I ran into the same issue with the sockets in mine being soldered to the bulbs, I can't recall where I found the sockets I used at, but the only issue I have with my cluster now is with the dash lights on, my hi beam indicator will slightly glow.

@Paveltolz would you know if there is a gasket of sorts inside the cluster shielding light from getting into the indicator areas? I never went back into the cluster to see why the hi beam one had a dim glow. though it lights up bright when the hi's are on.
 
@Paveltolz would you know if there is a gasket of sorts inside the cluster shielding light from getting into the indicator areas? I never went back into the cluster to see why the hi beam one had a dim glow. though it lights up bright when the hi's are on.
I didn't open up the instrument panel to see how it was constructed. I did look through the empty sockets to see what each bulb was supposed to illuminate and didn't notice a gasket per se anywhere. For the High Beam Indicator I didn't see any bleed over from the old bulbs, new incandescent (testing the sockets that weren't working) or new LEDs. FWIW, The High Beam light wouldn't stay lit with the LED #74 so I went back to incandescent for that one as well as a couple of others (wait to start for one).
 
I might need to pull and open up mine again and see what happened. it could very well be the fact that I had pieced mine together using the rear plastic from another cluster. back when I had bought the truck, my gauge needles were all over the place showing way off readings. I pulled it apart thinking the little motors were bad. I quickly realized someone before me had been in it before. the separator between the check engine and the service throttle light was broken out, looked like it was chewed on with pliers. the needles slip right off using a plastic fork prying up at the center. apparently they had just pushed the needles back not checking if the gauges were zeroed out.

a trip to the junk yard for another cluster (all I could find was for a gasser) the gauge layout and and indicators were the same other than the symbols. so I used the rear section from the gasser cluster and my face with the gauge motors, and ribbon circuit board to reconstruct the cluster.

There is probably a small gap between the two halves or something I missed. I still have the gasser cluster (what's left of it) in the garage saved for a rainy day lol
Removing the lens helped make the multiple in and out swaps much easier. However, the needles did get move around a bunch. Speedometer was easy to just move back to zero. The fuel, water, temps. and pressure ones on the right side I just gently moved the needles back towards zero and the motors just balanced the readings out to ‘normal.’ Big relief.

I’d like to see the insides of your gasser cluster too so, if and when you open it up, please post up a few pictures. Curiosity and all.

Just waiting for the next batch of AC Delco T10 Sockets so I can pull the CKO crap ones used for the iridescent bulbs and replace with these OEM-ish China made ones. No winning.

I ordered T3 LED bulb/sockets for the headlight switch and possible door lock/mirror stuff in the doors. ,While technically too small (should be T4 probably) I was able to insert them in such a way as they still illuminated.
Waiting on an AutoMeter dimmer to get the pillar gauges brilliance under control. Should be here tomorrow so I’ll finally be able to put the dash back together.

In the meantime, returning a bunch of Bulb and Socket kit CRAP to Amazon along with copper tape I thought I might need to repair contact patches on the ribbon circuit board and such. Now, what to order?
 
Back
Top