• Welcome to The Truck Stop! We see you haven't REGISTERED yet.

    Your truck knowledge is missing!
    • Registration is FREE , all we need is your birthday and email. (We don't share ANY data with ANYONE)
    • We have tons of knowledge here for your diesel truck!
    • Post your own topics and reply to existing threads to help others out!
    • NO ADS! The site is fully functional and ad free!
    CLICK HERE TO REGISTER!

    Problems registering? Click here to contact us!

    Already registered, but need a PASSWORD RESET? CLICK HERE TO RESET YOUR PASSWORD!

What did you do with your GMT400 today...or yesterday....

The lower control arm is in along with the energy suspension bump stop.I have to say this control arm fit beautifully.Absolutely zero issues overall.One of the easiest I ever installed.No need to hammer anything in place.It fit like a glove.It just glided into position.

The only thing I had to change was the grease fitting that was supplied.I simply changed it out.The reason being was I could not make a complete left turn because the fitting was sticking out too much.Now there’s no interference.I put some rust check on the areas after it was assembled.Its the coat and protect product sold here in Canada.Its very similar to fluid film.

I didn’t mess with the bushings in the new control arm.I had prothane poly bushings here that would fit but I just decided to leave well enough alone.
The new lower control arms I ordered from Napa arrived yesterday for my 96 gmc truck.I have to say they are excellent quality and just as good as the moog brand I installed recently.Still waiting on the passenger side mevotech control arm to arrive from Amazon to finish up the 96 Chevy truck.
 
I always wondered what that thing was... when I did a dash swap on my 95 there was one of these mounted under the new one. I pulled it off and kept it not knowing what it was!
 
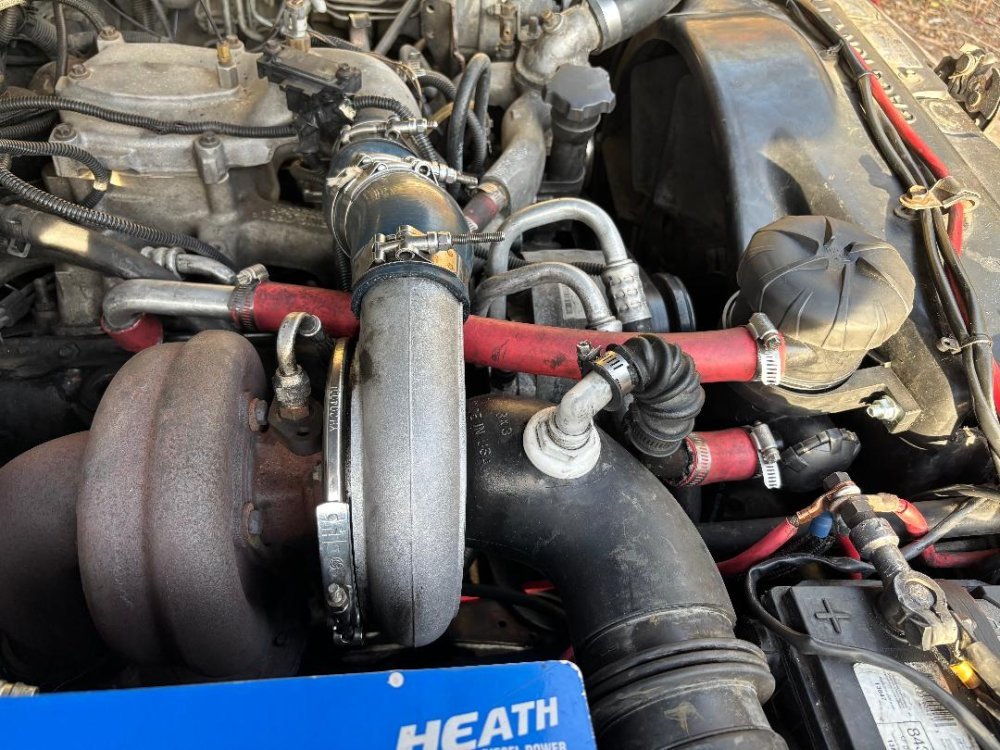
I installed a CKO ProVent catch can on the ‘94 K2500 today. Took my time, scratch up the back of my hands, but it is in.

IMG_7337.jpegIMG_7336.jpeg

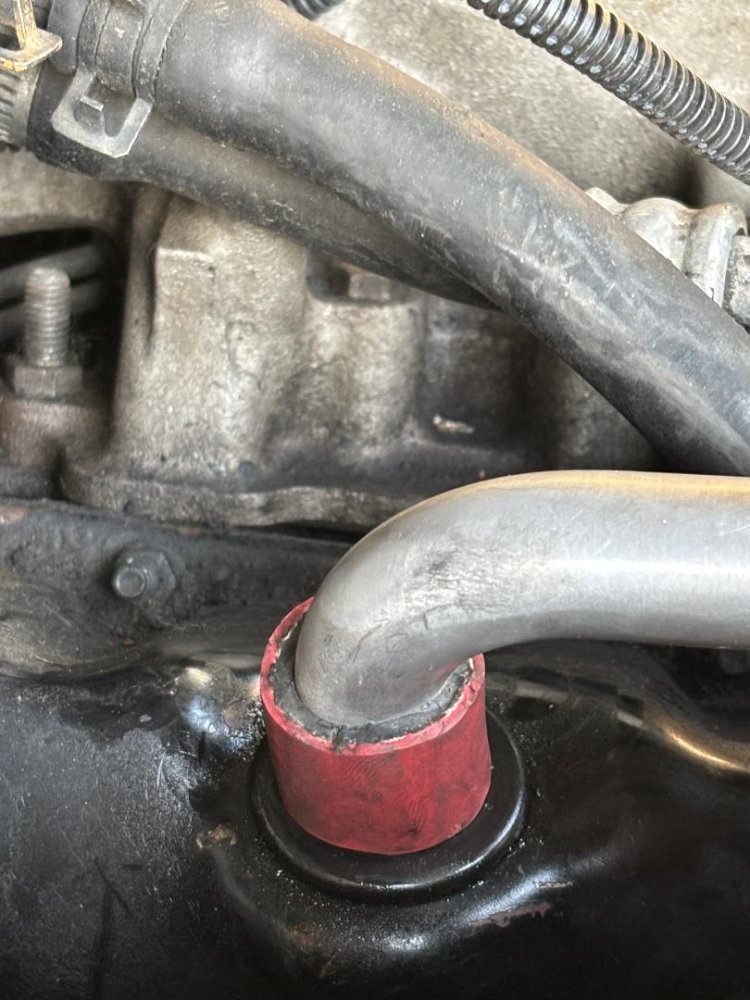
I had put a post asking which direction to install the check valve. I got it wrong, so I have some blowby coming out the valve cover grommet and more out the dipstick. It disappear when I remove the cap off the CKO ProVent. I will switch it tomorrow.

 
Is the check valve for the drain on the provent? I just used a small hose and a ball valve.

is your provent the real provent with the built in valve in the lower hose connection? mine was a CKO unit and did not have any valve in it other than one on the inside of the cap.
 
When you have the drain hose go back to the block but not into the liquid filled area of the oil pan- you need the check valve or the system will not work at all.
He is draining his back into the oil return with the turbo drain.

Using a ball valve works if you have it going to a hose that you manually drain.
Usually people have the drain hose into a bottle then the ball valve drains out the bottle. The system doesn’t work as well using the check valve but still helps more than nothing.

I believe you can order just the check valve.
 
On the hose routing for the provent, since mine did not have an internal valve inside the provent I did a little experimenting on it catching oil. I found that it catches more oil by runing the hose from the valve cover to the bottom connection on the provent and the top connection to the turbo inlet allowing the flow of gasses to be forced through the filter and up. I know the design of the provent is for the upper connection to come from the valve cover and foces the gasses to go in a circular pattern through the filter and down out the bottom connection.

as of recent I still have the stainless mesh filter in the CKO provent but it's now wrapped with what the shop at my work call elephant diaper. its a piece of oil absorbent material surrounding the stainless mesh filter. so far it seems to be doing well for catching most of the oil in the blow by.

I would like to connect some sort of pressure gauge on the engine so I could possibly measure internal crankcase pressure while driving just to see what is happening with the tuna can CDR still connected or without it.
 
Sorry I have this going in two threads, but I need feedback:

IMG_7342.jpeg


On the left of the valve is jcoming from the CKO ProVent; right is going to the engine. The rounded edge of the wide part of the valve is towards the engine.

So the non-flared end it facing the motor. When I blew into that end, it closed the valve. So in theory, blowby pressure in the engine case would close the valve, resulting in the blowby to circulate through the CKO ProVent and through the turbo.
 
BigT & I spoke.
For the drain hose, The check valve is correct on his and is not vertical but close.
For others in the future: the valve should have the flared end towards the provent. You should be able to blow from the provent down to the crankcase (in his case to to the turbo drain plate). You should NOT be able to blow from the crank case back into the provent.
 
OK ran truck on some errands, probably like 8 miles. Everything seems to be fine. Video below shows blowby coming out dipstick before and after removing the top cap on the CKO ProVent. The blowby from the valve cover grommet is basically gone.


Also note how the oil leaks have all been cleaned up. I did get the cap cross threaded at the end there.

The check valve is hanging at 7 o’clock as opposed to 6 o’clock, so it should drain fine.
 
finally got out there and did the oil change today with the weather dried up and in the 60's. decided to go from the cheapo walmart 15-40 to the Rotella T6 synthetic 5-40 like I use on the 95 since I'm putting more miles on it and hoping it might help clean better too.

I decided to check on the CKO provent, cleaning it out and all. after the oil change I started it up with the cap off and it immediately blew the filter out of the canister of the provent!! being I had wrapped the CKO filter with that thin sheet of oil absorbent material which is basically a fine woven stranded fiberglass material. all the blow by had completely plugged it up with soot deposits. before the material had been "self draining out" of oil but I guess after 3000 miles of use the soot buildup mixed with oil was too much!

cut that all off and re-wrapped it with extra mesh I made with pot scrubbers. stuffed the center full of pot scrubbers too to get as much surface area possible for the oil to grab onto and drain into the bottom. this time it didn't blow the filter out. I guess this means I can't use the real provent filters with this engine else I would be going though them like a mad man LOL

I might go back to how I had it before with about three of those pot scrubbers stuffed inside the 1" hose running from the CDR on the valve cover to the provent, that was catching a decent amount of oil before it went into the provent.

pulling that materials out should also help with the gasket leaks on the engine too. I think this engine is far gone and might not last much longer

I think my last stitch effort to catch the oil and keep it from throwing it back into the intake will be to maybe order another CKO provent and mount it under the cab somewhere with ether a real filter or more stuffing of stainless mesh, running long length of hose and go between this provent and the intake where it's not under the hood and can cool and condense some of the oil.

Blow by is getting to the point I can put my thumb over the hose on the intake and it'll blow the dipstick or oil cap in a couple seconds!
 
Did the church journey, 60 miles round trip.
Got back to town and once again fueled with No.1.
Took the roughest sloshiest road from the bulk station to my house, along the Yellowstone river. I wasnt going to drive another fifty or sixty miles to make sure the fuel was blended. I just hope its mixed good enough to prevent any more gelling possibilities.
The Oldsmobile is now starting just fine so it once again will be my DD.
Only reason I’ll fire up the truck will be for a road trip.
While cruising the river banks run across a fishing critter.
I think His woman is on the bank yanking his chain for not bringing up a meal.
HEY FOOL THATS OVER FLOW YOUR FISHING IN AINT NO FISH IN THERE.
😹😹😹
IMG_1999.jpeg
 
@Big T yeah- track the oil useage now and hopefully it eases up from the 1qt every 1,000 miles its at now. 300,000 miles- that provent can run until this engine gets swapped for your spare from crash, then help it to the 400,000 mile mark hopefully too.

@dbrannon79 everything you can do to get the vapor to cool and coalesce back to liquid is the goal- but without backing up pressure. Remove the cap on the provent and watch the pressure out the dipstick tube with dipstick out. That is the blowby you will never get rid of without adding a vacuum pump because that is what is blowing past the rings at the moment before it can even evacuate naturally.


Now hold rpm up to 1,000 or 1100 and Make a video of it and save the video for comparison to your experiments. Whenever you get more flow than that you are restricting more than desired. At idle the turbo isn’t pulling enough to help the system out. It’s basically pressure pushing out the provent. But the turbo gets to sucking air like a vacuum and it will do some work. Having an actual vacuum pump is a neat theory but creates a host more work and cost that is hardly able to justify.

The advantage of the cdr itself is it slows down the flow of the air carrying the oil mist. A miniature muffler design or a pipe with opposing walls to make the air flow keep changing direction would be ideal imagine this is an aluminum tube with baffles inside to make the air flow up, down, up, down, repeat. Slowing the air and shedding the heat out would help. Then LOOSELY having your stainless steel or copper mesh fill the void. Again- you want to slow the flow to cool the air but doing it with minimal pressure build up.
Remember where I told Big T about long hose from valve cover to provent, then short hose provent to turbo. This is to maximum vacuum at the restrictive filter in the provent. But ideally the whole system would be ice cold.

As to the provent filters- i haven’t played with what chemicals can clean the oil from the filter for re-use but not damage filter. But there has to be something. We need a person who can analyze the filter media. If we knew what it was made of we would know how to clean it without damaging it.
Maybe cutting up an old one into test squares and see what does damage and what doesn’t? Then we would learn how to reuse it the longest.
Seeing as it is built for oil, I would think a soak of gasoline shouldn’t hurt it. Then let it dry out naturally because blowing with an air hose is very likely to damage the fibers.
Problem is the filter is highly engineered and secretive because thats the part the cko folks can’t get right and why the real one works so much better.


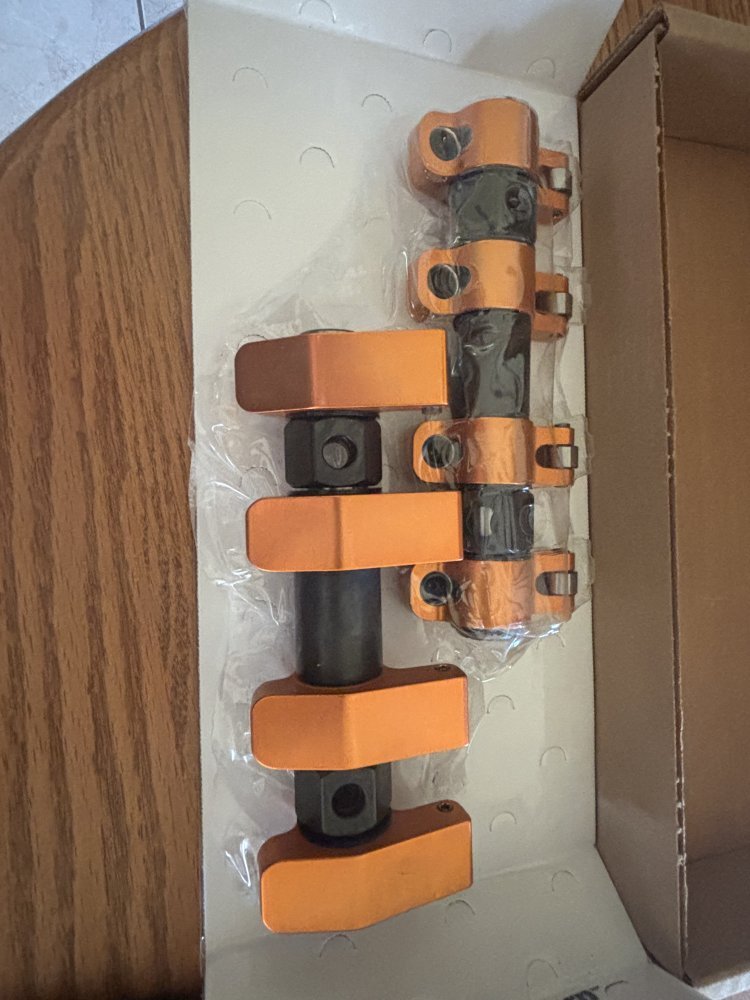
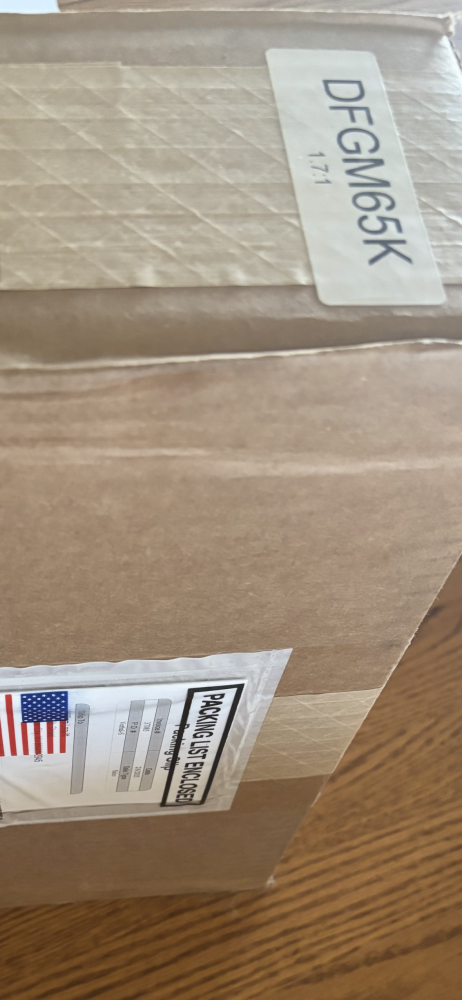
Oh, mine isn’t a gmt400… but i did break open the box to enjoy the prettiest rockers. Note the 1.7 on the box, not 1.6 since I also have the prettiest 18.1 TSP valve relieved pistons needed to run the 1.7 in rockers.

IMG_2900.jpegIMG_2903.jpegIMG_2904.png
 
I might have brainstormed a cheap and dirty idea for making a simple oil catch can to plumb inline with the current CLO provent along with mounting it under the truck somewhere that I can get to easily but also be out of the engine heat.

Home Depot sells empty metal paint cans in gallon and quart sizes. I think I could easily get one of those and put two 3/4 or 1" hose bungs on the side, one up top and one down low. add a small one on the bottom with a drain valve too. silver solder might be my friend here! stuff it full and somewhat loosely with dollar store pot scrubbers. Then run a decent length of that hardware store PVC hose down to it from the existing provent and back up to the intake. The only draw back is using that cheap PVC clear hose. it can collapse with very little heat and if it goes into a vacuum. I could possibly use some steel fence tie wire I have already and make a coiled length like they do for rad hoses.

Just thinking out-loud on the cheap side lol
 
There is a million diy ones out there.
But the real filter is $40-$50 range.
Playing around with things in the shed is one thing- but once you spend fuel to drive to home depot, buy $20 in parts- you already made a mistake because you are over half way there o having bought the real filter
 
There is a million diy ones out there.
But the real filter is $40-$50 range.
Playing around with things in the shed is one thing- but once you spend fuel to drive to home depot, buy $20 in parts- you already made a mistake because you are over half way there o having bought the real filter
Yeah if this POS CKO ProVent starts leaking, I’ll get the Nazi original.
 
@Big T yeah- track the oil useage now and hopefully it eases up from the 1qt every 1,000 miles its at now. 300,000 miles- that provent can run until this engine gets swapped for your spare from crash, then help it to the 400,000 mile mark hopefully too.

@dbrannon79 everything you can do to get the vapor to cool and coalesce back to liquid is the goal- but without backing up pressure. Remove the cap on the provent and watch the pressure out the dipstick tube with dipstick out. That is the blowby you will never get rid of without adding a vacuum pump because that is what is blowing past the rings at the moment before it can even evacuate naturally.


Now hold rpm up to 1,000 or 1100 and Make a video of it and save the video for comparison to your experiments. Whenever you get more flow than that you are restricting more than desired. At idle the turbo isn’t pulling enough to help the system out. It’s basically pressure pushing out the provent. But the turbo gets to sucking air like a vacuum and it will do some work. Having an actual vacuum pump is a neat theory but creates a host more work and cost that is hardly able to justify.

The advantage of the cdr itself is it slows down the flow of the air carrying the oil mist. A miniature muffler design or a pipe with opposing walls to make the air flow keep changing direction would be ideal imagine this is an aluminum tube with baffles inside to make the air flow up, down, up, down, repeat. Slowing the air and shedding the heat out would help. Then LOOSELY having your stainless steel or copper mesh fill the void. Again- you want to slow the flow to cool the air but doing it with minimal pressure build up.
Remember where I told Big T about long hose from valve cover to provent, then short hose provent to turbo. This is to maximum vacuum at the restrictive filter in the provent. But ideally the whole system would be ice cold.

As to the provent filters- i haven’t played with what chemicals can clean the oil from the filter for re-use but not damage filter. But there has to be something. We need a person who can analyze the filter media. If we knew what it was made of we would know how to clean it without damaging it.
Maybe cutting up an old one into test squares and see what does damage and what doesn’t? Then we would learn how to reuse it the longest.
Seeing as it is built for oil, I would think a soak of gasoline shouldn’t hurt it. Then let it dry out naturally because blowing with an air hose is very likely to damage the fibers.
Problem is the filter is highly engineered and secretive because thats the part the cko folks can’t get right and why the real one works so much better.


Oh, mine isn’t a gmt400… but i did break open the box to enjoy the prettiest rockers. Note the 1.7 on the box, not 1.6 since I also have the prettiest 18.1 TSP valve relieved pistons needed to run the 1.7 in rockers.

View attachment 92400View attachment 92401View attachment 92402
For cleaning them filters, maybe regular old fashioned mineral spirits paint thinner.
BBQ charcoal lighter fuel is the same stuff.
Mineral spirits is mighty gentle stuff, even on most soft plastics that brake and parts cleaner about destroys.

Love them rockers. 😍
 
Had to take the 93 in today to have what looked like a 1/4" bolt removed from the rear tire and repaired. since I had swapped over rims and tires from the 95, at the risk of Discount tire not honoring warranty so I pulled the wheel and took it in like that.
 
Back
Top