• Welcome to The Truck Stop! We see you haven't REGISTERED yet.

    Your truck knowledge is missing!
    • Registration is FREE , all we need is your birthday and email. (We don't share ANY data with ANYONE)
    • We have tons of knowledge here for your diesel truck!
    • Post your own topics and reply to existing threads to help others out!
    • NO ADS! The site is fully functional and ad free!
    CLICK HERE TO REGISTER!

    Problems registering? Click here to contact us!

    Already registered, but need a PASSWORD RESET? CLICK HERE TO RESET YOUR PASSWORD!

What did you do with your GMT400 today...or yesterday....

I have new red prothane brand bushings in the upper control arms with Delphi ball joints at the moment.I do have the red urethane bushings to fit the lowers as well.I would prefer those over the factory bushings for sure.

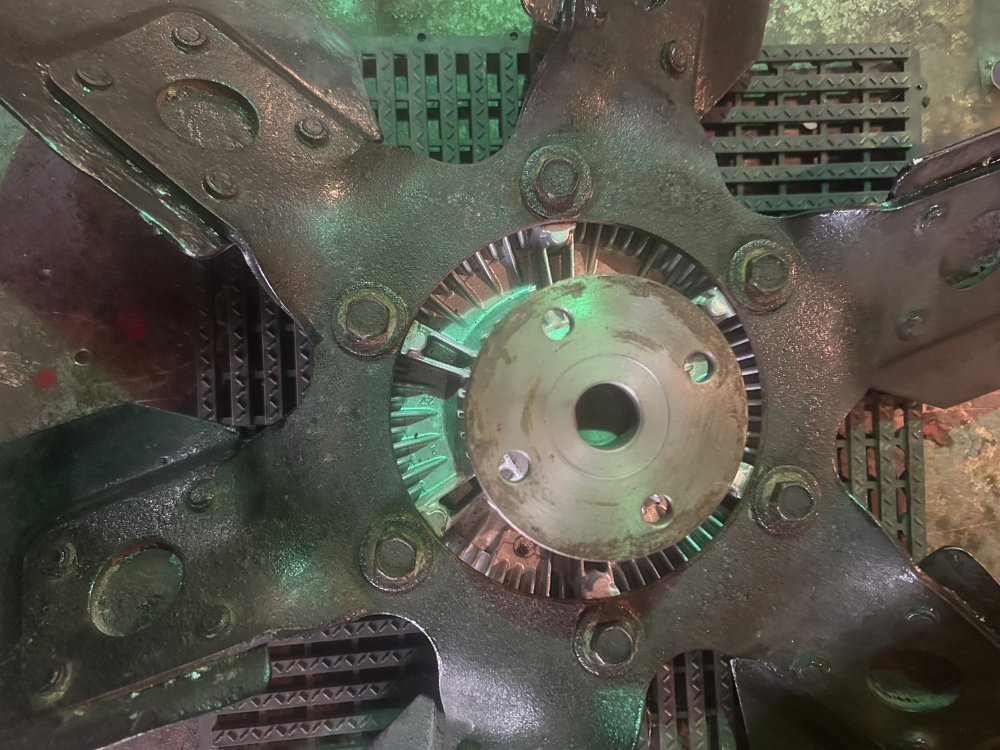
I guess when I installed the lower ball joints some rust must have dislodged itself exposing the pin holes in the control arm.I didn’t see anything on the passenger side control arm but I may as well replace both while I’m at it.
 
Last evening I purchased a couple wiper linkages for one of my K1500 trucks.Both trucks have moderate wear and tear on these parts so I figured a couple linkages would be handy to have and I’ll change them out when the weather improves.Total cost wasn’t much.Something like $50.
 

Attachments

  • IMG_9209.jpeg
    IMG_9209.jpeg
    23.8 KB · Views: 7
  • IMG_9208.jpeg
    IMG_9208.jpeg
    34.5 KB · Views: 7
This morning I removed the steering box assembly from the same 96 Chevy truck to allow installation of a new pitman arm.The old pitman arm was sloppy I have to say so a Napa fleet brand replacement was put into place.Just a matter now of getting the box back up into position.

The snap-on pitman arm puller we own has done a good job in getting these off over the years.I’ll post a picture of it.

Also at the same time a replacement Hayden fan clutch is being installed as well.The old fan clutch looks pretty tired
 

Attachments

  • IMG_9212.jpeg
    IMG_9212.jpeg
    117.3 KB · Views: 10
  • IMG_9213.jpeg
    IMG_9213.jpeg
    96.2 KB · Views: 8
  • IMG_9214.jpeg
    IMG_9214.jpeg
    155.1 KB · Views: 7
  • IMG_9215.jpeg
    IMG_9215.jpeg
    148.9 KB · Views: 8
  • IMG_9216.jpeg
    IMG_9216.jpeg
    103.3 KB · Views: 8
  • IMG_9217.jpeg
    IMG_9217.jpeg
    144.9 KB · Views: 10
  • IMG_9218.jpeg
    IMG_9218.jpeg
    129.9 KB · Views: 10
Drove Ole' Smokey the 93 out to Victoria, TX early this morning taking my wife's dad in for a procedure at the hospital there. Procedure all went well and were back home.

Trip was a full 200 miles round trip, not a single issue from the old worn out engine. even cruised in style with the AC running LOL. Need to check the oil and the provent to see how much it lost but this truck even with it's low compression and blow by is proving it's self to be a very reliable machine!

stopped in the small town of Luling TX at the Buc-ee's to fill up. all the stations we passed were priced around 3.19 to 3.49 a gallon for ULSD, there were no posted signs at the Buc-ee's for fuel prices so I figured I'd swing in and have a looksee, filled up with ULSD at 2.89 a gallon! also swoung around the corner to snag up on Luling's famous sausage at the city market bbq for a late lunch (we'd been out of the house since 5am and was hangry lol)

at $2.89 a gallon, that's 30 cents cheaper than anywhere else and is about 30 miles or so from my town. might be worth it to take the other truck out there just to fill it up too.
 
Update: Check the provent catch can, only caught maybe an ounce of oil. poured that back in and checked the oil. it was at the top dot on the dipstick last night, now it's at the middle dot half way down the hash marks, I believe that's about a 1/2 quart oil loss between the blow by and the leaking valve covers. not too shabby for this old gal.

maybe, just maybe the oil loss from blow by is slowing down the more I drive it. a year ago it had been sitting for about 3 or 4 years. I've only put about 4,000 miles on it since I brought it home on the trailer. Had 284k then and now it's at 288k. Maybe I should look further into that method of using ATF fluid down the yap to help un-stick the rings. @Will L. talked to me about it, I just have never done it.

4k miles in a year's time, Now having two trucks to drive, these poor things hardly get to have the cobwebs blown out!
 
This morning I removed the steering box assembly from the same 96 Chevy truck to allow installation of a new pitman arm.The old pitman arm was sloppy I have to say so a Napa fleet brand replacement was put into place.Just a matter now of getting the box back up into position.

The snap-on pitman arm puller we own has done a good job in getting these off over the years.I’ll post a picture of it.

Also at the same time a replacement Hayden fan clutch is being installed as well.The old fan clutch looks pretty tired

As of this morning everything is back together including the new fan clutch.Just waiting on the lower control arms to arrive and then everything will be new up front in regard to steering and suspension.
 
Learned something really strange about CHMSL today. They're not all the same. The one on my 99 CC dually needs repaired or replaced. Picked up one off a 97 extended cab and it doesn't fit. But I have a 95 regular cab that has the correct one. Evidently the extended cabs are different. Contour of the cab is different.
 
Learned something really strange about CHMSL today. They're not all the same. The one on my 99 CC dually needs repaired or replaced. Picked up one off a 97 extended cab and it doesn't fit. But I have a 95 regular cab that has the correct one. Evidently the extended cabs are different. Contour of the cab is different.
I remember trying to find you one in the boneyards of SoCal, but everone I looked at was trash, then there was that shipping cost issue.
 
Last night I attempted to get the driver side lower control arm removed on my 96 Chevy.Everything is off at this point.Had no trouble getting the lower bolts out of the bushings.

I used a Milwaukee reciprocating saw to slice down through the control arm in the torsion bar area in an attempt to split it but the blade would only cut down so far and not cut any further so I’m thinking the part that would not cut must be tempered or case hardened where the torsion bar enters.

I used Diablo cutting blades with lots of spray lube to keep the blade from overheating.It was pretty easy cutting down through the control arm until a certain point.Before throwing out the control arms I’ll just have to press out the new ball joints I have in place.

I’ll have to use a grinder with the thin cut off disc tomorrow to get down a little deeper and then i should be able to hammer the control arm off.I’ll post some pictures of how it looks when i finally get it off.
This the one I was referring tooooh. 😹😹😹
Maybe I wasn't clear I'm talking the pumpkin portion.
 
Did You unwind the torsion bar ?
Sawing control arms in the torsion bar area could get mighty dangerous.

Oh yes the torsion bar was fully unloaded.Swinging downward.The bolt that puts tension on the torsion key was also loosened completely.I also removed the steering knuckle with wheel bearing to get things out of the way.I placed the caliper upon the top of the upper control arm.
 
Back
Top