• Welcome to The Truck Stop! We see you haven't REGISTERED yet.

    Your truck knowledge is missing!
    • Registration is FREE , all we need is your birthday and email. (We don't share ANY data with ANYONE)
    • We have tons of knowledge here for your diesel truck!
    • Post your own topics and reply to existing threads to help others out!
    • NO ADS! The site is fully functional and ad free!
    CLICK HERE TO REGISTER!

    Problems registering? Click here to contact us!

    Already registered, but need a PASSWORD RESET? CLICK HERE TO RESET YOUR PASSWORD!

What did you do with your GMT400 today...or yesterday....

I once tried a syringe with glue, through the headliner.
That didnt turd out so well.
I tried staples and eventually stick pins. The fabric just continued its eventual drift to the top of the seats.
That was the 88 Buick Century. I eventually pulled it all down to discover there is some kind of an insulation stuff up there.
No wonder the glue wouldnt bond.
The headliner material comes with foam backing and that is glued to the headliner shell. If you have headliner material separating from the foam and sagging, it’s done. No glue will permanently reattach the material to the foam because the foam is shot.
 
I've watched vids of people removing the foam and glueing the fabric to the shell. It actually looked pretty good
The headliner material is like $70. Then you need the glue. Have to wire brush the foam off the shell, then glue the material in place. Not worth it to save $200 on labor, so I took it in. This guy used to work at an auto body shop and now this is his side hustle to his landscaping job.
 
The headliner on the 95 needs redoing but I'm scared of breaking trim or being able to manhandle that large of a headliner getting it out of the cab in one piece being a crew cab! I've thought about cutting it in half about the middle of the cab and making some sort of seam like is done in burbs.
 
The headliner on the 95 needs redoing but I'm scared of breaking trim or being able to manhandle that large of a headliner getting it out of the cab in one piece being a crew cab! I've thought about cutting it in half about the middle of the cab and making some sort of seam like is done in burbs.
You won’t break the shell.
 
With the headliner out, now is the time to cover the roof in sound deadening and extra insulation!

BTW if those extra cutouts are for overhead AC vents, do they come from the front unit or rear?
 
@Big T I have a somewhat stupid question....

I can tell the outline on the center overhead console and center domeage. but what are the three other cutouts for?

View attachment 91995
I assume those are rear facing ac/heater vents, but it’s from a Dodge Caravan so how would I know?

My headliner shell came out in two pieces.
 
mine is not that bad yet but it's getting there LOL. funny thing is its a 95. my 99 dodge ram literally doesn't have any fabric left and the entire top of the dash is non-existent LOL

as far as dashes go, I'm very surprised someone hasn't stirred the pot making a huge law suit on auto makers mainly dodge, on the safety hazard of the dashes. iirc GM trucks of this era are the same, but there is not much other than the plastic holding the passenger side air bags in place. in the event of a crash and that air bag deploys you can just imagine what happens! sharp shrapnel exploding in the cab with an air bag launching from the dash!
 
This evening I installed a new idler arm and idler arm bracket on my 96 Chevy K1500.The last part that needs replacing is the pitman arm.Hoping in the next day or two to have that installed.

Although I did see a couple small holes in the lower control arm on the driver side.I didnt want to weld these holes up as the arm is probably thin in other areas too.I purchased a new control arm tonight from amazon.A Chevy Astro van awd im told uses lower control arms that fit the K1500 no problem.But it uses the older 88-94 style bolt in ball joint which is okay with me.I may as well buy the lower right side as well at this point.If I replace the driver side you can be sure the passenger side is not far behind either in showing hidden pin holes.

The full front suspension along with the brakes has been gone through at this point.

Just a nice paint job is the only thing that remains after the lower control arm is replaced.Heres a picture of the control arm I bought tonight.
 

Attachments

  • IMG_9203.jpeg
    IMG_9203.jpeg
    60.2 KB · Views: 7
I figured I may as well buy the lower passenger side control arm for the same truck.This one is coming from Amazon as well.Total cost was $250.
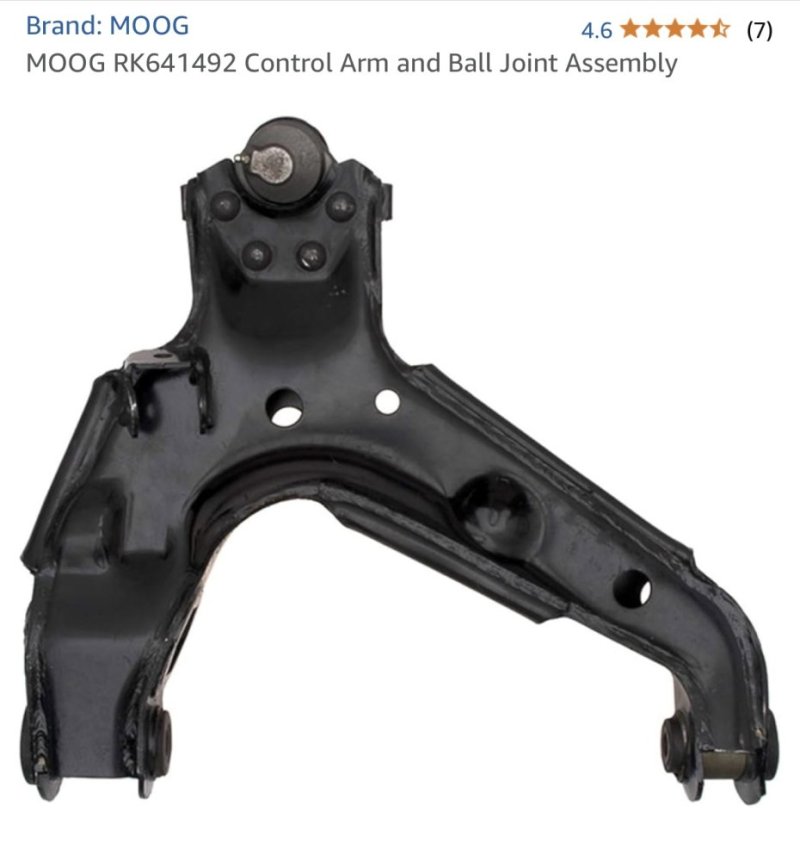
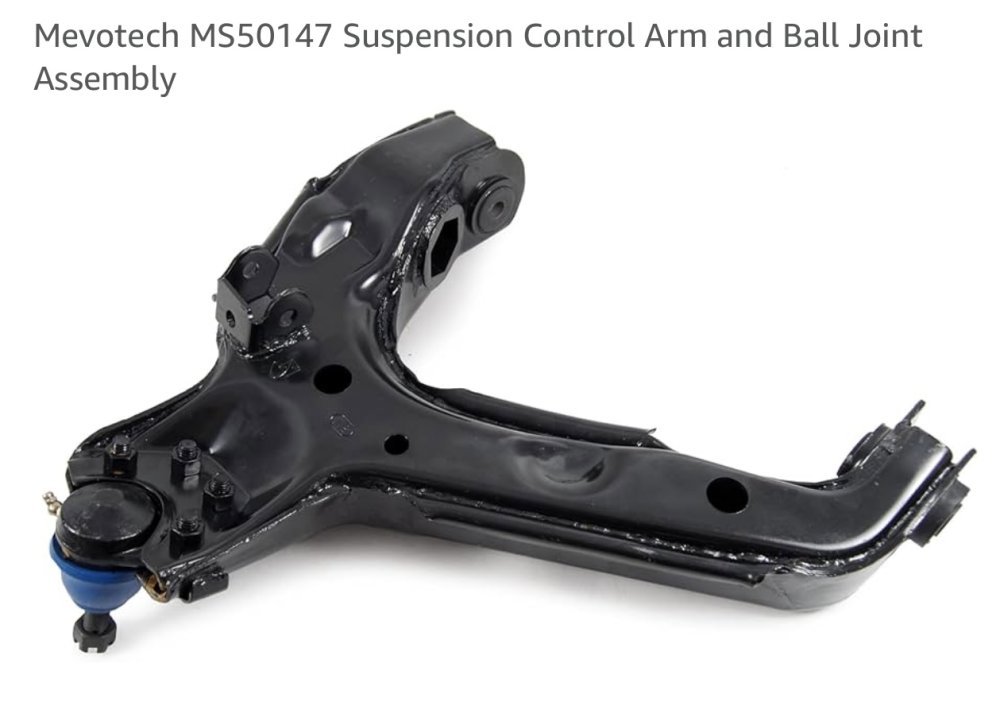
give the ball joints and bushings a good looksee. depending on what seller you ordered from on the jungle site, they could be just as bad as ordering from RA. chineesium junk.

when I did this on my 95, I ordered complete upper arms from my local advance auto parts. not realizing they were chineseium junk. had to replace ball joints and later upper bushings. I found out quickly that the holes for the bushings were different than the factory GM ones. they wouldn't fit. luckily I had saved my old ones, rebuilt them and put them back on. something I should have done the first time was go with urethane upper and lower bushings. you might even look into doing that with your new ones before the install.
 
Back
Top