• Welcome to The Truck Stop! We see you haven't REGISTERED yet.

    Your truck knowledge is missing!
    • Registration is FREE , all we need is your birthday and email. (We don't share ANY data with ANYONE)
    • We have tons of knowledge here for your diesel truck!
    • Post your own topics and reply to existing threads to help others out!
    • NO ADS! The site is fully functional and ad free!
    CLICK HERE TO REGISTER!

    Problems registering? Click here to contact us!

    Already registered, but need a PASSWORD RESET? CLICK HERE TO RESET YOUR PASSWORD!

What did you do with your GMT400 today...or yesterday....

Not a Raptor. Same company, Pure Flow AirDog makes them both though.

The Raptors have what appears to be a verticle pump and a single filter.
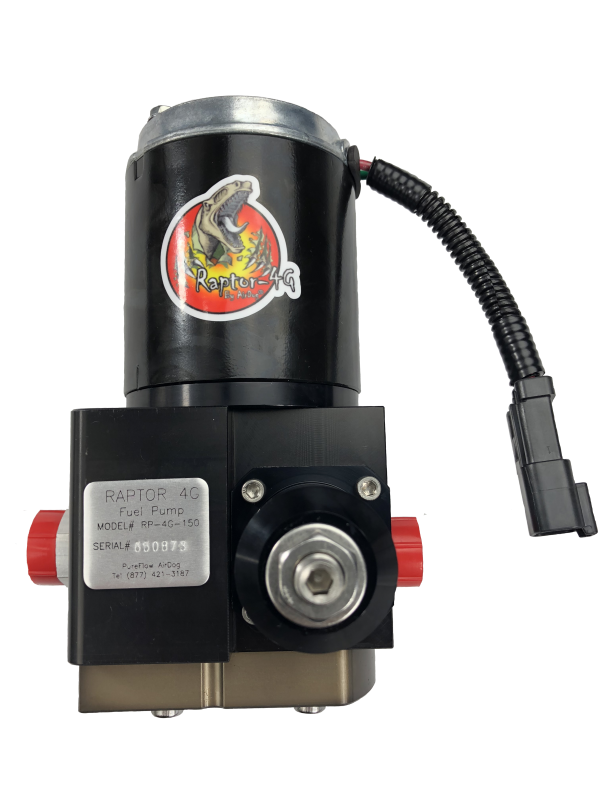
1716136062172.png

Original AirDog and the AirDog II's have what appears to be a horizontal pump and the dual filter setups with the Water Seperator and the Filter.
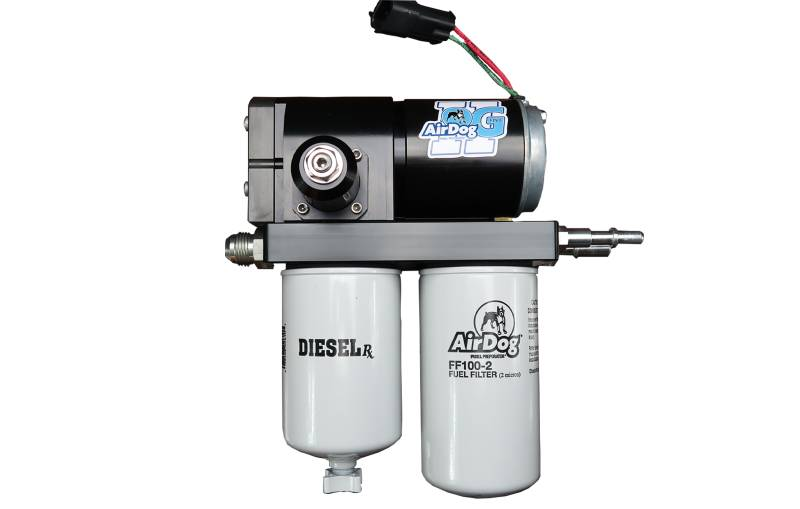
1716136307064.png
Pictured is the newer version of the DF-165 I'm running. Mine was probably made in 2008 and has the pressure adjustment screw on the filter mounting plate vs. the side of the motor like this one.
 
I had low and high beam HIDs out on the passenger side, high out on the driver’s side. Did some testing and the ballasts were out. I had a spare and replaced the high on the passenger side (most accessible). Ordered two new ballasts off Amazon for $18 with tax, no shipping. Probably will order another pair. That said, this is probably the last rodeo with the HIDs, as I’m tired of the ballasts not lasting very long. Next round will be LEDs like Paveltolz.


IMG_3248.jpeg
 
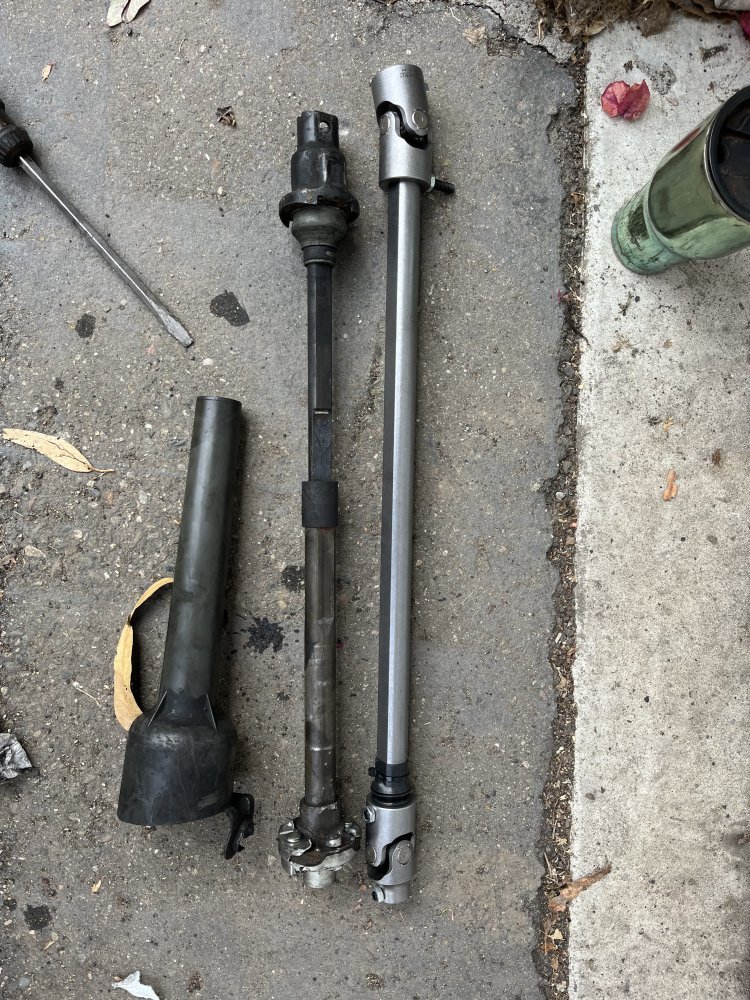
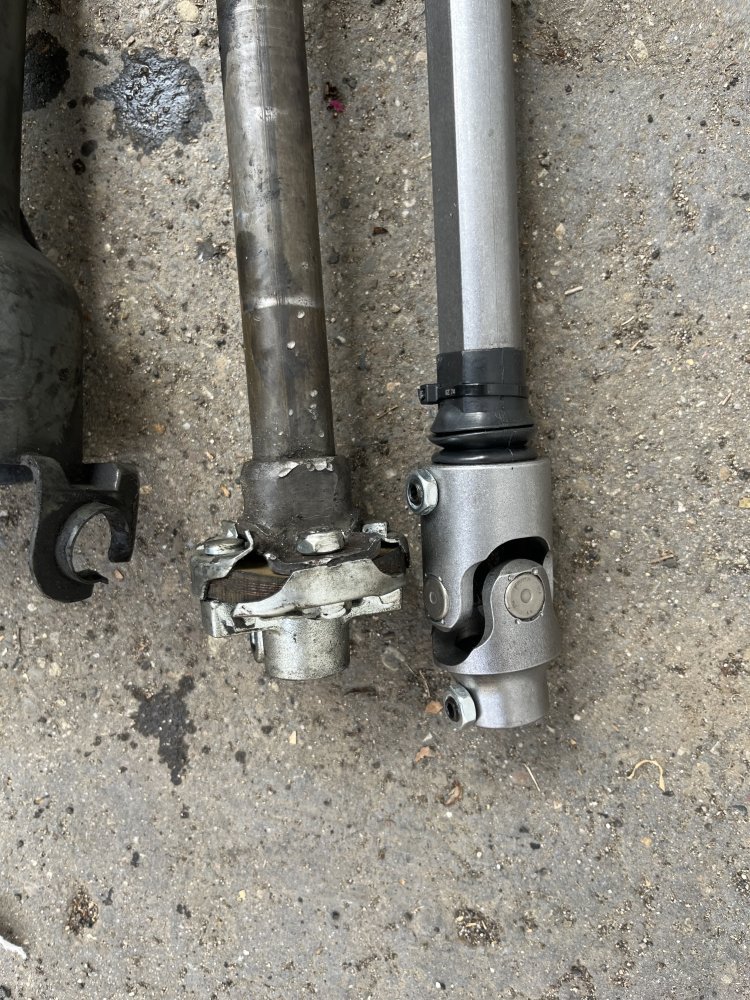
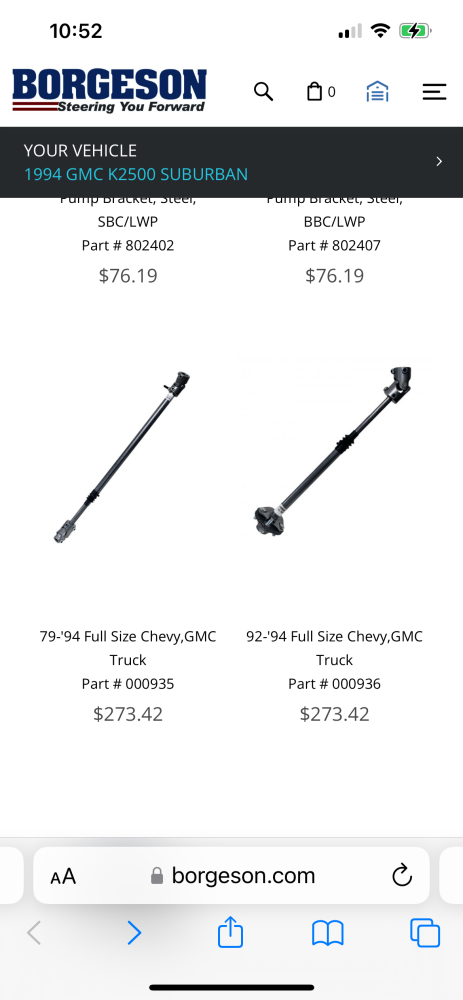
So while I was in steering shaft replacement mode, decided to do the ‘94. Unfortunately they sent me the incorrect shaft, as it is way too long. Their invoice says Borgeson part #000935 for ‘79 to ‘94, but the instructions say ‘79 to ‘91. I will now be dealing with the vendor on Monday.

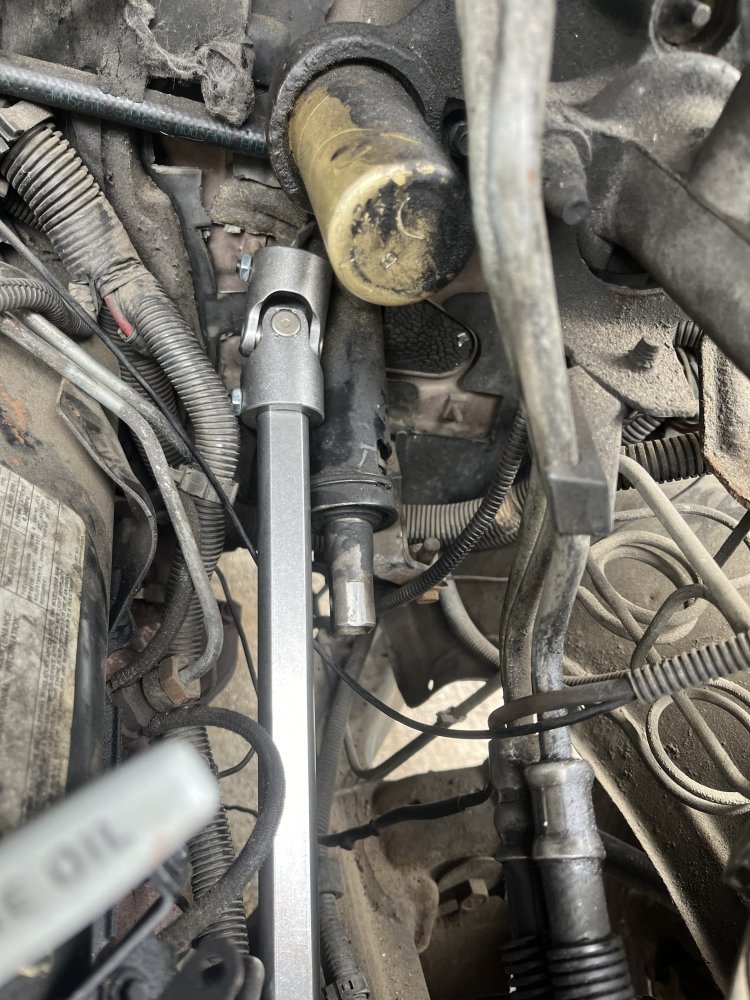
IMG_3257.jpegIMG_3258.jpegIMG_3260.jpeg
 
I did some measurements and it’s 20.25” from the base of the input shaft of the steering box to the connection point on the upper steering shaft. The Borgeson unit they sent me measures 26” fully collapsed. Borgeson sells the 935 which I got, and the 936 with a rag joint. If that’s all they got, I will stick with the OEM rag joint shaft.
IMG_3261.png
 
Not a Raptor. Same company, Pure Flow AirDog makes them both though.

The Raptors have what appears to be a vertical pump and a single filter.
View attachment 87741

Original AirDog and the AirDog II's have what appears to be a horizontal pump and the dual filter setups with the Water Seperator and the Filter.
View attachment 87742
Pictured is the newer version of the DF-165 I'm running. Mine was probably made in 2008 and has the pressure adjustment screw on the filter mounting plate vs. the side of the motor like this one.

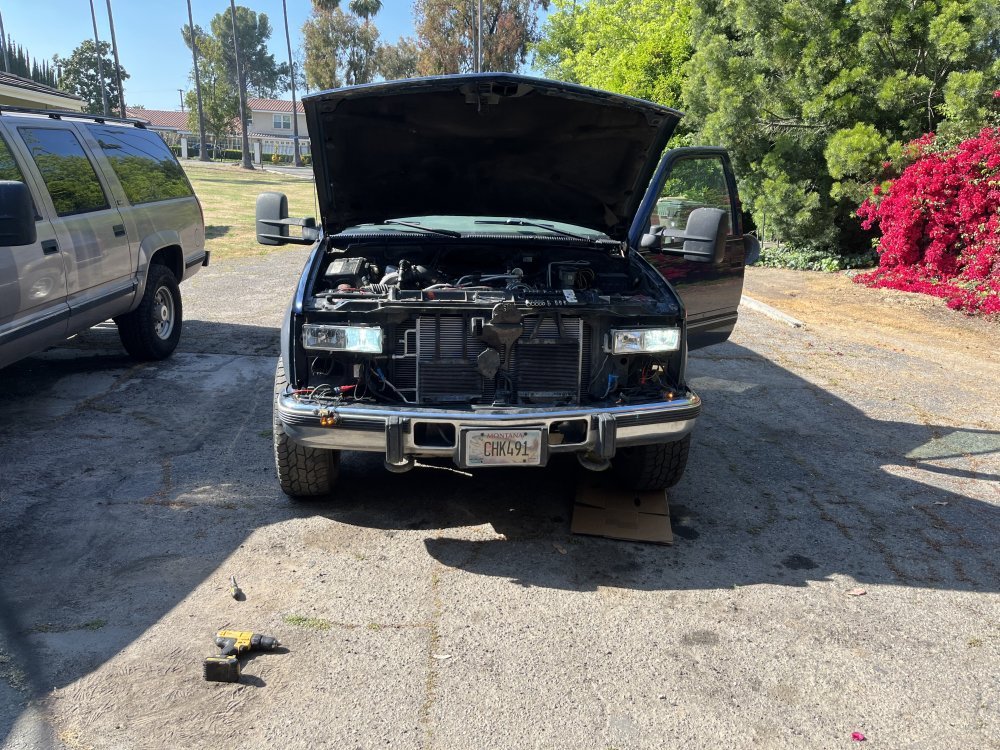
Correction to the above statement about the Raptor: NO FILTER. Apologies....
Didn't catch the mistake intime to edit. You'll have to either trust your OEM Fuel Filter Manager or, if not, add another inline filter.
Returning you now to your normal browsing.
 
I just replaced the rag joint on my 99. Fairly easy job if you have a larger die grinder, as in not a dremel
I’ve replaced the rag joint on the ‘94. They sell kits for that and it’s not a difficult job.

I’m stuck with the Borgeson units on the ‘99. The new one is better construction than the prior. I cannot pinpoint what cause the prior u-joint to fail. It only goes on the shaft one way. All I can think is the angle of attack on the joint had binding, but I never heard nor felt that. Furthermore, the truck is not lifted.

As noted the ‘94 shaft and the upper shaft for the ‘99 are both going back to the vendor.
 
Door panel on the driver's side won't stay on. New pins and grommets don't work. The door closes hard (air pressure trap like a VW) so the inertia causes the panel to separate from the door. I've had the grommets come out of their holes a couple of times. Sometimes the panel will wedge the door so it won't re-open without the application of some serious attitude.
So, I replaced all the pins and grommets again. RTV'd the grommets to the door and coated the pins with RTV as well. Then, used 3M automotive two sided tape (like that used on fender flares etc.) to further bond the panel to the door and gorilla taped it tight to hold pressure. Left it all there for 48 hrs and then gave the door a good slam this morning. Seems to have done the job.
You want more permanency, use 5200 marine adhesive.
 
Door panel on the driver's side won't stay on. New pins and grommets don't work. The door closes hard (air pressure trap like a VW) so the inertia causes the panel to separate from the door. I've had the grommets come out of their holes a couple of times. Sometimes the panel will wedge the door so it won't re-open without the application of some serious attitude.
So, I replaced all the pins and grommets again. RTV'd the grommets to the door and coated the pins with RTV as well. Then, used 3M automotive two sided tape (like that used on fender flares etc.) to further bond the panel to the door and gorilla taped it tight to hold pressure. Left it all there for 48 hrs and then gave the door a good slam this morning. Seems to have done the job.
Check how close the door panel edge is to the trim and molding in the cab. I have seen where something shifted slightly and made a door panel start to catch on inner molding allowing it to be pulled on as the door was opened.
 
Hey everyone.A couple days ago I finished up the fuel system upgrade on my 96 gmc.I know WILL suggested I put the regulator as close to the fuel pump as possible although I liked the idea of monitoring the mechanical fuel pressure gauge under the hood and make adjustments to the regulator as needed if I had to.In the pictures you’ll see a red fitting at the bottom of the regulator.Thats the return port going back to the tank.I have to say this is a very nice regulator and well built.I’d recommend it to anyone.

I relocated the fuel pump much closer to the tank and extended the wiring harness as any electric fuel pump works better pushing fuel vs pulling it.I had to put a couple layers of brown electrical tape to the body of the lift pump as it wasn’t quite tight enough within the fuel pump bracket once I tightened the pinch bolt.

As of now there are no leaks and the pressure directly at the injection pump is 11psi vs 3-4 psi like before.Its showing 14-15psi at the regulator but since fuel has to pass through two filters the pressure is slightly reduced to 11.This 7.3 lift pump puts out 43psi so lots of pressure behind it.I also bought a spare 7.3 lift pump just to have in case I need it sometime down the road.

I flared the ends of the supply steel line I have on the chassis so the fuel hose would not blow off because of the increase of pressure this 7.3 fuel pump delivers.The hose I’m using is also rated for 300psi working pressure.I also used some new fuel injection clamps as well.

Overall I’m pretty happy with this upgrade.Its definitely much better than the gm lift pump and I think the DS4 will definitely live much longer.
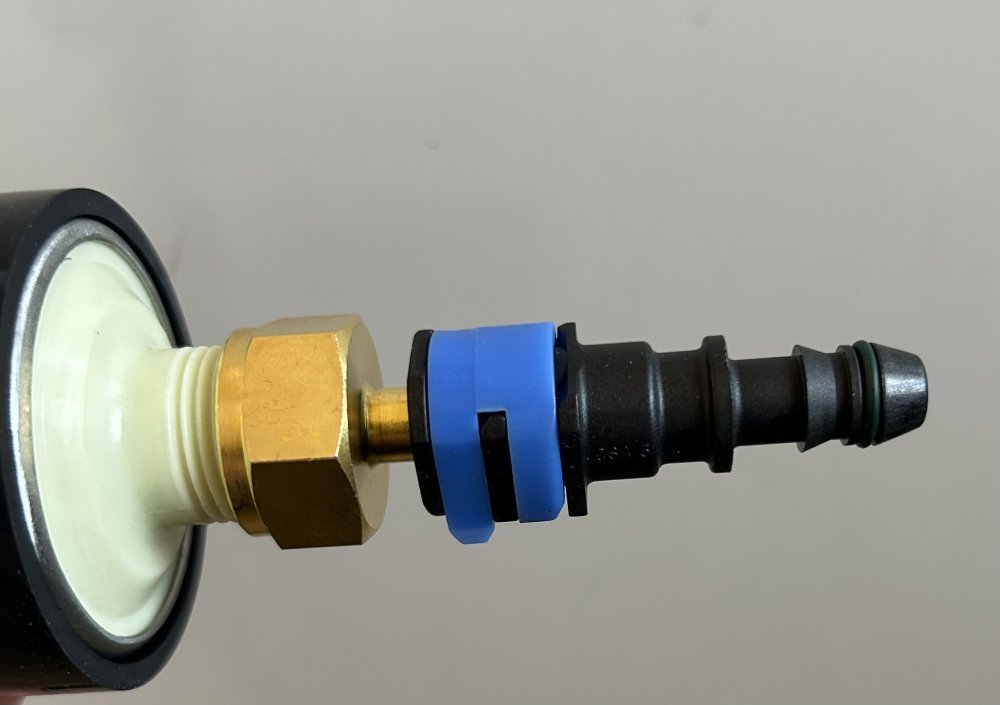
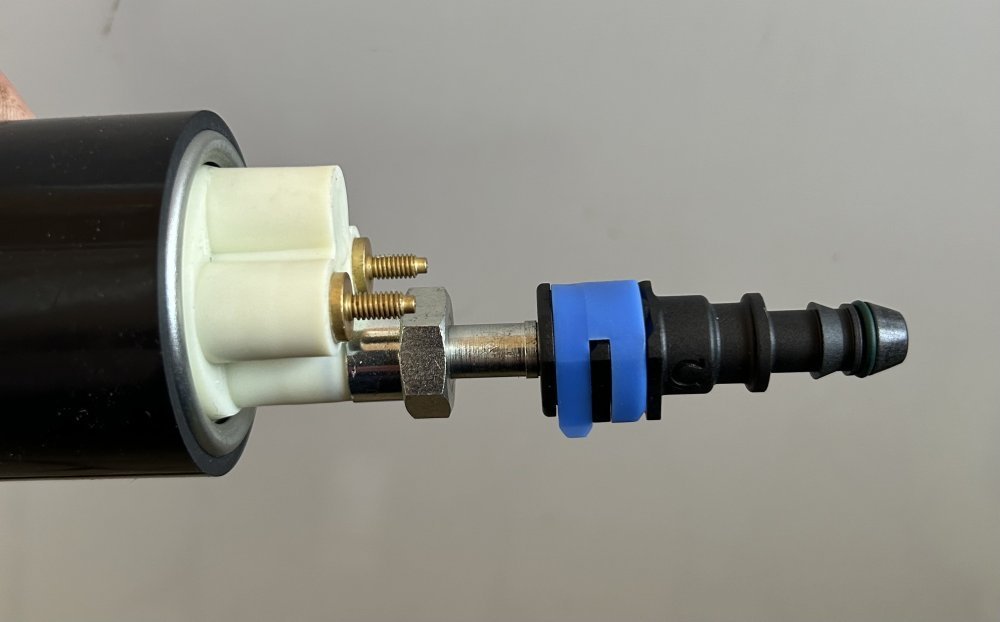
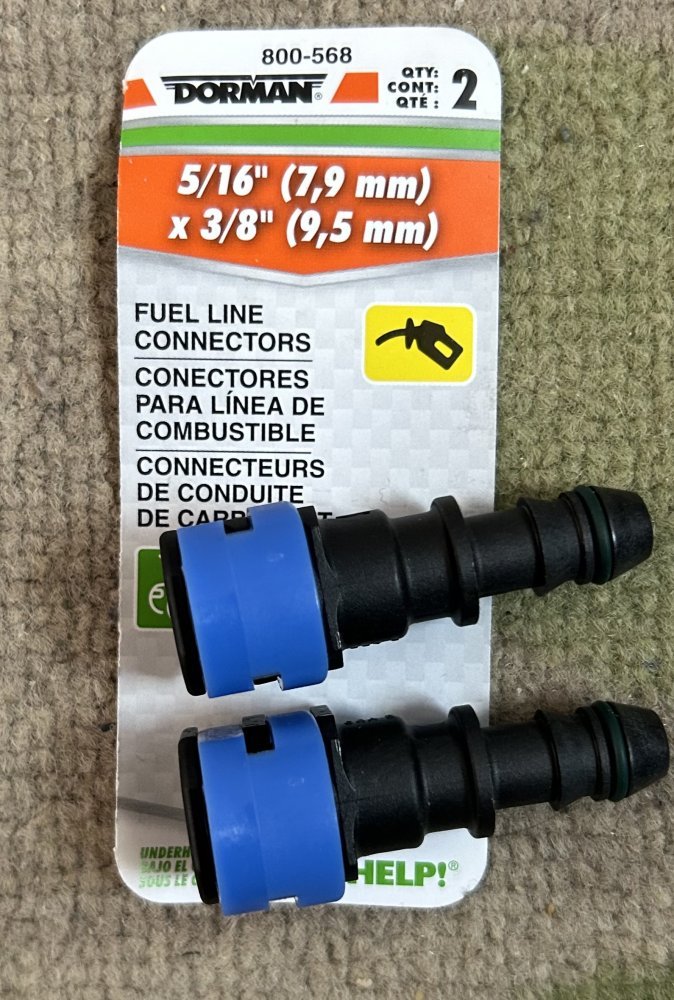
Today fedex delivered the quick connect fittings I ordered from rockauto for the 7.3 electric lift pump I have on my 96 gmc truck.Currently I just have the 3/8 hose pushed over both ends of the lift pump with a couple fuel injection clamps but now I have the proper fittings to ensure reliability
 

Attachments

  • IMG_8197.jpeg
    IMG_8197.jpeg
    48 KB · Views: 5
  • IMG_8196.jpeg
    IMG_8196.jpeg
    40.4 KB · Views: 5
  • IMG_8195.jpeg
    IMG_8195.jpeg
    154.9 KB · Views: 5
Today fedex delivered the quick connect fittings I ordered from rockauto for the 7.3 electric lift pump I have on my 96 gmc truck.Currently I just have the 3/8 hose pushed over both ends of the lift pump with a couple fuel injection clamps but now I have the proper fittings to ensure reliability
I’ve had that style of fitting fail on me recently. Just replace one a little over a week ago.
 
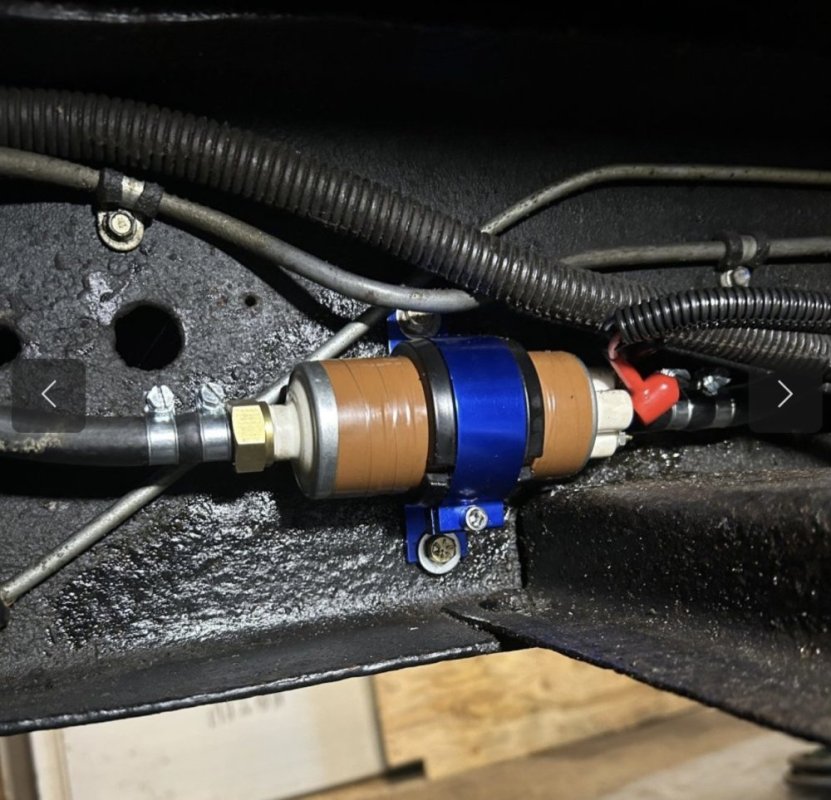
Thanks guys.I appreciate the reply.They snap in place nicely but I did read online they sometimes allow air leaks as well.I’ll just toss em in the toolbox.This is how my current setup looks without the fittings in place.
 

Attachments

  • IMG_8199.jpeg
    IMG_8199.jpeg
    156 KB · Views: 6
Back
Top