• Welcome to The Truck Stop! We see you haven't REGISTERED yet.

    Your truck knowledge is missing!
    • Registration is FREE , all we need is your birthday and email. (We don't share ANY data with ANYONE)
    • We have tons of knowledge here for your diesel truck!
    • Post your own topics and reply to existing threads to help others out!
    • NO ADS! The site is fully functional and ad free!
    CLICK HERE TO REGISTER!

    Problems registering? Click here to contact us!

    Already registered, but need a PASSWORD RESET? CLICK HERE TO RESET YOUR PASSWORD!

What did you do with your GMT400 today...or yesterday....

Nope. no gasket will be going back. I got a can of cheese wiz sitting on the counter ready to apply! The right stuff, just hope a 7 oz can is enough for both covers.

I was looking at how I was going to apply it once I get it all cleaned up. I really don't see any way the can's tip will get in there with the turbo in place. I suppose I'll ether apply with my finger or apply to the cover on this side.
 
Put a straw or piece of stiff tubing over the outlet and make an extension for it.
Thats a good idea right there.
I also dont take a lot to remove the
If the tube wont get into the firewall end of the sealing ridge on the cylinder head, smear the flingers and wipe to the sealing ridge of the back of the head, make bead about a 1/4” thick.
 
They were much cheaper and came in a bag of 20 or so.
I might have posted a link to what I actually used a long time ago. Maybe around 2014.
I've been using the nozzles for caulking for many years. At least since about 2012.
 
As an Amazon Associate we earn from qualifying purchases.
Well the cheese wiz can was a big fail. That shit wouldn’t hardly come out of the can! Was flowing so slowly that it would take me 20 minutes just to get enough out to do maybe one short side of the head. Nope. Gonna go find a caulk tube of RTV or some small tubes.

image.jpg
 
Well the cheese wiz can was a big fail. That shit wouldn’t hardly come out of the can! Was flowing so slowly that it would take me 20 minutes just to get enough out to do maybe one short side of the head. Nope. Gonna go find a caulk tube of RTV or some small tubes.

View attachment 84239
The can-tainer I had, I unscrewed the nozzle a bit farther, must have put extra pressure on the cannister and it flowed at a fair good clip.
 
I just about had it unscrewed all the way. It’s really thick coming out. Wouldn’t even go into a drinking straw I had on the tip. I can also squeeze the bottom off the can as if there’s no pressure in there
 
I just about had it unscrewed all the way. It’s really thick coming out. Wouldn’t even go into a drinking straw I had on the tip. I can also squeeze the bottom off the can as if there’s no pressure in there
Be sure to take it back and get credit for that.
If they was smart, theyd send it in and see whats its problems iz. 🤷‍♂️
 
Be sure to take it back and get credit for that.
If they was smart, theyd send it in and see whats its problems iz. 🤷‍♂️
My guess is that it had been sitting in inventory/on the shelf too long or had been exposed to extreme temperatures that caused it to semi set up in the can. I've had 100% silicone caulk do that in unopened 14oz caulk gun tubes before.

Could also be some a-hole slightly depressed the trigger of it as the can set on the store shelf and left a plug in the base of the nozzle that cured and plugged the works up.

My mechanic friend uses The Right Stuff in the cheese whiz can all the time, and I've watched him lay a bead on a valve cover flange in seconds. You also have to push the nozzle over down at the base of it, so the trigger assembly must be down near the base to crack the valve open far enough, if you do it anywhere up the nozzle there's too much nozzle flex to open the valve fully to dispense. Changing pressure on the nozzle with your fingers on the trigger grip then regulates the flow out the nozzle.
 
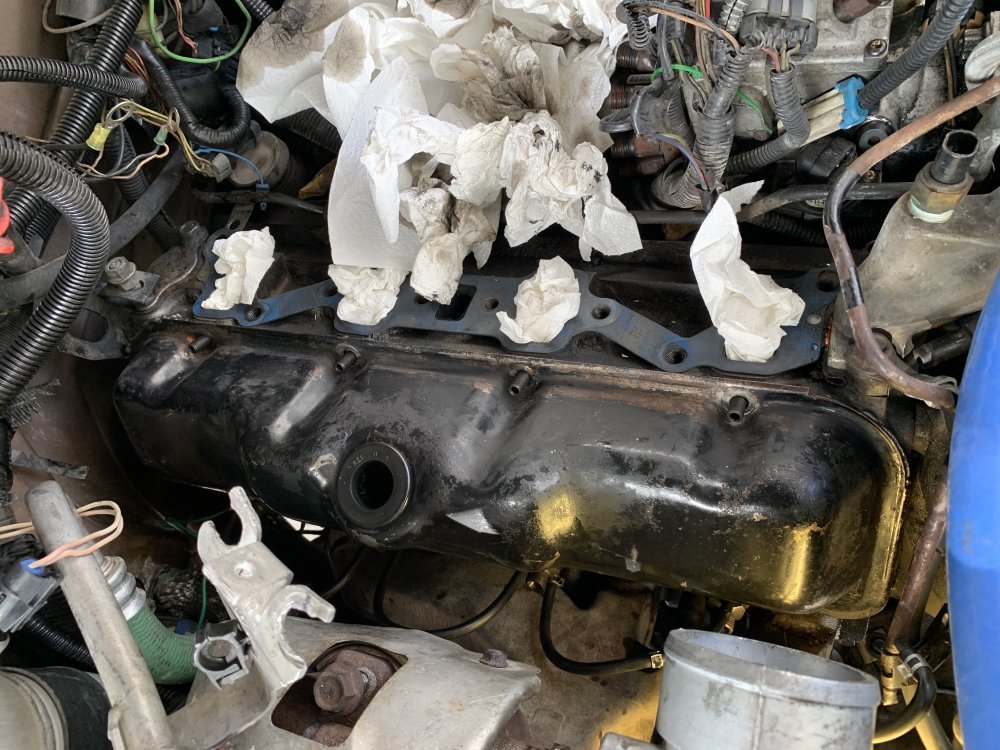
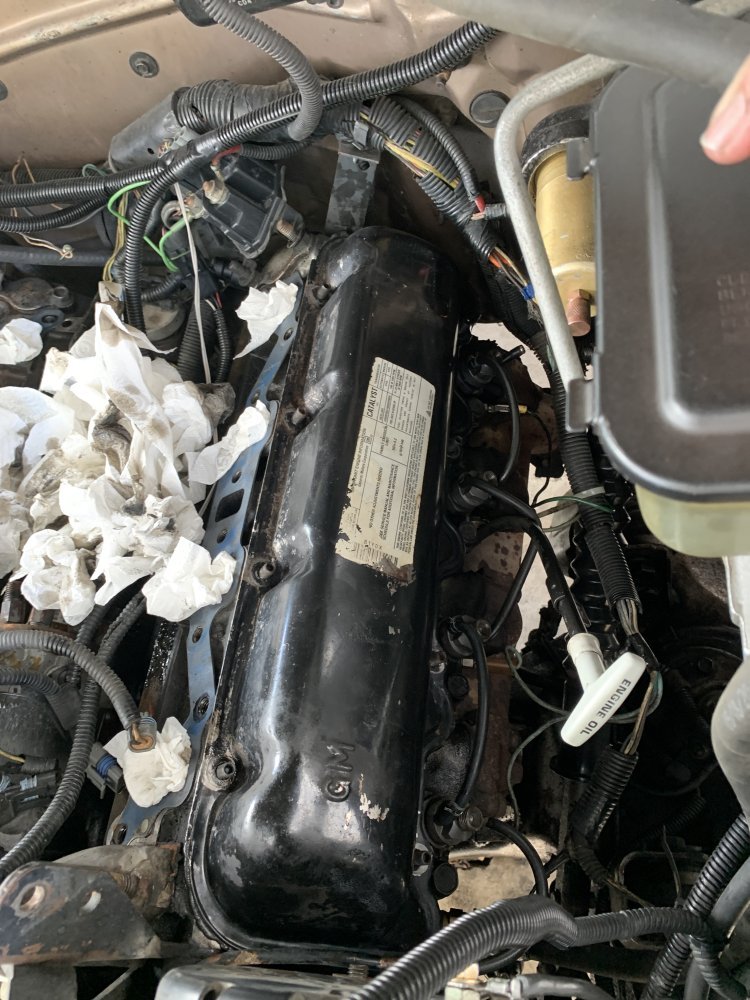
Success! Got both covers cleaned up and back on. Had to use my fingers to spread the RTV in some areas mainly the back side of the passenger side and some around the turbo area but overall it went well.

While I was at it I was able to switch out the hardware I had used for the hold downs so now I can put the brackets back on that holds the IP lines in place.

I’ll let them sit for a while before applying any clamping force to them so the RTV will seal

image.jpgimage.jpg
 
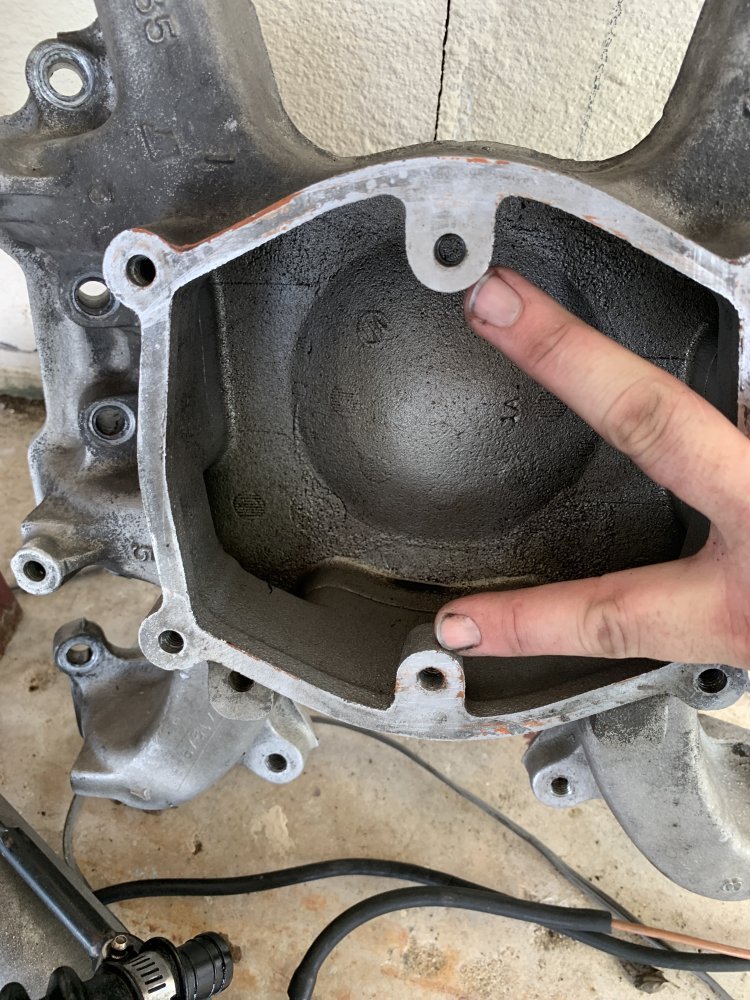
In the meantime while I let the silicone set up. My intake has the two center bolt holes that hold the upper plenum on stripped out. I have been using some longer bolts to secure it.

I have a mind of pulling the intake off from the 6.2 I have and if it’s in better shape use it on my truck

The two I’m pointing at are partially stripped out along with all 4 of the holes that hold down the top plastic cover the threads are completely gone

image.jpg
 
What a task... I'm done! it's back together and running now. I didn't end up swapping out intakes after all. I was just too tired and didn't feel like unsealing that block and having to re-seal it again. I've got ever orifice plugged off and sealed to keep moisture and trash out since it's sitting outside. Put the intake back on and primed the IP lines before buttoning it all up. almost ran the batteries dead trying to get the IP to push fuel.

Doofus forgot to connect the PCM ground wires LOL. once I discovered that and connected them it primed up quick. Fired it off for a few minutes and then buttoned it all back up.
 
Back
Top