• Welcome to The Truck Stop! We see you haven't REGISTERED yet.

    Your truck knowledge is missing!
    • Registration is FREE , all we need is your birthday and email. (We don't share ANY data with ANYONE)
    • We have tons of knowledge here for your diesel truck!
    • Post your own topics and reply to existing threads to help others out!
    • NO ADS! The site is fully functional and ad free!
    CLICK HERE TO REGISTER!

    Problems registering? Click here to contact us!

    Already registered, but need a PASSWORD RESET? CLICK HERE TO RESET YOUR PASSWORD!

Pseudo-Resto 96 K-1500…Um, when was this a good idea?

Thank you Will and others for the compliments.

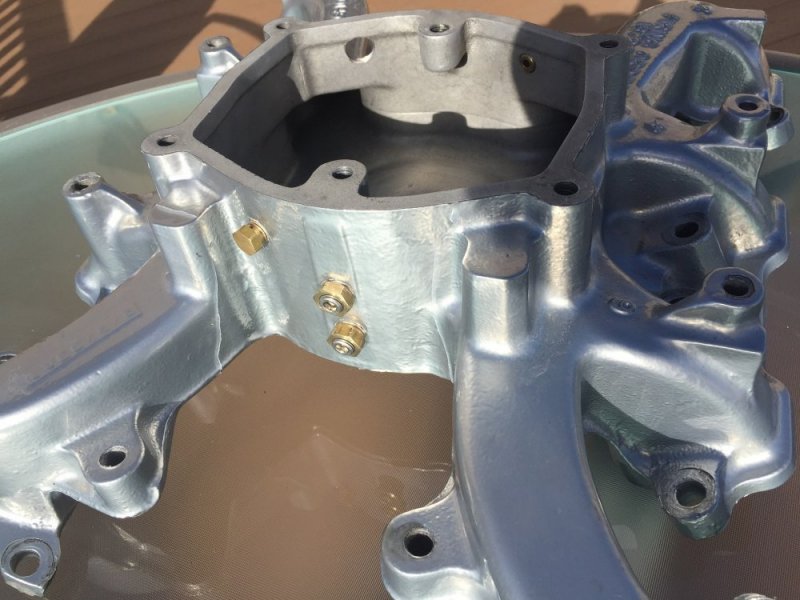
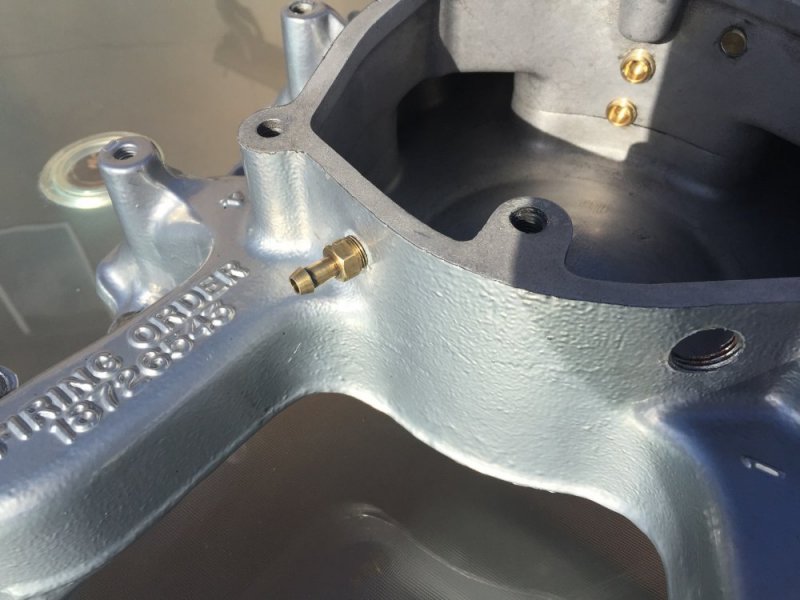
I have a second lower intake that I don’t use. It is from another members build that went south and has been extrude honed, as well as tapped to accept the OEM ECM boost & air intake sensors as well as after-market gauge senders, WMI & Propane nozzles. He's the one that gave me the idea for the Peninsular "Hat" intake set up only his was tapped to accept Nitrous too (and you all think I'm insane)!

20151127-01.JPG

20151127-02.JPG

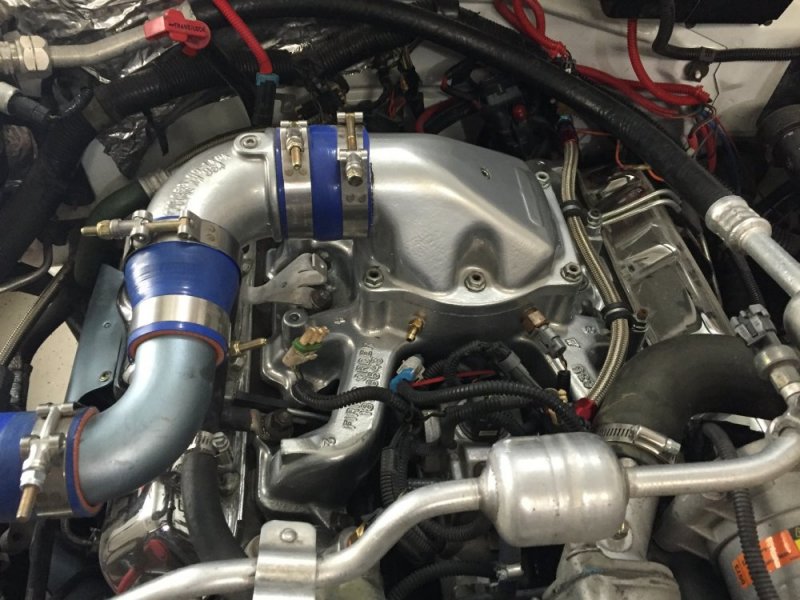
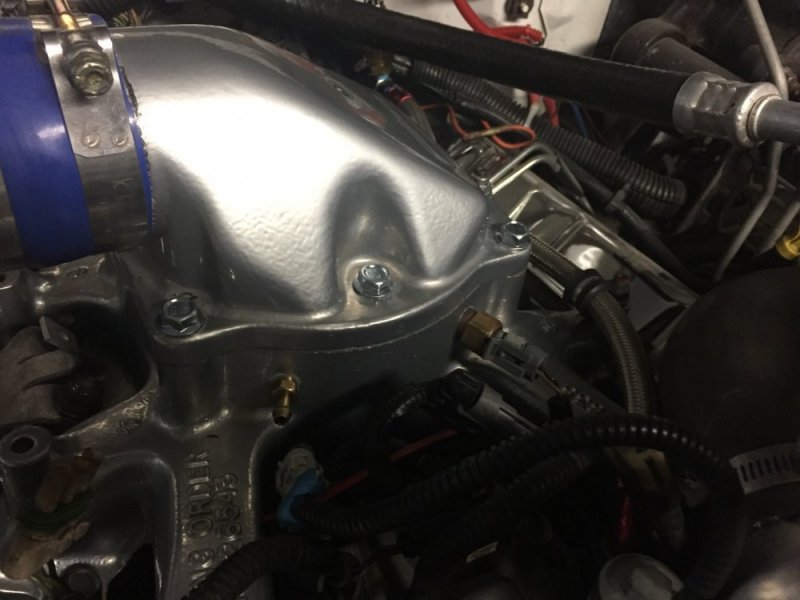
The additional taps aren't a bad thing given the use of the Peninsular ‘Hat’ for an upper intake and the resulting need for someplace to put all the added stuff (I simply inserted 1/8NPT plugs in the holes I didn't need). Utilizing this one eliminated the need for the spacer I had built for my OEM intake set up (I didn't want the Pen Hat looking like a porcupine).

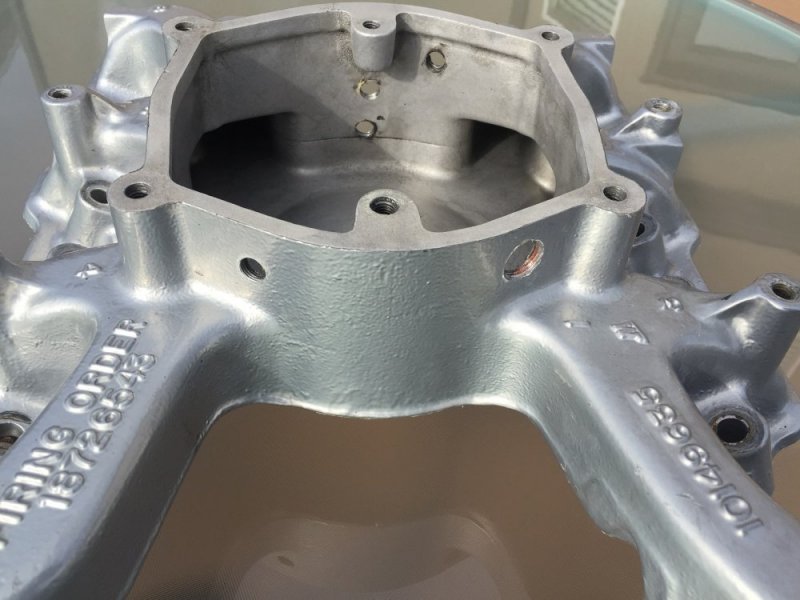
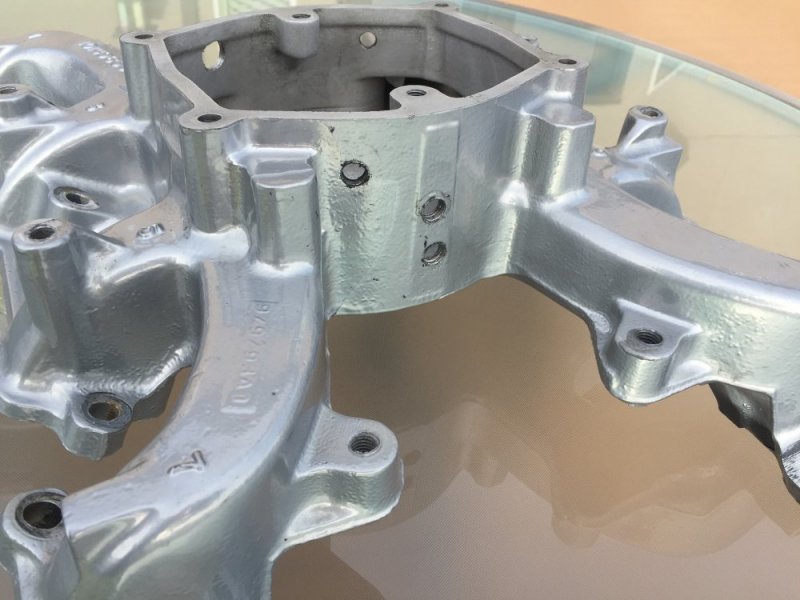
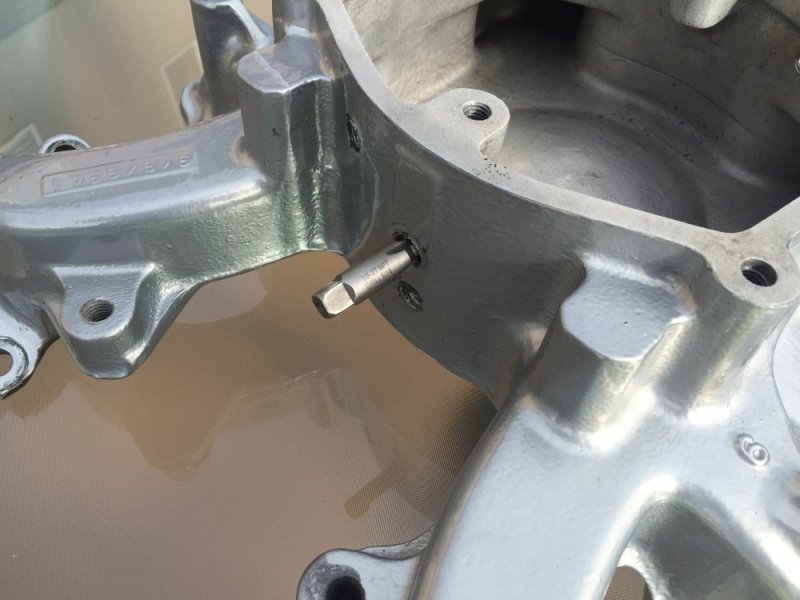
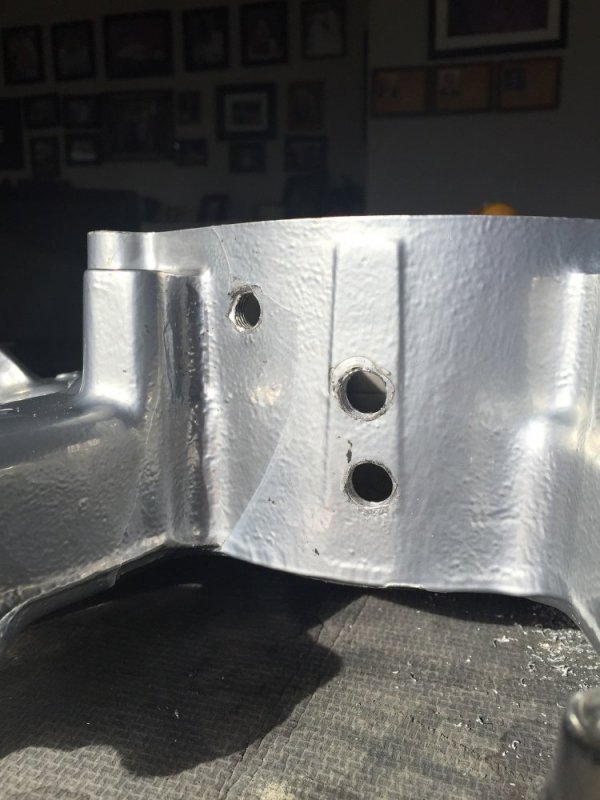
However, the WMI/Propane ports I didn’t use were apparently tapped too deep and wouldn’t seal. No matter what technique I used; thread sealer, RTV, different length plugs, shouldering the plugs, rubber washers between the plugs and intake…they would weep oil from the CDR and that meant I was losing boost however infinitesimal. Even swapping the senders in to the weeping holes didn’t work.

Compare the boost sender hole (no weeping) to the WMI/Propane holes on the back side.
Boost Sensor front, Sender in the back.
20151127-06.JPG

20151127-05.JPG

WMI/Propane tapped too deep.
20151127-04.JPG

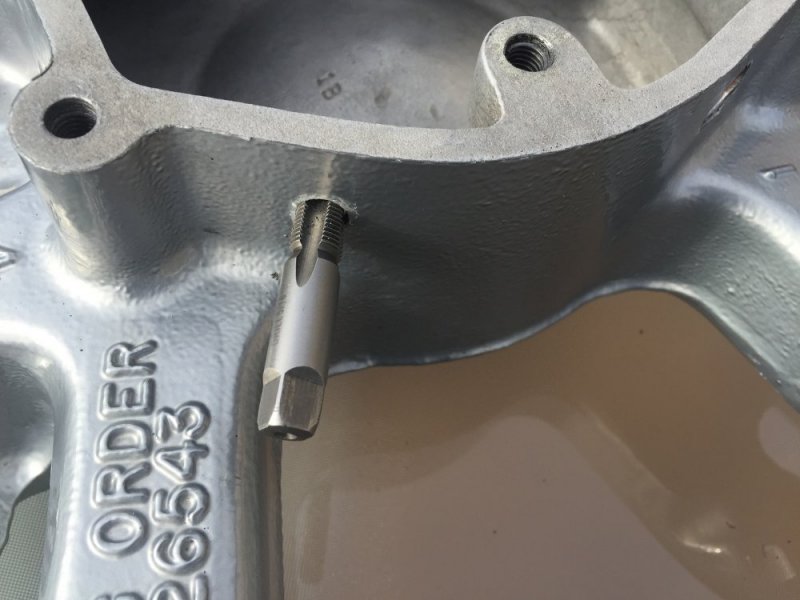
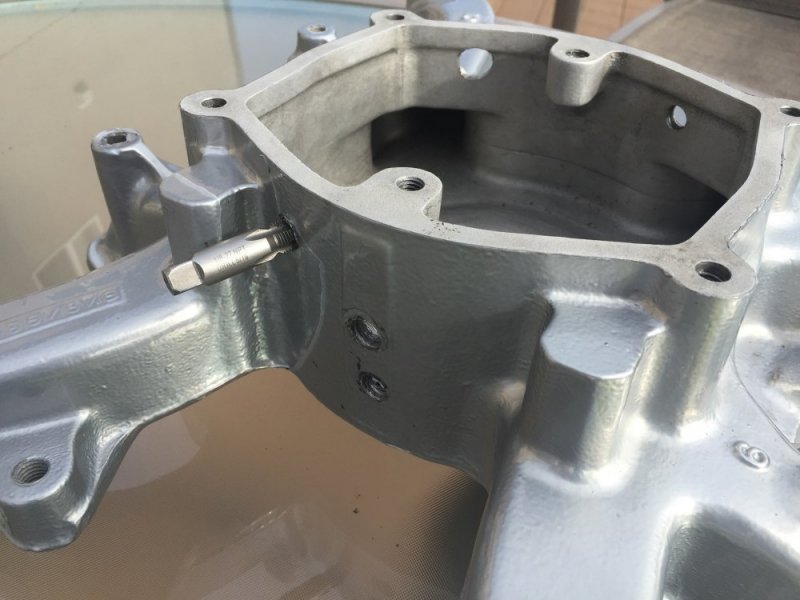
Asthetically, it didn’t really matter because the weepers were in the back but it remained a point of concern. I mentioned it on another thread and I think it was Leroy that recommended to simply re-tap the weepers correctly using 1/4” NPT and insert a bushing tapped for 1/8 NPT to solve the issue so, today, I went ahead and did just that. As I had already swapped my old black intake in, I didn’t worry about it and besides, I had that nifty spacer to use in the meantime with my old lower intake. Anyway, fickled me, I’ve decided to go back to this intake so, repair time.

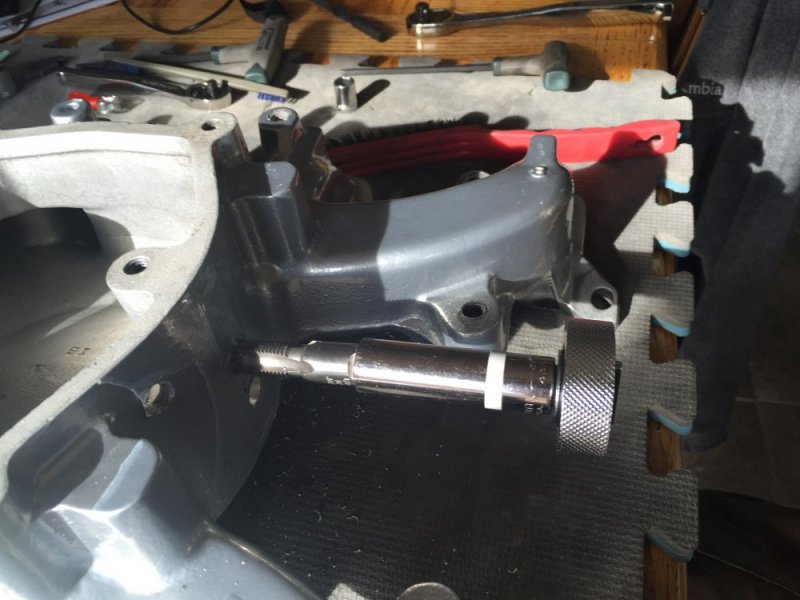
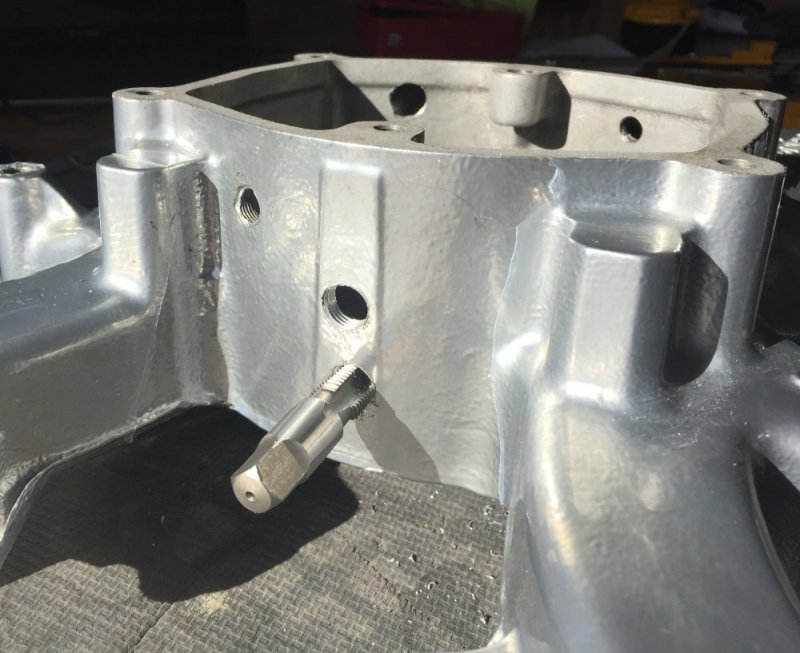
After cleaning things up, I carefully drilled out the weepers using the recommended 7/16” bit and then ran the 1/4" NPT tap using a hand ratchet and ½” 12Pnt socket (too close confines to use a T-Handle) to get things started. I used a ratchet handle to finish the job.
20151127-07.JPG

20151127-08.JPG
20151127-09.JPG

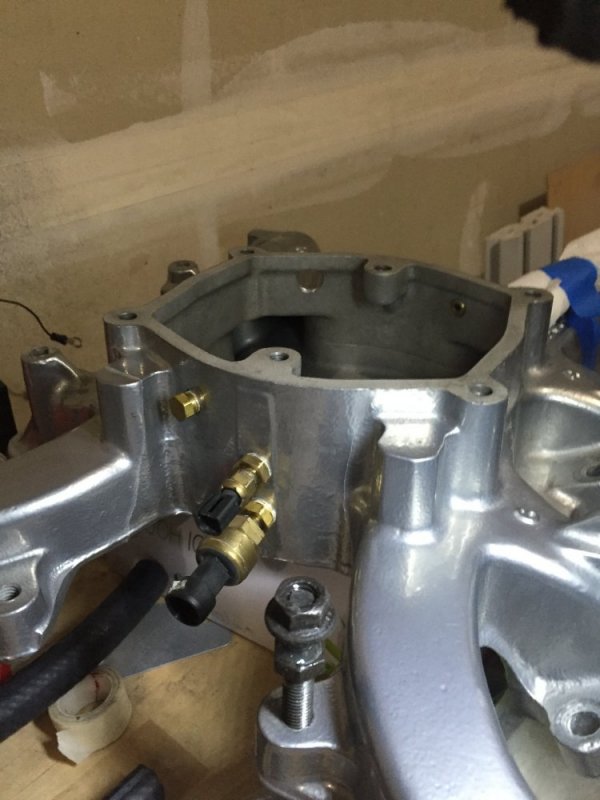
Finished it up with the 1/4NPT bushings and inserted 1/8” plugs and inserted a shorter 1/4" barb for the ECM Boost in the front.
20151127-10.JPG

20151127-11.JPG

Prior to inserting the bushings and the 1/8NPT boost hose barb, I coated the threads with sealant and then froze them. It may not make a real difference but I figured by keeping the lower intake warm, the holes would expand and inserting a cold plug would allow them to seat a little further. Once everything returned to an equal temperature, the seal would be a little bit better. Probably wrong and I’ll happily entertain the reasoning as to why from the 100’lbs heads around here so we can all learn a little bit.

I’ll swap it in later today or tomorrow. Don’t want to rush this….
 
We got an early snow dusting this morning. Around here it was only about 2-3” and made for a nice morning of shoveling snow for us and neighbors. Earlier than forecasted (tomorrow) and enough to make a lot of people put their cars in ‘stupid’ given the wrecks being reported. Good reason to stay at home and put swap out the intake.

Remove: upper Peninsular intake hat assembly; studs; AIT and Boost Sensor connectors; sensors; grounds from main point and back of engine; fuel line hold downs; fuel line; negative battery cables; heater hose; and, finally, the bolts followed by the intake. Note where the shorter studded bolts originated from (the five long ones are self explanatory).

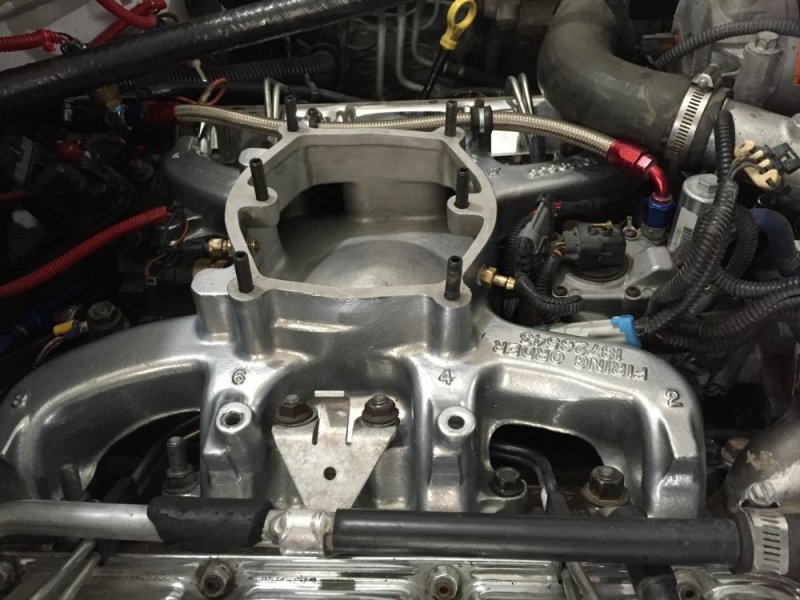
Install in Reverse order to put the new unit in. I attached the AIT and Boost Gauge Senders prior to replacing the lower on to the motor for ease of access.
20151128-01.JPG
The studded bolt in the fore ground is for all the grounds save the braided copper one that attaches to the back of the manifold at Cyl #8.

As always, replacing the lower is a little trickier as one must be careful to not collect any of the wiring or the return line retainer tabs on the passenger side between the intake and the heads. After coating the threads with copper anti-size I got the bolts started by hand and then snugged them down in an ever expanding “X” pattern from the middle to the outside bolts. Then I made two passes at them with a torque wrench following the “X” pattern from the inside out; first at 20 ft lbs and then a final at 31ft Lbs.
20151128-03.JPG

Then it was ECM sensors, Intake hat and associated tubing. I’ll have to wait to use studs as the ones I used with the spacer are much too long and I’ve only got M8x1.25 x 30mm.
20151128-04.JPG

I’ve got some M8 flared bolts to use to hold things together in the meantime.
20151128-05.JPG
 
Thanks Mike. If all goes well for 'Thing 2.5', we might be out your way a few times a year. Son-in-law is trying for a teaching position at Devry near Naperville. Hope springs eternal....
 
Thanks Mike. If all goes well for 'Thing 2.5', we might be out your way a few times a year. Son-in-law is trying for a teaching position at Devry near Naperville. Hope springs eternal....
Would be great to see you guys from time to time. I still hope to get out there to the salt flats in the next few years.
 
After spending an inordinate amount of time away from home (3 of 4 weeks DEC-FEB then two months Mid-Mar-Mid May and another work road trip this last week), I'm finally back and able to get under the truck...literally. I have no idea what my prioritized punch list is anymore so I reached into the bed and grabbed something. Turned out to be the cross over. Might as well put it in there then. But first....
Attempted to get the studs out of the driver side but was only 1/3rd successful. Decided to leave them in as I didn't want to snap them off and do the helicoil boogie. I just wanted to put some copper anti-seize on them 'since I'm in there anyway.' Oh well, I'm not going to let perfection get in the way of good enough anymore.
So, its in and I'll figure out the next item for Monday.
Cross Over 4 Installed.JPG
 
Looks awesome!

But I must point out, you have a few nuts mixed up on the intake, the thick ones with the floating washer are for retaining the heater hose pipe, the floating washer is so it wont turn and try to tear up and distort the ears on the line support.

Seems backwards to have that thick head on such a light duty task, but I guess the washer is the big deal.
The washers are there because the 'ears' are already distorted from using just the flare nuts in the past. PO overtightened them once upon a time, to the point they spread the ears. I bent them back but the damage was done so I've used the washers to ensure the support stays secure.
 
Finally got the firewall covered with the RAAMaudio sound dampener material. Hands are cut to shreds from the aluminum. I'm not looking forward to covering it all with the black padding either. May just have to enjoy the Lunar Lander appearance what with the hood covered in the same stuff and all.IMG_7020.JPG
 
if you cover it you will lose the reflective r value
Good Point. I got the inside covered with the stuff from when the carpet was pulled out for cleaning after the heater core let go a couple of years back.

Good to see you are back in town and back on your truck. Its been far too long since it's been on the road
I agree. I've pretty much decided that what's left can be done while it is running and driving. More to the point, no need to let perfection get in the way of good enough for a project that is dragging out much too long for its intended purpose.

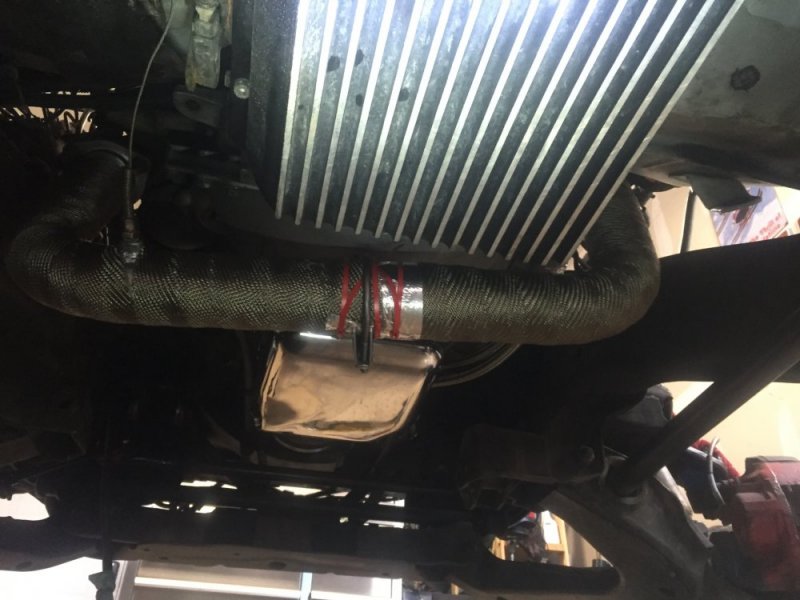
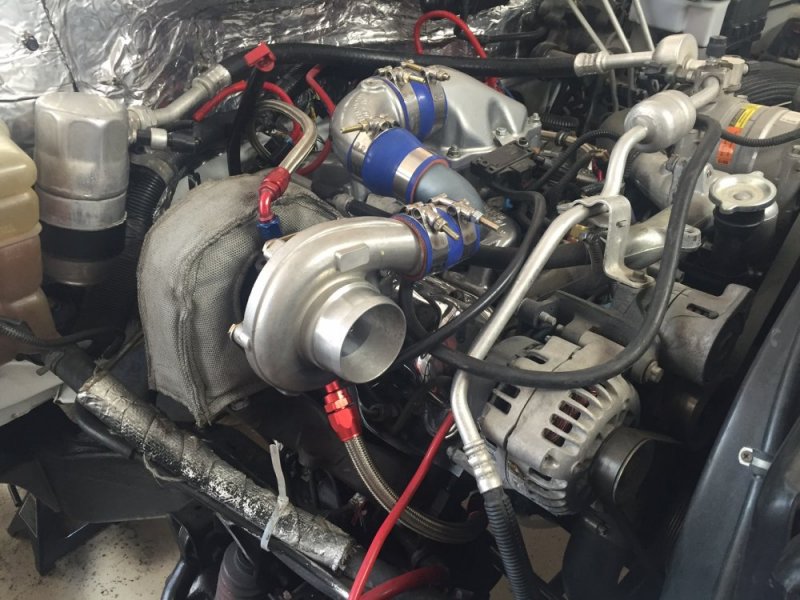
Today the S-86 Turbo was put back on along with the intake piping, oil feed & oil drain lines. I also re-sealed the dip stick tube to the oil pan.
IMG_7021.JPG
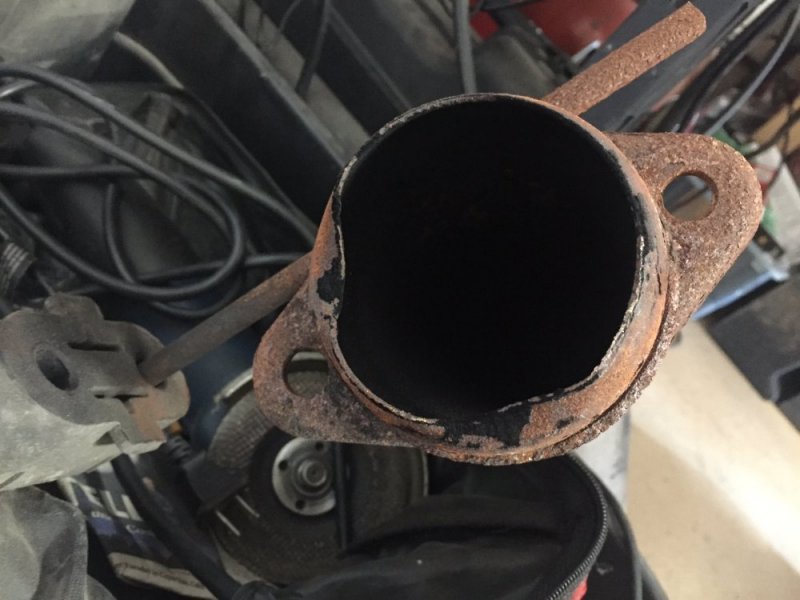
Exhaust was going back in but I noticed the down pipes ball socket was / has been dented up for some time. Lots of soot getting past. Need to either repair it or replace it. At least now I know where the exhaust whistle was coming from all that time.
IMG_7022.JPG
 
Got the hammer but something else caught my attention which turned in to another project. "Some Assembly Required" but it is done and ready to help with the post garage projects.
image1.JPG
 
45 minutes after you arrive. With the distance you've got to cover, I can break the thing in and know how to make a very nice steak to go with the fixings Maggie whips up.
 
Back
Top