• Welcome to The Truck Stop! We see you haven't REGISTERED yet.

    Your truck knowledge is missing!
    • Registration is FREE , all we need is your birthday and email. (We don't share ANY data with ANYONE)
    • We have tons of knowledge here for your diesel truck!
    • Post your own topics and reply to existing threads to help others out!
    • NO ADS! The site is fully functional and ad free!
    CLICK HERE TO REGISTER!

    Problems registering? Click here to contact us!

    Already registered, but need a PASSWORD RESET? CLICK HERE TO RESET YOUR PASSWORD!

Pseudo-Resto 96 K-1500…Um, when was this a good idea?

I keep telling myself I'm supposed to be retired but the job is paying for some needed home improvements and quality of life stuff. As for missing your old 6.5...yeah, right! Unless you've had LBZ repairs to do that required a loan where the same work on a 6.5 wouldn't.

No repairs to speak of so far just upgrades and my custom "touches". New exhaust tip shows up today, shift kit should be in the truck in the next couple of weeks, Then pulling the turbo to have the inducer milled out. more upgrades to come after that. Oh ,actually just the other day the outside of the muffler came loose and is vibrating, will need to weld or just straight pipe, haven't decided yet, only repair though :rolleyes:.

I miss the old rattle and the sound, and of course the body style but still in love with my lbz. We will need to hook up again when all my upgrades are done. Or sooner so I can lend a hand in getting your rig rolling.
 
Thanks Mike, Much appreciated. The trans filtration project has been on the back burner for a couple of years. If I can't sort it out right away, its an "Oh well, maybe later" thing.

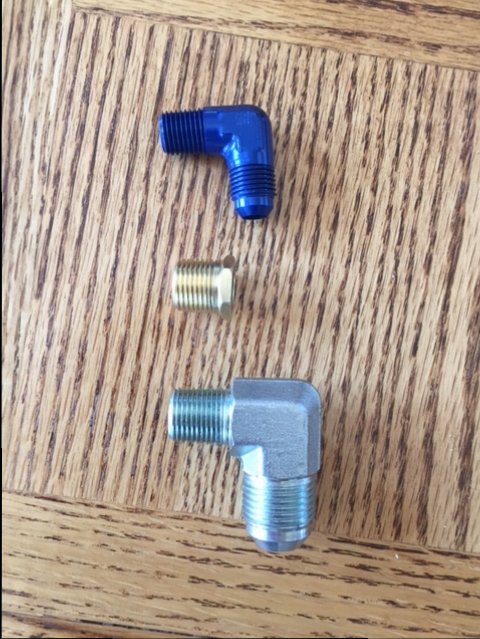
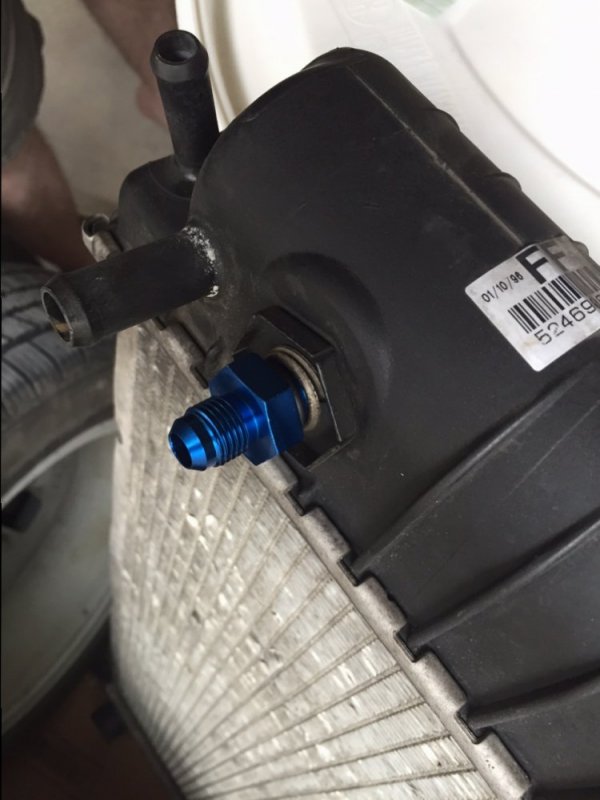
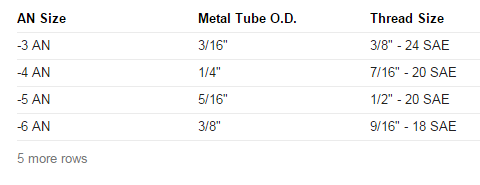
For the radiator fittings, it figures my writing skills failed again. It is a matter of getting the thread size for the radiator side as -6 AN the wrong size. Referencing the picture, the left facing threads are what I'm trying to get right.
Blue Fitting is 1/4" NPT
Brass is 3/8" NPT
Steel fitting is close but the threads are too fine
20150909 Fittings.JPG
Once I have the radiator side correct, then the right straight through -6 AN Male to ______ Male adapter can be sourced or cobbled up.
 
No repairs to speak of so far just upgrades and my custom "touches". New exhaust tip shows up today, shift kit should be in the truck in the next couple of weeks, Then pulling the turbo to have the inducer milled out. more upgrades to come after that. Oh ,actually just the other day the outside of the muffler came loose and is vibrating, will need to weld or just straight pipe, haven't decided yet, only repair though :rolleyes:.

I miss the old rattle and the sound, and of course the body style but still in love with my lbz. We will need to hook up again when all my upgrades are done. Or sooner so I can lend a hand in getting your rig rolling.

Yeah, I've seen your custom 'touches'. You need to come by and catch up regardless of work on the truck. I've a couple of new bullet launchers that need showing off too.... Harder to find the house now that several homes have been built above me. Oh well.
 
Yeah, I've seen your custom 'touches'. You need to come by and catch up regardless of work on the truck. I've a couple of new bullet launchers that need showing off too.... Harder to find the house now that several homes have been built above me. Oh well.

I will for sure come out and catch up, and bring some ammo to spend. As for the new houses, sorry for your lack of view, its been a while but I still think I know where to find you;)
 
If you talking about the threads that are on the quick disconnect fittings going into trans cooler? they are 3/8" npt.
 
If you talking about the threads that are on the quick disconnect fittings going into trans cooler? they are 3/8" npt.
I'll try that NPT fitting out on the Aux. Trans Cooler. However, 3/8 NPT doesn't work on the radiator's trans-cooler. Its apparently a straight threaded 5/8. I'll try to find something in a 5/8 thread locally. Home Depot didn't appear to have anything and a plumbing supply place only had NPT stuff. Didn't have time to go to my favorite specialty hose shop but will Monday.

Glad to see your truck coming together Paul. You do nice work, and I like your "while I'm there" extras. Its always makes me feel better about a job, if I tidy things up while I'm there. :)
Matt
Yeah, it lasts a week before a dust storm or rain produced mud gets things all mucked up. A week if I'm lucky.
 
I'll try that NPT fitting out on the Aux. Trans Cooler. However, 3/8 NPT doesn't work on the radiator's trans-cooler. Its apparently a straight threaded 5/8. I'll try to find something in a 5/8 thread locally. Home Depot didn't appear to have anything and a plumbing supply place only had NPT stuff. Didn't have time to go to my favorite specialty hose shop but will Monday.
Radiator trans cooler fittings are 3/8 inverted flare. Any auto parts store will those premade lines that will fit.
 
Four Way Head Light mod. Part I of II

Some time ago I installed the 4-Hi mod using a kit from Painless wiring. I’ve had not issues with the functionality of the set up other than that experienced by everyone using the e-bay variety HID set ups for high beam. I removed that set up long ago and went with Sylvania brightest stuff (name escapes me but the impact on the wallet still smarts). I had also installed a wiring harness marketed by LMC that pulls battery power to the headlights directly through relays rather than full power being run through the light switch in the cab. Seemed like the correct thing to do for the HIDs and more so for the Sylvanias.


With the 4-HI kit from Painless, I never cared for the quick T-Splice that came in the kit. Always worried about the possibility of corrosion given the exposed nature of the splices design. I probably should have used silicon or NoAlox but didn't think of it at the time. Still, I always wanted a better, weatherproof, means of connecting everything up but then there’s the issue of limited wire play in the harness for the factory Hi and Lo beam wires (Green and Tan respectively).

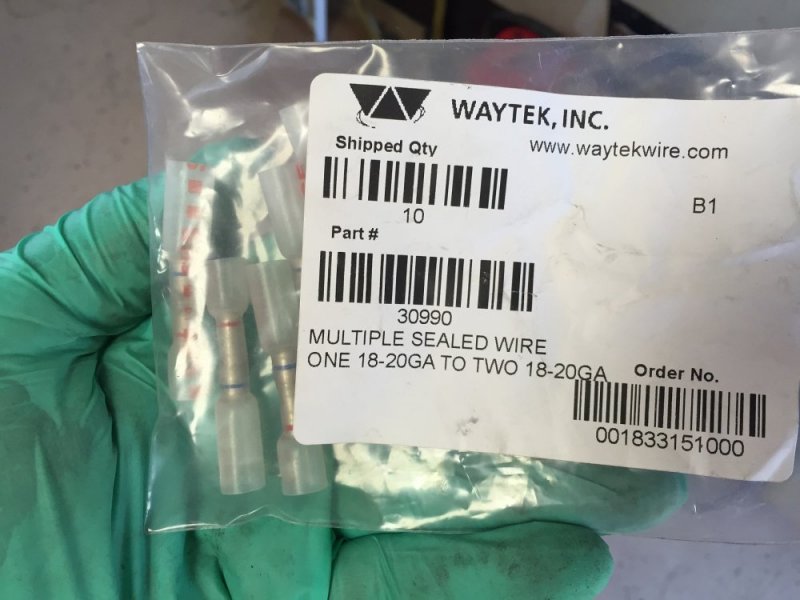
Enter Waytek Inc. They have a weather proof, heat shrinked line of but splices that allow two wires on one side and the single wire on the other. Done deal. Check them out...lots of stuff to get you imagination going and projects completed.
20150912-4.JPG

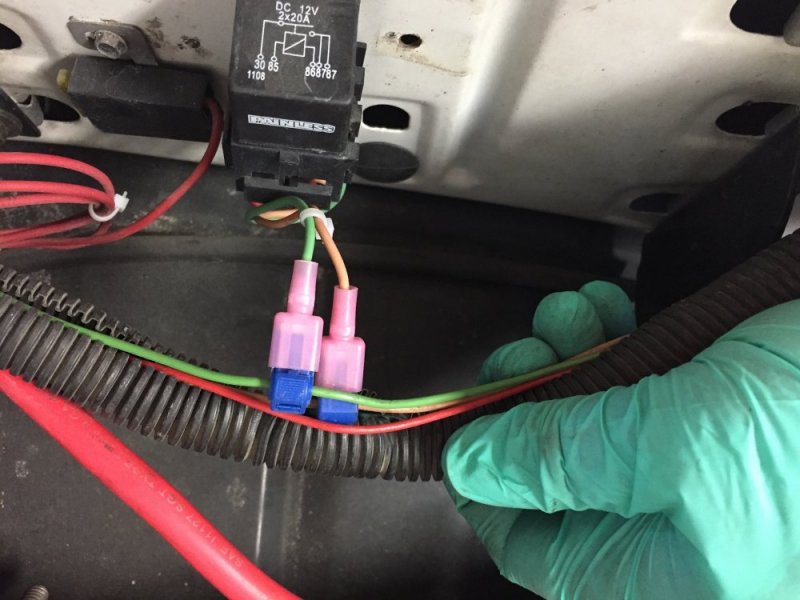
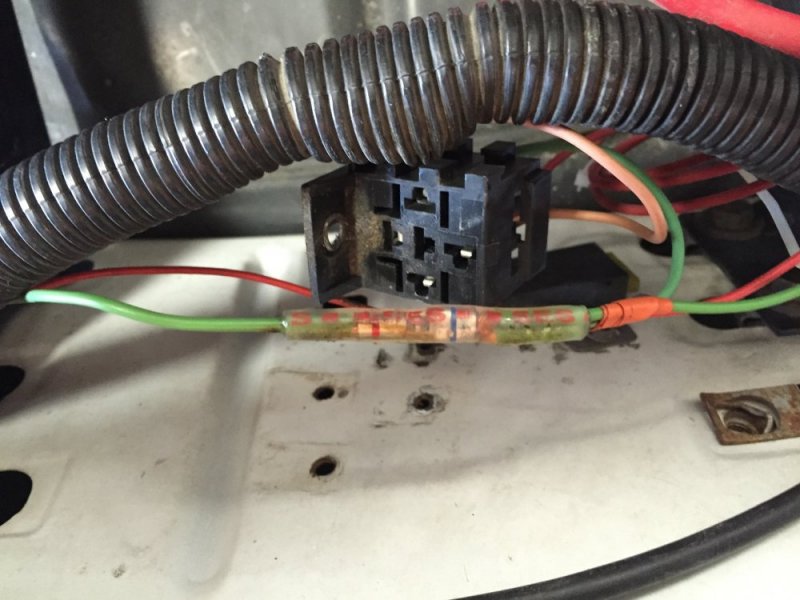
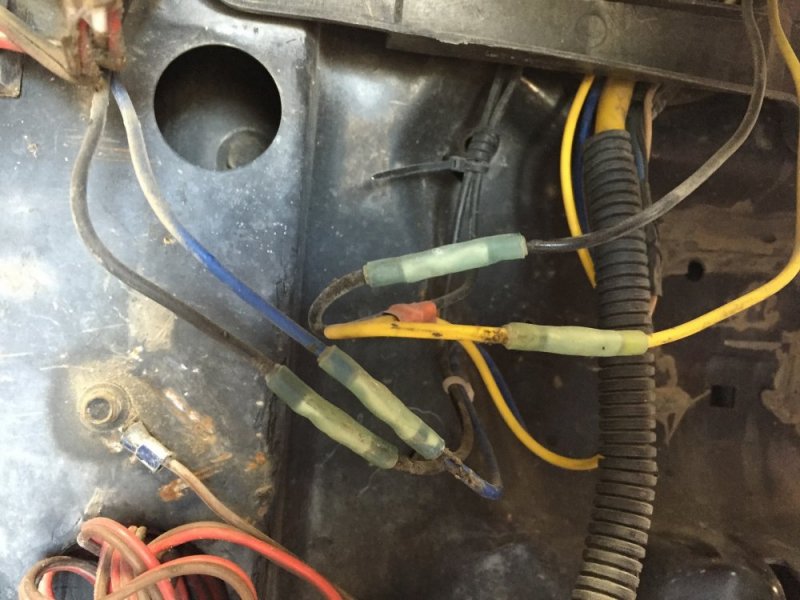
Set up as originally installed. You can see the T-splices sticking out of the factory wiring harness
20150912-2.JPG

T-Splice cuts in the OEM wires. Fortunately, no corrosion visible.
20150912-3.JPG

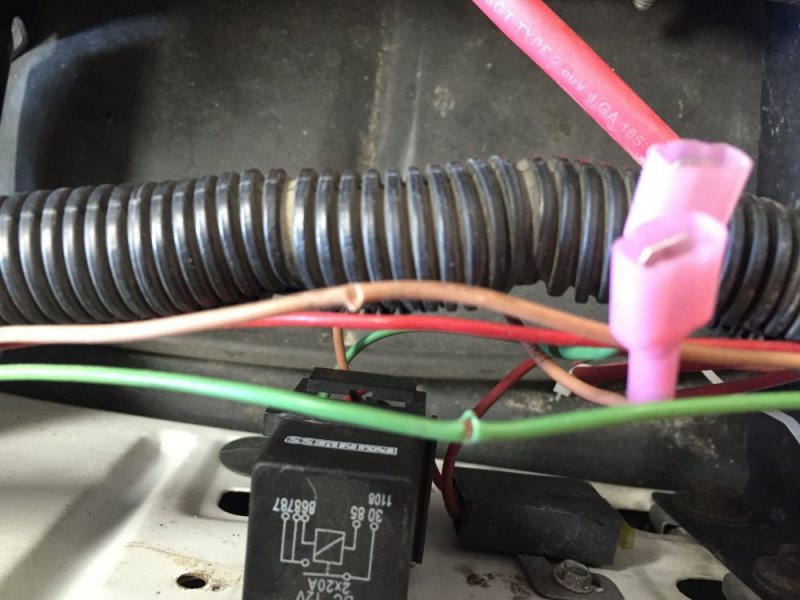
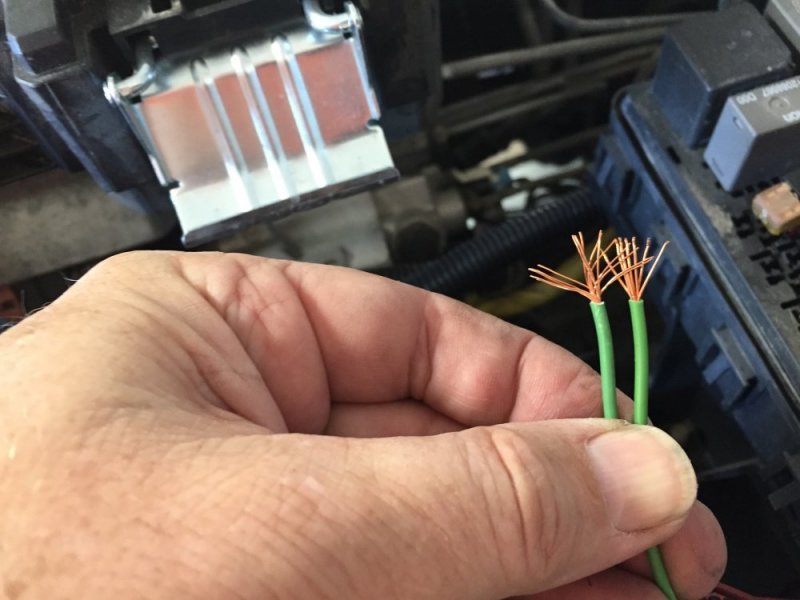
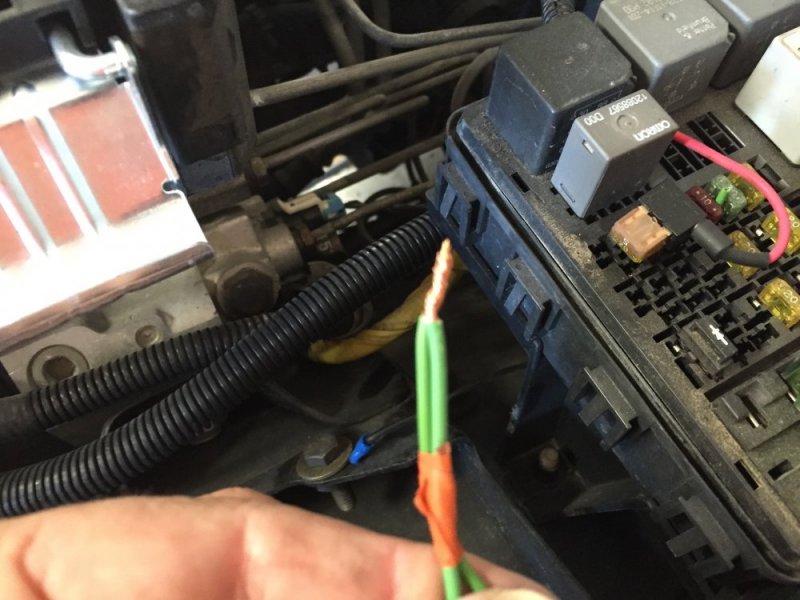
After making the nervous cut on the OEM wires, I discovered that fanning out the wires for the two-wire side facilitates joining them together (OEM and Painless). Otherwise, they don’t join and come apart when inserting into the butt splice’s double side.
20150912-5.JPG 20150912-6.JPG


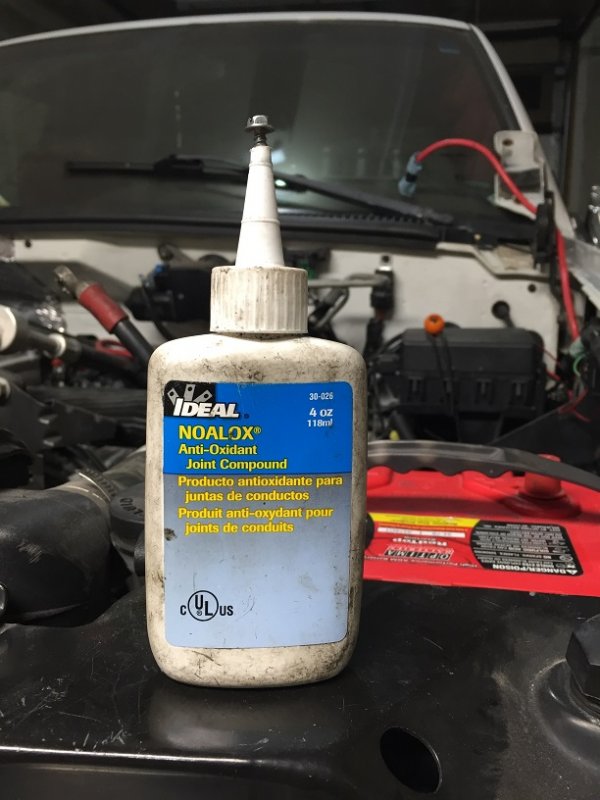
Even though the splices have a resin that is heat activated to seal things up, I put a dab of Noalox on the wires to ensure a good connection and add additional weather proofing to the effort. NoAlox goes on all ground points and power connections where there's no chance of contacting grounds or other wires as it's a connectivity enhancer and water inhibitor.
20150912-7.JPG

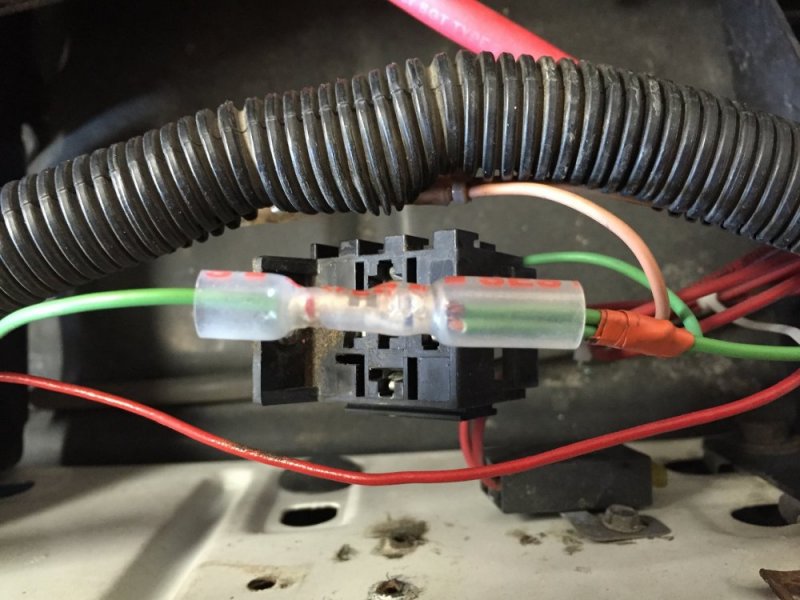
Two to one splice crimped and ready for the heat shrinking.
20150912-8.JPG

Post heat-shrinking of the splice.
20150912-9.JPG

Probably at the limit for pictures and blather for this post.
 
Just remembered you want to go to -6an. I can get the fittings but it will take two to get what you need.
 
Four High Mod. Part II of II

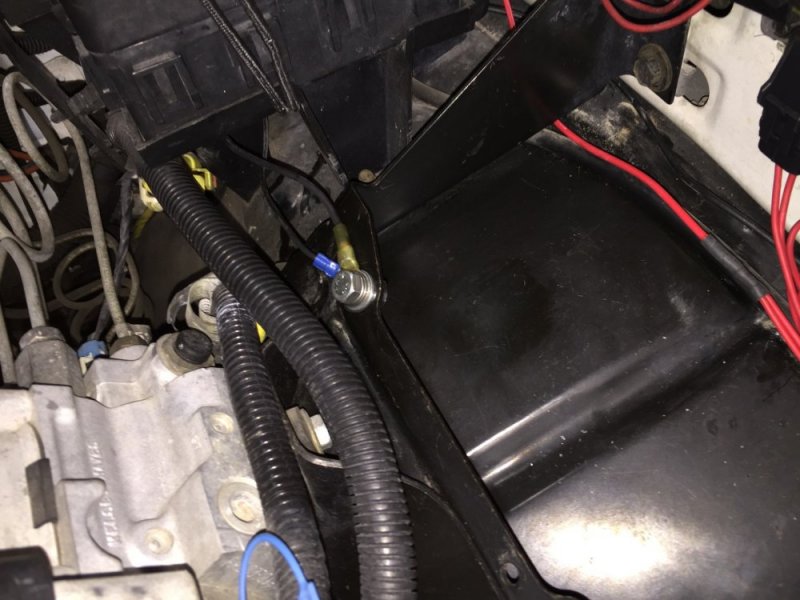
Ground wire connected using an 8mm bolt and washers at the Brake control bracket in front of the Under Hood Fuse Box. Power lead runs beneath the bracket to the Under Fuse Box
20150912-15.JPG

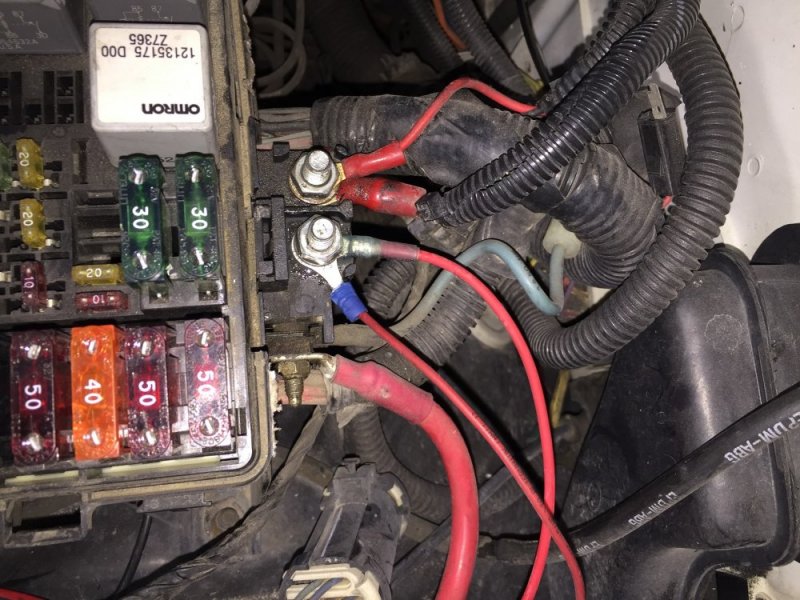
Hot Side connected to the B-AUX stud on the Under Hood Fuse Box. Obviously, I need to clean up some of the stray NoAlox.
20150912-16.JPG

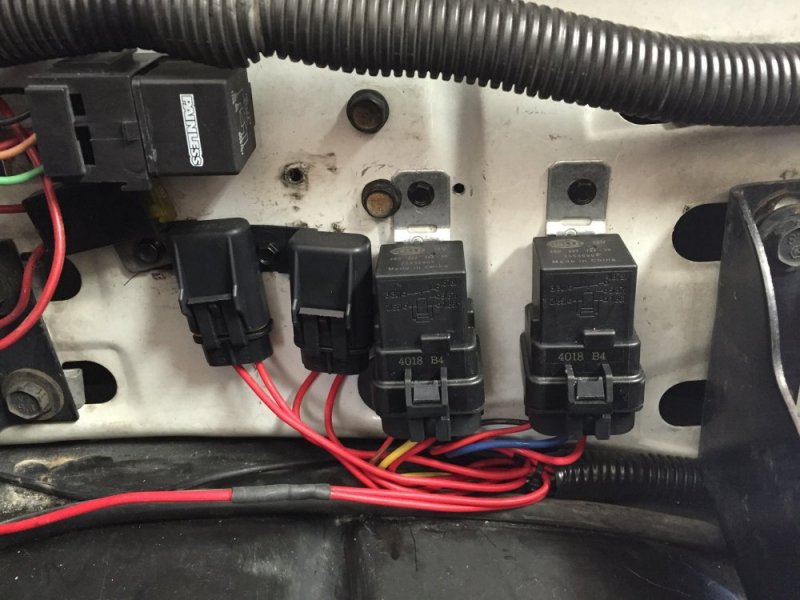
In the end, I had to move the relay a bit toward the cab to make room for the new Headlight Harness from Painless that replaces the LMC unit. But that’s another posting which will show the before and after of the assorted relays and fuses for both kits mounted together on the driver's side fender wall.
 
Thanks. I ordered them on-line about an hour ago. 5/8-18 to -6 AN and 3/8 NPT to -6 AN. Male at both ends.
I see you're up late too. :bookworm:
Yep about to turn this thing off and call it a day. Did you confirm you'll need 5/8-18 ? Im pretty sure its 3/8" inverted flare that go's in the radiator.
 
Yep about to turn this thing off and call it a day. Did you confirm you'll need 5/8-18 ? Im pretty sure its 3/8" inverted flare that go's in the radiator.
Yes, I'm 100%. I bought a 3/8 NPT plug and it is a definite "No Go." It starts but after a 1/4 turn, it's done. As the radiator I'm testing on is the one that came out when I pulled the motor and the same lines fit the replacement unit, I'm pretty positive the 3/8 NPTs won't work for me there either. To be sure, I pulled out my Tap and Die (sp) set and the 5/8 NFI tap was the only one that would thread in there. I'm about to post up the Heavy Duty Headlight Harness adventure so don't run off just yet... or save something for tomorrow's episode of "Entertainment and Excitement from Paul's Garage."
 
Heavy Duty Headlight Harness.

The LMC harness is typical Chinese Crap. While it worked as designed, the connectors at the headlight bulbs were so brittle that I had to replace them a couple of times. That's because the replacement connectors, being Chinese Crap, weren’t much better. Zip Ties are your friend. One issue I did have was there seemed to be hickups with the HID bulbs.

The associated Relays mounted up well enough. Wiring to the Aux B post was straight forward but the grounding was done at each headlight requiring a new tap into the core support. No big deal, just pointing it out. Given the ‘Restoration’ idea, I ordered a beefier kit from Painless. Like I said earlier, not so painless in the wallet. It’s been sitting on the windshield since November I think. The old adage of 'if you don't have time to do it right the first time, when will you find the time to do it over' certainly applies to me.

Installation was hampered only in trying to figure out how to get the two mongosso relays with their fused power leads (upgrade from the LMC marketed unit) to fit in the same area as the old ones. It was 'Pain-fully' obvious that using the old mounting locations wasn't going to play out.

Before and After shots of “Relay Central.” You can see where I moved the 4-Hi relay to make room for the new guys. The LMC harness used Yellow looming and ran over the top of the Power Brake Control bracket where the Painless unit was run underneath it.
20150912-11.JPG 20150912-14.JPG

Old mess of wires at the core support. Example of one of the many repairs where I had to splice in new headlight bulb connectors.
20150912-12.JPG

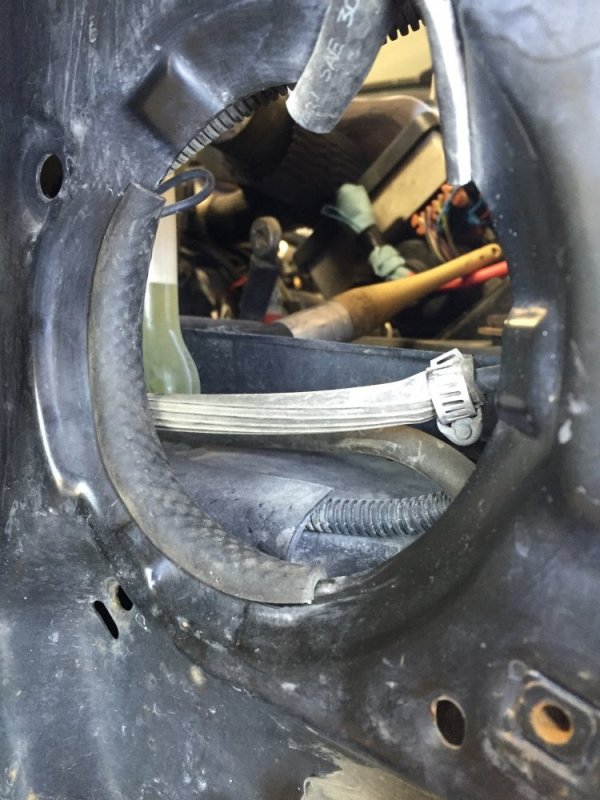
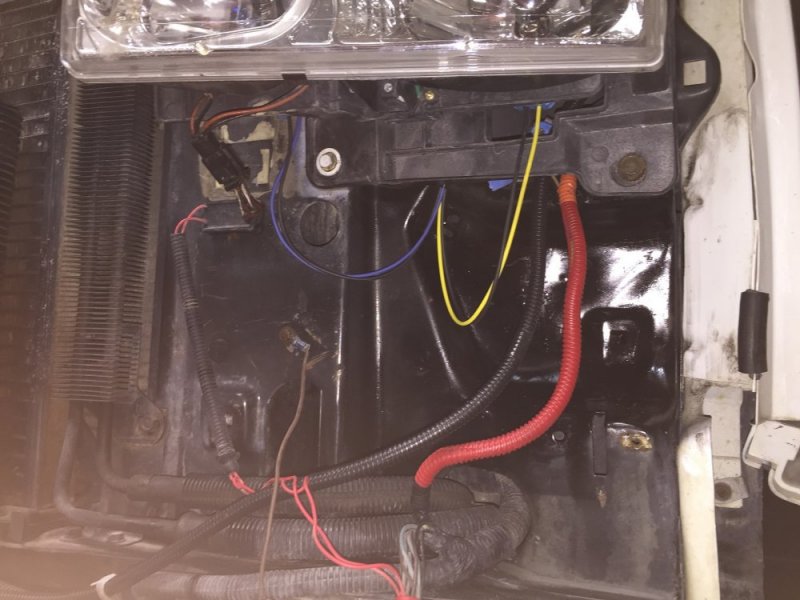
Wires from the harness to/from the headlights passes through the headlight portal in the core support. To prevent chaffing, I will often use a split piece of fuel line along sharp edges where contact is anticipated. I’d done this originally with the old harness.
20150912-17.JPG

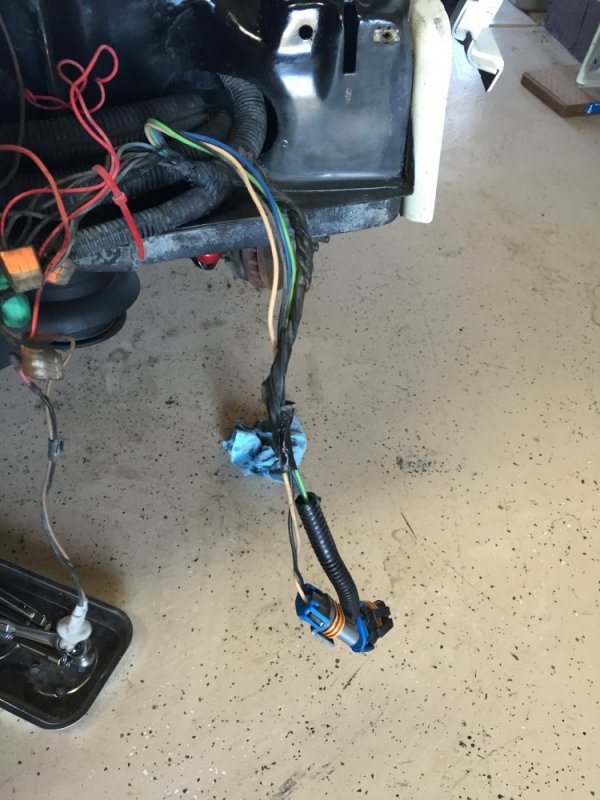
The driver’s side OEM connectors. Power from the light switch passes to the factory Headlight Harness and, at the driver’s side, it feeds power back to the Heavy Duty Harness and feeds the relays, causing them to activate and “relay” the power to the HD Harness. Power is then pulled from the battery via the Aux B post at the Underhood fuse box to the lights via the new harness that connects to both headlights. High and Low Beam. Another good reason to upgrade to RaceDay’s battery wiring kit.
20150912-13.JPG
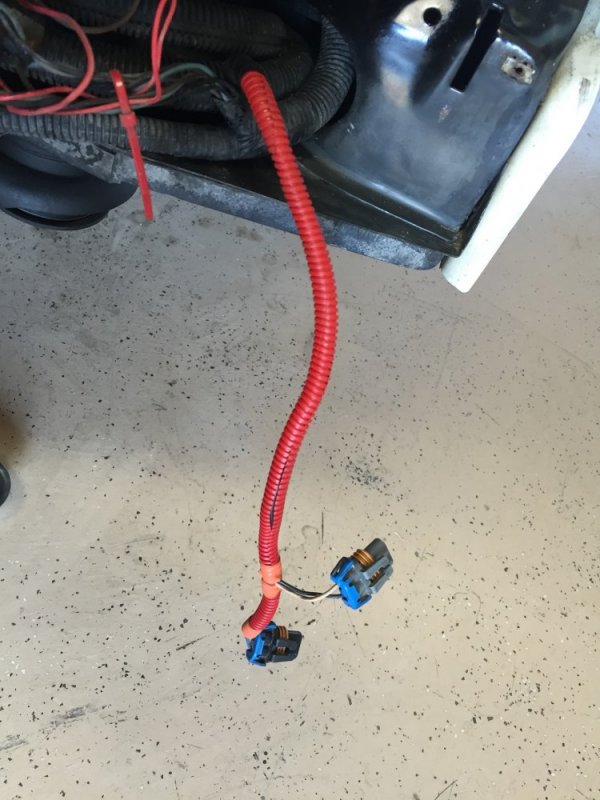
Anyway, I cleaned these up by removing the factory electrical tape in favor of aftermarket wire loom. I chose red to help me remember the power routing when I go back in there later to replace something or another (it never ends)
20150912-18.JPG

Finished, the wiring and routing is much cleaner than before but then, I didn’t have the front end apart when I did it the first time.
20150912-19.JPG 20150912-20.JPG 20150912-21.JPG
Yes, I know that I need to clean off the old silicon and mounting tape from the old HID ballasts removed from the core support.
 
Last edited:
Yes, I'm 100%. I bought a 3/8 NPT plug and it is a definite "No Go." It starts but after a 1/4 turn, it's done. As the radiator I'm testing on is the one that came out when I pulled the motor and the same lines fit the replacement unit, I'm pretty positive the 3/8 NPTs won't work for me there either. To be sure, I pulled out my Tap and Die (sp) set and the 5/8 NFI tap was the only one that would thread in there. I'm about to post up the Heavy Duty Headlight Harness adventure so don't run off just yet... or save something for tomorrow's episode of "Entertainment and Excitement from Paul's Garage."

Im not saying 3/8" NPT that won't fit as you've seen. Its 3/8" inverted flare thread (or might be called tube thread). Get a piece from FLAPS and check it out.
 
Thanks Leroy, I misread the 'inverted flare' when I saw 3/8th's. I'll have to take that radiator with me next time.
 
Summit...fast shipping!
The fittings I ordered Saturday night at about midnight arrived this afternoon...36 hrs turn around.
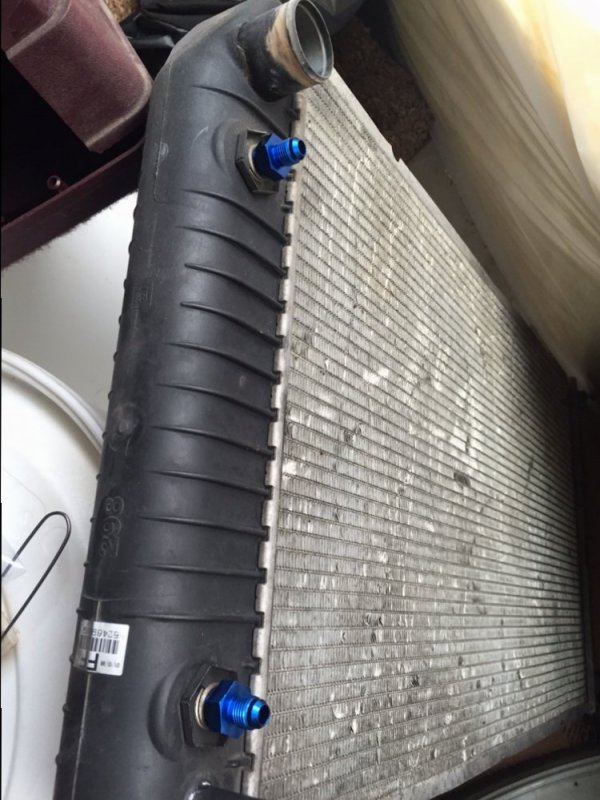
The question about the 5/8 -18 thread for the trans cooler lines to the Radiator is answered and confirmed positively.

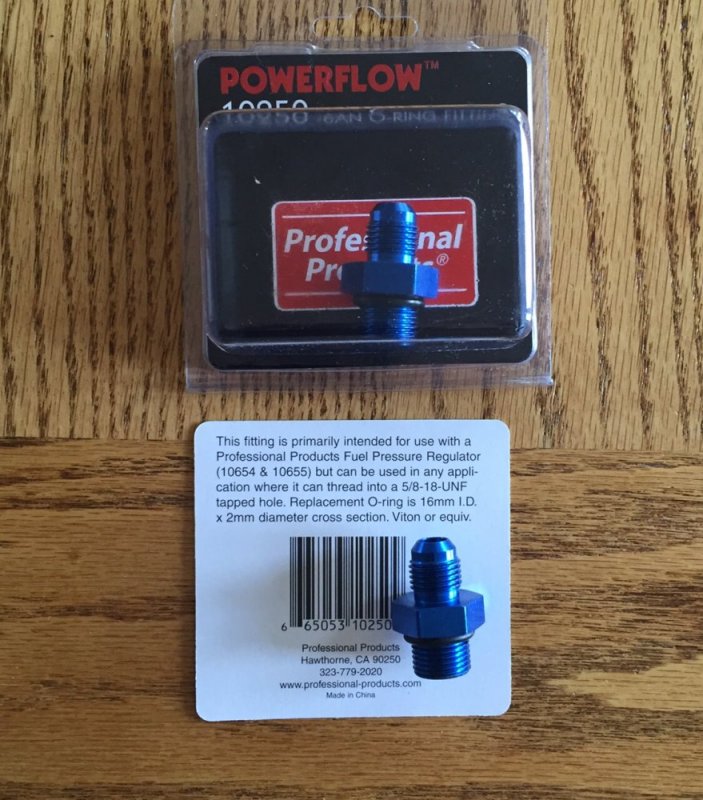
Fittings and packaging.
140914-1 Trans to Radiator Fitting.JPG

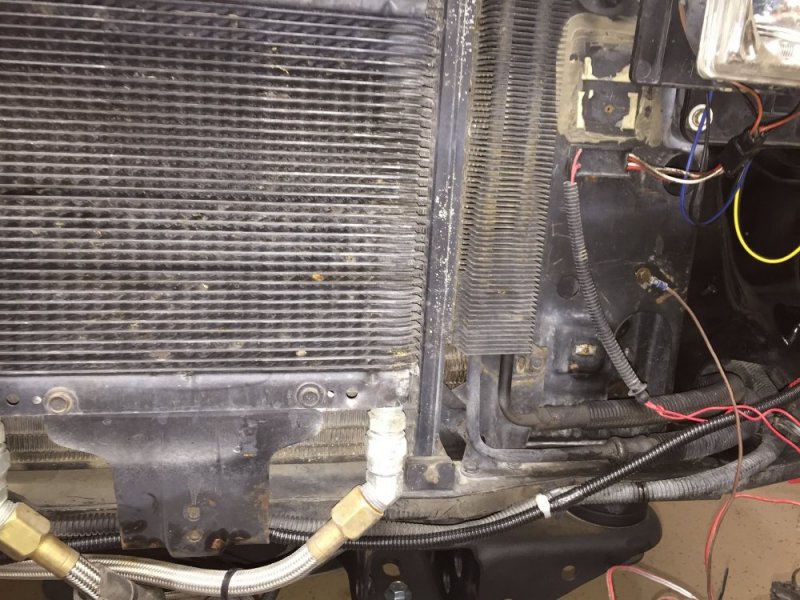
One in place on the mock up radiator.
140914-2 Trans to Radiator Fitting.JPG

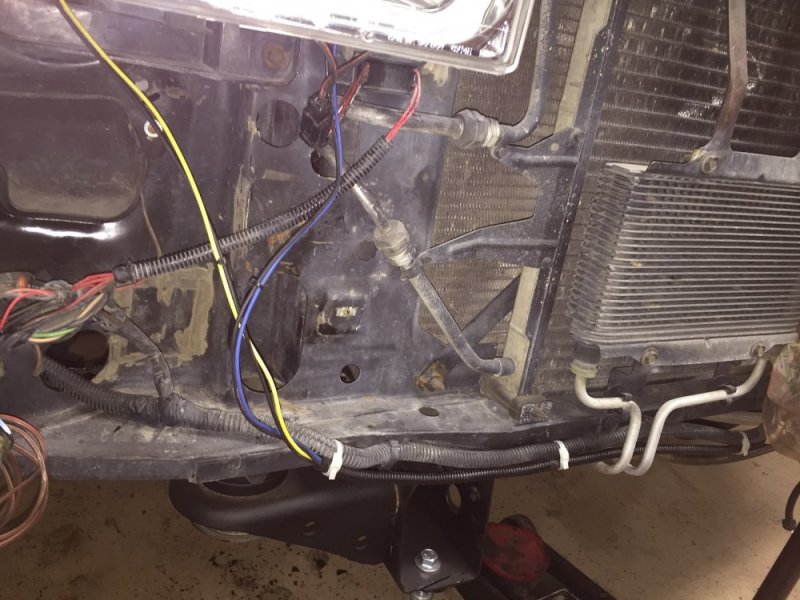
Both set in place.
140914-3 Trans to Radiator Fitting.JPG
Guess I'll need some pipe thread because the fitting is too deep to allow the O-Ring to compress.
I also have the 3/8 NPT fittings to try on the Auxiliary Trans cooler plus another set of 5/8-18 to -6 AN fittings yet to arrive as a back up. We'll see.

Also in the order were the 45 degree and Straight -6 AN to the Hose fittings to so I can get on to mocking up the lines and prepared for the run back to the FS-2500 filters...wherever it is I decide to mount those.
 
Back
Top