Navigation
Install the app
How to install the app on iOS
Follow along with the video below to see how to install our site as a web app on your home screen.
Note: This feature may not be available in some browsers.
More options
-
Welcome to The Truck Stop! We see you haven't REGISTERED yet.
Your truck knowledge is missing!
- Registration is FREE , all we need is your birthday and email. (We don't share ANY data with ANYONE)
- We have tons of knowledge here for your diesel truck!
- Post your own topics and reply to existing threads to help others out!
- NO ADS! The site is fully functional and ad free!
Problems registering? Click here to contact us!
Already registered, but need a PASSWORD RESET? CLICK HERE TO RESET YOUR PASSWORD!
You are using an out of date browser. It may not display this or other websites correctly.
You should upgrade or use an alternative browser.
You should upgrade or use an alternative browser.
Electric Fan clutch
- Thread starter ak diesel driver
- Start date
MrMarty51
Well-Known Member
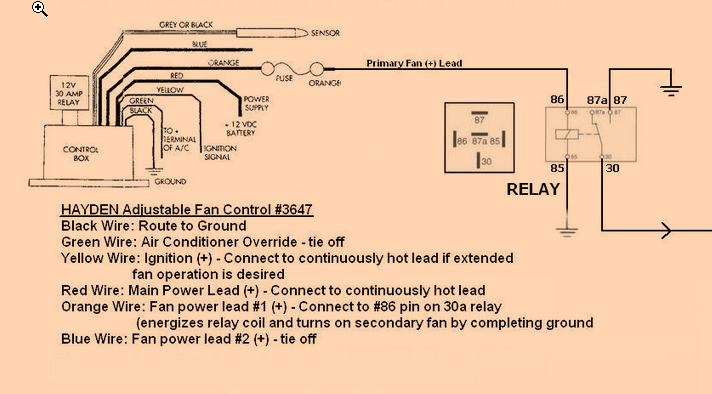
The fan is the Delco unit from RA. And the controller is the Hayden with the screw in probe.I will have to look at mine and see which wires were used. I know only two are used on the clutch connector. one is ground and other power from the controller. I did find out from experience that the wire colors are different between brands of fan clutches. I at first bought an off brand one then later ordered the AC Delco one.
which controller are you using? Hayden makes two of them. one with a thread in sensor and the other with a probe that you can strap to something.
Is it correct that the blue wire from the fan clutch is the one that needs to be grounded ?
Yup, I too am quite efficient at derailing the train from the threaded tracks.STICKY!!
STICKY!!
STICKY!!
Well, could a moderator do “qoutes” of the threads that have the pertinent info and make a locked sticky of that? 17 pages and counting and many non crucial comments- a ton are mine here don’t need to be in it.
Several of Mine can be eliminated too.
Husker6.5
135' diagonal 16:9HD, 25KW sound!
Be careful of that light at the end of the tunnel!
dbrannon79
I'm getting there!
I need to look at my fan. Probably won’t be till later tonight after work. Iirc I think I posted how I connected mine On one of the threads I started. I’ll have to look for itThe fan is the Delco unit from RA. And the controller is the Hayden with the screw in probe.
Is it correct that the blue wire from the fan clutch is the one that needs to be grounded ?
Yup, I too am quite efficient at derailing the train from the threaded tracks.
Several of Mine can be eliminated too.
MrMarty51
Well-Known Member
Thank You very much.I need to look at my fan. Probably won’t be till later tonight after work. Iirc I think I posted how I connected mine On one of the threads I started. I’ll have to look for it
MrMarty51
Well-Known Member
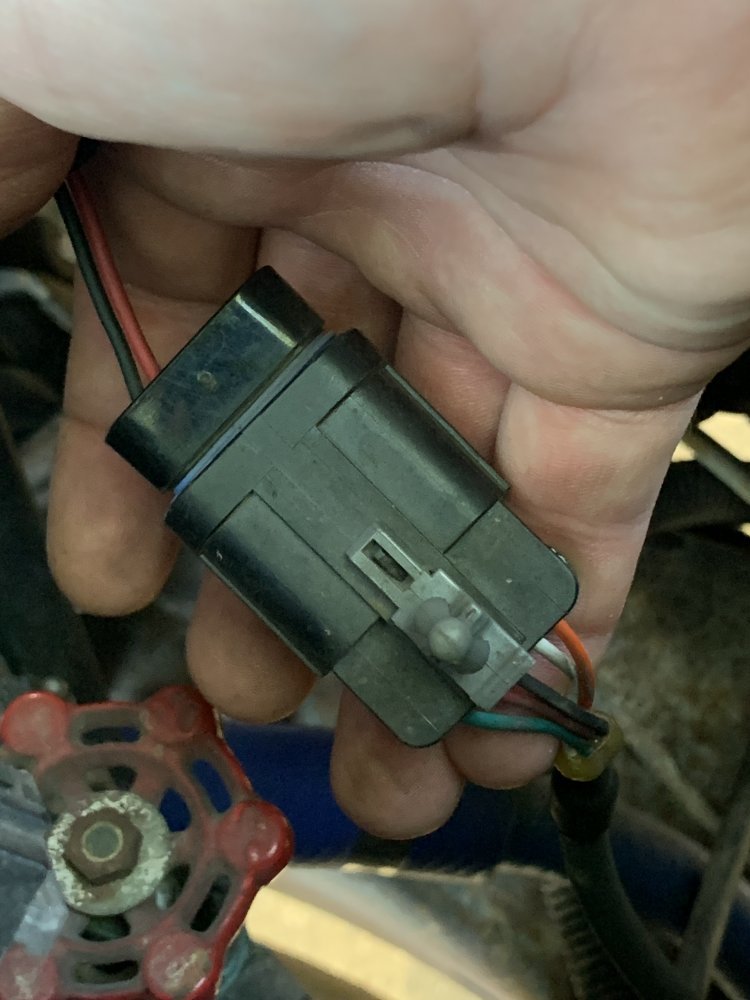
just to be sure I’m reading you right…. Looking at my connector pin A (blue) will be ground and pin B (red) is hot 12v+
The clutch is from a 2010 express van 3500 6.6 d-max
this connector isn’t labeled with any pin lettering or numbers. Cheap Chinese made I guess lol
This one ?
dbrannon79
I'm getting there!
I think so, it should be the two pins on one end of the connector iirc I know I had posted a pic of my connector here somewhere.
MrMarty51
Well-Known Member
Okay, thank You very much. The red and the blue are the two end units within the connector.I think so, it should be the two pins on one end of the connector iirc I know I had posted a pic of my connector here somewhere.
After I make a sammich and let Maggie(the dog) share it with Me, I go out and do some rearranging within the connector.
Suppose to be right next to, or over 100 this afternoon so the temps is just perfect for such a test.
MrMarty51
Well-Known Member
The wire that I thought was blue, from the fan clutch, it was green. Took apart the plug connector and moved the ground wire to that position. You do not have to cut the wires to het them removed from the plug.
Thats what it took to get My system functional. Just because a wire is black does not necessarily mean that it is for a ground.
Hoooo boy. 104 degrees ambient air temp. Down here in the valley. Weather app says 100 degrees.
Allowed the engine to warm up then took a drive towards town. I wanted to be sure the engine was well warmed up before pulling over the Yellowstone Hill.
I forgot to do one thing. Start the engine analyzer app on the phone. Stopped across the bridge and parked at the parking lot. Fired up the app. It was on 192 degrees with the AC on full max. I do have the controller wired so the fan runs when the AC compressor is turned on.
Finished the drive on over the hill and down off of the back side. Temp stayed right on 192.5. Drove on out to about the four mile post and turned around. Coming back and pulling the back side of Yellowstone hill, about a mile or more, quite a steep climb, AC on max, temp gauge stayed right on 198.2. After reaching the top and a very short distance the temp gauge went to 201.5 and stayed at that for about a half a mile then began to drop.
The rest of the way home and up to the garage the tamp stayed at 192.5. Into the garage. Turned off the AC with the engine running and adjusted the temp pot so that the light just went out.
Next test will be to take it out and drive and begin the process of dialing in the on temperature.
I’m thinking that about 198 degrees would be a good turn on temp.
I want to say thank You to
@ak diesel driver for starting this thread and for everyone that pitched in to perfect this system.
Just one thing for anyone thinking of doing this modification, be sure that Your engine mounts are in good condition before starting this project. If You have any doubts as the their condition, order new poly engine mounts when ordering the fan and controller kit.
MrMarty51
Well-Known Member
Oh yeah, with that fan engaged, even me being near totally deaf, there is no mistaking that the clutch is engaged and the fan is pulling air.
That baby really rocks.


That baby really rocks.
ak diesel driver
6.5 driver
I wouldn't use the probe style controller, it's designed to strap to the radiator or push into the fins. More delayed reaction.
ak diesel driver
6.5 driver
Can't remember if I mentioned it earlier but if you're getting hot consider gearing down to increase water flow. 2500 seems to be the sweet spot for me.
DieselAmateur
She ain't revved 'til the rods are thrown...
@MrMarty51 how did you wire the controller so the fan turns on with the A/C? Did you find a magic trinary switch or splice into one of the a/c system pressure switches?
dbrannon79
I'm getting there!
Sorry I’m late lol but @MrMarty51 you are correct. Green and red are connected. Here’s a pic of my connector as promised. I have mine adjusted to 200 degrees for the fan to turn on and the ac wire connected to the GM purple fan pressure switch on the compressor so the fan only turns on when the ac pressure gets over 285 iirc

dbrannon79
I'm getting there!
one thing I can attest to... when this can is on, it does suuuck the fuel lol lately with the hot 100+ degree temps and running the ac on max, the fan has been on much more. I haven't taken my mileage lately but I can tell shes burning more fuel! so to anyone that does this fan clutch mod and wants to connect it to run full time with the ac and not let it run through a pressure sensor. Just be ware!!
with mine running though the pressure sensor, I can tell !!
with mine running though the pressure sensor, I can tell !!
MrMarty51
Well-Known Member
I’ll get to the garage tomorrow and see which wire from the controller I hooked to the AC compressor clutch.@MrMarty51 how did you wire the controller so the fan turns on with the A/C? Did you find a magic trinary switch or splice into one of the a/c system pressure switches?
Too tired tonight. Step son took us for a not a boat ride and it went from a journey to an adventure in about three minutes.
I will look at it in the morning.
Besides, my shoes is soaked from wading in the river trying to rescue his boat.
MrMarty51
Well-Known Member
I remembered, I needed to go out and shut down the AC unit in the garage. Took a peek at the wire.
It is the green wire from the controller hooked to the + feed wire going to the AC clutch.
It is the green wire from the controller hooked to the + feed wire going to the AC clutch.
CursedH1
Active Member
- Messages
- 76
- Reaction score
- 238
Hello, Apologies for the thread necromancy (I run the Hummer Network Forums so I know how it can be annoying) but I feel like this is an applicable update to the thread as I have a question for the 6.5 gurus.
This past weekend I finally added the electroviscous fan clutch to my H1's brand new P400 (well, 2 years old now I guess). Going off of the feedback from a very smart guy I know who tried this same setup on his H1, the Hayden on/off controller just doesn't work for our rigs as he indicated that the on/off nature of the operation just wasn't ideal. So I went with a Mishimoto PWM fan controller for myself. I put together a harness that included an A/C pressure switch tied in with a manual override switch in the cabin for an Auto/Off/Override functionality where I can manually turn on the fan. I put the temperature sender in the thermostat housing as it was easily accessible and didn't require that I drain the coolant in order to install.
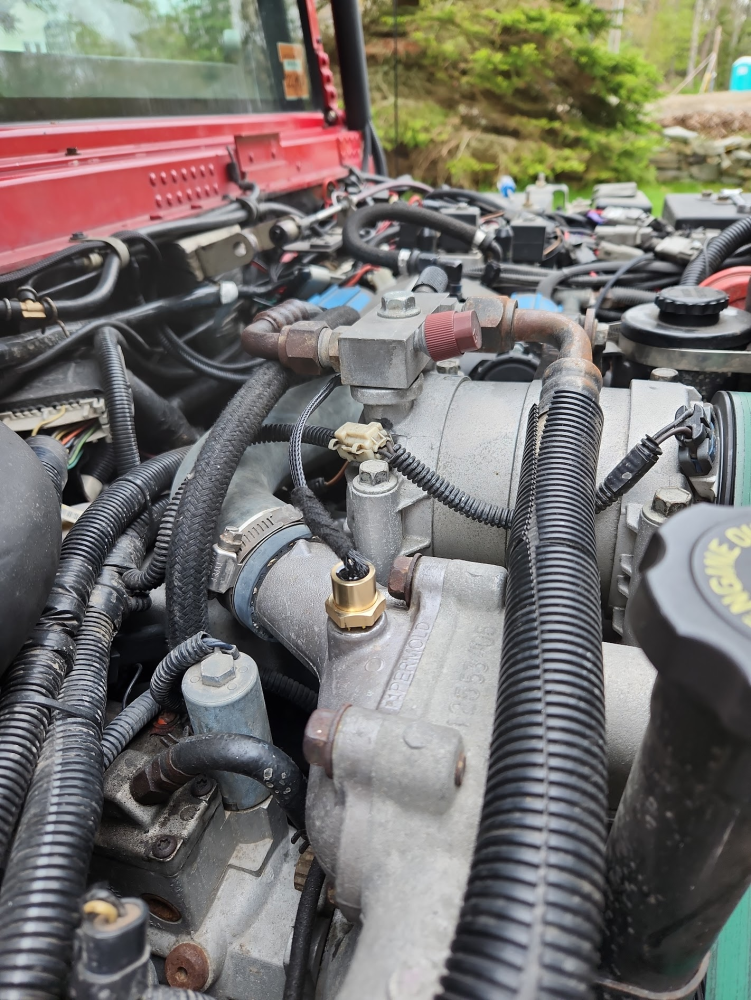
I've taken 3 trips so far with the fan clutch operating. I've adjusted it a few times but am not happy with its operation. I have Torque logging the data and as soon as I have enough, I'll run it through some visualizations however I think that I need to find an alternate location for the temperature sender. The engine will warm up and be fine until about 200'F on the ECM sensor. I've had the fan come on at 197'F and at 204'F so I'm guessing that the 200'F is about where it starts to engage. The problem is that the fan will stay engaged (evident by the deafening roar) until the temp is well below 175 again - which, if the PWM controller was working properly - shouldn't be happening. I think the issue is that the coolant temp level that the controller is reading - thanks to it being in the top of the thermostat housing - is entirely different than the temp reading I'm getting from the engine computer. I was thinking about, and @Will L. recommended putting a tee at the top passenger side head where the existing temperature sender is for the computer but others have indicated that this is not a great solution as the flow up into the tee will not be great and it could collect sediment. Is there another pre-tapped location in the P400's that I could use to put the fan controller sender?
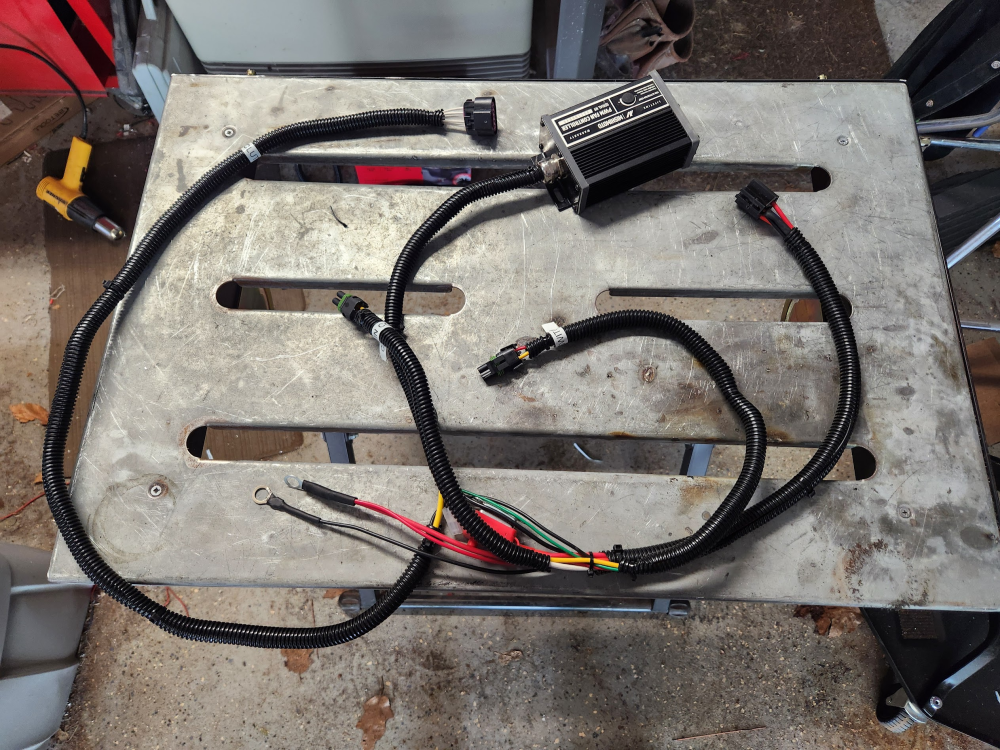
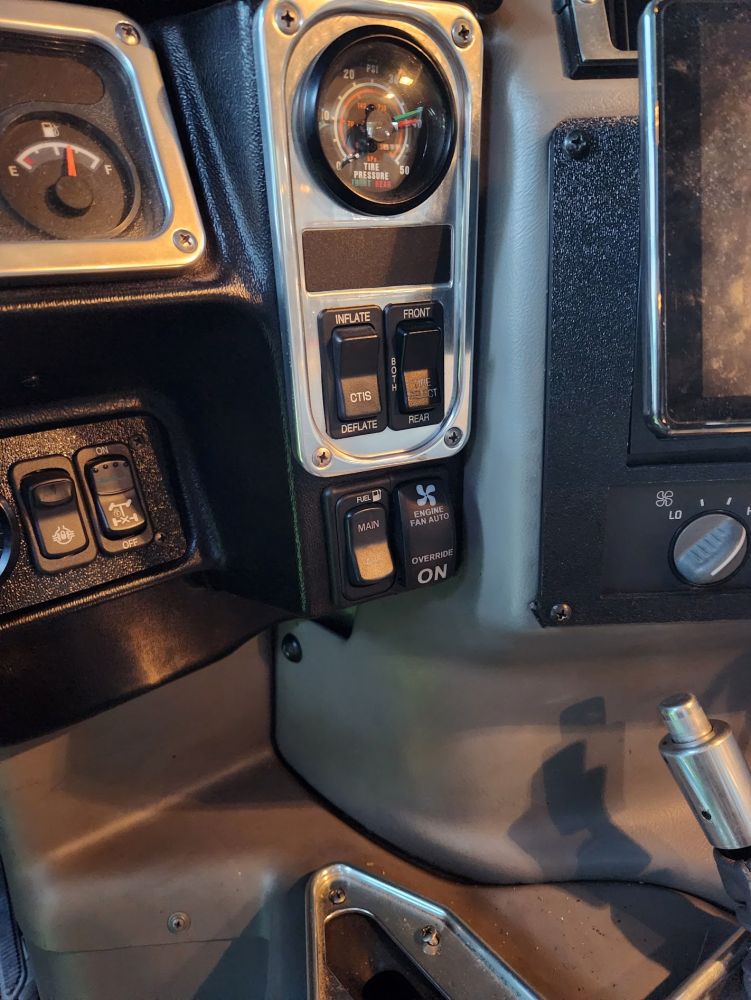
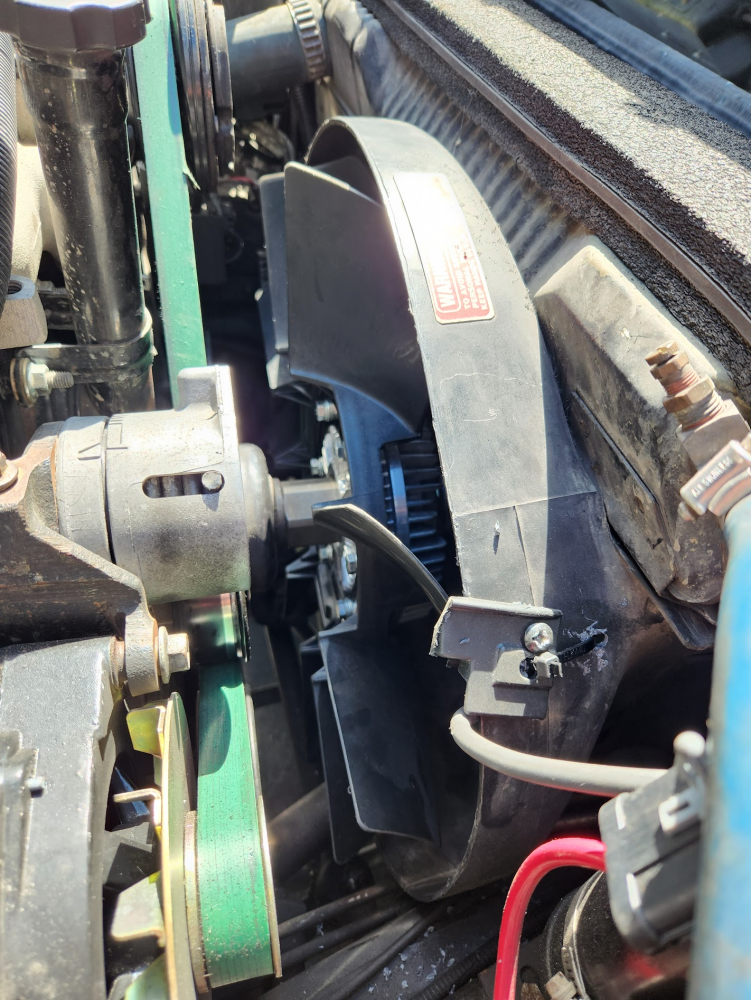


Hello, Apologies for the thread necromancy (I run the Hummer Network Forums so I know how it can be annoying) but I feel like this is an applicable update to the thread as I have a question for the 6.5 gurus.
This past weekend I finally added the electroviscous fan clutch to my H1's brand new P400 (well, 2 years old now I guess). Going off of the feedback from a very smart guy I know who tried this same setup on his H1, the Hayden on/off controller just doesn't work for our rigs as he indicated that the on/off nature of the operation just wasn't ideal. So I went with a Mishimoto PWM fan controller for myself. I put together a harness that included an A/C pressure switch tied in with a manual override switch in the cabin for an Auto/Off/Override functionality where I can manually turn on the fan. I put the temperature sender in the thermostat housing as it was easily accessible and didn't require that I drain the coolant in order to install.
I've taken 3 trips so far with the fan clutch operating. I've adjusted it a few times but am not happy with its operation. I have Torque logging the data and as soon as I have enough, I'll run it through some visualizations however I think that I need to find an alternate location for the temperature sender. The engine will warm up and be fine until about 200'F on the ECM sensor. I've had the fan come on at 197'F and at 204'F so I'm guessing that the 200'F is about where it starts to engage. The problem is that the fan will stay engaged (evident by the deafening roar) until the temp is well below 175 again - which, if the PWM controller was working properly - shouldn't be happening. I think the issue is that the coolant temp level that the controller is reading - thanks to it being in the top of the thermostat housing - is entirely different than the temp reading I'm getting from the engine computer. I was thinking about, and @Will L. recommended putting a tee at the top passenger side head where the existing temperature sender is for the computer but others have indicated that this is not a great solution as the flow up into the tee will not be great and it could collect sediment. Is there another pre-tapped location in the P400's that I could use to put the fan controller sender?
View attachment 88029
View attachment 88030
View attachment 88031
View attachment 88032
I watched your progress on the hummer thread.
I went with a hummer fan system in my dually, the hydraulics is tied into the steering system.
Anyway, my controller is adjustable for on & off temps and I tied into the original temp sensor in the d/s head, I'll use the p/s head location when I get around to changing it. The controller is easy to adjust the temp is accurate.
My dually is a 93 so the controller doesn't need anything else...
I can get the controller number if anyone wants it, it's a Dakota digital.
ak diesel driver
6.5 driver
So my experience with mine so far is the clutch takes quite a while to turn off, I think it's the clutch and not the controller. I'm planning on drilling and tapping the coolant crossover plate over the number 8 cylinder to put my sender in. Had it in the passenger side temp sender hole but the turbo cooked it, twice. Recently my clutch has started to take a long time to engage so I'll be buying a new one soon.

