Navigation
Install the app
How to install the app on iOS
Follow along with the video below to see how to install our site as a web app on your home screen.
Note: This feature may not be available in some browsers.
More options
-
Welcome to The Truck Stop! We see you haven't REGISTERED yet.
Your truck knowledge is missing!
- Registration is FREE , all we need is your birthday and email. (We don't share ANY data with ANYONE)
- We have tons of knowledge here for your diesel truck!
- Post your own topics and reply to existing threads to help others out!
- NO ADS! The site is fully functional and ad free!
Problems registering? Click here to contact us!
Already registered, but need a PASSWORD RESET? CLICK HERE TO RESET YOUR PASSWORD!
You are using an out of date browser. It may not display this or other websites correctly.
You should upgrade or use an alternative browser.
You should upgrade or use an alternative browser.
'95 Engine build
- Thread starter SnowDrift
- Start date
SnowDrift
Ultra Conservative. ULTRA!
Based on this video, measurement of pushrod length isn't a very precise measurement, since it is done here with a yard stick?
How do I decide what ratio rockers are best for me? I'm not racing. The truck has always been used for towing. Sometimes heavier than I should as some may recall but mostly within the legal range, as well as within a reasonable range. Most tows are under 20k gross.
Are the pushrods in stock form 8.822" in length? I'm asking in regards to purchasing a pushrod length checker. Something like this?
Last edited:
SnowDrift
Ultra Conservative. ULTRA!
I haven't looked back, is it a 506 block? They all have the nozzles n/a or turbo.
Our valve train is not the same as in the video, so that isn't really the way it has to be done with these motors, for one thing our rockers are set, and the lifter needs a .050" preload. A short or long rod won't change where the roller sits on the valve.
ak diesel driver
6.5 driver
I recently saw a na 506 without squirters. Surprised me
I haven't looked back, is it a 506 block? They all have the nozzles n/a or turbo.
SnowDrift
Ultra Conservative. ULTRA!
The block has "506" cast into the valley. Based on the Julian date code, it's a 2011. It was a center mounted turbo engine with a mechanical injection pump out of a HMMWV.
Easiest thing to do is look and see if it has nozzles.
Will L.
Well-Known Member
Idk the last year from Navistar made blocks from the new ones- but I did a 2010 and it still had them.
If you go with a rocker higher than 1.5 your builder better make sure there is plenty of clearance, these are interference engines..
SnowDrift
Ultra Conservative. ULTRA!
SnowDrift
Ultra Conservative. ULTRA!
Yes. I just thought I would ask since I don't have the crank out yet. It looks like that is where the nozzles go, under the bearings.Easiest thing to do is look and see if it has nozzles.
This is why I worked with PAC racing springs to develop a better spring.TSP, you had posted this in another thread
View attachment 78132
Should I be looking at stiffer springs for the new heads also?
SnowDrift
Ultra Conservative. ULTRA!
With those better springs you mention, should I also be looking at the 7/16" dia. pushrods due to the increased column load?
No they are designed for stock setup's.
SnowDrift
Ultra Conservative. ULTRA!
Is there a particular part number I can search on the springs or do I need to call them? I left a message today, but didn't hear back yet. Or do you sell them, TSP?
I sell them. 300$ a set.
SnowDrift
Ultra Conservative. ULTRA!
Groovy.
SnowDrift
Ultra Conservative. ULTRA!
I've read lots of horror stories about removing the valve covers from these and have to admit that I was glad I had a cover I could use for practice. Maybe this will be useful to someone down the road. There is a rolled edge around most of the cover, with exception of the uppermost two outside corners. I used a wide putty knife and drove it in to cut the silicone in the outside corners. I drove the knife to the rolled edge in both directions, but I recommend not going past these points at this time.
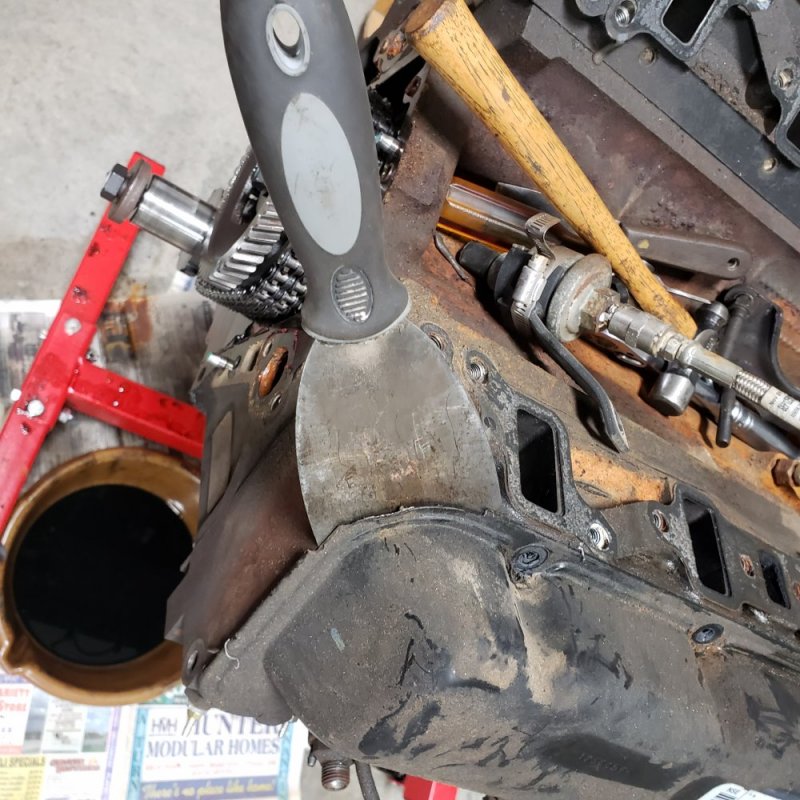
Looking at the photo above, you can see the place where the rolled edge begins. I turned the putty knife to start driving the same direction as the crank, but I would not drive too far at this point. If so, the knife can begin to cut into the rolled edge.
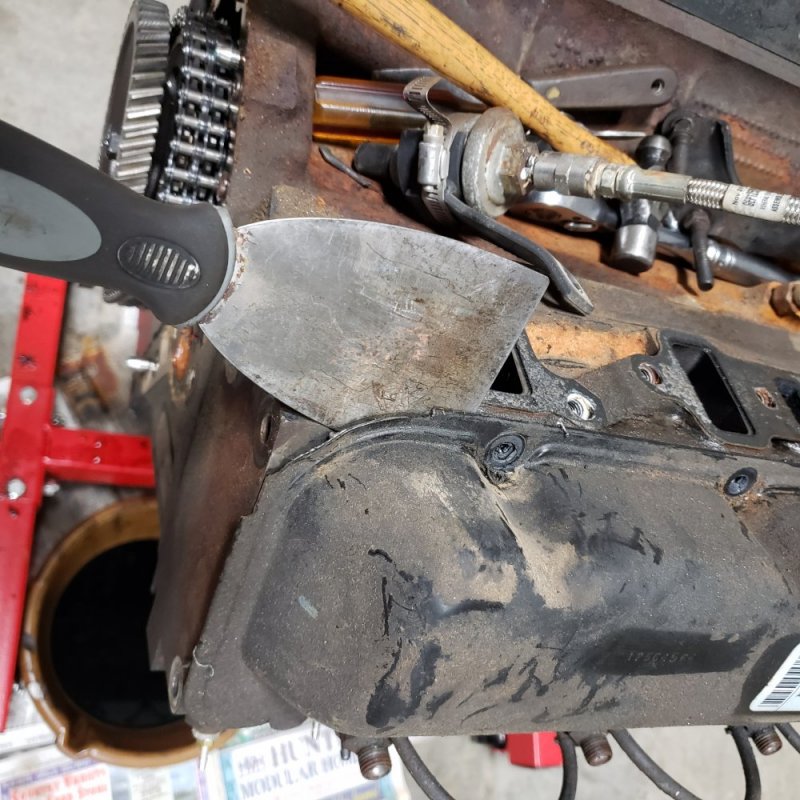
Here is a close-up of where the rolled edge begins.
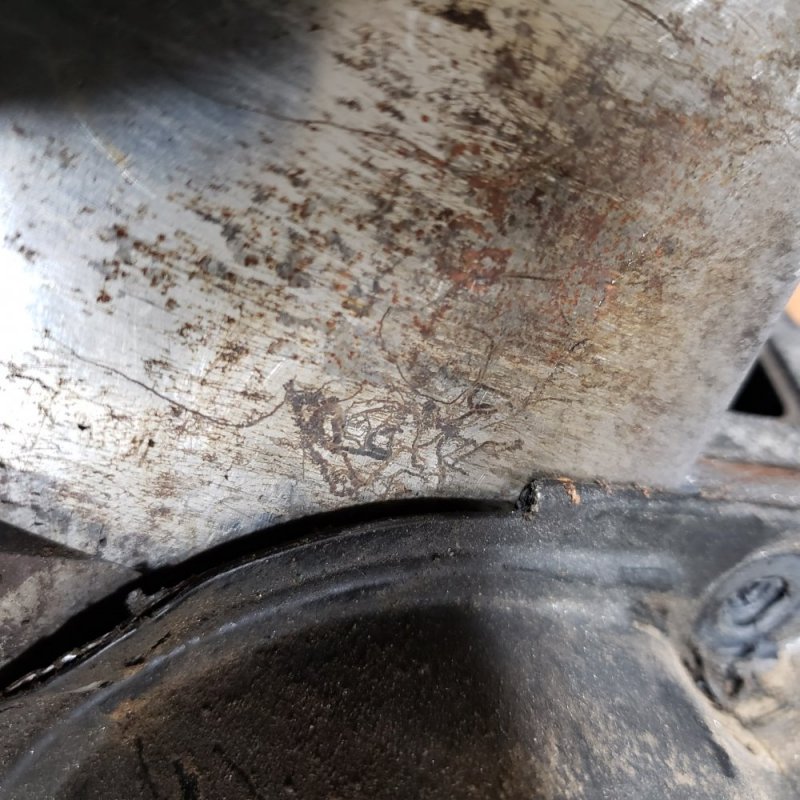
I found that working my way in at a slight angle seemed to do the trick.
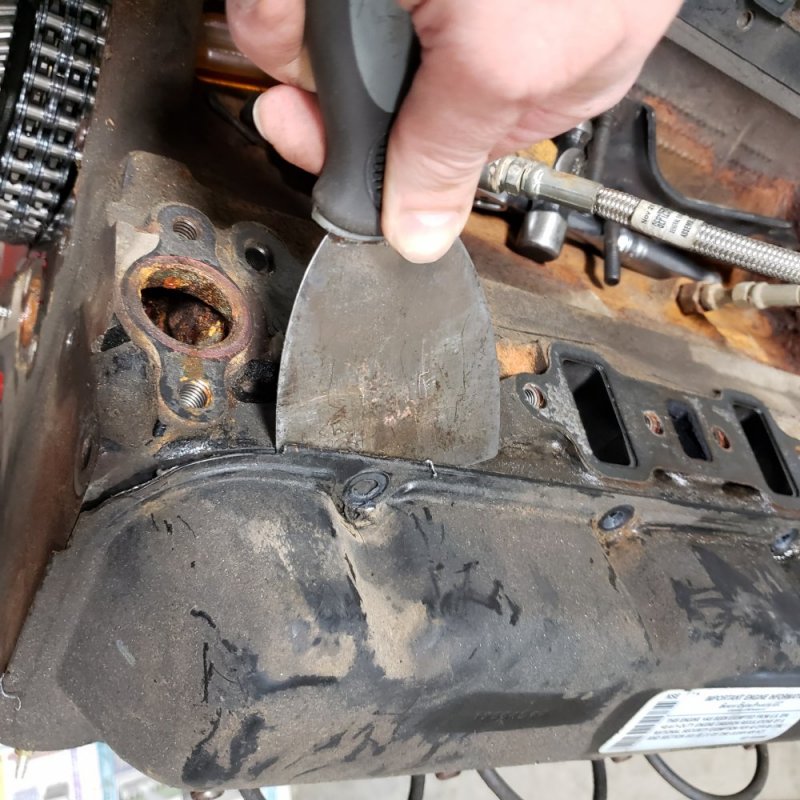
Once I got the first width driven in, I did the same thing on the end of the valve cover. After that was done, I started along the upper edge again, but this time, I used a gasket scraper to hold the cover up slightly, then drove the putty knife straight in between the rolled edge and the head.
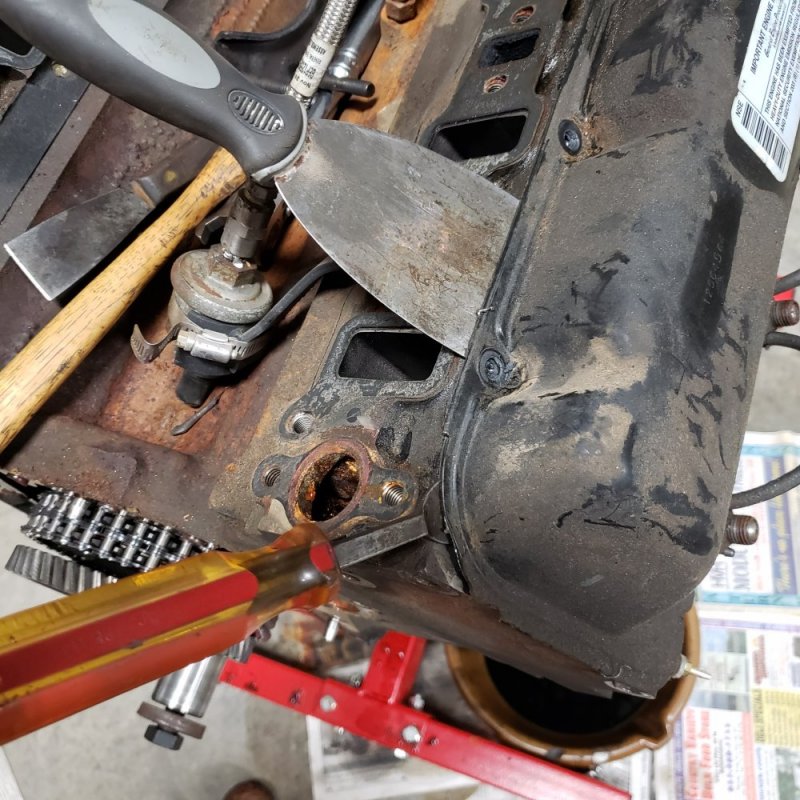

Looking at the photo above, you can see the place where the rolled edge begins. I turned the putty knife to start driving the same direction as the crank, but I would not drive too far at this point. If so, the knife can begin to cut into the rolled edge.

Here is a close-up of where the rolled edge begins.

I found that working my way in at a slight angle seemed to do the trick.

Once I got the first width driven in, I did the same thing on the end of the valve cover. After that was done, I started along the upper edge again, but this time, I used a gasket scraper to hold the cover up slightly, then drove the putty knife straight in between the rolled edge and the head.

SnowDrift
Ultra Conservative. ULTRA!
After making my way all the way across the top, I went back to the end where I started. I used the scraper again to give myself some room to work, then started driving again. At this point, some may notice some damage where the rolled edge has started to roll up. This was what happened during some of the beginning stages. After I figured out that driving straight in seems to do the trick, I didn't have that damage occurring any longer. Again, this is just for practice. This cover is already damaged and I won't be using it anyhow.
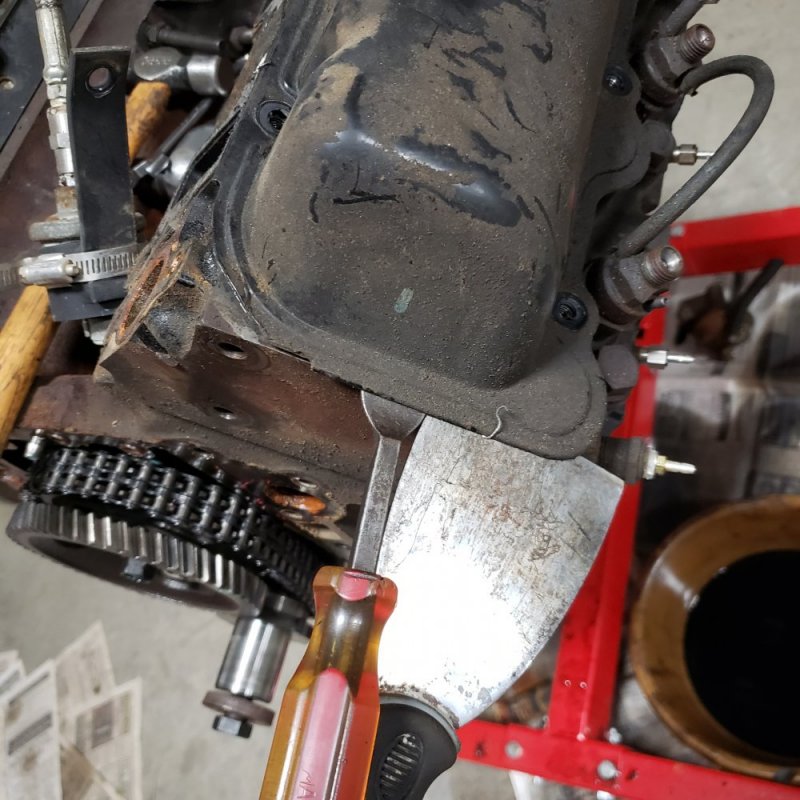
After the front end was done, I moved toward the rear to start the same procedure. By the time the ends are done, the only edge left is the one toward the injectors. Notice that by the time I moved back to the rear, I used the technique described above and didn't damage the rolled edge, as seen below.
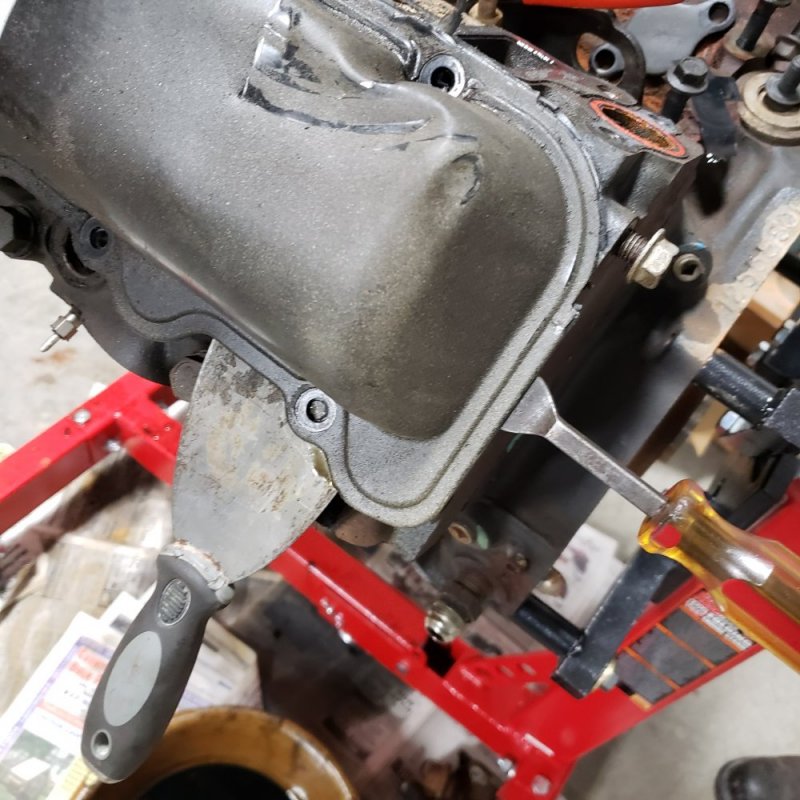
Then at a slight angle, again, I drove the putty knife perpendicular to the cover, as I did with the top and worked my way along.
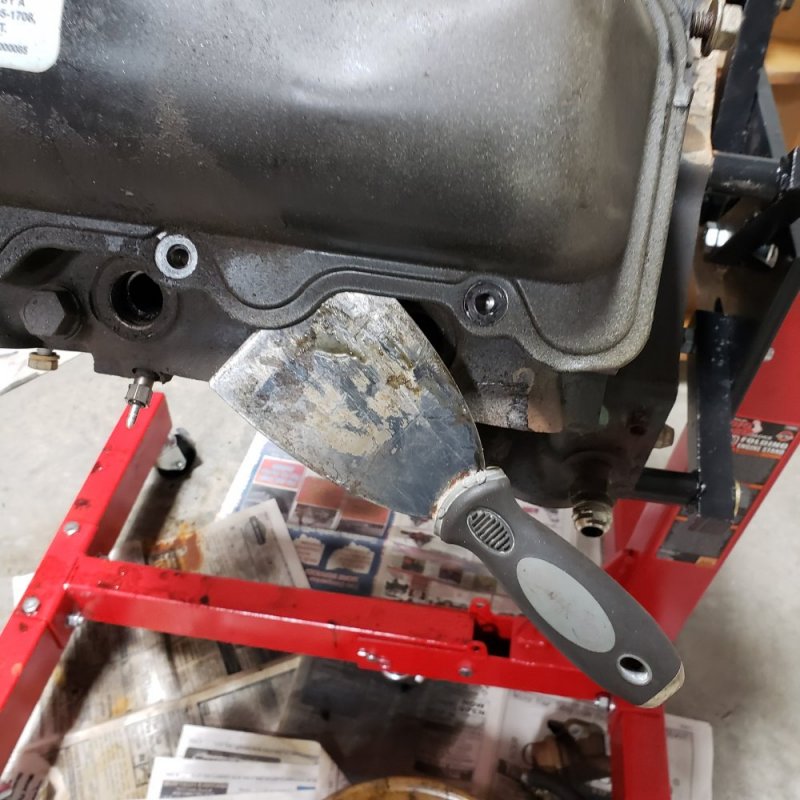
One thing to note is that driving the putty knife too far on the upper edge toward the intake, could result in damage to the push rods. I would suggest a paint line on your putty knife or something of the sort to help determine the depth the blade has been driven to prevent getting carried away.

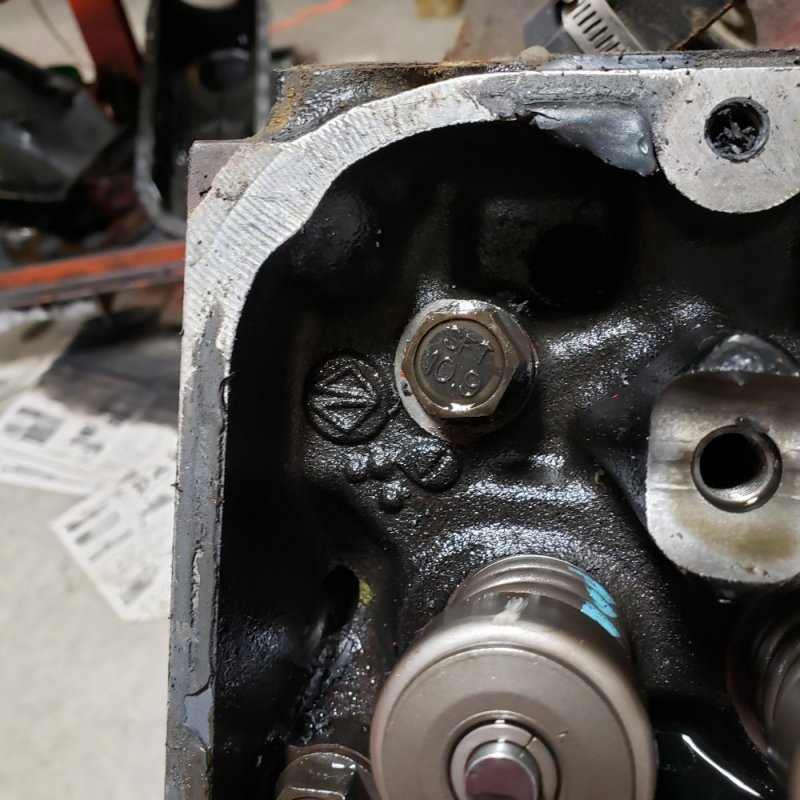
I didn't expect to see this Navistar emblem in the casting. I had it in my mind it was only in the valley.
By no means am I claiming this is the best way, as there are a dozen others on here that have probably had way more success than me on this and have done it with much more finesse. I hadn't seen much of any writeup on it, though, so even if someone criticizes, and offers better suggestions, we'll have some photos to use to point out my errors.

After the front end was done, I moved toward the rear to start the same procedure. By the time the ends are done, the only edge left is the one toward the injectors. Notice that by the time I moved back to the rear, I used the technique described above and didn't damage the rolled edge, as seen below.

Then at a slight angle, again, I drove the putty knife perpendicular to the cover, as I did with the top and worked my way along.

One thing to note is that driving the putty knife too far on the upper edge toward the intake, could result in damage to the push rods. I would suggest a paint line on your putty knife or something of the sort to help determine the depth the blade has been driven to prevent getting carried away.

I didn't expect to see this Navistar emblem in the casting. I had it in my mind it was only in the valley.

By no means am I claiming this is the best way, as there are a dozen others on here that have probably had way more success than me on this and have done it with much more finesse. I hadn't seen much of any writeup on it, though, so even if someone criticizes, and offers better suggestions, we'll have some photos to use to point out my errors.

