• Welcome to The Truck Stop! We see you haven't REGISTERED yet.

    Your truck knowledge is missing!
    • Registration is FREE , all we need is your birthday and email. (We don't share ANY data with ANYONE)
    • We have tons of knowledge here for your diesel truck!
    • Post your own topics and reply to existing threads to help others out!
    • NO ADS! The site is fully functional and ad free!
    CLICK HERE TO REGISTER!

    Problems registering? Click here to contact us!

    Already registered, but need a PASSWORD RESET? CLICK HERE TO RESET YOUR PASSWORD!

'95 Engine build

SnowDrift

Ultra Conservative. ULTRA!
Messages
3,059
Reaction score
3,792
Location
Central Ohio map dot
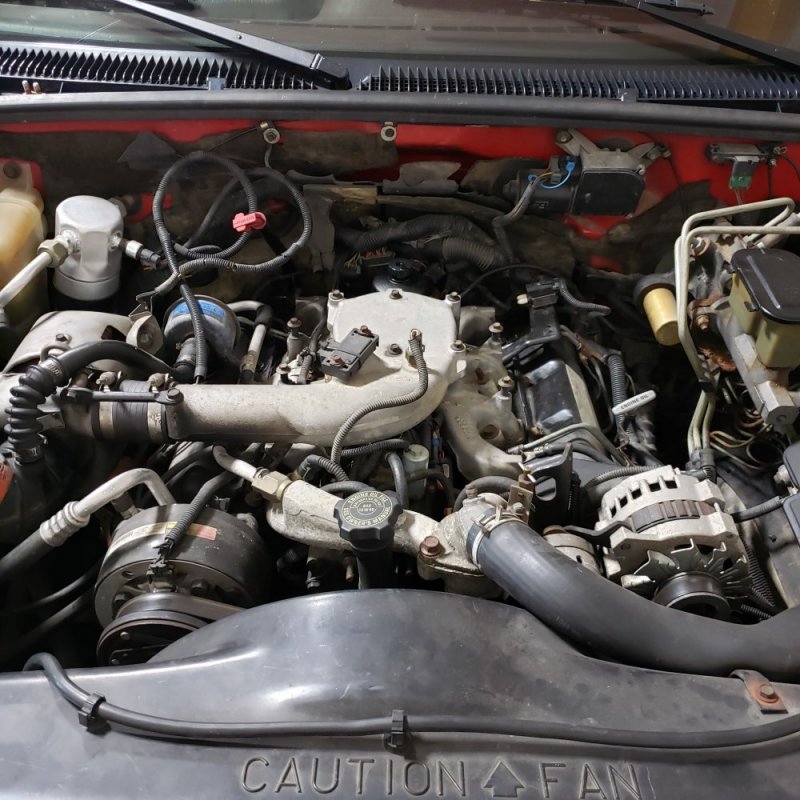
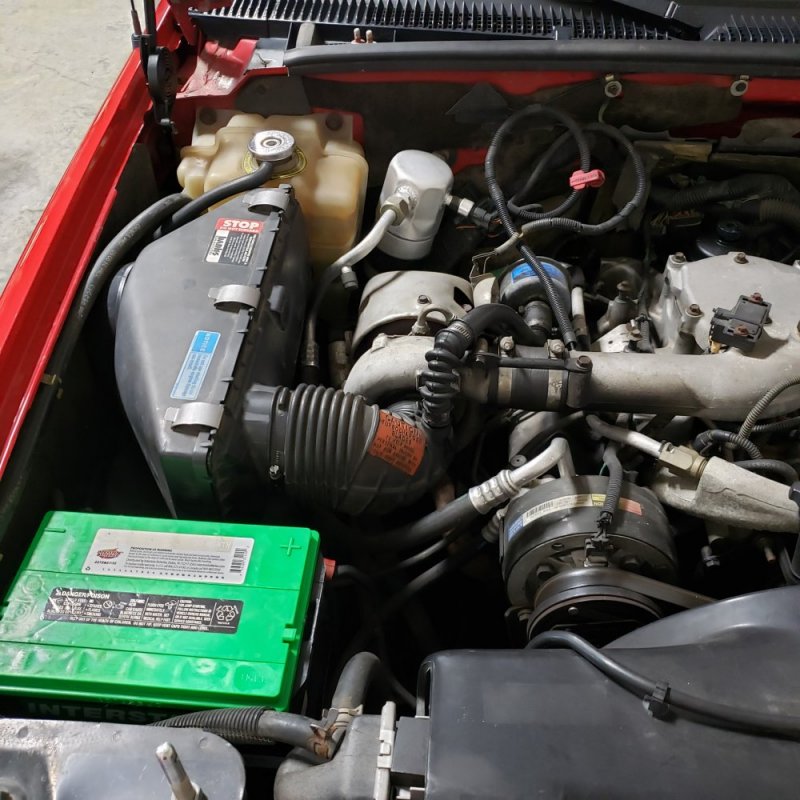
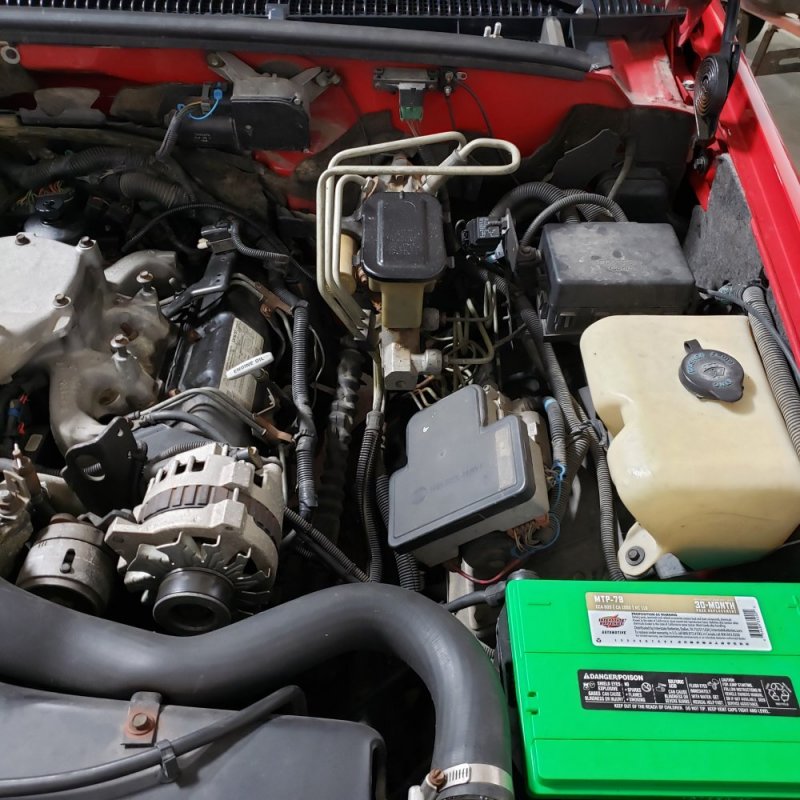
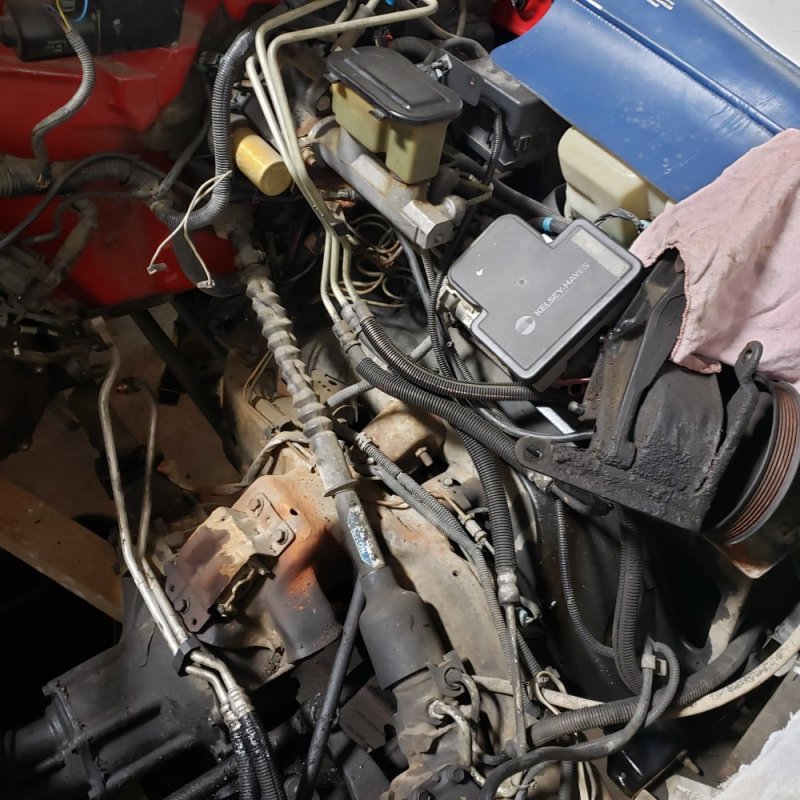
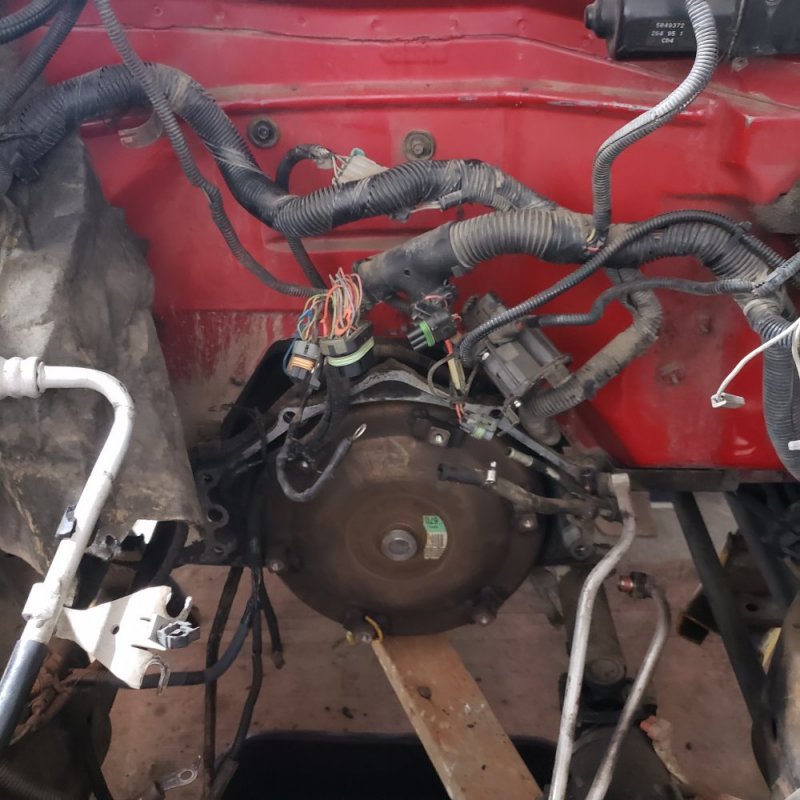
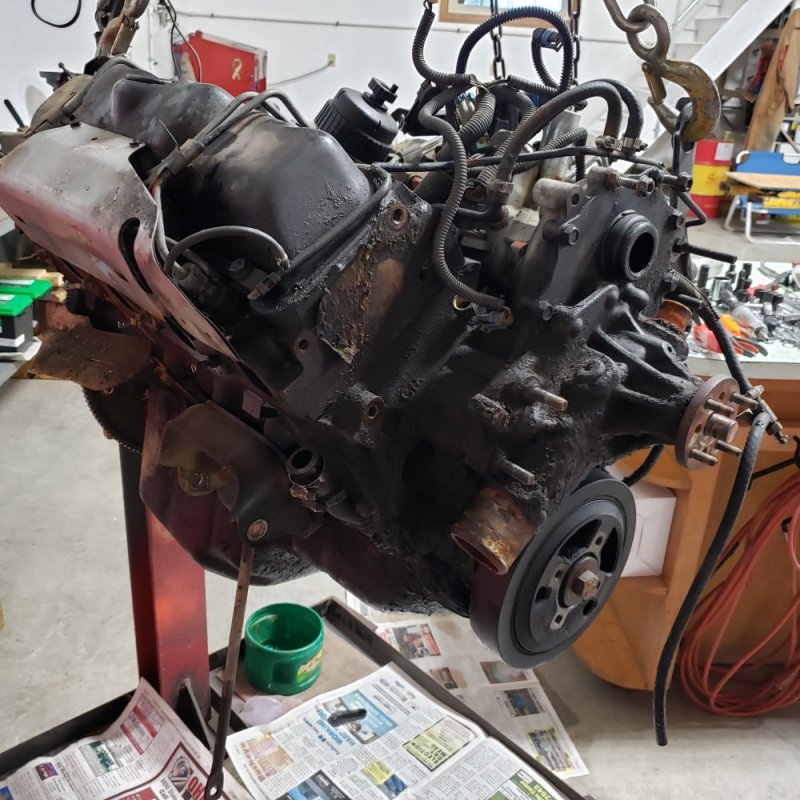
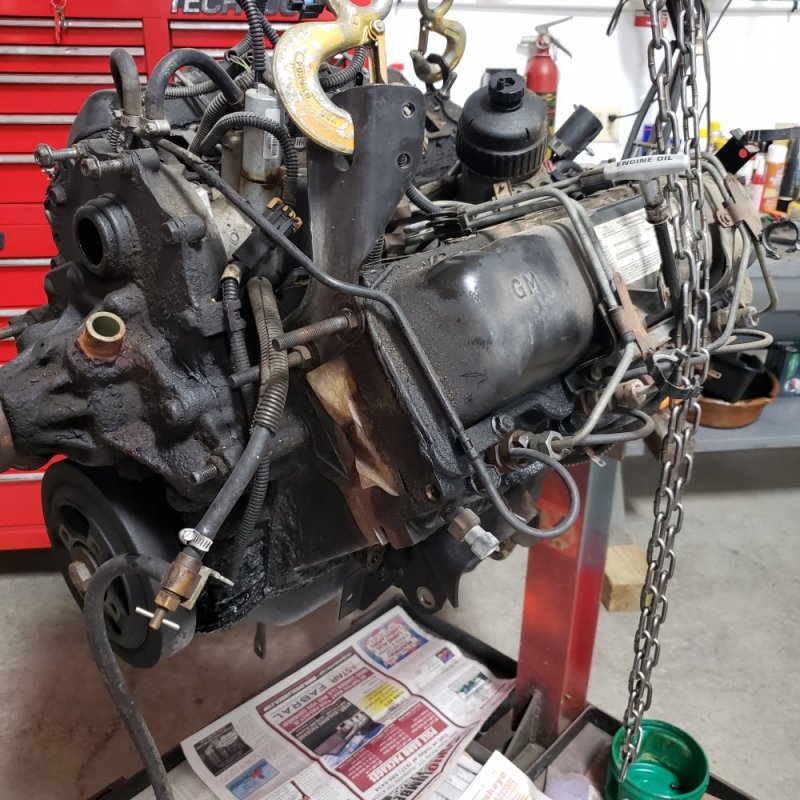
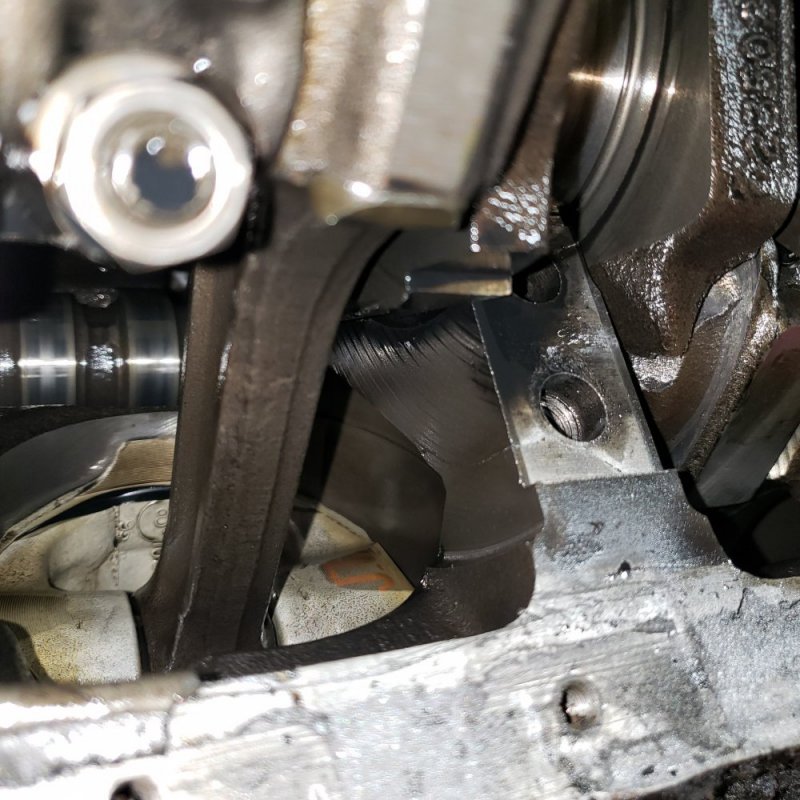
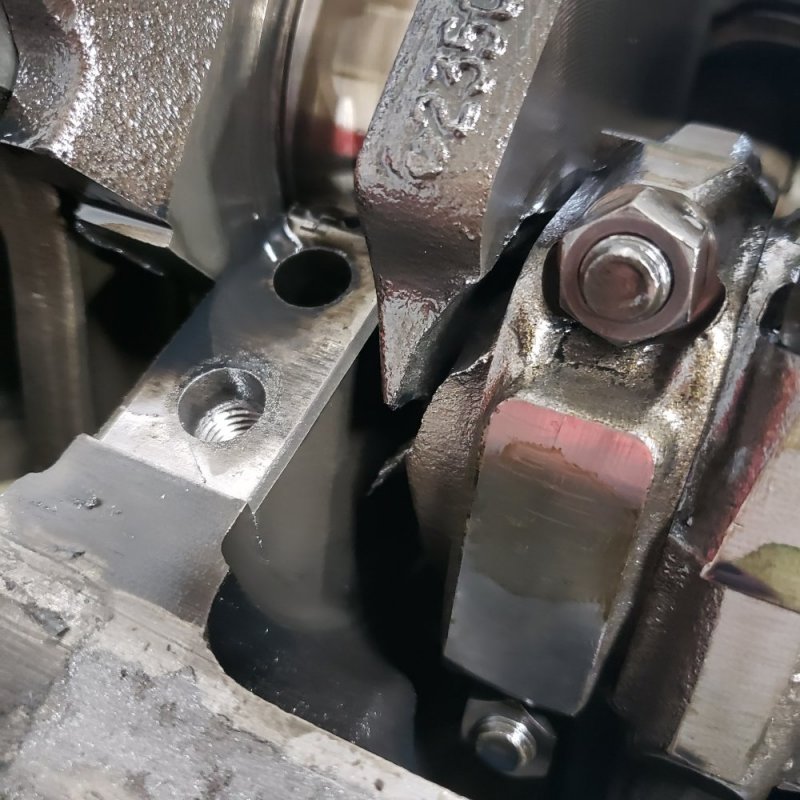
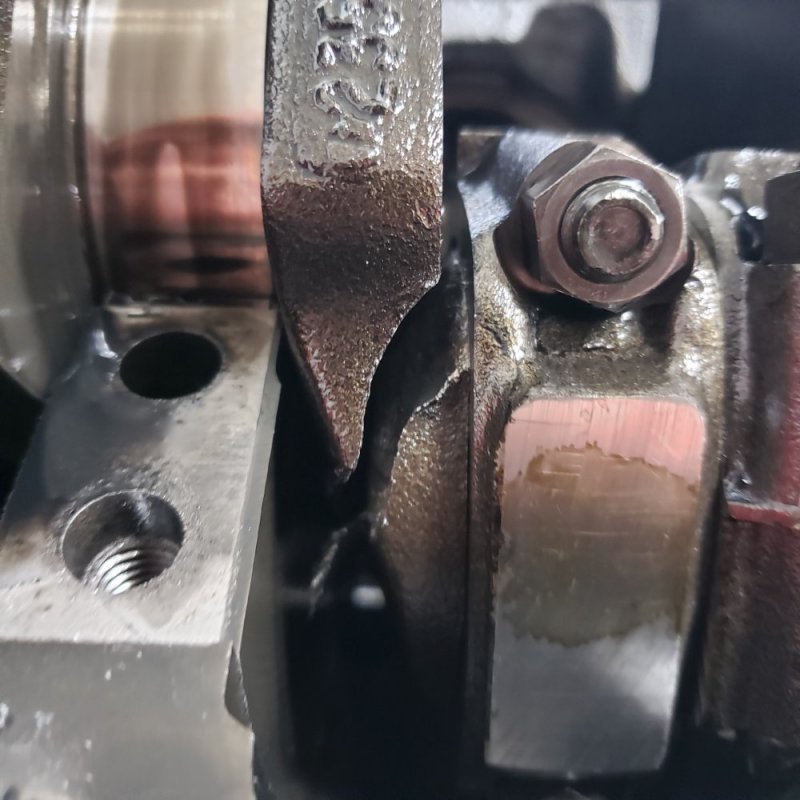
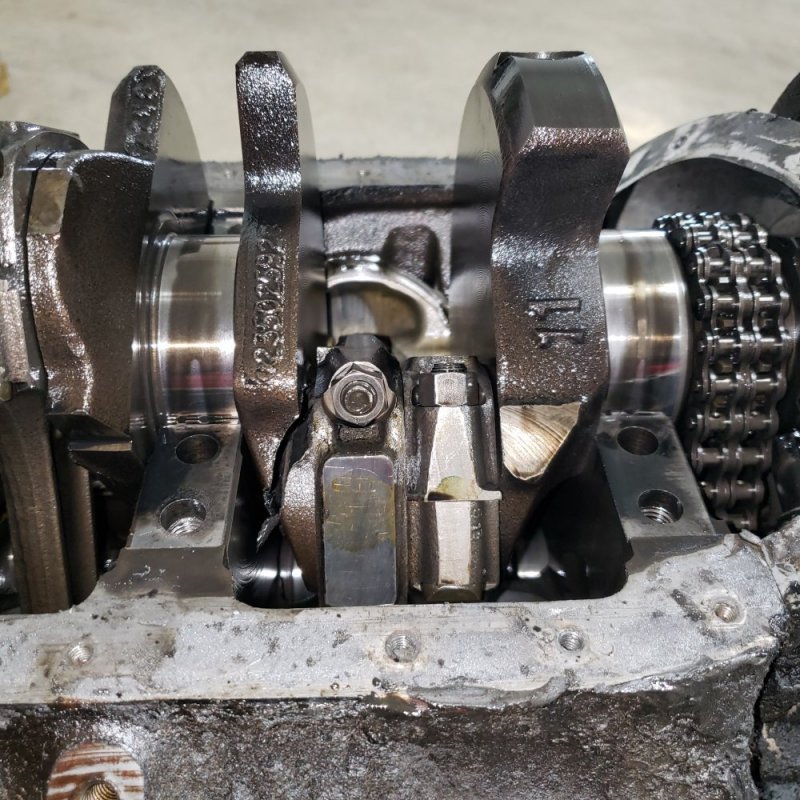
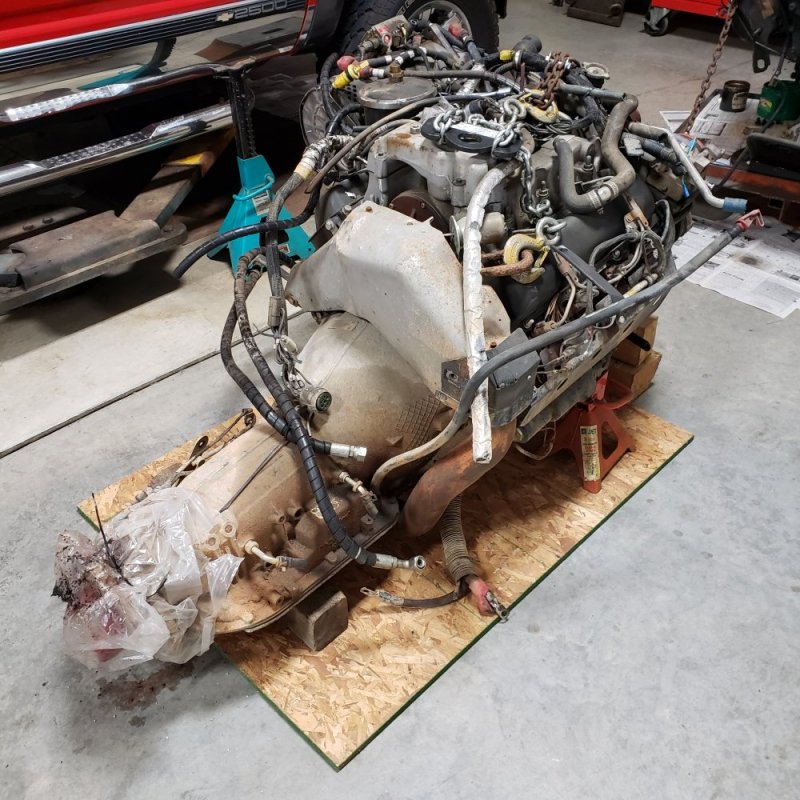
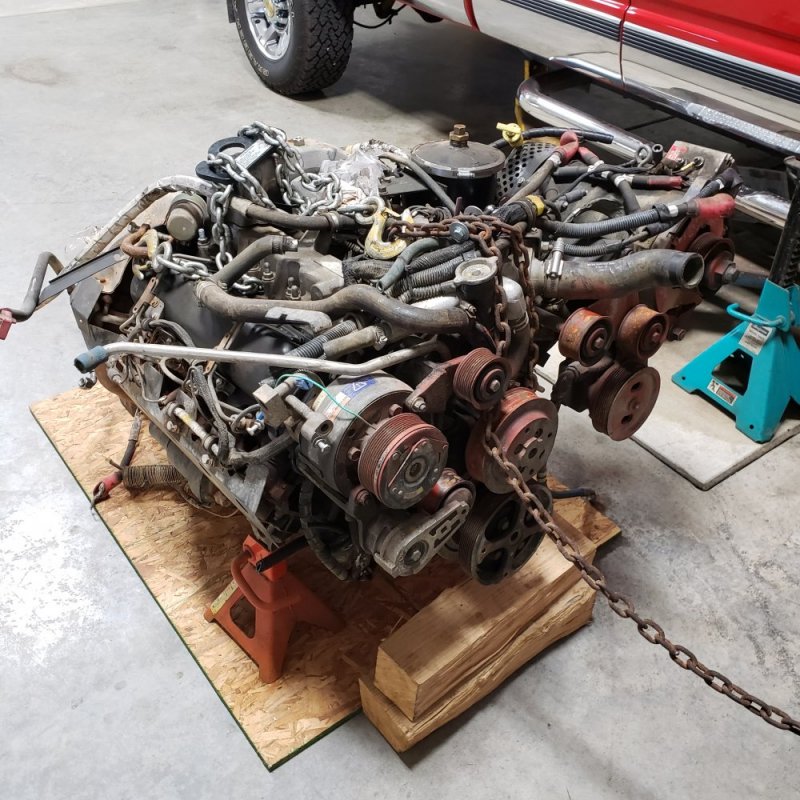
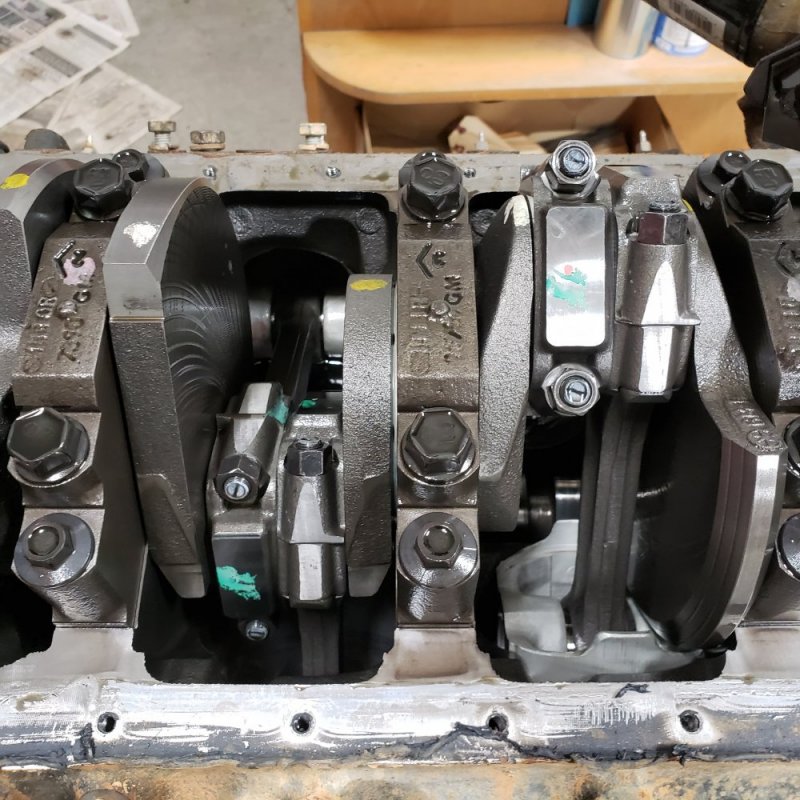
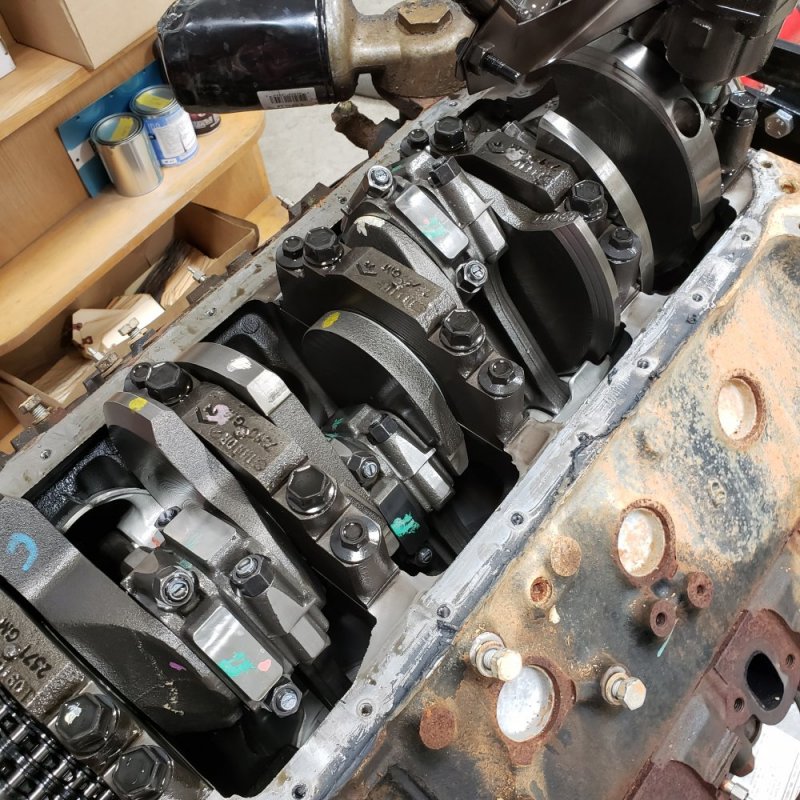
I guess I'll start one of these. I don't guess this will be nearly as useful as Hink's website or some others, but maybe it will help someone, as well as myself to try to keep track of some information. Here it is with a broken crank diagnosis, to start with.
 

Attachments

  • 20220910_131825.jpg
    20220910_131825.jpg
    185.3 KB · Views: 29
  • 20220910_131829.jpg
    20220910_131829.jpg
    168.4 KB · Views: 26
  • 20220910_131835.jpg
    20220910_131835.jpg
    176.7 KB · Views: 26
Power plant is out. Parts are getting cleaned and making their way to the bed. Insulation on firewall is a thing of the past. Over the years, it has been drooping more and more. I found what may have been the last piece in the country a couple months back, but everything has to come off to install it, so I opted to find a different solution.
 

Attachments

  • 20220923_180224.jpg
    20220923_180224.jpg
    187.3 KB · Views: 21
  • 20220923_180218.jpg
    20220923_180218.jpg
    148.8 KB · Views: 20
  • 20220923_180209.jpg
    20220923_180209.jpg
    136.6 KB · Views: 19
Here is the culprit sitting on the engine stand. This came far sooner than I thought it would. I wasn't far from home, though, for which I'm very thankful. I had a two mile trip and was half way into it when it let loose.
 

Attachments

  • 20220923_180601.jpg
    20220923_180601.jpg
    186.5 KB · Views: 21
  • 20220923_180609.jpg
    20220923_180609.jpg
    213 KB · Views: 20
These are the nazty ones, proving what I suspected in living color. Two piece crank, three webs cracked. 141 block is now boat anchor status.
 

Attachments

  • 20220925_163428.jpg
    20220925_163428.jpg
    173.1 KB · Views: 36
  • 20220925_163418.jpg
    20220925_163418.jpg
    162.5 KB · Views: 35
  • 20220925_163412.jpg
    20220925_163412.jpg
    121.6 KB · Views: 34
  • 20220925_163401.jpg
    20220925_163401.jpg
    224.9 KB · Views: 36
There are a few links I thought I would try to include during the process leading up to today. One is a hijack, but has proven useful for an education.

Looking for Ohio shop - in case someone is needed locally, this might help.
Trustworthy shop in central Ohio? | The Truck Stop

Conversations on decisions - I had to run through several scenarios in my head to see what made the most sense for me.
Decisions on engine options | The Truck Stop

Where it all began.
Two piece crank club | The Truck Stop

Hijacked thread from TSP – information on heads. I guess I had a lot of things I was sorting out on heads and this became an education piece.
Final details for my "Twisted" P400 build | Page 4 | The Truck Stop
 
Believe me that I was sorry, too. This isn't at all how I saw the tail end of my summer going dumping money into an otherwise good truck. I didn't even get a full tank of fuel through it this year. I was delayed in getting it out and then once I did, and was driving it to work every day, shortly after, things went downhill.

No warranty on a new engine was probably the biggest deterrent. I would have likely gone that route but just could not justify the cost. Building one up, I can pick away at it a little at a time.

Meanwhile, after a LOT of conversations and debating, I ended up with one of these. Considering the cost of a long block with HMMWV heads or a short block that a guy could put together for me, I opted to get a complete unit. I have lots of parts to figure out what they are and hope to be able to recover some cost.
 

Attachments

  • 20221106_150541.jpg
    20221106_150541.jpg
    224.8 KB · Views: 28
  • 20221106_150547.jpg
    20221106_150547.jpg
    227.9 KB · Views: 28
The 2004 HMMWV supposedly belongs to some rapper that had a Duramax conversion done. I was told the mileage on the vehicle and decided to take a chance. This picture tells little with the frequency of repaints the military does, but goes along with the story.
 

Attachments

  • HMMWV.PNG
    HMMWV.PNG
    105.8 KB · Views: 21
I believe this ends up being a 2011 block if I'm not mistaken. I posted the information before, but I'm not sure I posted a photo. After removing the injection pump, I was able to see this in the valley. No big deal for most because I think the Julian date code means it's an Optimizer block, but until I saw the Navistar casting mark, I was still suspicious.
 

Attachments

  • 20221107_185241.jpg
    20221107_185241.jpg
    107.1 KB · Views: 16
  • 20221127_162156.jpg
    20221127_162156.jpg
    197.2 KB · Views: 16
I'm open to anyone's thoughts on what I found once I took off the pan. Personally, I was pleased. I'm unsure how many times does the crank have to roll through the oil before the paint wears off. Any guesses on mileage?
 

Attachments

  • 20221127_151543.jpg
    20221127_151543.jpg
    199.9 KB · Views: 42
  • 20221127_151701.jpg
    20221127_151701.jpg
    254.9 KB · Views: 41
I wonder if those paint marks are indicating select fit?
Yes that is what they are for.
Thanks for confirming, Will, but what does that mean?

I guess I had just assumed it was a QC mark of some sort where each assembly guy has their own paint stick color, by which they mark things they're accountable for to ensure it was handled properly.
 
Like mentioned- factory has close counts theory. Plastigauge is cheap and easy.
Then after they are all proven ok or swapped for better fit:
Remove the bearings and put them in numbered ziplock baggies for shipping to Chris for coatings.
 
You shouldn't count on the marks, should measure the crank bore and crank. The factory used a wide tolerance.
Do you mean a wide tolerance between the bearing ID and crank OD?
If you want to replace the bearings just carefully remove the old and document location and replace with new of the same size.
Do you recommend bearings being replaced if they look good once the crank is out? For coating them, is it best to use new? I believe you had mentioned having to send cams out to be cleaned to get all the oil off before coating, so I wasn't sure if it is the same deal for bearings.
Like mentioned- factory has close counts theory. Plastigauge is cheap and easy.
Then after they are all proven ok or swapped for better fit:
Remove the bearings and put them in numbered ziplock baggies for shipping to Chris for coatings.
Swapped for better fit meaning swap between existing bearings that are already in the engine or do you mean buy new bearings with tighter clearance? If I fit up with plastigauge for the proper clearance and then have the bearings coated, doesn't that negate my results since the coating should make the clearance slightly tighter?

Secondary question - are the main bolts TTY? I'm planning to use the main stud girdle TSP sells if I don't make my own. Do I perform this clearance check using those particular studs with the kit or the factory bolts on the bearing caps?
 
The coating will not effect clearance. It is microns thick not thousandths.

I am saying if the tolerance can be improved- now is the time to swap in different bearings. Probably perfectly fine to leave as is- I tend to go for “while you’re there” stuff.

You need to measure with the studs installed. Yes the bolts are TTY (amazing to me everyone knows to replace them for the heads but doesn’t know for main)
 
Back
Top