• Welcome to The Truck Stop! We see you haven't REGISTERED yet.

    Your truck knowledge is missing!
    • Registration is FREE , all we need is your birthday and email. (We don't share ANY data with ANYONE)
    • We have tons of knowledge here for your diesel truck!
    • Post your own topics and reply to existing threads to help others out!
    • NO ADS! The site is fully functional and ad free!
    CLICK HERE TO REGISTER!

    Problems registering? Click here to contact us!

    Already registered, but need a PASSWORD RESET? CLICK HERE TO RESET YOUR PASSWORD!

What did you do with your GMT400 today...or yesterday....

@Big T are those the bushings that need to be greased every so oftin? I have been pondering going back in and replacing my rubber ones for these and then adding a grease fitting in there somewhere. I have heard may good things about them but also have heard that they will start squeaking if not kept lubed up.

Yes they use grease. Not sure you have to grease them regularly, but I’m sure someone will say otherwise. I take it you would drill and tap the LCA for a grease fitting? The mechanic simply said to apply grease to each end of the bushings before installing.

In this supply disrupted market, I was unable to find MOOG or AC Delco bushings that fit. I had these laying around forever, so I finally put them in. The uppers you have to retain the steel shells from the old bushings which makes no sense to me as that is the part that wears.

I know people say these will squeak, but I suspect the 6.5 engine noise will do a fine job of drowning that out.
 
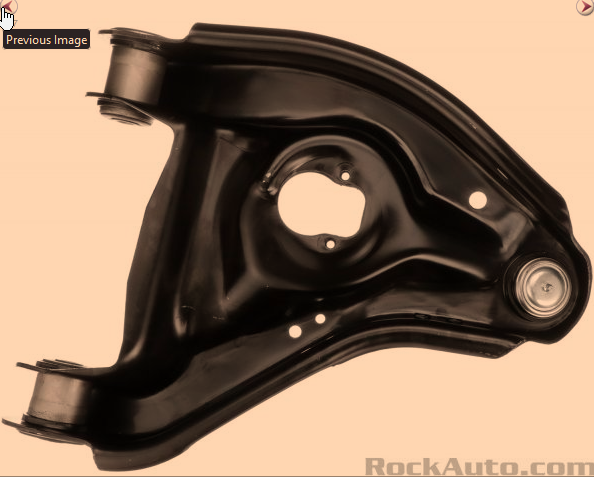
it was an idea I had to drill and tap in the center to add grease after they were installed on the truck. on my lowers I would also have to retain the outer shell since my LCA's are stamped steel. old school style where the center has the cup to hold the coil spring. I haven't looked for any online but I though RA carried them.

since the sleeve is so thin once the grease fitting was installed it would have to be ground down flush with the inside of the sleeve but would possibly help with greasing in that hard to get area!

1658496118648.png
 
Nope, been done a bunch of times with sad results. People cut slots in it trying to help- nope. The only trick I ever heard of working long term is teflon tape. Then grease on top of it. Eventually the tape will wear and need replacement again. Some do tape and grease fitting, but still only get about 5 years before removing to re-tape.

Performance parts come at the price of more labor.
 
H
Nope, been done a bunch of times with sad results. People cut slots in it trying to help- nope. The only trick I ever heard of working long term is teflon tape. Then grease on top of it. Eventually the tape will wear and need replacement again. Some do tape and grease fitting, but still only get about 5 years before removing to re-tape.

Performance parts come at the price of more labor.

Well these are the black graphite ES bushings, so they are special and don’t squeak.
 
Took on the driver’s side front and rear doors as they stopped opening from the interior handles. Got them working periodically, but I’m going to replace the latches and the interior handles. Also read door lock actuator as the harness plug came off and on the re-install attempts the male wire ends pushed into the actuator I can’t get them out. Neither of the interior handles were bent, but the front lock button was seriously impeding the actuator.
 
it was an idea I had to drill and tap in the center to add grease after they were installed on the truck. on my lowers I would also have to retain the outer shell since my LCA's are stamped steel. old school style where the center has the cup to hold the coil spring. I haven't looked for any online but I though RA carried them.

since the sleeve is so thin once the grease fitting was installed it would have to be ground down flush with the inside of the sleeve but would possibly help with greasing in that hard to get area!

View attachment 76028
Yes ra sells them that's where I got mine from.. I'm going to tell you right up front by your own lower ball joint and put it in it and throw out that piece of crap that they put in it.. I just replaced my passenger side lower control arm not maybe 6 months ago if that and the lower ball joint went to shit last week.. had to replace it and put a good one in..
 
@Stoney I had the same issue with mine. I bought both lower arms from Advance Auto and a few months later the drivers side lower ball joint gave out! replaced it with an AC Delco one but it fits loose enough that it needs to be tack welded! now I am fearing my lower control arm bushing are tearing since I am getting a weird loose feeling in the steering and can't find the problem. me the dummy tossed my old arms where I could have saved and rebuilt them.
 
Took on the driver’s side front and rear doors as they stopped opening from the interior handles. Got them working periodically, but I’m going to replace the latches and the interior handles. Also read door lock actuator as the harness plug came off and on the re-install attempts the male wire ends pushed into the actuator I can’t get them out. Neither of the interior handles were bent, but the front lock button was seriously impeding the actuator.
when you go to install your inside handles, try pulling the rod out going to the latch and tighten up the "S" bend to more of a straight "Z" and reinstall the rod. I did this on my drivers door and now my new inside handle you only have to pull it about half ways till the door unlatches and opens with ease! before I did this mod the new handle would contact it's internal stop before the door would unlatch!

I also think the rod for the outside handle needs to be lengthened very slightly too, pulling up on the handle it will reach the stop right when it unlatches! the rod is straight but the end just pokes through an eye opening on the latch mech. maybe adding a single flat washer on it will do the trick.
I pulled the rod to the handle and the latch had no more to go. Disconnected the rod from the handle and it went no further.
 
Take a look at the thread I posted on the inside door handle. I shot a pic of how far I bent the rod. it's hard to explain, but before I bent it, it had something like this... ˉˉˉ\__ after I was done it looked like ... ˉˉˉ|__ . that made all the difference :)

the bend is right below the door lock motor.
What’s the title to the thread?
 
 
@Stoney I had the same issue with mine. I bought both lower arms from Advance Auto and a few months later the drivers side lower ball joint gave out! replaced it with an AC Delco one but it fits loose enough that it needs to be tack welded! now I am fearing my lower control arm bushing are tearing since I am getting a weird loose feeling in the steering and can't find the problem. me the dummy tossed my old arms where I could have saved and rebuilt them.
There are just certain front end/brake parts I just won't get from AA or the other mass chain bargain parts stores. "Loaded" lower/upper control arms being one of them, as you know neither the quality of the bushings and ball joints, nor of the stamping die or of the steel. You'd probably be better off at this point and hunting down a pair of OEM arms from a U-Pull-It yard or reputable parts yard and just rebuilding them with good aftermarket pieces like bushings and ball joints.
 
There are just certain front end/brake parts I just won't get from AA or the other mass chain bargain parts stores. "Loaded" lower/upper control arms being one of them, as you know neither the quality of the bushings and ball joints, nor of the stamping die or of the steel. You'd probably be better off at this point and hunting down a pair of OEM arms from a U-Pull-It yard or reputable parts yard and just rebuilding them with good aftermarket pieces like bushings and ball joints.
I have a set of forged lowers from a ‘99 K2500 Suburban. What cost me $80 to pull, turned into nearly $300 with shipping across the country. So they sit in a box in my CA garage.
 
Replaced latch and lock actuator on second door of drivers side and all is working well.

Door handle I received was the wrong color (beige) so it’s being returned (free on Amazon) and a new grey one is on it’s way. I did like the heavy return spring on this version.

So without the handle, I did not tear into the driver’s door. However, I did not the latch is hitting hard on the striker pin. I lifted the door up from the end and there is play in the bushings, so It looks like I need to address those…again. Seems like this entire thread started with hinge pins and will keep going with them.
 
Back
Top