Navigation
Install the app
How to install the app on iOS
Follow along with the video below to see how to install our site as a web app on your home screen.
Note: This feature may not be available in some browsers.
More options
-
Welcome to The Truck Stop! We see you haven't REGISTERED yet.
Your truck knowledge is missing!
- Registration is FREE , all we need is your birthday and email. (We don't share ANY data with ANYONE)
- We have tons of knowledge here for your diesel truck!
- Post your own topics and reply to existing threads to help others out!
- NO ADS! The site is fully functional and ad free!
Problems registering? Click here to contact us!
Already registered, but need a PASSWORD RESET? CLICK HERE TO RESET YOUR PASSWORD!
You are using an out of date browser. It may not display this or other websites correctly.
You should upgrade or use an alternative browser.
You should upgrade or use an alternative browser.
What did you do with your GMT400 today...or yesterday....
- Thread starter deejaaa
- Start date
MrMarty51
Well-Known Member
MrMarty51
Well-Known Member
MrMarty51
Well-Known Member
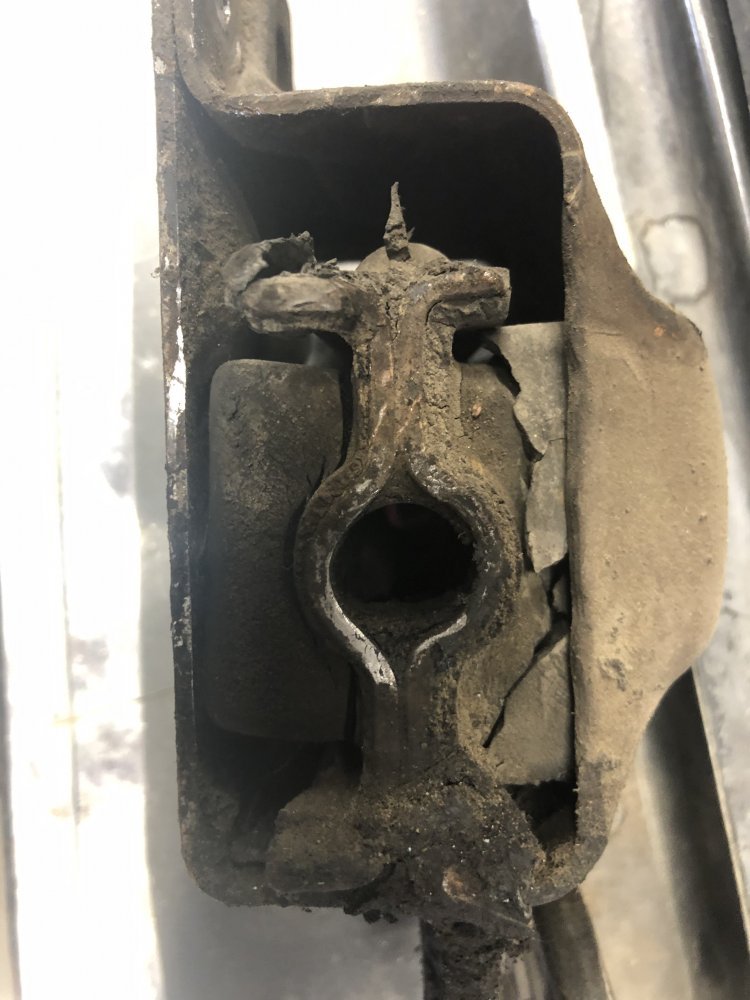
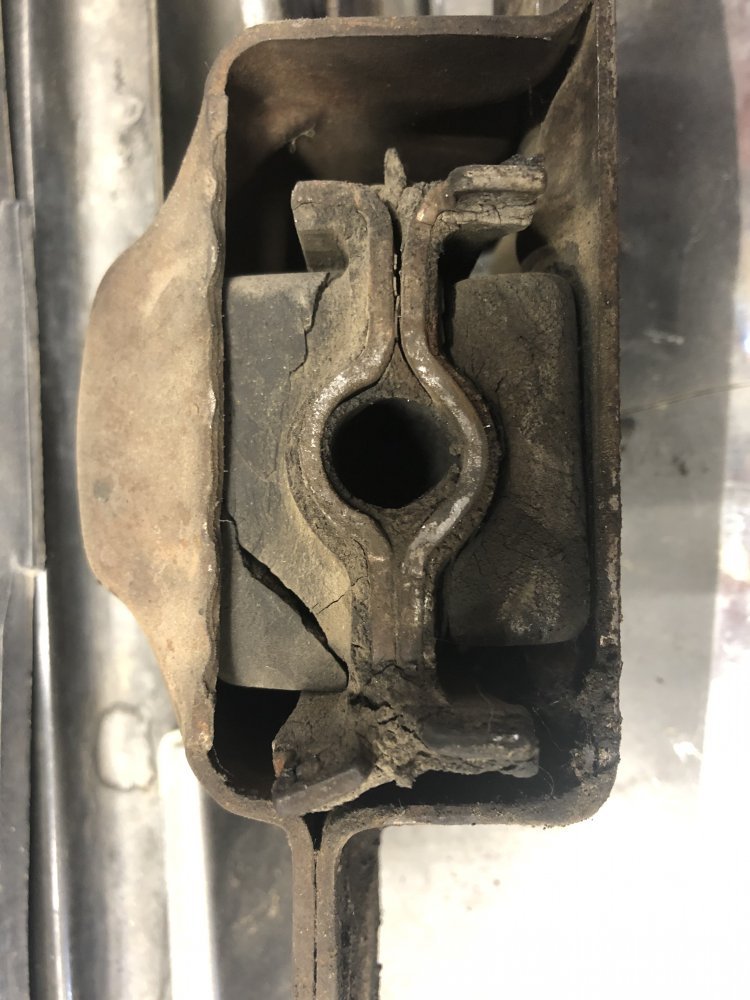
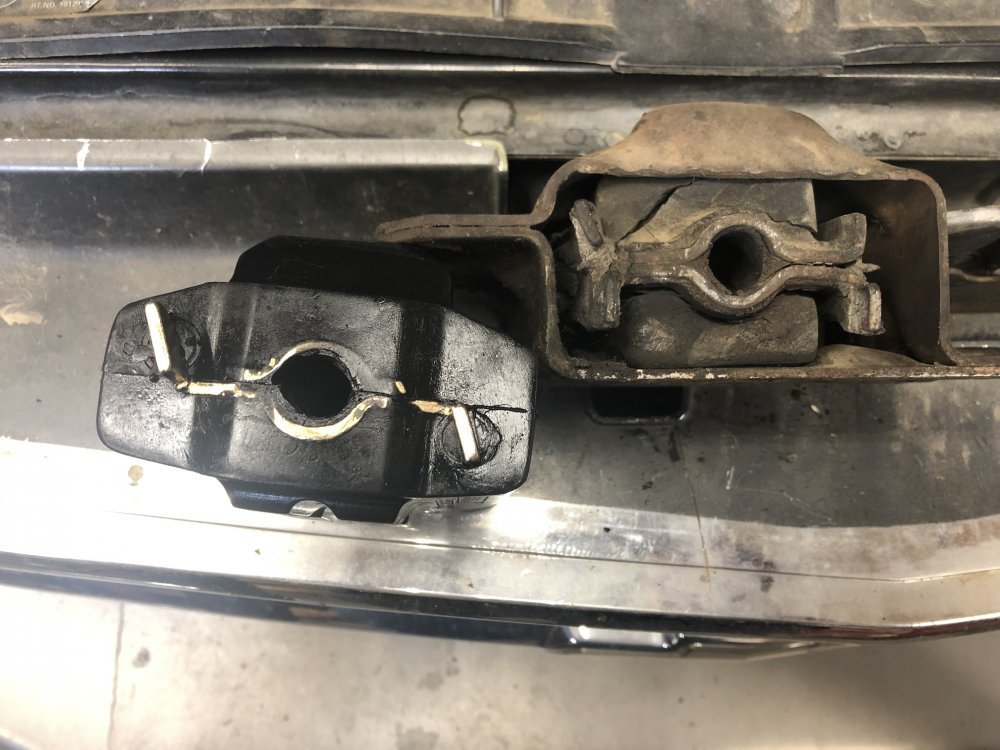
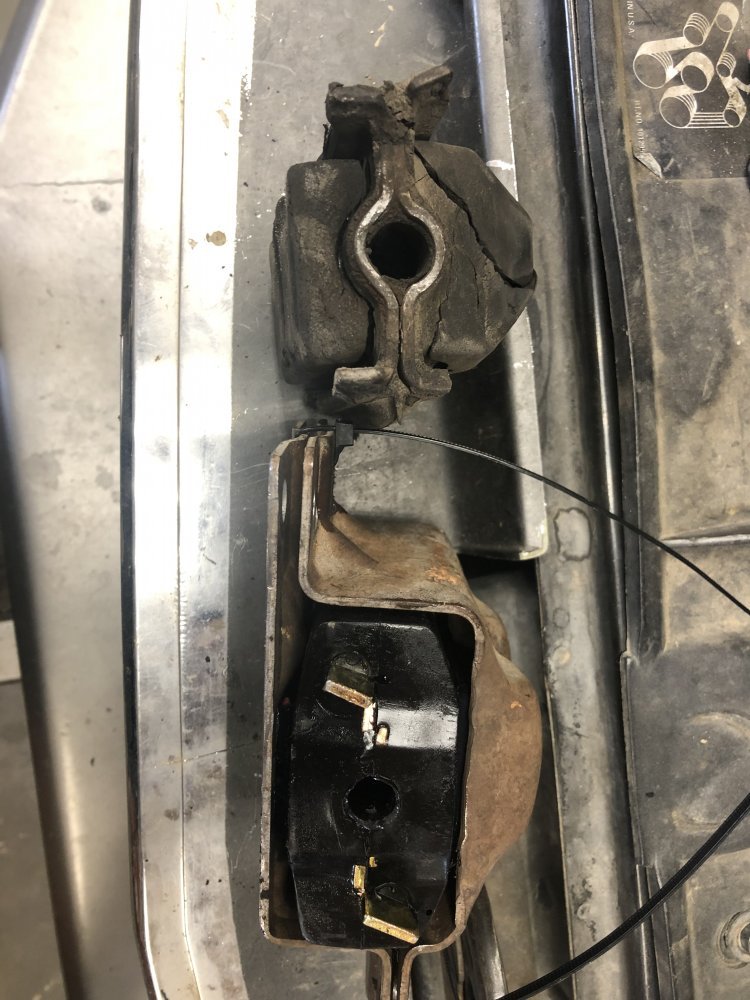
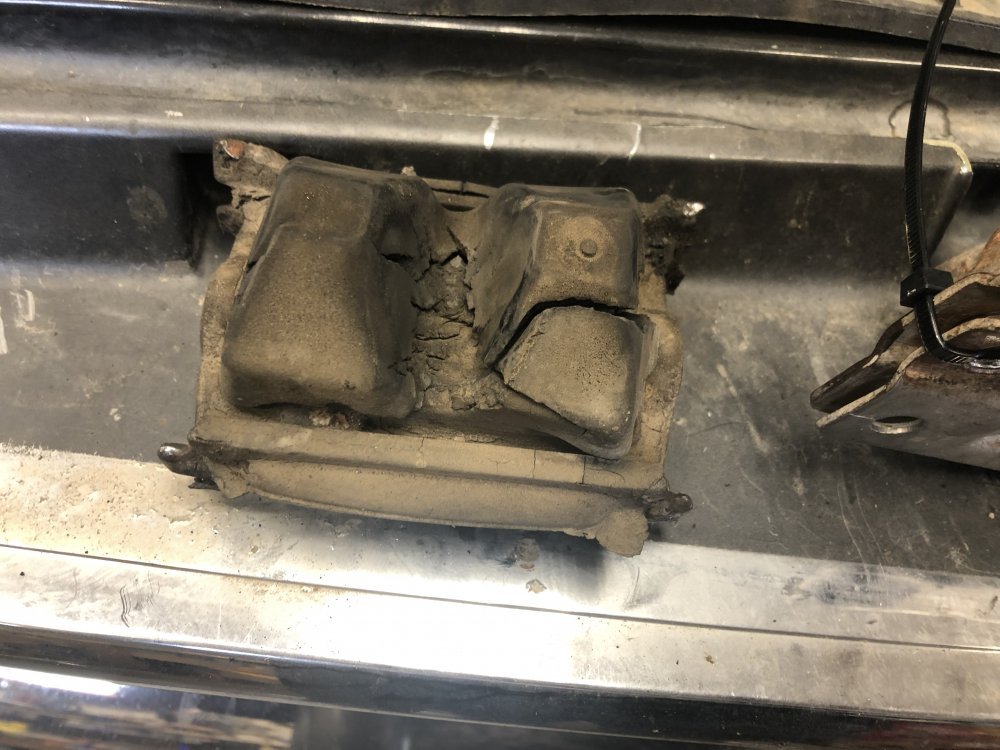
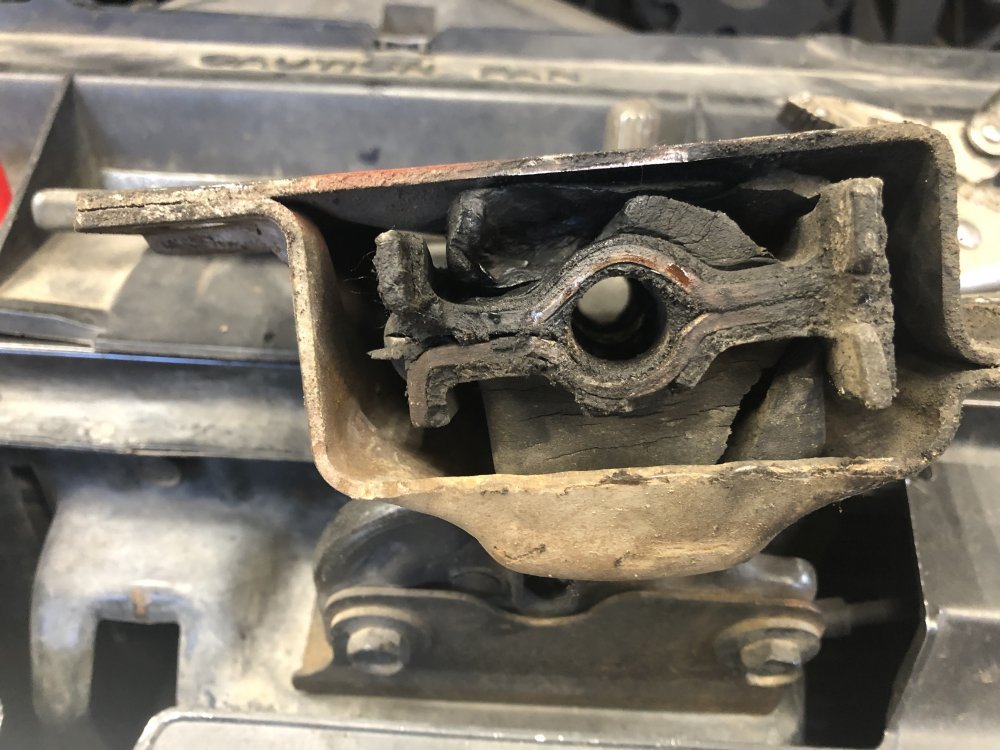
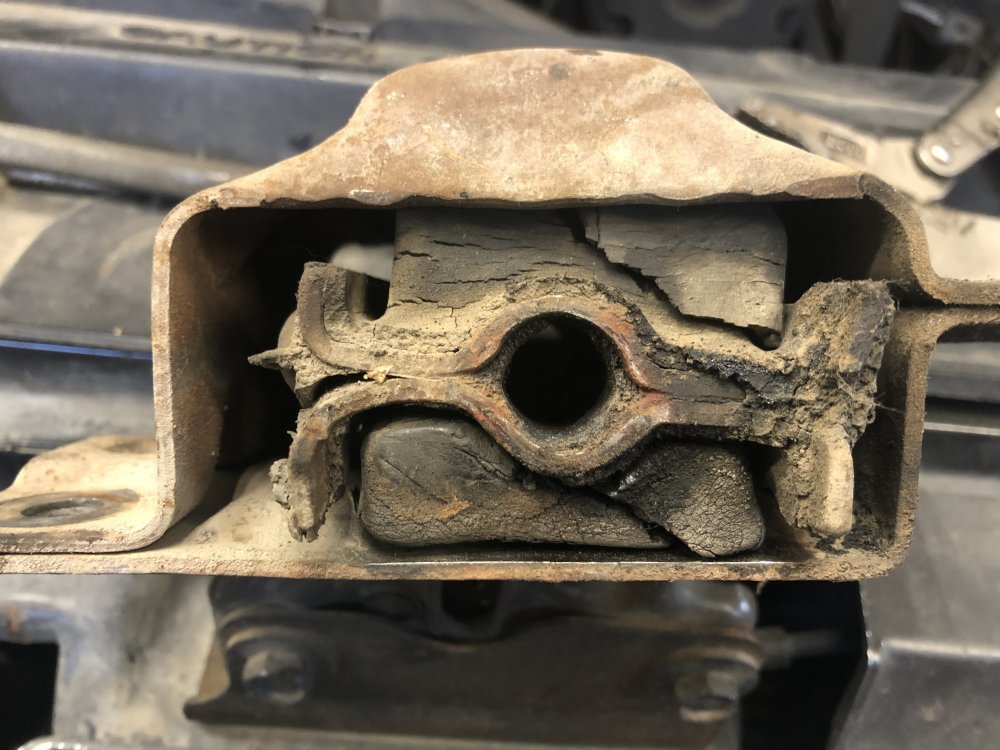
Left side enjun mounting is out. Vice grips on top side bolt head and loooong extension with wobbly socket on the bottom side. Popped them right out, the lower bolt, ratcheting 15mm end wrench on bolt head and 15 mm open end on nut. A bit of a bear but they is now out.
Left side clam shell slid right out of the hole for some reason. Right side had to be totally dismantled and then it still took some twisting and forcing. It really helps to remove that bell housing to engine mount strut rod ad drop that inner plate out of the way until the clam shell is into the upper engine mount.
Left side worse than the right.


MrMarty51
Well-Known Member
Got a bunch of new old stock battery cables. Getting to top post mount cable upgrade take care of today too. Long as I got the starter so visible. 


dbrannon79
I'm getting there!
Marty, let me know how the motor feels and any idle vibrations in the floor or pedals after you get done. I had replaced my mounts and had a foot massage action going on for a while. It's seemed to have subsided not, but unsure if that's due to the summer weather and the rubber has softened or they finally have broken in!
MrMarty51
Well-Known Member
When I had pulled the nuts on the through bolts during disassembly, the through bolts could not be pulled by hand. Had to use a hammer and a punch and drive them out. The right side was a real bear.
After installing the new mounts, them through bolts pushed right through, almost no resistance at all.
After installing the new mounts, them through bolts pushed right through, almost no resistance at all.
MrMarty51
Well-Known Member
I sure will. I was also wondering how many rattles and squeaks these new mounts is going to eliminate.Marty, let me know how the motor feels and any idle vibrations in the floor or pedals after you get done. I had replaced my mounts and had a foot massage action going on for a while. It's seemed to have subsided not, but unsure if that's due to the summer weather and the rubber has softened or they finally have broken in!
MrMarty51
Well-Known Member
I took my new/old stock cables over to the NAPA store. I had all the cables cut to length and used pull strap zip ties to hold it all together so the cables would be in their perspective positions.
The parts person most familiar with making up cables was put to the task. Stripped the insulation from the main big cable that would have gone to the starter. Corrosion, all the way through.
Well crap, this aint going to do. We discussed it and I priced their cable by the foot. The larger size 0 i think its called, was $6.00 a foot. Okay, 3-1/2 feet of that. Okay, that aint so bad, the smaller diameter cable, same size GM used on the side terminals was like $3.00 a foot and I think it was about 8 foot of that.
He set about soldering top post terminals to the wires and included a 10 gauge pigtail for a fusible link to the alternator.
I wanted the terminal that hooks to the starter to have that positioning lug that keeps it from turning and rotating around to the solenoid terminal. The store does not carry such a starter terminal. Clipped the old starter wire and used a wire coupler sleeve to splice it to the new harness.
If anyone is thinking about making up their own cables it might be a good idea to see if those starter specific terminals are available someplace online and get those before attempting the build, or, do just like we did and splice the old terminal to the new harness. It will be perfectly fine as the wires of the old cable were bright and fresh looking. The coupling aas then heat shrink protected with the heavy gauge heat shrink made for battery cables, as well as all of the other terminals.
The negative top post cables was easy, stock cables from off the shelf.
Now the positive cables are all red and the negative cables are all black.
All told the price tag came to $138.00.

MrMarty51
Well-Known Member
That cable heading towards the firewall, that one feeds the relay/fuse box and uses a terminal with a 1/4” hole in it. That is a lot heavier cable than what the factory cable had running back there.
I guess now, I will take all of that new old stock battery cable that I have, split the insulation, peel it off and drop it into the copper wire bucket to be sold for scrap.
Melt down the lead post lugs and make them into bullets and stinkers, oooops, sinkers.


I guess now, I will take all of that new old stock battery cable that I have, split the insulation, peel it off and drop it into the copper wire bucket to be sold for scrap.
Melt down the lead post lugs and make them into bullets and stinkers, oooops, sinkers.
dbrannon79
I'm getting there!
That all looks good! I bet she cranks over a lot better now! although I would go with a larger cable than 10 gauge for the alternator. I added a 4 gauge to mine piggybacking the factory one and ran it to the relay box so it's feeding the batteries and the fuses. you could run a separate cable off the side post terminal to the alternator, add one of those 100 amp resetable breakers on it rather than a fuseable link. that way if it ever trips you can just reset it and be on down the road.
MrMarty51
Well-Known Member
I will look into that 100 amp resettable breaker.
On one other comment about changing enjine mounts.
Have one of those gear wrench 15 mm ratcheting end wrenches in your tool box before starting this job., it is most valuable.
On one other comment about changing enjine mounts.
Have one of those gear wrench 15 mm ratcheting end wrenches in your tool box before starting this job., it is most valuable.
Husker6.5
135' diagonal 16:9HD, 25KW sound!
Here's one. They also list 120A, 150A and 200A 12VDC circuit breakers, too, @MrMarty51.I will look into that 100 amp resettable breaker.
On one other comment about changing enjine mounts.
Have one of those gear wrench 15 mm ratcheting end wrenches in your tool box before starting this job., it is most valuable.
100 Amp Manual-Reset DC Circuit Breaker BPC Buyers Products CB100PB | Buyers Products | Brands | www.surpluscenter.com
100 Amp Manual-Reset DC Circuit Breaker BPC Buyers Products CB100PB, Buyers Products, 100 AMP MANUAL-RESET DC CIRCUIT BREAKER BPC, HIGH AMPERAGE DCBuyers Products,CB100PB ,
www.surpluscenter.com
Husker6.5
135' diagonal 16:9HD, 25KW sound!
Here's the whole page of breakers they have, both AC and DC, @MrMarty51.
Circuit Breakers | Circuit Breakers & Fuses | Electrical | www.surpluscenter.com
Circuit Breakers,Circuit Breakers & Fuses,Electrical, ADJUSTABLE CIRCUIT BREAKER New, AEG adjustable circuit breaker, model Mbs 16. Trip amps are
www.surpluscenter.com
Big T
Well-Known Member
You're going to like the Energy Suspension mounts.
MrMarty51
Well-Known Member
I will get one a coming. Thank You very much for the link.Here's the whole page of breakers they have, both AC and DC, @MrMarty51.
Circuit Breakers | Circuit Breakers & Fuses | Electrical | www.surpluscenter.com
Circuit Breakers,Circuit Breakers & Fuses,Electrical, ADJUSTABLE CIRCUIT BREAKER New, AEG adjustable circuit breaker, model Mbs 16. Trip amps arewww.surpluscenter.com
Should a person go higher than a 100 amp, wellp, maybe answer my own question. Alternator is capable of at least 100 amp so probably a 150 amp would be better.
Not doing a thing today. Just the usual and kicking back.
If the truck is not completed before the back surgery towards the end of the month, then that is just okay. It can wait until I am healed and by then that nice CB will be here and I wont be doing extra wire changes to the alternator.
Will L.
Well-Known Member
Find out what amperage the fuseable link is and MATCH IT. DO NOT GO HIGHER.
Will L.
Well-Known Member
But I do like the idea of that breaker instead of the fuseable link. Modern rigs just use the maxi fuses. That’s a better choice than fuseable link imo.
dbrannon79
I'm getting there!
you could utilize one of the auxillary maxi fuses in the box under the hood for this. those two extra studs on the back side are for those two fuse blanks. I used one of them with the extra 4 gauge wire I added on the back of my alternator.
Husker6.5
135' diagonal 16:9HD, 25KW sound!
I could definitely see using one of those breakers on a dedicated auxiliary circuit for something like a sand/salt spreader, a snowplow hydraulic pump, some serious Aux lighting or with a killer sound system with a couple of thousand watts or so of amps.

