• Welcome to The Truck Stop! We see you haven't REGISTERED yet.

    Your truck knowledge is missing!
    • Registration is FREE , all we need is your birthday and email. (We don't share ANY data with ANYONE)
    • We have tons of knowledge here for your diesel truck!
    • Post your own topics and reply to existing threads to help others out!
    • NO ADS! The site is fully functional and ad free!
    CLICK HERE TO REGISTER!

    Problems registering? Click here to contact us!

    Already registered, but need a PASSWORD RESET? CLICK HERE TO RESET YOUR PASSWORD!
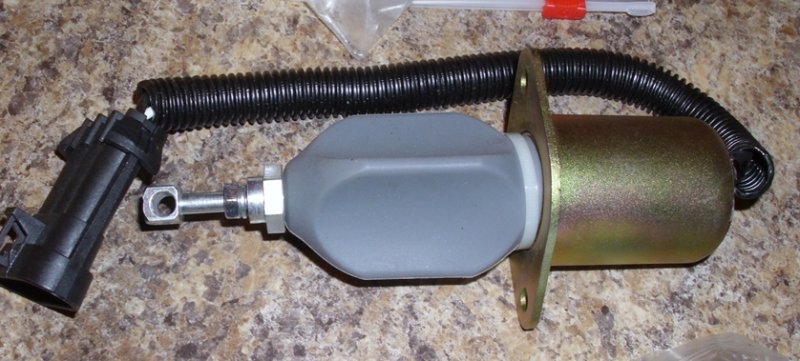
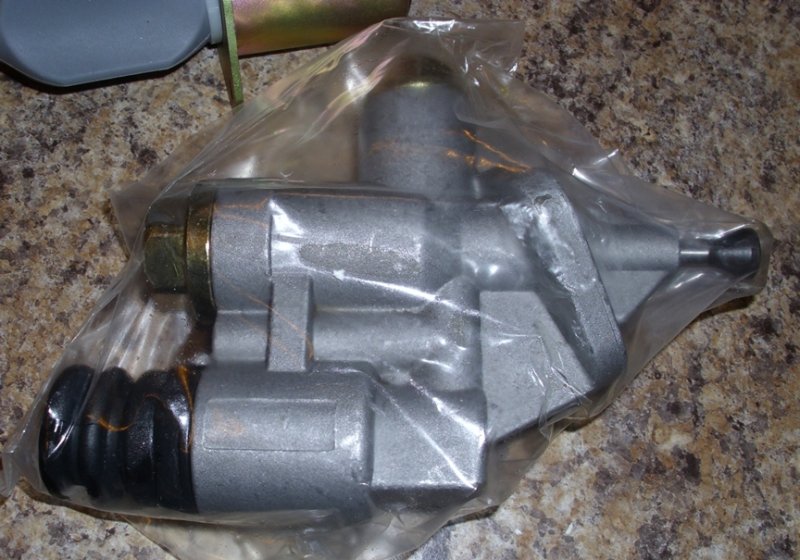
Progress w/12 valve conversion has been slow but sure.

Lots of parts sitting on the bench waiting for install. At issue is most of my tools were submerged in salt flood waters during hurricane Hermain cleanup here still not finished then there is 600’ of shoreline debris to contend with.

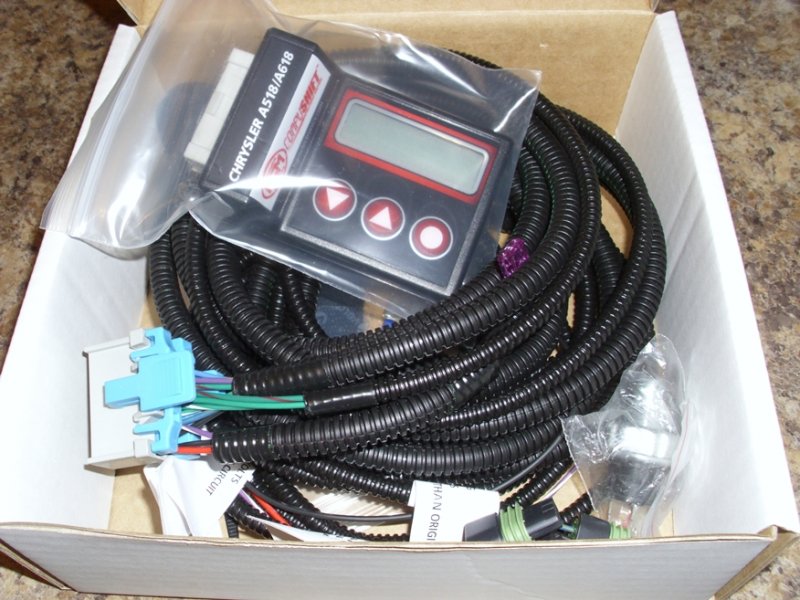
Most recent parts addition is a COMPUSHIFT MINI CONTROLLER which will effortlessly handle lockup & overdrive after I address an old issue all early 12 valves had with the TPS bushing wear causing throttle shaft to wobble around interfering with TPS output in turn causing erratic shifting LU/OD problems I used brass bushings to solve the problem. Yes, I could have just went with two toggle switches for control of LU/OD however I like redundant so I’ll have the two switches isolated via a manual lockout device, if all fails I can still drive “slower” w/3 gears.

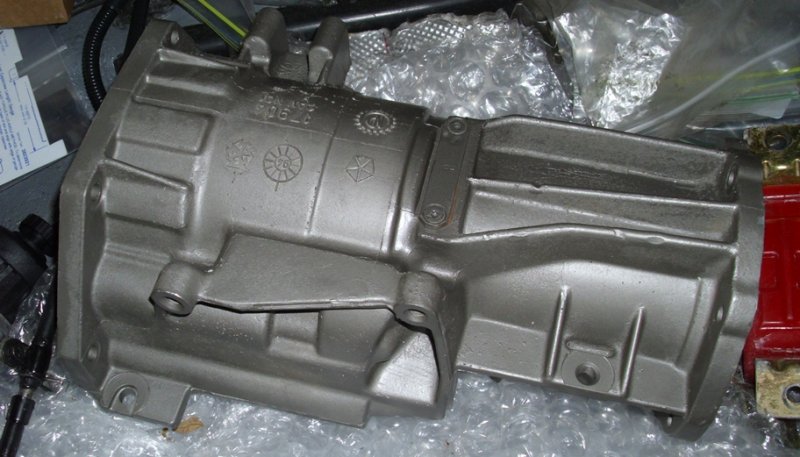
I purchased a re-manufactured RH47 4X4 overdrive unit to convert from 2wd it will be attached to a late model NP241 w/40 tooth tone ring tail section for VSSB etc. I have to change out the t-case input shaft from GM 32 spline to Dodge/Jeep 23 spline input.

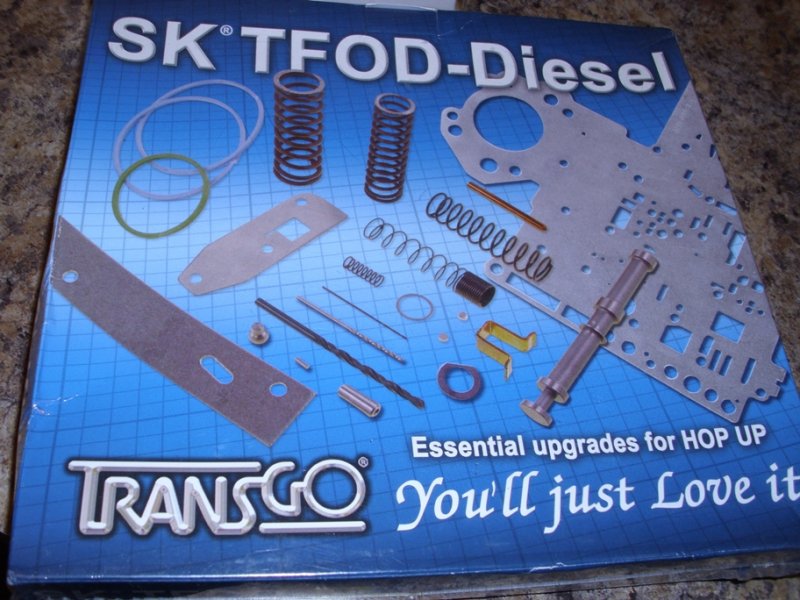
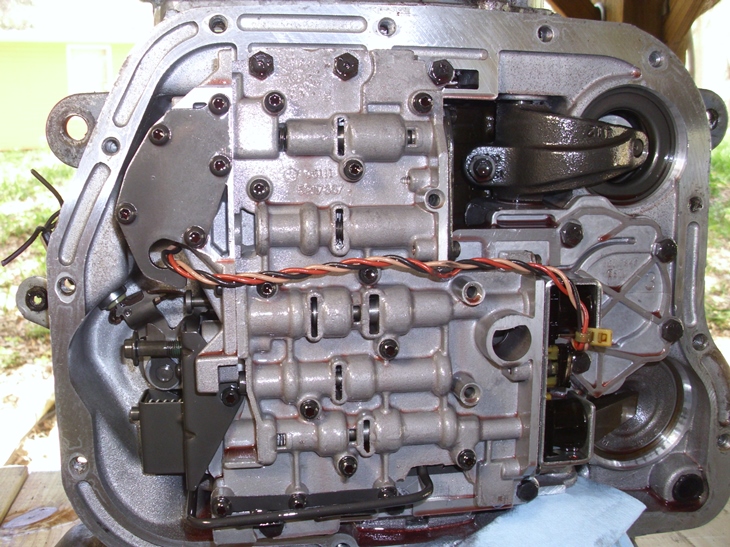
TransGo TOFD diesel shift kit is my choice for valve body mods going with firm shifts etc.

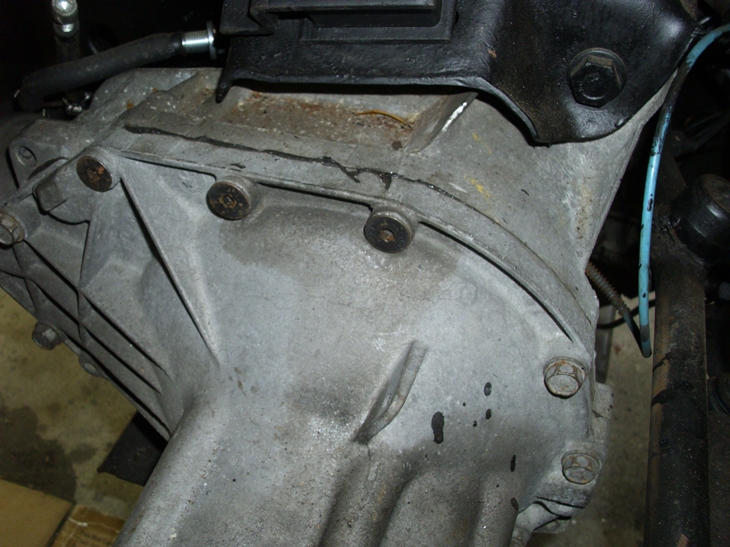
The jury is out as to whether or not to relocate the vent on the 47RH which is at top of front pump to the top of the case for easy vent hose attachment and routing up high in engine bay then there is the 4X4 OD unit with its lower vent grove between it and the t-case and considering sealing the grove and placing a vent on top of it too. I will have to use a clocking ring and still don’t know if I’ll have issues with the driver’s side starter on the 12 valve I’m thinking not but I can always lower the front diff 2” or so.

The RH47 was used for only two years so some parts are at a premium but I like the hydraulic control.

I’m almost done with the 12 valve, today is valve adjustment day followed by injection pump install & timing. I opted to go with a metal timing pin instead of the plastic one that is stock on the 12 valve.

My 4” exhaust will use the Cummins cobra-head down pipe. I’m still mulling around how to get the HX super 40 to spool ‘down low’ considering my exhaust manifold is centered & split 3x3 cylinders to dual volute T-3 configuration.


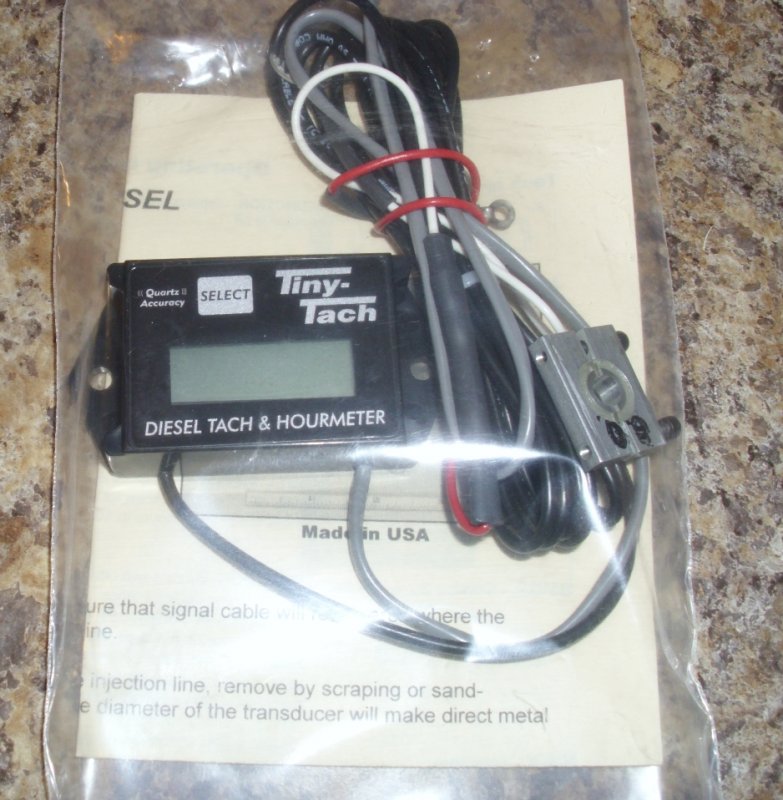
Have a TINY TACH w/hour meter and injection line transducer (6mm) for most accurate RPM reading so it will be useful when I play with pulley diameter on the GM GEN/ALT to get a better reading on the dash tach, yep redundant again.

Using updated Ram IP throttle cable new throttle valve cable & GM shifter cable which has to come in from the front of the 47RH to work so bracket fab is a must.

I picked up a GM cruise control box w/attached cable & harness.

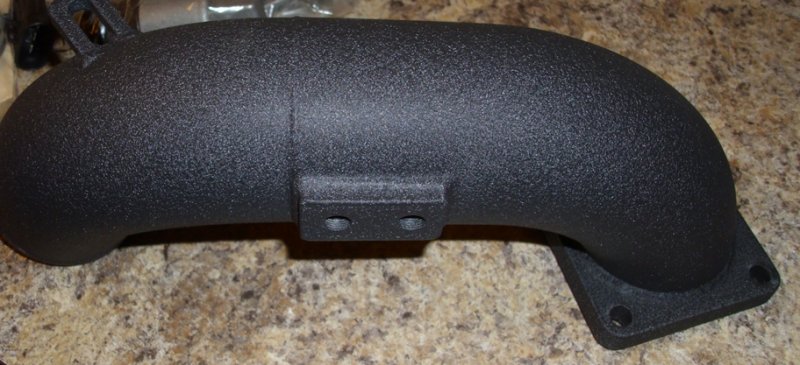
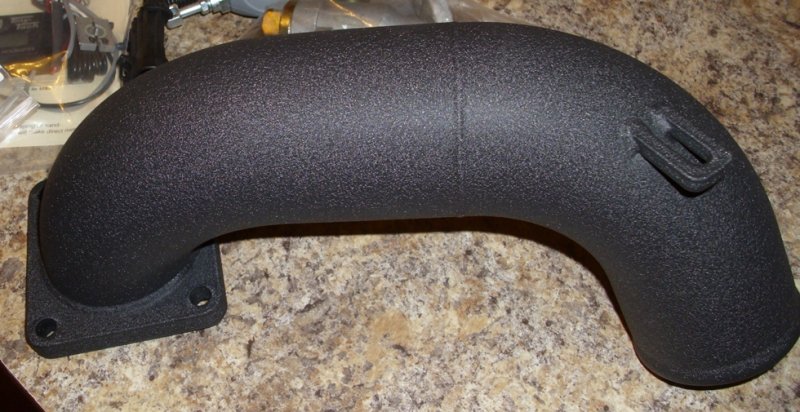
Intake runner powder coated.

Suggestions welcome.
DSCI0001 (1).JPG DSCI0001.JPG DSCI0002 (1).JPG DSCI0002.JPG DSCI0003 (1).JPG DSCI0003.JPG DSCI0004.JPG DSCI0005.JPG
 
Only thing I can throw in is on the vents. Being 4x4 and you are modifying the world anyways, attach lines to them (1/4" dot plastic airline is perfect larger doesn't hurt, just harder to run) and run them up topside to eliminate water intrusion. Do the axles also. You can tie them all together.
Hmmwv/ hummers, mraps, etc all do this- and run them to the air filter housing.
Only downside is taking the time to do it and the $30 in parts.
 
For your transfer case, you do know the GM and DODGE units are clocked 90 degrees off from each other, right? Most people who do this use a DODGE case, then just swap in the GM reluctor in place of the speedo drive gear setup. Or you can go SYE for not alot of money for the short one for a 40 tooth reluctor.
 
For your transfer case, you do know the GM and DODGE units are clocked 90 degrees off from each other, right? Most people who do this use a DODGE case, then just swap in the GM reluctor in place of the speedo drive gear setup. Or you can go SYE for not alot of money for the short one for a 40 tooth reluctor.
I was running into a weight issue w/NP241DHD & its PTO my research shows the GM 241 as a medium duty design while the Dodge NP 241 DLD is listed as light duty. I can't find any info on if the starter on D/S of 12 valve will be an issue w/frt driveshaft and suspect I will have to drop t-case some however not sure of this yet.
 
My 4” exhaust will use the Cummins cobra-head down pipe. I’m still mulling around how to get the HX super 40 to spool ‘down low’ considering my exhaust manifold is centered & split 3x3 cylinders to dual volute T-3 configuration.

Do you have room for the BD Spool Valve? It was invented for big turbo Cummins projects... @Burning oil Leroy Diesel can get them. :)
 
Do you have room for the BD Spool Valve? It was invented for big turbo Cummins projects... @Burning oil Leroy Diesel can get them. :)
I'd have to change out the exhaust manifold that is 6 into one t-3 open not divided so a spool valve could work.

Perhaps, I can cut the wall between the two volutes I have on this manifold.
 
I was running into a weight issue w/NP241DHD & its PTO my research shows the GM 241 as a medium duty design while the Dodge NP 241 DLD is listed as light duty. I can't find any info on if the starter on D/S of 12 valve will be an issue w/frt driveshaft and suspect I will have to drop t-case some however not sure of this yet.
The dodge 241 with the pto drive is the heavy duty model of 241's(hence the hd at the end). Theres several different 241's, but Dodge used the strongest one behind the cummins in the 3500's. Don't know where you found it was a light duty model as that is very false info.
 
The dodge 241 with the pto drive is the heavy duty model of 241's(hence the hd at the end). Theres several different 241's, but Dodge used the strongest one behind the cummins in the 3500's. Don't know where you found it was a light duty model as that is very false info.
The web is full of miss info that said I found that the NP241 DHD is heavy duty and attached to shorter 4x4 OD units than what I'm using also it's heavy in so I decided it was not what I wanted to hang at the end of my 47RH's long 4x4 OD assembly. I see the NP241 DLD is listed as light duty and suspect it is really a medium duty like the NP241c or am I missing something?
 
Theres multiple of each model. GM used the np241c in 1500's and 2500's in both a 27 and 32 spline input and output. Dodge offered it in 23, 32, and the massive 29 spline input. Double check your trans to see which output you have as many Cummins equipped trucks with the 241 dhd got the 29 spline input and output shafts, so you could have a 29 spline output in your trans to match it, but I believe most 29 splines were behind the nv4500hd and nv5600. Many 47re's got the small 23 spline output shaft that was used in JEEP's so you gotta double check that.
 
Update, on my Cummins 12 valve w/P7100 conversion.

Yep, it’s been awhile because I’m not in the best of health but fighting hard to get past it.

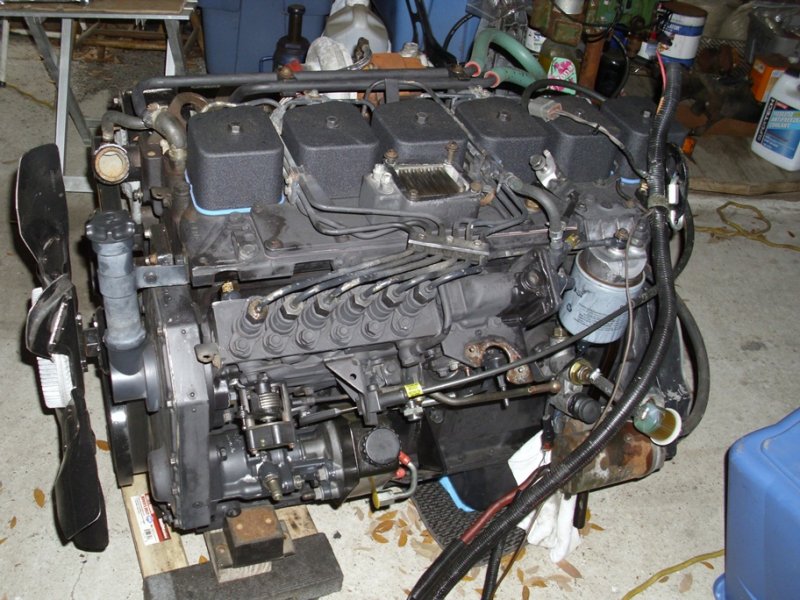
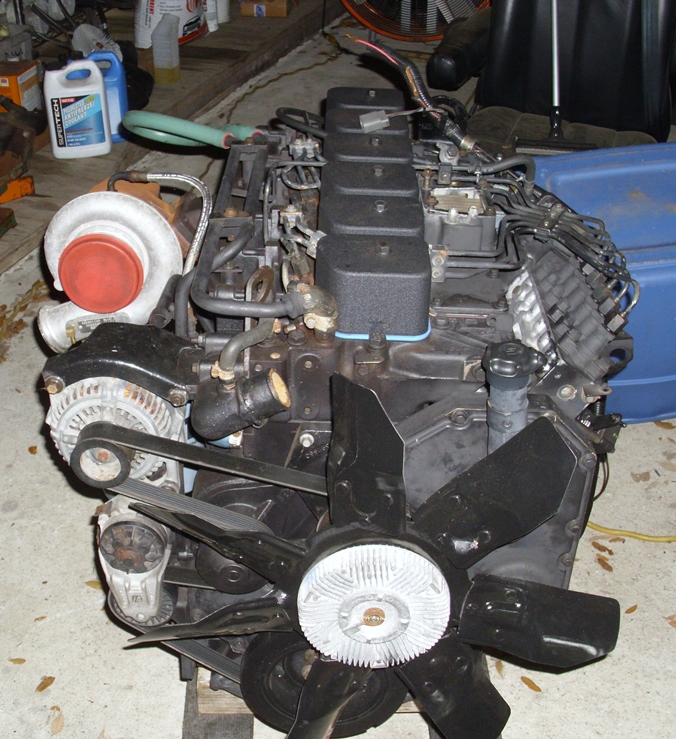
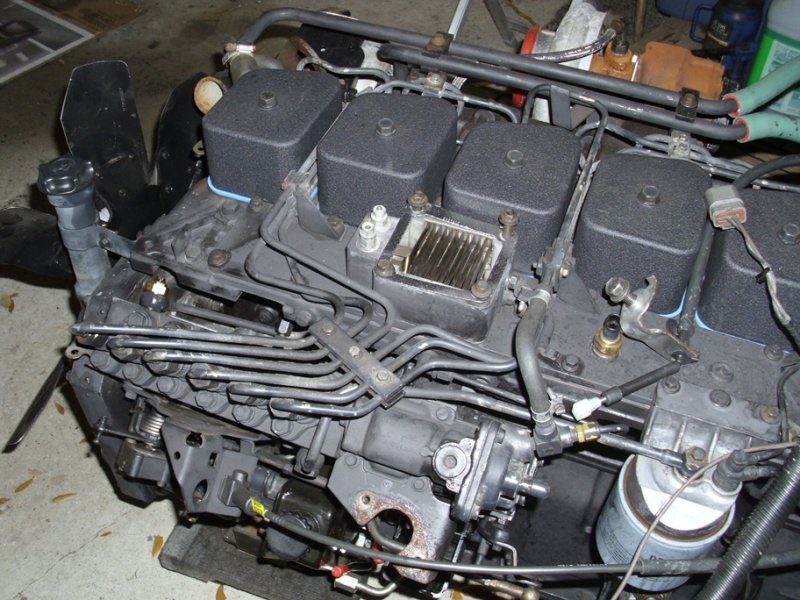
This Cummins was rebuilt by Cummins and has a block and head both cast by NAVISTAR, I tore it down for inspection and to replace all the gaskets and seals. I will install it soon along with the transmission. The 12 valve will sit back 2 ½” so the cooling fan clears the radiator.

I’m still thinking of exactly what mods I want to do to the P7100 to bring me to 325/350 RW/HP using the HX Super 40 and perhaps a spool valve too.

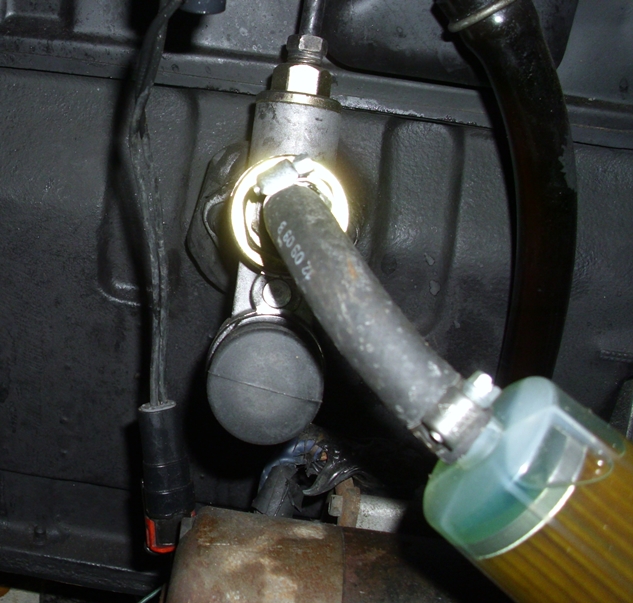
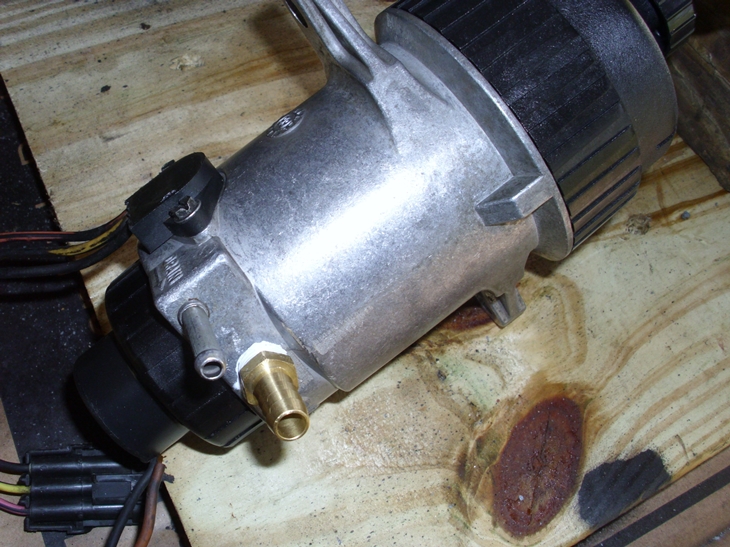
I did delete the Dodge pre-filter heater assembly to use the GM 6.5TD FFM modified to feed this beast.

Killer dowel pin mod done.

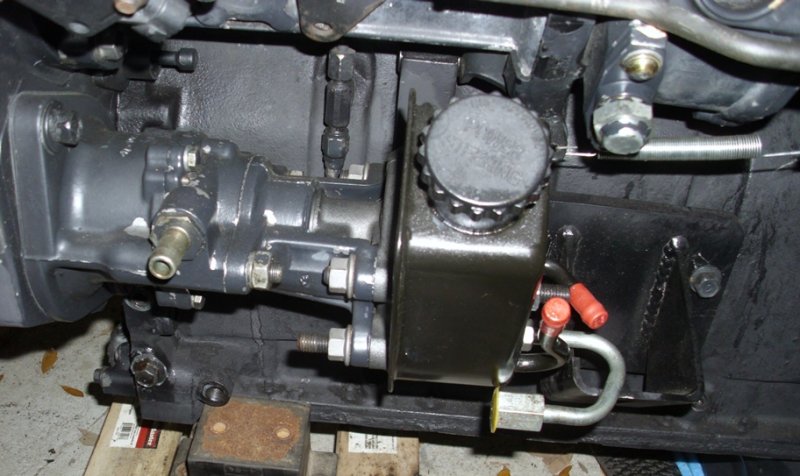
I rebuilt the vacuum pump and installed a PSC hydro-boost P/S unit.

The transmission is an 47RH (big case 618) more than capable now to hold the torque of my Cummins build, its hydro shifted for first 3 gears then solenoids are used for overdrive & lockup (OD/LU). Most common is that manual switches are used for OD/LU in conversions while others vie for relay or Hobbs valve controlling the solenoids however I’m using a COMPUSHIFT MINI controller that allows for a vast array of shifting, OD & LU tuning w/OD on/off switch. I converted the 47RH 2wd to 4x4 making it about ½” longer than the 4L80e 4x4 transmission.

The t-case adapter for the 4L80e to NP246 or NP241 is 2 ¼” thick while the clocking ring to clock the NP241c case I’m using on the 47RH is 3/8” thick & no adapter required between the transmission and t-case so figuring in the Cummins diesel to 47RH trans adapter which is 2 ¼” thick I may be looking at the same +- .50” difference between the two drivetrains (just guessing here for now).

One thing I forgot to do was measure the NP246 front mounting to tail housing length so if any of you have one perhaps you could measure yours and let me know.

The NP241c is off of a 98 Suburban big block w/4L80e so it has the three (3) pin case switch for the GM automatic low tables which I don’t need with my configuration which is wired like a manual transmission. The NP241c retains the GM 40 tooth tone ring.

I had to counter sink three upper bolts on the front differential for oil pan clearance if that’s not enough I can lower the diff 2” with kit. Gear sets are currently 4.10:1 w/lockers at both ends not sure if I’ll go to 3.42:1, or?

The TPS is critical for proper transmission control of OD/LU so I rebuilt my TPS shaft using brass bushings instead of the plastic ones Dodge used which caused nightmares for most Ram owners as they wore out.

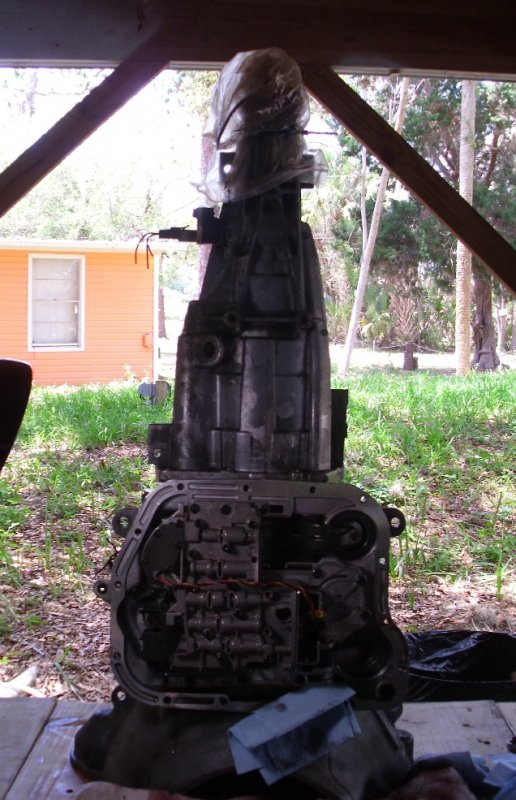
The valve body was a bear I have many hours into modifying/installing the TransGo TFOD reprogram tuner kit along with Sonnex fix parts, billet servo, anchor, strut and a 4.2 ratio actuation lever for better clamping force under higher pressures (stock is 3.8 ratio). Additional clutches & steels are used in the OD clutch pack assembly in the 4x4 unit. The jury is out as to wither I’ll use billet shafts or cryo treated units.

I just remembered today I had forgot to add an upper transmission case vent and block off the factory vent at the front pump will be doing this within the next week. The factory vent is a design for road use that allows water to enter at the front pump there is no option for an extended vent tube so any light flooding or even shallow water crossings will destroy the 47RH.

The fuel throttle cable is Ram Cummins attached to a manual GMT400 gas pedal.

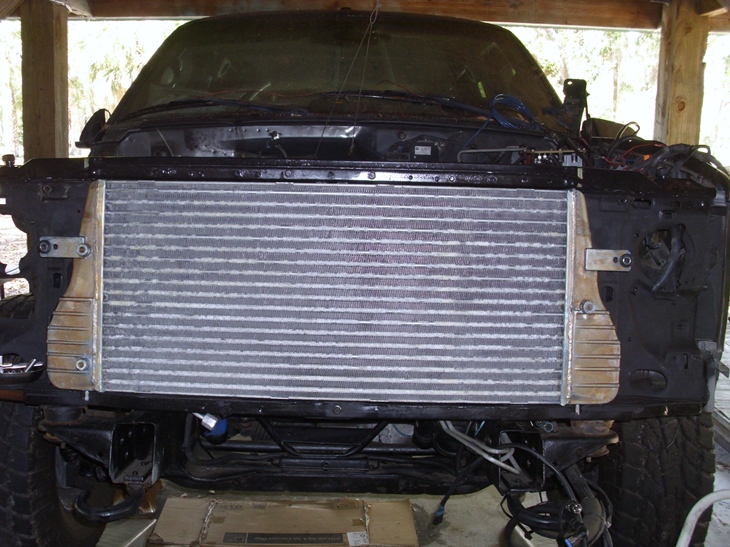
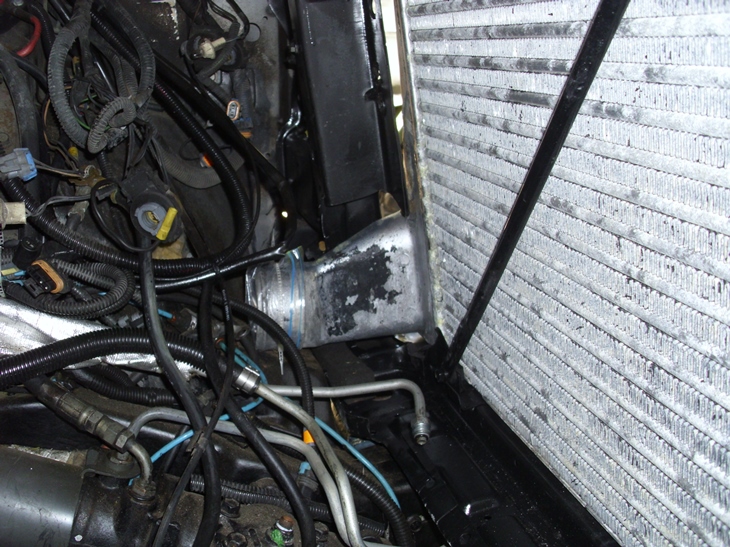
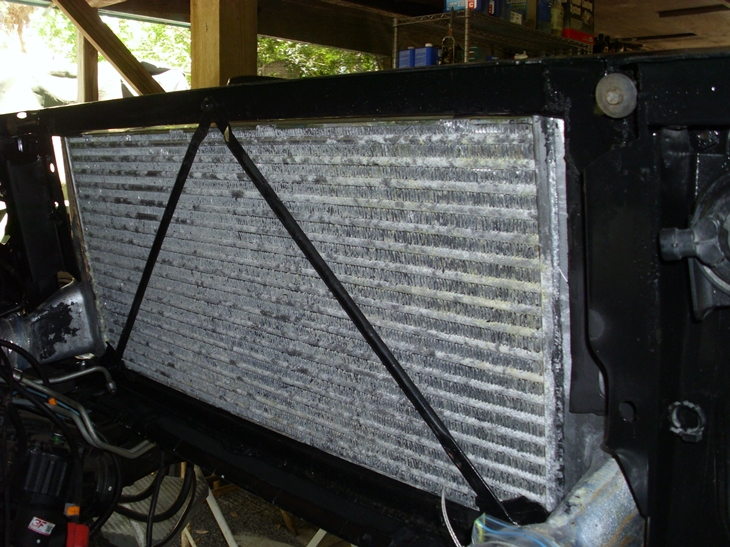
I have fitted the Ram Cummins thick core radiator & charge air cooler within the width of the GT400 radiator support w/x bar support, the AC condenser will be moved out some or maybe relocated.

The driver side battery needs to be turned because it hits the radiator inlet.

I’ll be using the GMT400 diesel coolant accumulator tied into the Cummins lower radiator hose.

I removed the block heater because of the issue with EVANS coolant and haven’t figured just what I’ll do about a coolant heater I’m thinking diesel fired like the cabin heater I bought from site vender Lube Spec.

Installing a MINI TACH w/engine hour meter with service reminder functions I’ll be able to calibrate dash tach exact then.

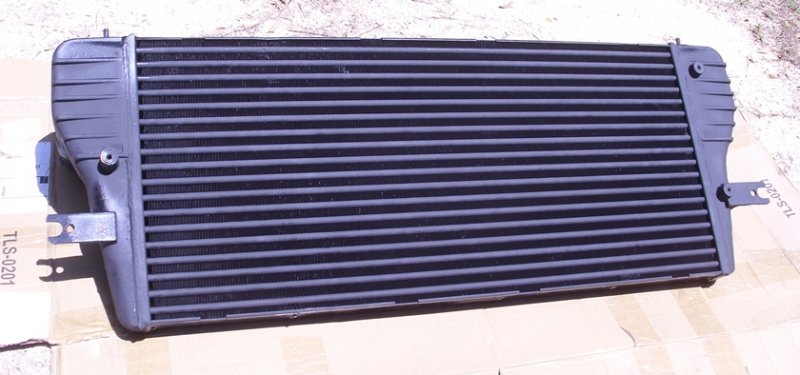
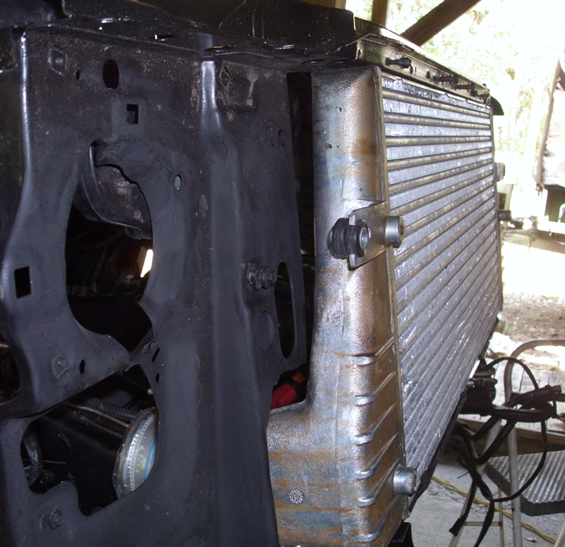
On Ram Cummins charge air coolers aka: intercoolers that are painted or powder coated “I really don’t know which” the coating cracks over time letting in moisture and oxygen under the coating starting the corrosion process that goes mostly unnoticed as the corrosion spreads under the coating it eventually reduces the efficiency of the charge air cooler however it can be fixed at the cost of mostly labor stripping the coating removing the corrosion then resealing and refinishing the unit.

The following process is information only of what I did so if you do it “it is at your own risk.”

“PROCEED WITH EXTREME CAUTION BY READING & UNDERSTANDING USES OF PRODUCT & SEAFETY WARNING LABELS.”

Restoring the charge air cooler (aka: intercooler) CAC/IC starts w/pressure test then scoping visually the interior of the unit to determine if the return is worth the effort.

After using a good paint remover “water based is great” to remove coating start brass brushing off the excess corrosion then stripping the remaining aluminum corrosion with phosphoric or other suitable acid you then seal the CAC with aviation grade ALODINE & paint with thin coat of high temp resistant paint I use 2k deg. F paint. See: Before and after images posted herein.
 

Attachments

  • DSCI0001.JPG
    DSCI0001.JPG
    61.7 KB · Views: 23
  • DSCI0001 (1).JPG
    DSCI0001 (1).JPG
    139.2 KB · Views: 27
  • DSCI0001.JPG
    DSCI0001.JPG
    78.7 KB · Views: 26
  • DSCI0002 (1).JPG
    DSCI0002 (1).JPG
    101.3 KB · Views: 27
  • DSCI0002.JPG
    DSCI0002.JPG
    55.4 KB · Views: 26
  • DSCI0003 (1).JPG
    DSCI0003 (1).JPG
    140.1 KB · Views: 25
  • DSCI0003.JPG
    DSCI0003.JPG
    95 KB · Views: 25
  • DSCI0004 (1).JPG
    DSCI0004 (1).JPG
    86.1 KB · Views: 25
  • DSCI0004.JPG
    DSCI0004.JPG
    81.6 KB · Views: 24
  • DSCI0005.JPG
    DSCI0005.JPG
    52.6 KB · Views: 23
Update, on my Cummins 12 valve w/P7100 conversion.

Yep, it’s been awhile because I’m not in the best of health but fighting hard to get past it.

This Cummins was rebuilt by Cummins and has a block and head both cast by NAVISTAR, I tore it down for inspection and to replace all the gaskets and seals. I will install it soon along with the transmission. The 12 valve will sit back 2 ½” so the cooling fan clears the radiator.

I’m still thinking of exactly what mods I want to do to the P7100 to bring me to 325/350 RW/HP using the HX Super 40 and perhaps a spool valve too.

I did delete the Dodge pre-filter heater assembly to use the GM 6.5TD FFM modified to feed this beast.

Killer dowel pin mod done.

I rebuilt the vacuum pump and installed a PSC hydro-boost P/S unit.

The transmission is an 47RH (big case 618) more than capable now to hold the torque of my Cummins build, its hydro shifted for first 3 gears then solenoids are used for overdrive & lockup (OD/LU). Most common is that manual switches are used for OD/LU in conversions while others vie for relay or Hobbs valve controlling the solenoids however I’m using a COMPUSHIFT MINI controller that allows for a vast array of shifting, OD & LU tuning w/OD on/off switch. I converted the 47RH 2wd to 4x4 making it about ½” longer than the 4L80e 4x4 transmission.

The t-case adapter for the 4L80e to NP246 or NP241 is 2 ¼” thick while the clocking ring to clock the NP241c case I’m using on the 47RH is 3/8” thick & no adapter required between the transmission and t-case so figuring in the Cummins diesel to 47RH trans adapter which is 2 ¼” thick I may be looking at the same +- .50” difference between the two drivetrains (just guessing here for now).

One thing I forgot to do was measure the NP246 front mounting to tail housing length so if any of you have one perhaps you could measure yours and let me know.

The NP241c is off of a 98 Suburban big block w/4L80e so it has the three (3) pin case switch for the GM automatic low tables which I don’t need with my configuration which is wired like a manual transmission. The NP241c retains the GM 40 tooth tone ring.

I had to counter sink three upper bolts on the front differential for oil pan clearance if that’s not enough I can lower the diff 2” with kit. Gear sets are currently 4.10:1 w/lockers at both ends not sure if I’ll go to 3.42:1, or?

The TPS is critical for proper transmission control of OD/LU so I rebuilt my TPS shaft using brass bushings instead of the plastic ones Dodge used which caused nightmares for most Ram owners as they wore out.

The valve body was a bear I have many hours into modifying/installing the TransGo TFOD reprogram tuner kit along with Sonnex fix parts, billet servo, anchor, strut and a 4.2 ratio actuation lever for better clamping force under higher pressures (stock is 3.8 ratio). Additional clutches & steels are used in the OD clutch pack assembly in the 4x4 unit. The jury is out as to wither I’ll use billet shafts or cryo treated units.

I just remembered today I had forgot to add an upper transmission case vent and block off the factory vent at the front pump will be doing this within the next week. The factory vent is a design for road use that allows water to enter at the front pump there is no option for an extended vent tube so any light flooding or even shallow water crossings will destroy the 47RH.

The fuel throttle cable is Ram Cummins attached to a manual GMT400 gas pedal.

I have fitted the Ram Cummins thick core radiator & charge air cooler within the width of the GT400 radiator support w/x bar support, the AC condenser will be moved out some or maybe relocated.

The driver side battery needs to be turned because it hits the radiator inlet.

I’ll be using the GMT400 diesel coolant accumulator tied into the Cummins lower radiator hose.

I removed the block heater because of the issue with EVANS coolant and haven’t figured just what I’ll do about a coolant heater I’m thinking diesel fired like the cabin heater I bought from site vender Lube Spec.

Installing a MINI TACH w/engine hour meter with service reminder functions I’ll be able to calibrate dash tach exact then.

On Ram Cummins charge air coolers aka: intercoolers that are painted or powder coated “I really don’t know which” the coating cracks over time letting in moisture and oxygen under the coating starting the corrosion process that goes mostly unnoticed as the corrosion spreads under the coating it eventually reduces the efficiency of the charge air cooler however it can be fixed at the cost of mostly labor stripping the coating removing the corrosion then resealing and refinishing the unit.

The following process is information only of what I did so if you do it “it is at your own risk.”

“PROCEED WITH EXTREME CAUTION BY READING & UNDERSTANDING USES OF PRODUCT & SEAFETY WARNING LABELS.”

Restoring the charge air cooler (aka: intercooler) CAC/IC starts w/pressure test then scoping visually the interior of the unit to determine if the return is worth the effort.

After using a good paint remover “water based is great” to remove coating start brass brushing off the excess corrosion then stripping the remaining aluminum corrosion with phosphoric or other suitable acid you then seal the CAC with aviation grade ALODINE & paint with thin coat of high temp resistant paint I use 2k deg. F paint. See: Before and after images posted herein.
Good to hear from you! It had been a while so I was getting concerned. Glad to see the project is moving forward - it sounds like you have gotten a lot done despite your health.....good job! That intercooler work doesn't sound ANY fun. Keep kicking!
 
I removed the block heater because of the issue with EVANS coolant and haven’t figured just what I’ll do about a coolant heater I’m thinking diesel fired like the cabin heater I bought from site vender Lube Spec.

Might want to look into sump heaters and attach them to the block instead of the sump.

Diesel fired coolant heater is good if off-grid heating is necessary.


On Ram Cummins charge air coolers aka: intercoolers that are painted or powder coated . . . the coating cracks over time letting in moisture and oxygen under the coating starting the corrosion process . . .

Maybe treat a 'naked' one with heat-shedding ceramic coating?
 
Might want to look into sump heaters and attach them to the block instead of the sump.

Diesel fired coolant heater is good if off-grid heating is necessary.


Maybe treat a 'naked' one with heat-shedding ceramic coating?

Ceramic coating heat shedding type? Where can I get that?

I have this cabin heater & thinking directing its exhaust to the side of the oil pan.
http://www.lubricationspecialist.co...r-heater-with-installation-kit/digi-max-1000/

Other choice is this........ http://www.lubricationspecialist.com/hydronic-5/new-hydronic-iii-d5e-w/easy-start-timer/
 
Good to hear from you! It had been a while so I was getting concerned. Glad to see the project is moving forward - it sounds like you have gotten a lot done despite your health.....good job! That intercooler work doesn't sound ANY fun. Keep kicking!

Thanks! Whole life style has changed a bit but I'm a fighter so I'll deal with it and move on......
Yes, the stripping of the CAC coating was a bear but the end result is a renewed & efficient CAC.
 
Some more images.....
 

Attachments

  • DSCI0020.JPG
    DSCI0020.JPG
    74.9 KB · Views: 11
  • DSCI0014.JPG
    DSCI0014.JPG
    122.8 KB · Views: 11
  • DSCI0017.JPG
    DSCI0017.JPG
    46.8 KB · Views: 11
  • DSCI0018.JPG
    DSCI0018.JPG
    86.7 KB · Views: 10
  • DSCI0026.JPG
    DSCI0026.JPG
    64.8 KB · Views: 10
  • DSCI0018.JPG
    DSCI0018.JPG
    138.3 KB · Views: 10
  • DSCI0017.JPG
    DSCI0017.JPG
    92.7 KB · Views: 10
UPDATE:

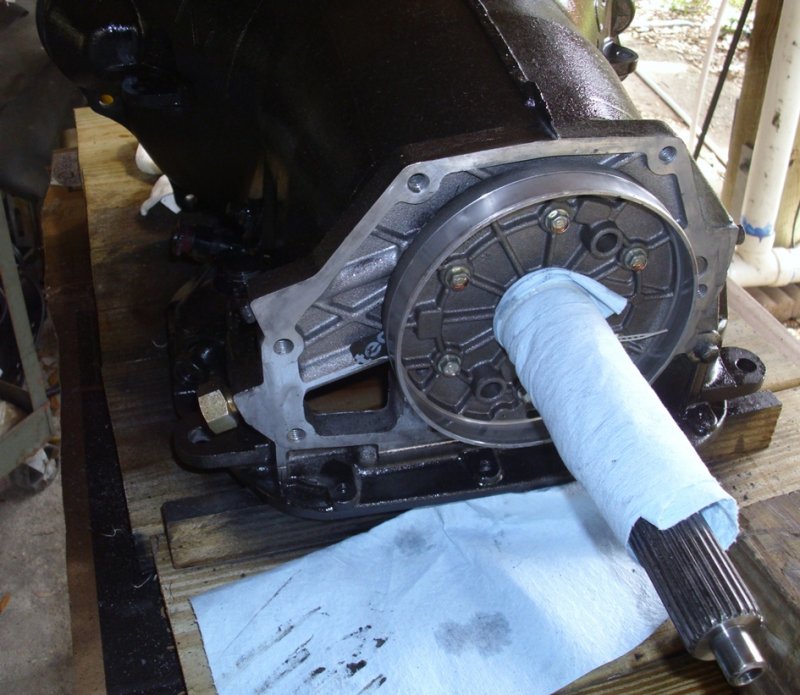
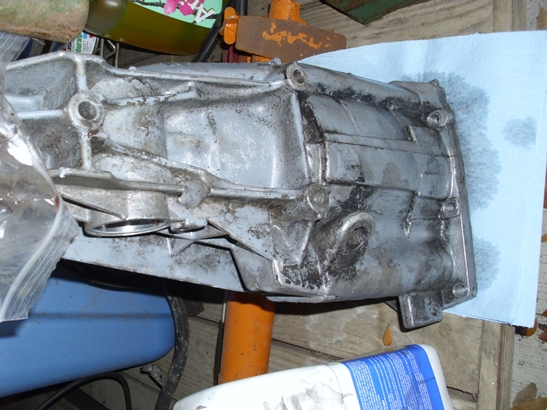
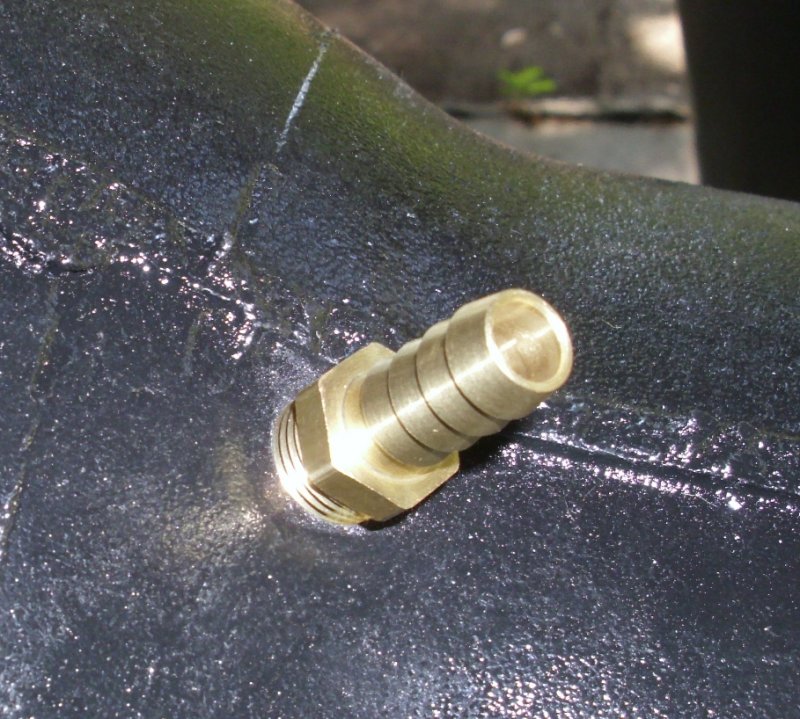
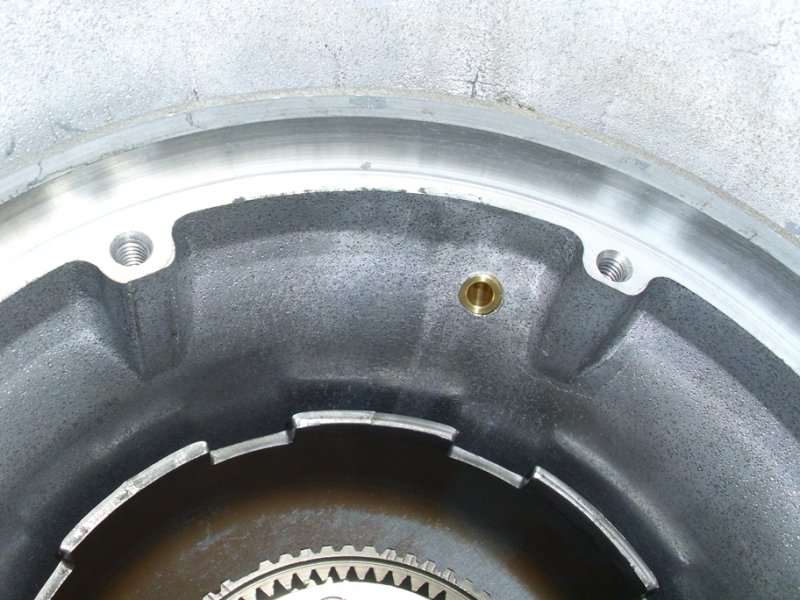
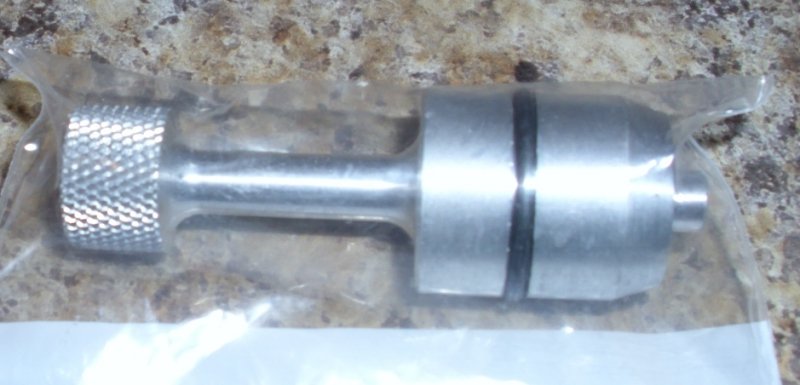
Well, I eliminated the vent at the front pump on the 47RH that dodge commonly uses on most of their transmissions now using an upper case vent now plumbed up high in the engine bay. The new vent (image) is for test fit which I’ll replace with a 90 degree one.

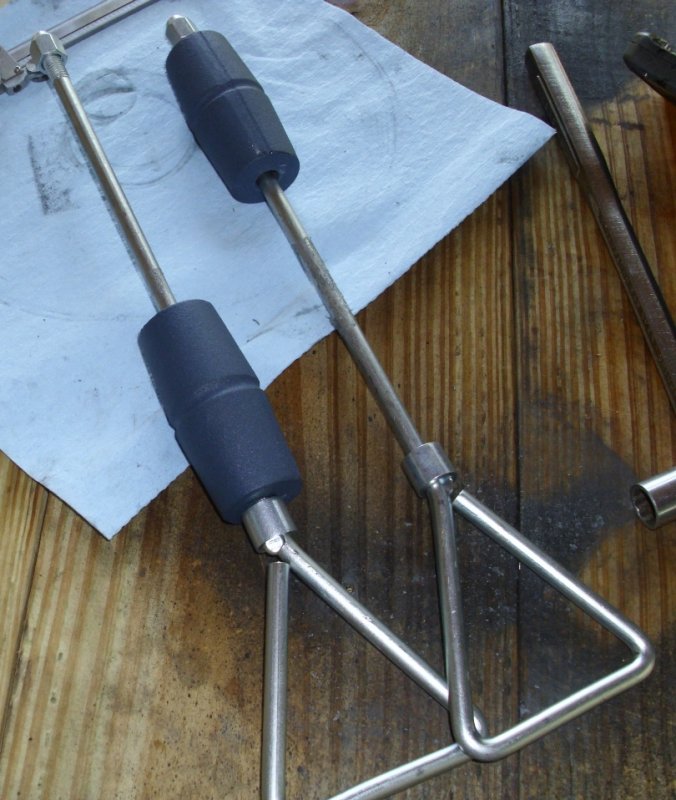
I had bought 1lb slide hammers off the bay 2 for $25.10 they have the same thread pattern as the 47RH from pump these hammers are needed to pull the front pump.

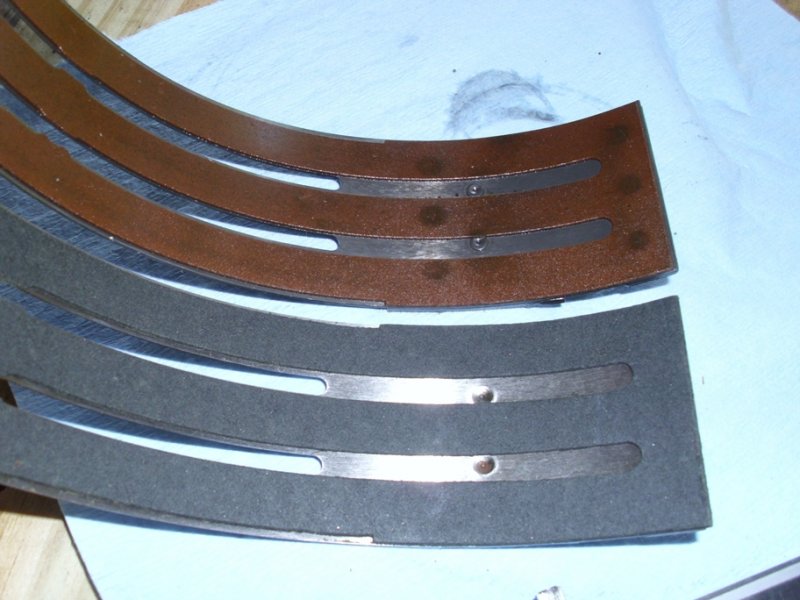
Band clutch ALTO as compared to black carbon fiber….using carbon fiber.

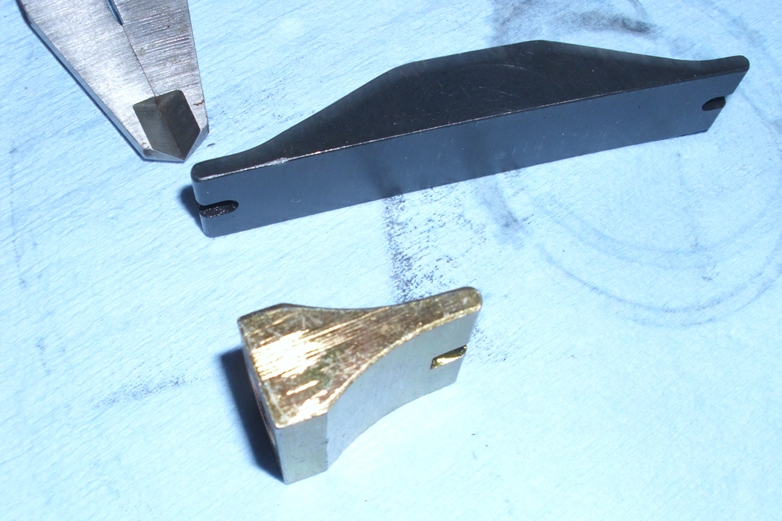
More billet goodies too….

Once I reassemble the transmission and bolt on the 4x4 OD unit I’ll install it with the Cummins in the Burb.

The last item is the NP214c input shaft install to mate with the 47RH output shaft then cut the floor for the t-case shifter then I can see if the drives shafts will work w/o more mods.
 

Attachments

  • DSCI0005.JPG
    DSCI0005.JPG
    124.1 KB · Views: 11
  • DSCI0004.JPG
    DSCI0004.JPG
    55.2 KB · Views: 10
  • DSCI0003.JPG
    DSCI0003.JPG
    88.5 KB · Views: 13
  • DSCI0002.JPG
    DSCI0002.JPG
    162.5 KB · Views: 12
  • DSCI0001.JPG
    DSCI0001.JPG
    121.9 KB · Views: 12
Back
Top