• Welcome to The Truck Stop! We see you haven't REGISTERED yet.

    Your truck knowledge is missing!
    • Registration is FREE , all we need is your birthday and email. (We don't share ANY data with ANYONE)
    • We have tons of knowledge here for your diesel truck!
    • Post your own topics and reply to existing threads to help others out!
    • NO ADS! The site is fully functional and ad free!
    CLICK HERE TO REGISTER!

    Problems registering? Click here to contact us!

    Already registered, but need a PASSWORD RESET? CLICK HERE TO RESET YOUR PASSWORD!

2008 GMC Envoy Denali

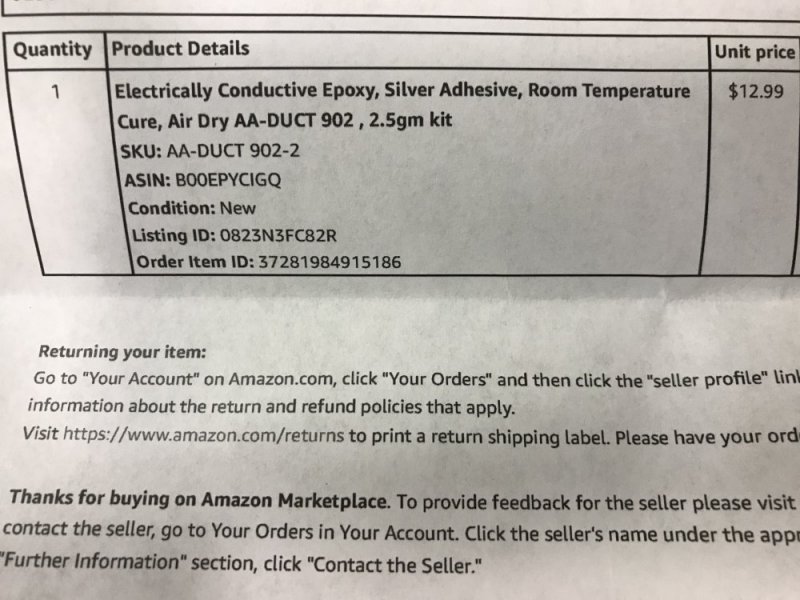
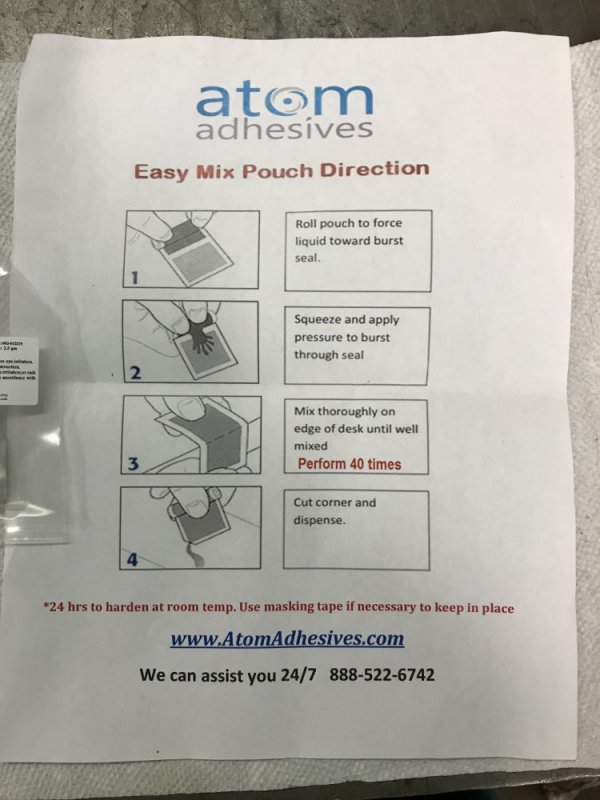
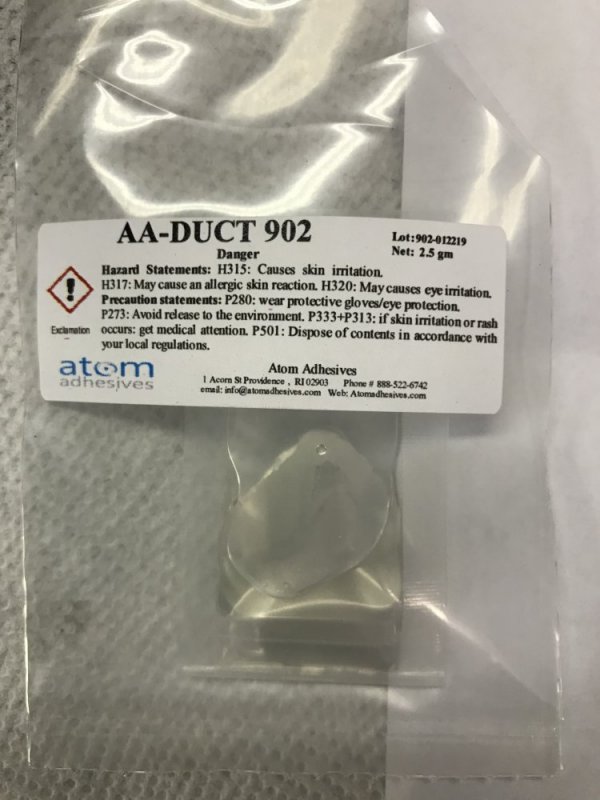
Thursday night I repaired one of the connectors for the defroster on the back glass. I bought some electrically conductive epoxy off of Amazon that had good reviews.
BBB6E1A4-3A42-4661-8DA1-B393CC53F3A7.jpeg98A8C984-3A96-4961-8A4F-296DC7509F5C.jpegFE513C15-41B9-4F1C-BCD3-80F7C04DE52E.jpeg

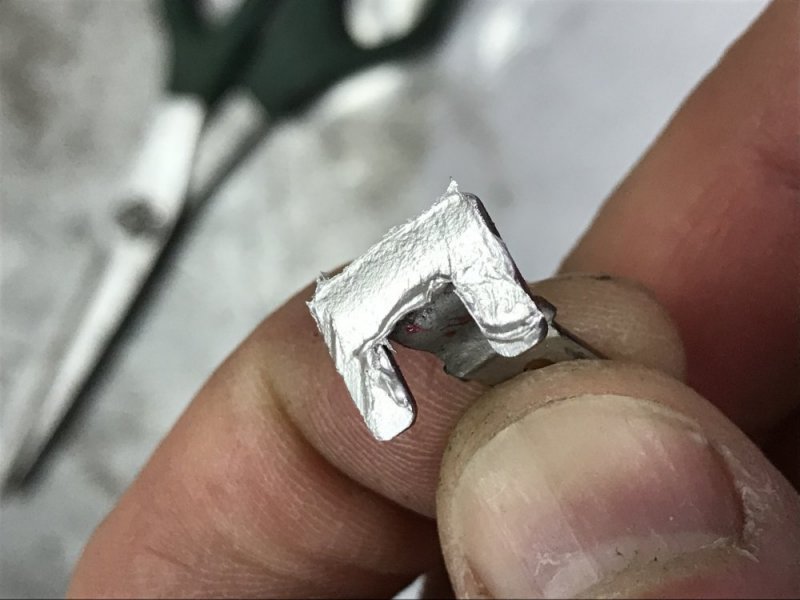
I sanded the old adhesive off the tab and cleaned the tab and the window glass. After mixing the 2-part epoxy it looks like molten solder.
7D1474F7-2742-42DB-87E2-BF21B7C54E98.jpeg

I put it in place and then held it there with masking tape.
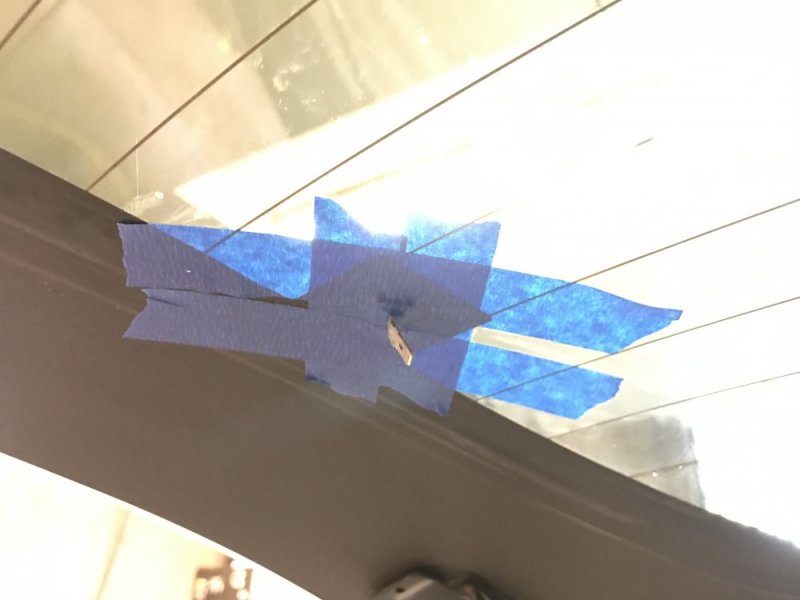
3221C96A-4E84-40A5-831D-59F3491CDD9A.jpeg

Last night I took the tape off. It feels snug.
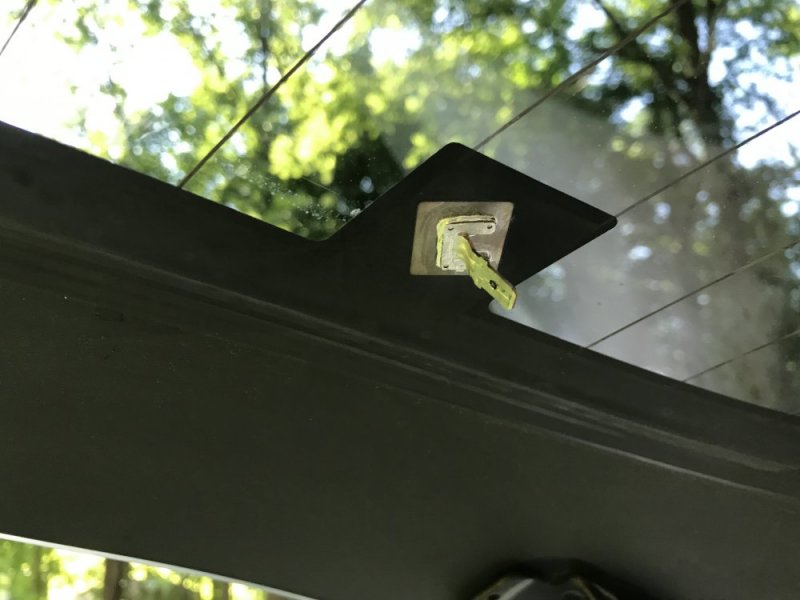
FBC8F2FD-F837-4EA2-A022-14A7FCA2D53E.jpeg

I reattached the wire so now that should be set.
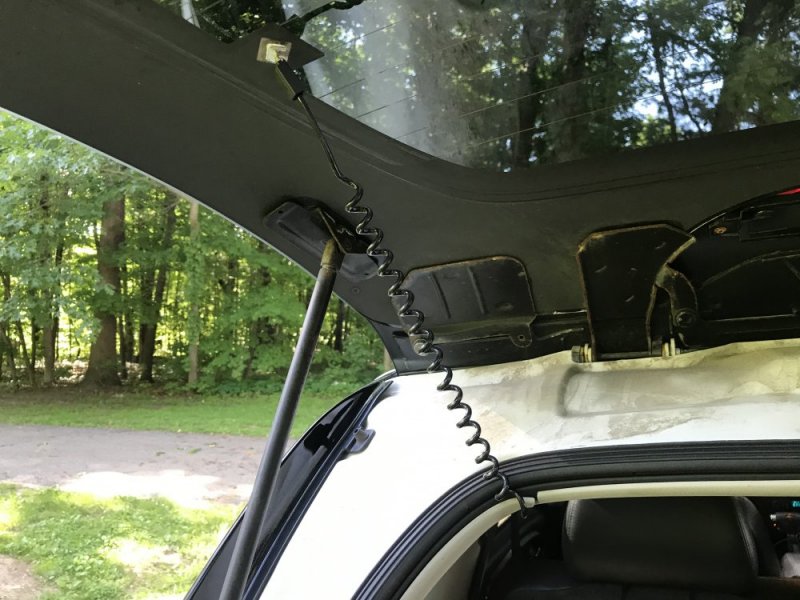
2966DE9B-888D-4D30-9F06-46BD1115E51C.jpeg

Last night I also did the 500 mile oil change. I’m enjoying the truck so far, but VERY interested in putting the 4.11 gears in it to make it feel snappier. I’m going to start doing some documebtation of how the 3.42s work so I can make a good comparison between them and the 4.11s and decide what direction forward makes the most sense. I need to compare not only acceleration, but also mpg (city, 55mph backroads and highway) and NVH comparisons at various speeds. The calculator says my highway rpm should only go up 400 rpm, but that may be enough to be annoying on a road trip.

I also balanced the rear tires last night. It has a vibration at highway speeds and it felt like it was coming from the back. It’s better, but still there so I’ll do the front tires next. If that doesn’t do it then I’ll have to take a look at the driveshaft I guess.

One more thing to note: every once in a while, when I start the truck after it’s been sitting I get a healthy puff of oil smoke. Not every time, just sometimes - so far it seems random. My best guess right now is that I have a bad valve stem seal on an exhaust valve, but I’m still just keeping an eye on it. I’m not looking forward to tearing into it to make that repair so I’ll make sure that’s what it is before I do it.
 
Small road trip yesterday from Kalamazoo to Grand Haven, Michigan. About 150 miles round trip. Most of it was 55mph back roads, but there was some 70mph interstate and a few stops and starts. Oh and some traffic with a couple people that needed to be passed... I averaged 17.1mpg by the onboard calculator for the leg there. Not what I had hoped for-I hoped to be able to average at least 20 on back roads. For some lame reason this truck doesn’t have an instantaneous mpg display, only average, so I couldn’t see mpg under specific conditions unfortunately.

On the way home I reset it again and watched it. Based on some observations it looks like it gets a little over 19mpg on flat roads doing 60 and a little over 17mpg on flat roads at 76mph. Less than I had hoped for, but it does still deliver on smiles per gallon....especially when we were cruising through the beach town with all the windows down listening to the choppy idle. I’m going to come up with some solid test routes and document mpg before swapping to 4.11. Who knows.....with this cam I may see an increase with lower gears? I guess I’ll find out. Oh and I still have my vibration at highway speeds. It’s a fairly high frequency vibration and it’s constant, not rhythmic, like most tire imbalances I’ve felt. I’m starting to think it may be the rear driveshaft. I’ll try to narrow it down further and decide what to do. The 14 bolt swap will include a driveshaft change, so I’m not sure if it’s worth investing in this driveshaft or not.

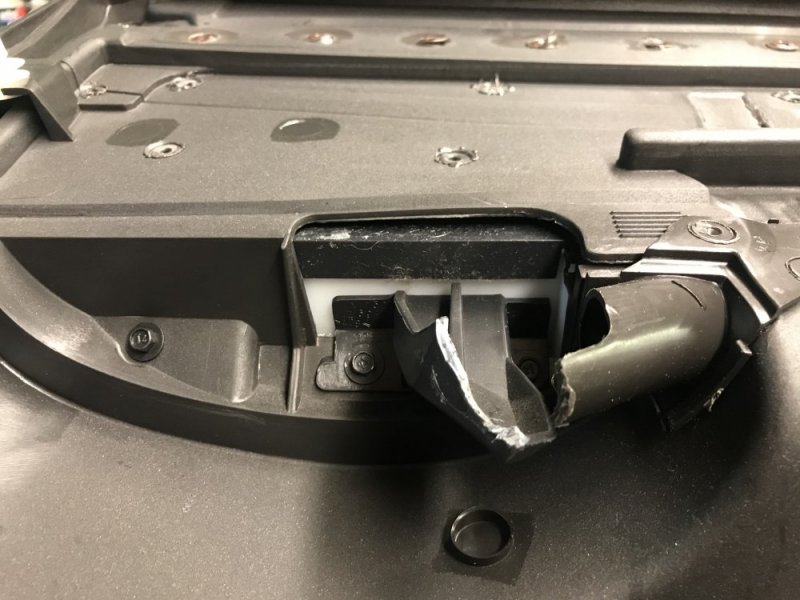
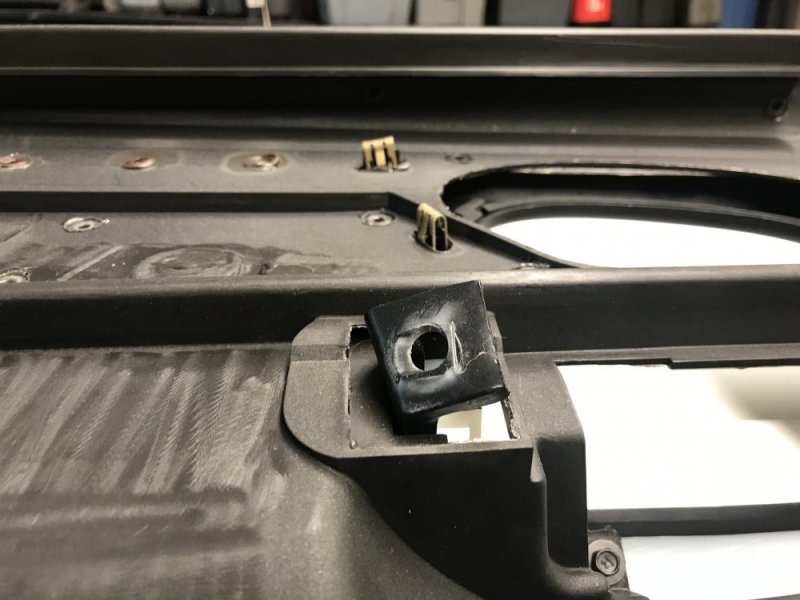
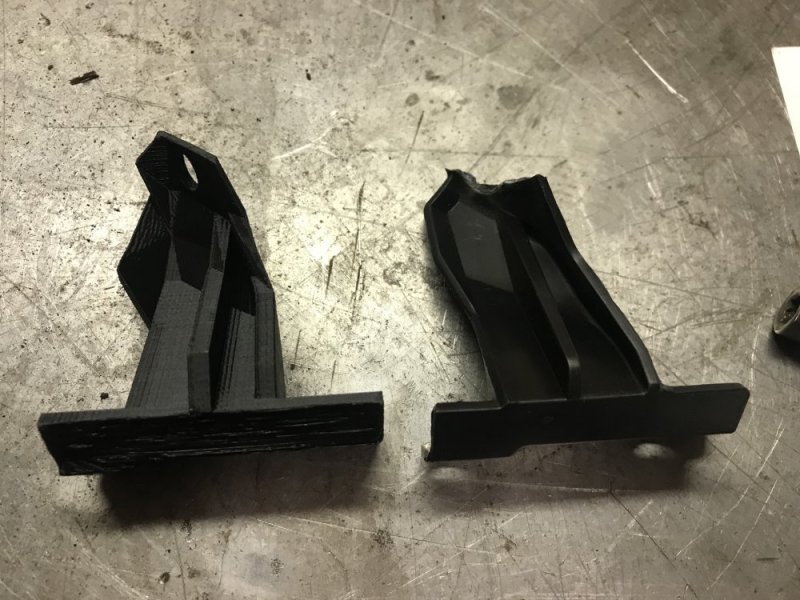
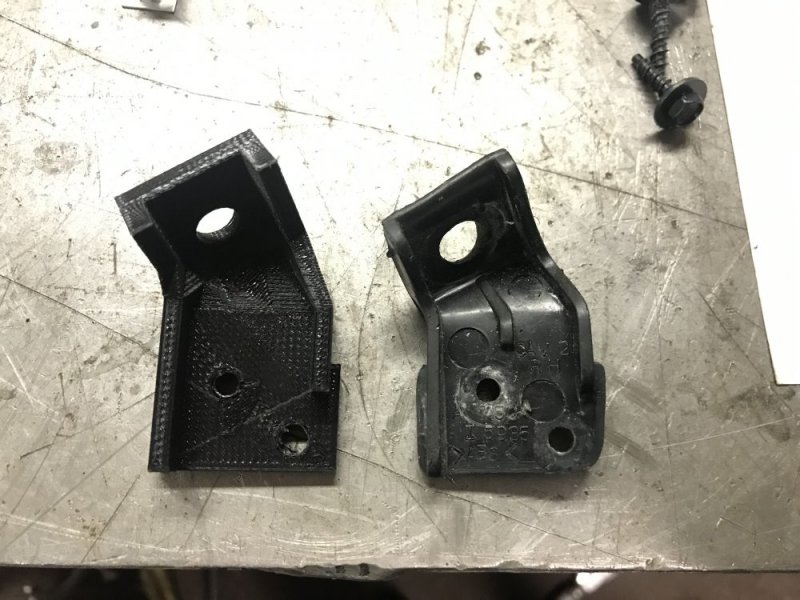
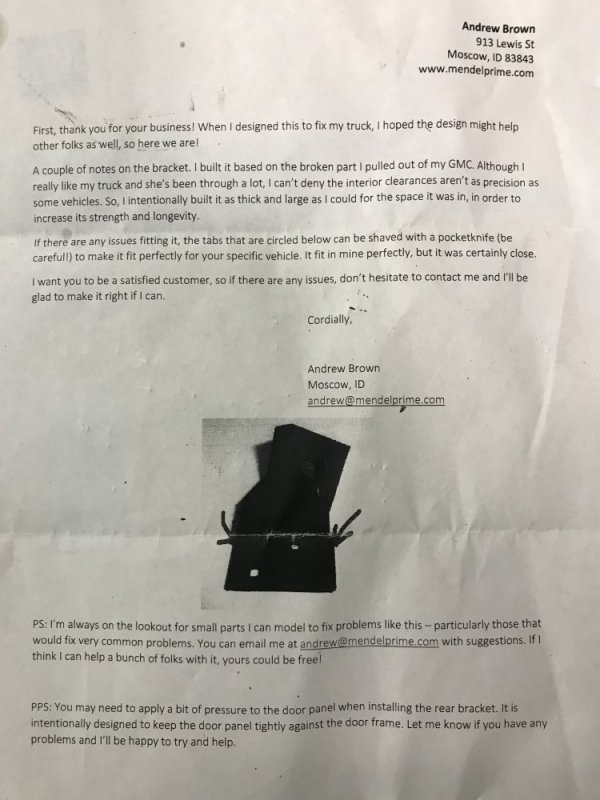
Today I repaired the passenger side door panel attachments. I found a guy on Ebay that 3D prints an improved set of panel attaching brackets. I installed them and they worked great. I’m going to get a set for the driver side too because I think one of those is starting to break.

BE4EA313-92AA-421A-B087-3269D2384A9E.jpeg5FB88C93-A50B-48A0-B862-81EE9D7A5D16.jpeg1C33F22C-4C32-4C60-BD2C-A3C47338EA65.jpegDE080287-3850-4DEC-99BE-6B68ECBCFCBF.jpegA4602BEC-C700-46F8-B483-798F20E185B4.jpeg
 
I do have to say, this Envoy is sure making me appreciate the performance and mileage the Tahoe with the 6.5, which is 1000 pounds heavier and less aerodynamic than the Envoy, was able to deliver. I had toyed around with the idea of swapping a 6.5 into a GMT800 Tahoe or Yukon to get some more creature comforts (mostly dual zone climate control) in a similar sized package.....perhaps that will be my next daily driver project after all.....
 
Last edited:
I’m at 1200 miles on the engine and trans and things are working out pretty well. It hasn’t given me a puff of smoke at start up for a while so I guess whatever was causing that took care of itself.....weird. Sometimes when I would get on it, it would feel really strong and I’d be happy, then other times it would feel kind of doggy. I started to equate it to whether temps were cooler or hotter so I plugged my scanner in to watch the intake temps - I’ve seen IATs of 40-50 degrees above ambient and it seems above 100 degrees is when I feel it getting doggy. And since I’m running 87 I’m sure the tune is much more conservative so it’s probably pulling a fair amount of timing out. So I’m working on plans to make a true cold air intake that will pull the intake air from behind the front bumper, through the fog light opening. That will be happening quite soon.

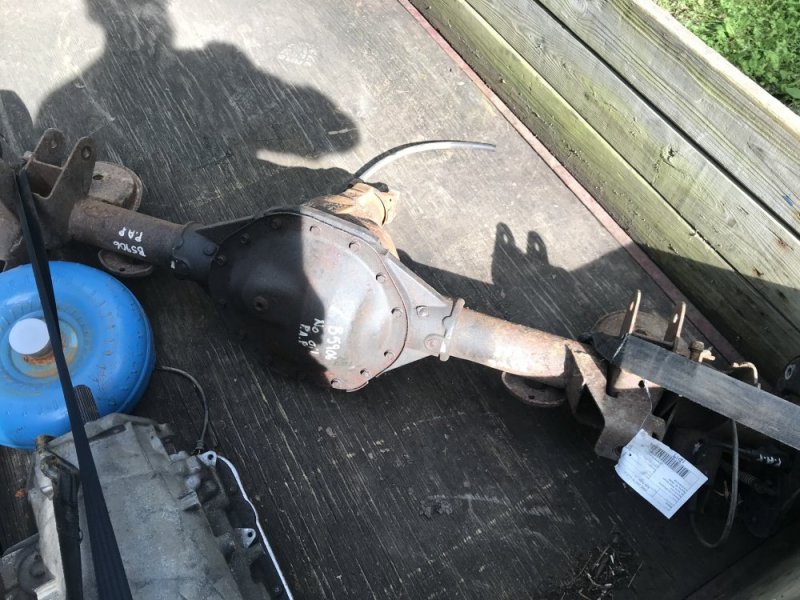
I also got another part of the package tonight: I picked up a TBSS 14 bolt with 4.10 gears and an Auburn limited slip for $200! I couldn’t find a GM number on the gears, but I figured for that price I could afford to buy new gears if these end up being noisy aftermarket gears.

B21EF92A-79B8-4D15-B457-BEC7AEEB3139.jpeg

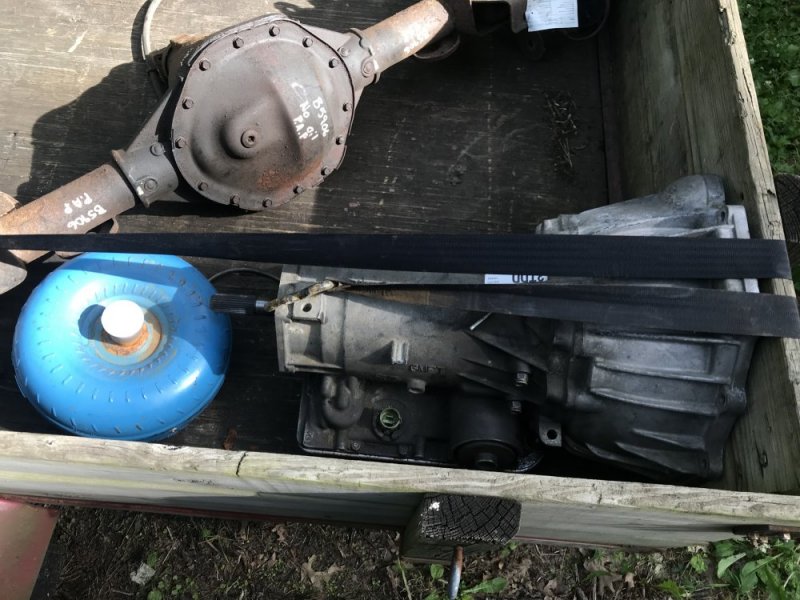
I also got a 4L60e core for $20......because 4L60......

074A0957-346E-43B2-9EB5-F48F8C3CD9F9.jpeg

After the CAI is made I’m going to hit the strip for a baseline, then I’ll put the 14 bolt in and see what the difference is. I still need to do my mpg and nvh baselines too....
 
I’m at 1200 miles on the engine and trans and things are working out pretty well. It hasn’t given me a puff of smoke at start up for a while so I guess whatever was causing that took care of itself.....weird. Sometimes when I would get on it, it would feel really strong and I’d be happy, then other times it would feel kind of doggy. I started to equate it to whether temps were cooler or hotter so I plugged my scanner in to watch the intake temps - I’ve seen IATs of 40-50 degrees above ambient and it seems above 100 degrees is when I feel it getting doggy. And since I’m running 87 I’m sure the tune is much more conservative so it’s probably pulling a fair amount of timing out. So I’m working on plans to make a true cold air intake that will pull the intake air from behind the front bumper, through the fog light opening. That will be happening quite soon.

I also got another part of the package tonight: I picked up a TBSS 14 bolt with 4.10 gears and an Auburn limited slip for $200! I couldn’t find a GM number on the gears, but I figured for that price I could afford to buy new gears if these end up being noisy aftermarket gears.

View attachment 57409

I also got a 4L60e core for $20......because 4L60......

View attachment 57410

After the CAI is made I’m going to hit the strip for a baseline, then I’ll put the 14 bolt in and see what the difference is. I still need to do my mpg and nvh baselines too....
That 4l60e appears to be a 60 degree bellhousing. FYI, it is quite different from your 4l60e. Different bellhousing, different input shaft, different 2nd gear servo(most likely), different seperator plate, and it may be a different valve body as some , even in 03, were not ec3 capable.
 
That 4l60e appears to be a 60 degree bellhousing. FYI, it is quite different from your 4l60e. Different bellhousing, different input shaft, different 2nd gear servo(most likely), different seperator plate, and it may be a different valve body as some , even in 03, were not ec3 capable.
He said it came out of a 5.3 Trailblazer, but wasn't sure of the year (thought it was an 04). I know mine has the input speed sensor, but wasn't sure on the rest of the differences. For the price I figured it was worth getting (he actually offered it to me for free, but I didn't feel right just taking it for free after he gave me such a smokin' deal on the axle). I'll put it in the parts stash and maybe it will get used in another project or maybe somebody else will need it.

I just looked up the tag on the case and it's for a 2003 TB with the 4.2, so definitely not a donor for the Envoy, but maybe it will help a friend of mine out at some point. Or maybe I just helped the guy get another piece out of his barn. Either way, I'm ok.
Hmm i have an 03 4.2 Envoy... LOL mime works ok right now. Just the stupid A/C clutch that you can't purchase alone.
 
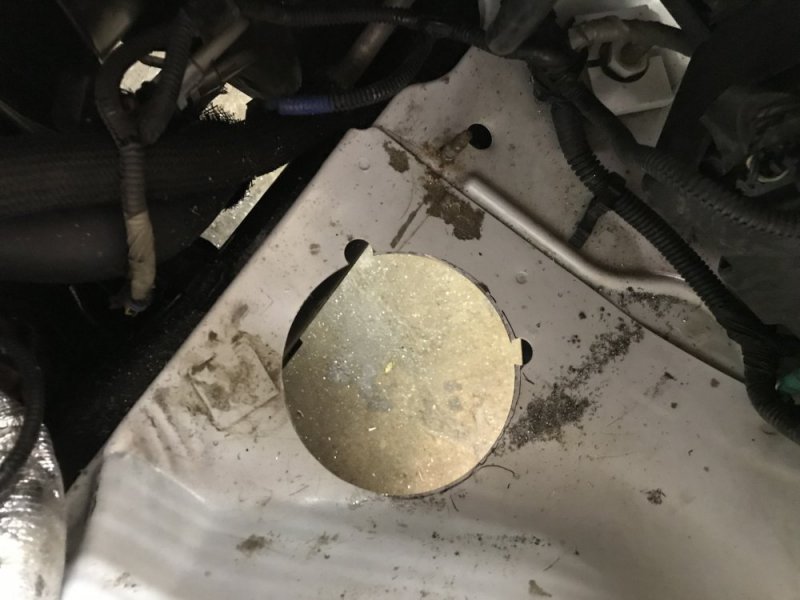
I started working on the cold air intake yesterday. After removing the washer reservoir and the inner fender liner I did lots of measuring.....deciding not only where it made sense for the tube to pass through the fender well, but also where it was going to be best to pass through the reservoir and not affect the functionality of the pumps or the fluid level sensor. Once the location was established I drilled the hole in the fender well with a 5” hole saw.

4C73FFF3-F8A8-413C-A5C0-3F99B739C4CB.jpeg

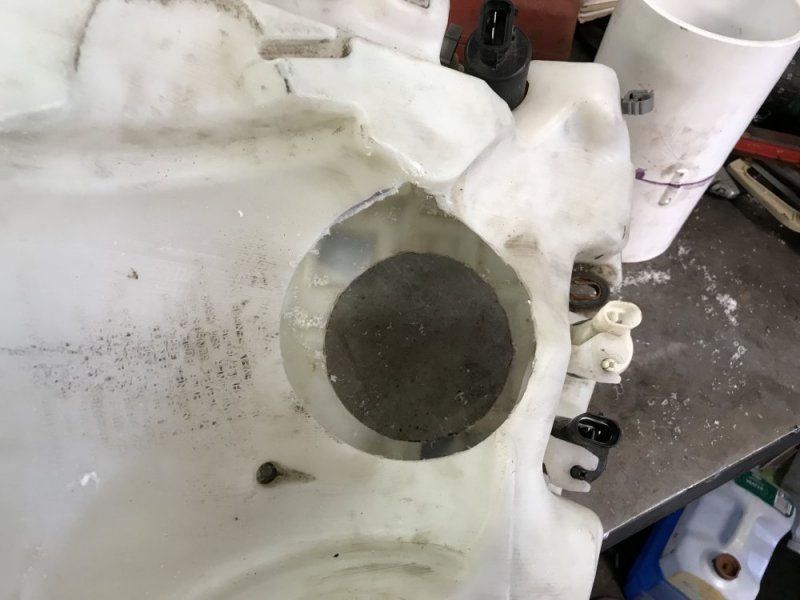
Once that was drilled I reinstalled the reservoir so I could transfer the outline of the hole to the reservoir. Then I drilled holes through the top and bottom. The bottom was pretty easy to drill since it is a relatively flat surface. The top was more tricky due to the irregular shape - I transferred some marks to the inside of the top through the hole in the bottom to get me started, then I cut it out using the hole saw to start and then finish it with a die grinder.

1EB7E4D0-2510-4BC9-BF6E-555749EB3B17.jpeg

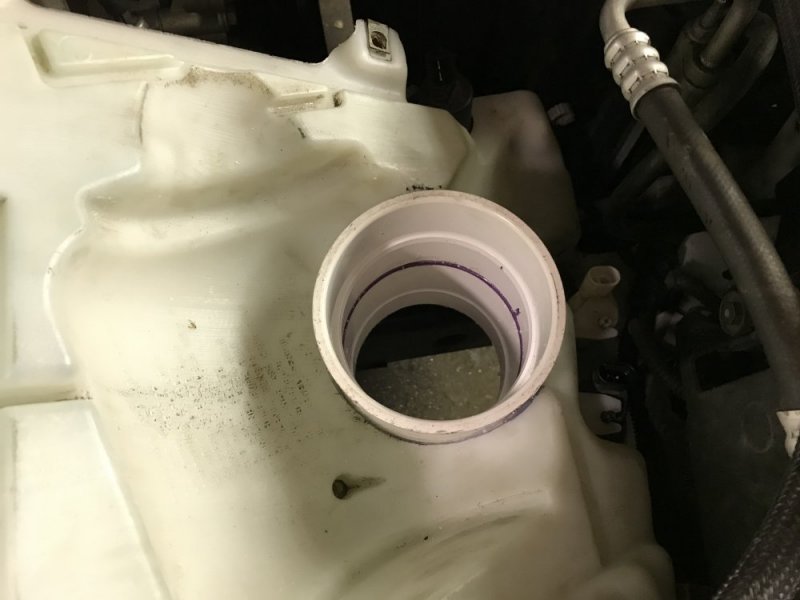
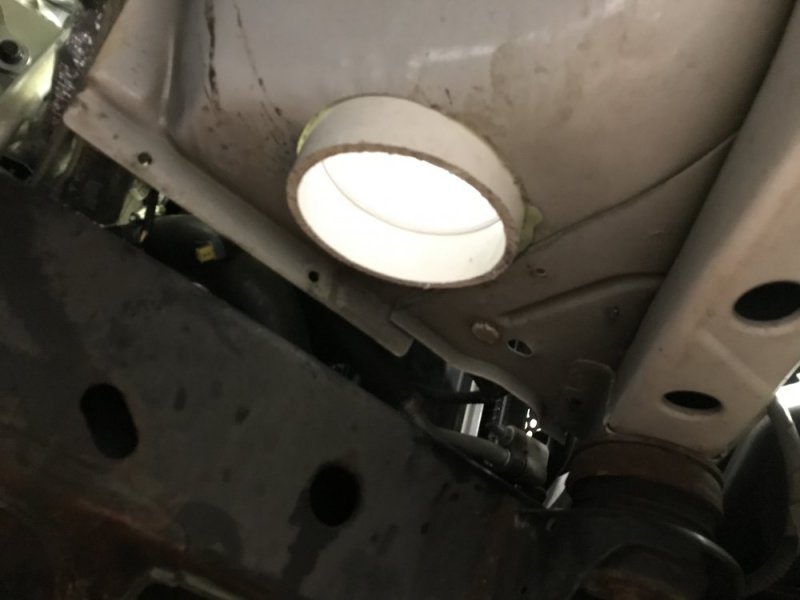
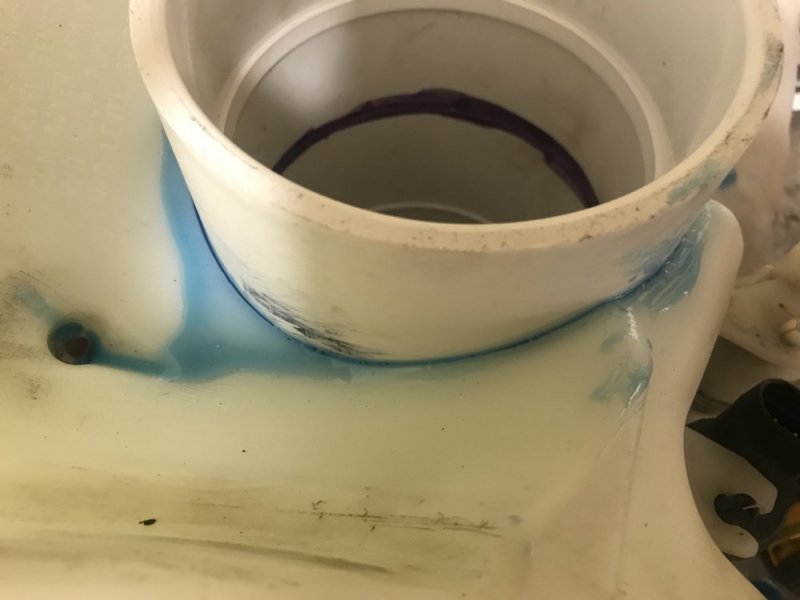
I forgot to take a picture of the pass through tube before putting it in the reservoir. I got 2 PVC 4” couplers and glued them end to end using PCV glue. This gave me enough length to span the height of the reservoir. Here’s what the pass through looks like installed. You can see the seam in the PVC tube (the purple line).

C022B692-579E-43A0-8B73-225540256E3E.jpeg7EF12D8F-A7B1-4F7E-B4E0-989D58430DE3.jpeg

I extended the tube through the bottom far enough so it would function as a grommet for the fender well, protecting the intake from the raw edge of the sheet metal.

41B61223-93FB-4B51-9173-71C7696CB560.jpeg

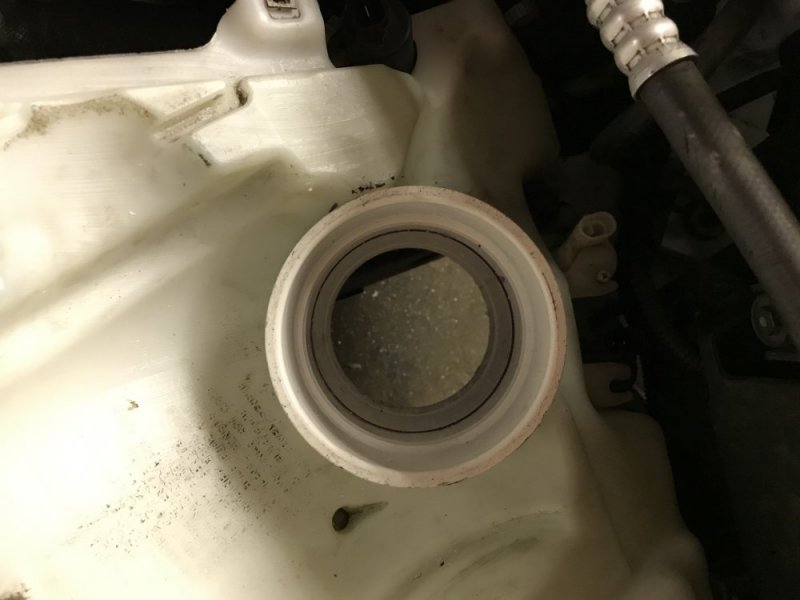
After this mock up I applied epoxy to glue the pass through tube to the reservoir so it could sit overnight. I got some Lord 305 2-part epoxy from work. I’ll see how it turned out when I go out to the barn today. I also applied some KBS Rust Seal to the raw edges of the sheet metal to prevent it from rusting.

The steps for today are to run the tubing for the intake and then figure out the mounting of the air filter. I will also have to trim the inner fender liner and make a plan for protecting the filter from splash.
 
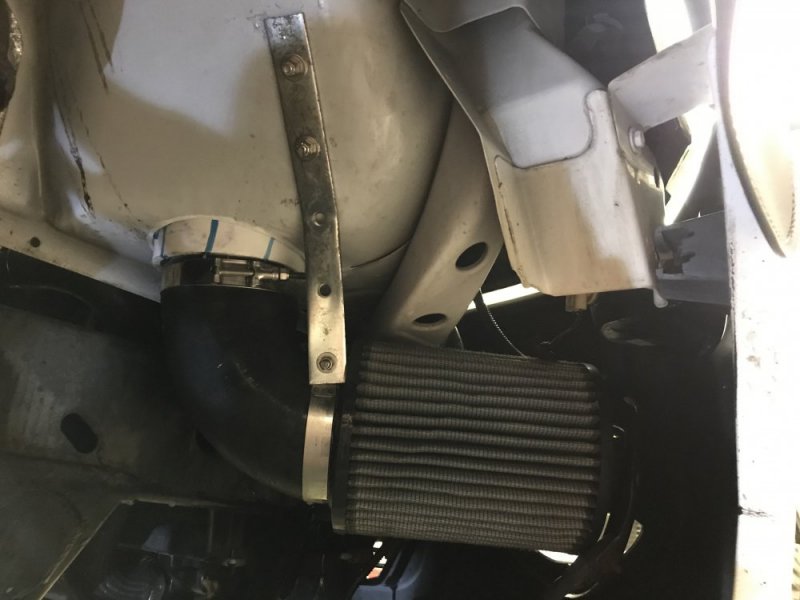
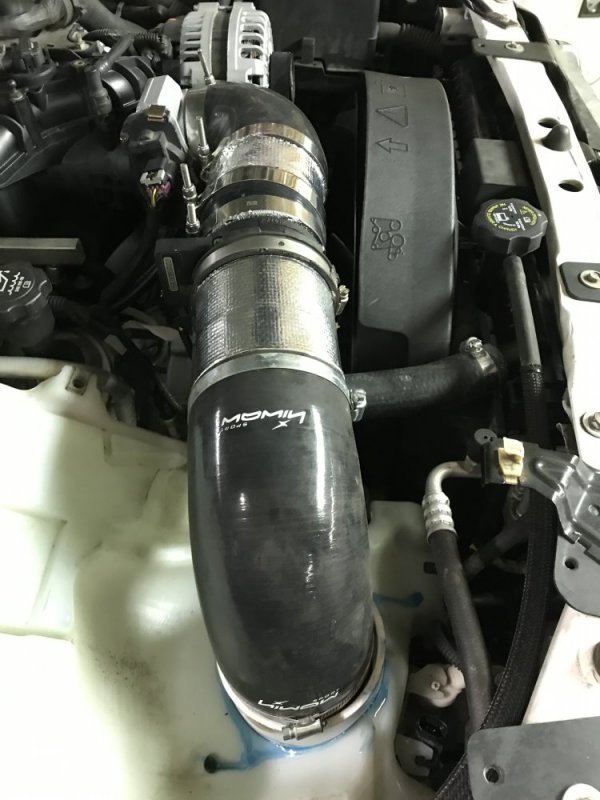
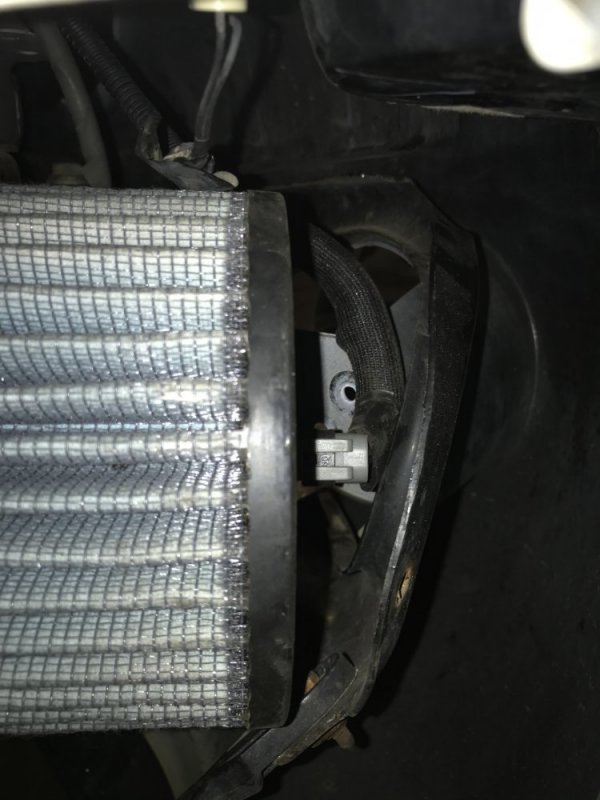
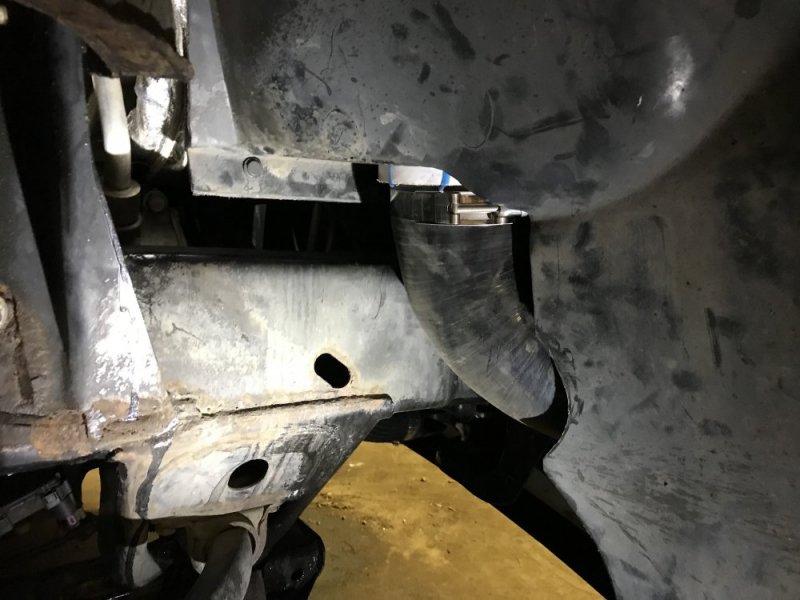
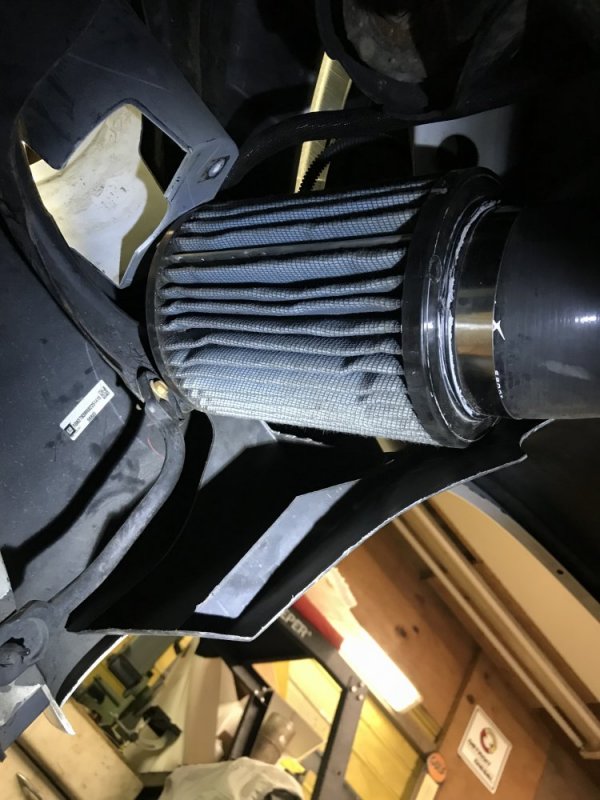
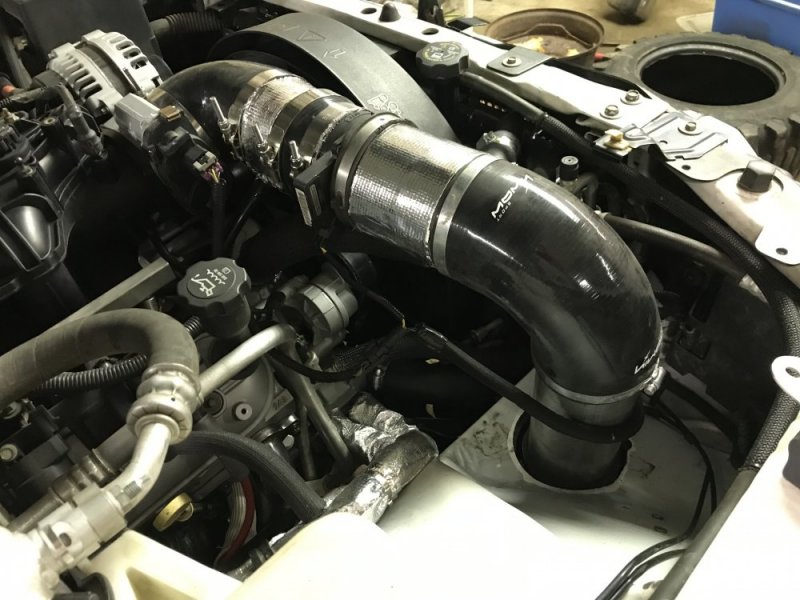
Finished up the intake today. I first started by getting the filter located and braced. It fit pretty snugly with just a simple 90 elbow that was trimmed on one end. The pipe down to the elbow from the engine compartment is an 11” long chunk of 4” exhaust pipe because that’s what I had on-hand. I’ll swap this to aluminum later to save some weight which will make the hanging bracket’s life easier.

6C59ECB8-E587-414B-9AB0-E8811E42EBD7.jpeg

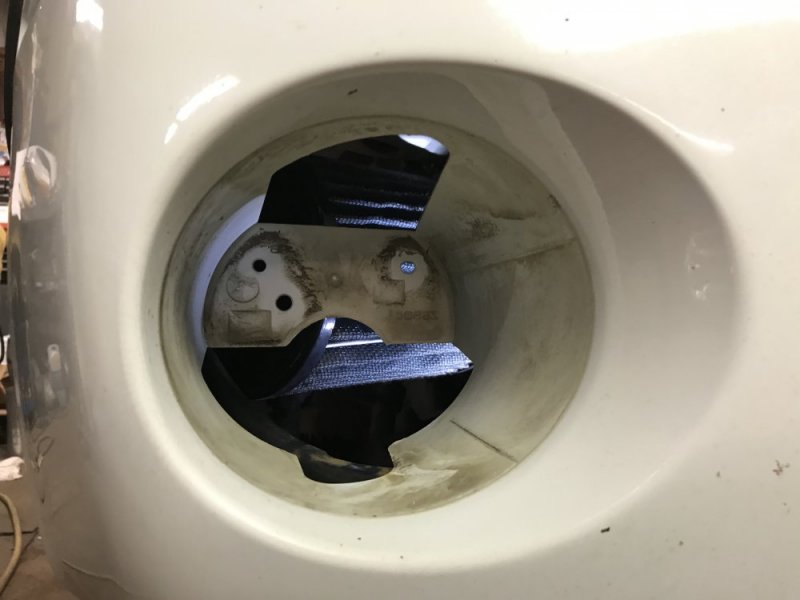
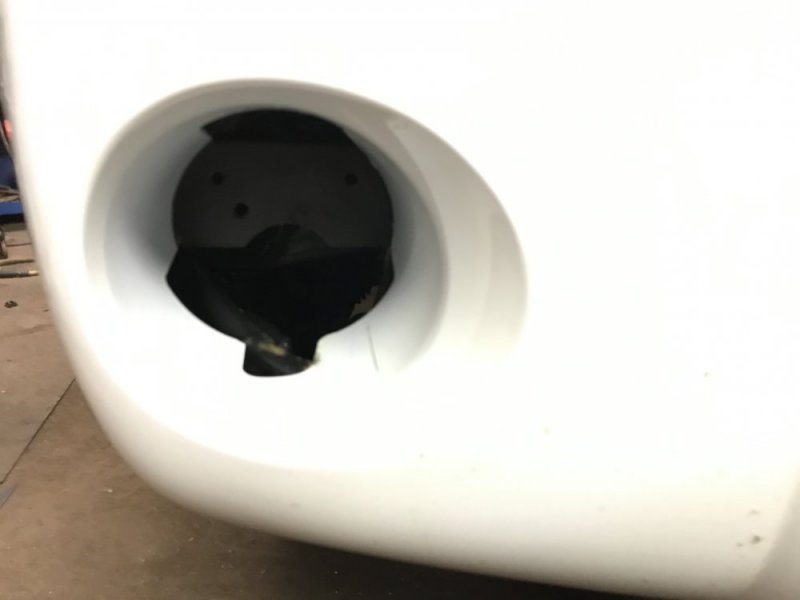
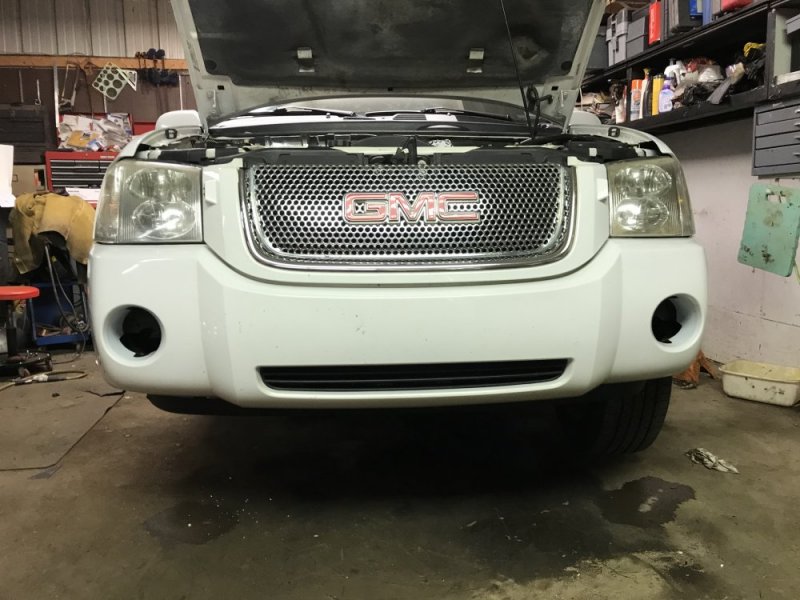
Easy access to fresh air through the fog light opening.

DA21FD05-BFF9-4988-BF75-99F9BF52660B.jpeg

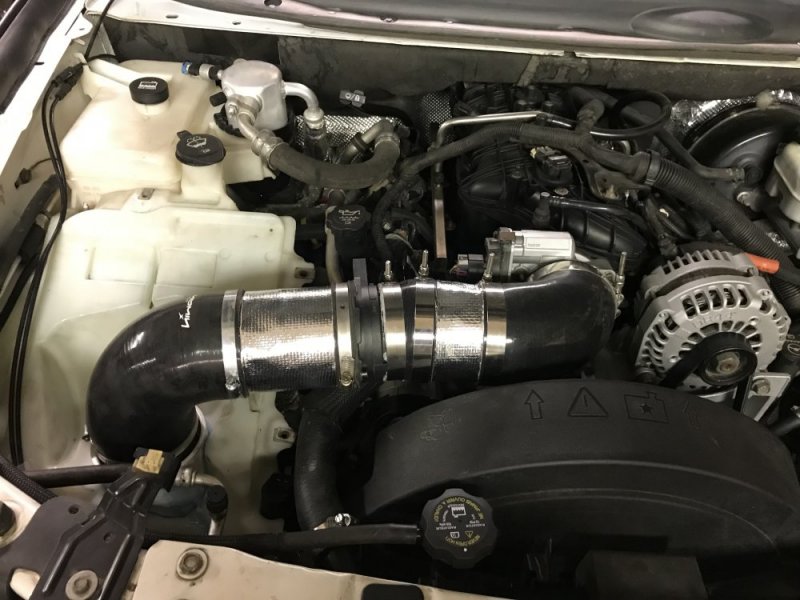
Then I started connecting the dots up top. I didn’t have the exact pieces I would have liked to use, but I made-do with what I had. So it looks a little pieced together, but it does the job. I wrapped the exposed metal pieces with some DEI mat to reduce heat transfer.

A1D20225-79AD-4A57-A1DE-6C61E75D7EC4.jpeg6DCAD639-D201-4DE5-9616-659E4702932D.jpeg

I didn’t want to cut the fog light mounting plates from the fascia in case I ever wanted to put some lights back in or whatever, so I painted them flat black so the openings would look better.

410A2D99-35A5-4289-9F34-18FB9F106AFD.jpeg3B7B0673-E5C4-4EFE-B6DF-5AD33C2AD05E.jpeg

I also had to extend the IAT sensor breakout harness so it could reach the sensor in the relocated filter.

ACB0848E-5A50-4003-978D-F6B4CA4B260D.jpeg

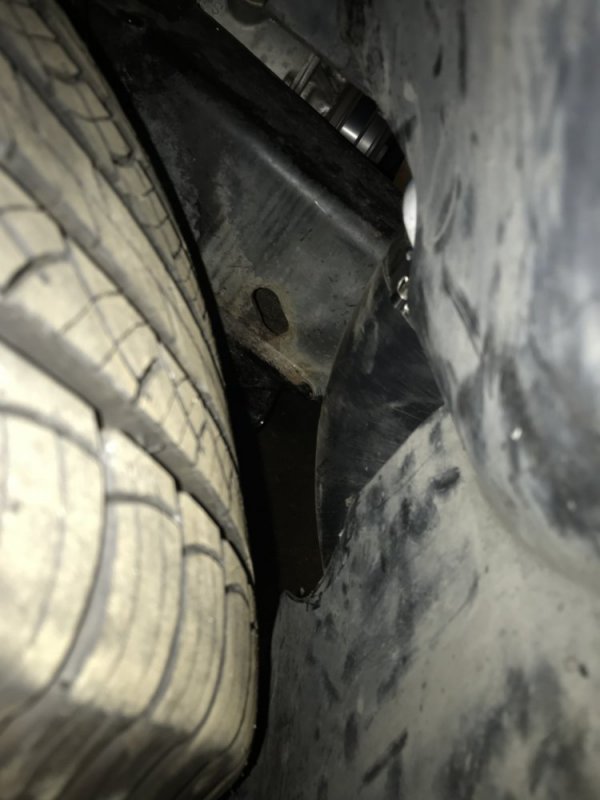
After that was reinstallation of the fender liner. It didn’t take a lot of trimming and it actually protects the filter more than I thought it would. I’m going to get a water-repellant Outerwear for the air filter to give it more protection and then I’ll probably cut up another fender liner to make a little more shielding to make it better able to survive daily driving duties, being so low.

5E96BAE5-E59B-4B6A-98C5-D5FA50ED2D16.jpeg76447705-EAA4-4F41-A568-75AF98A4C6A1.jpeg

It clears the installed tire very well, too.

73811B90-2010-4FB4-84A2-91459BA67E3C.jpeg

Then it was time for the moment of truth - a test drive. It’s in the upper 80s today which would normally give me IATs MUCH higher than ambient - the other day in similar conditions I saw IAT of 51 degrees over ambient! And yes, it was super doggy when it was that hot. Today, my IATs never got 3 degrees over ambient. And it never got doggy, so it was definitely the high IATs that were affecting my performance. However, I got 2 more unexpected benefits that I was happy to experience - 1. The interior noise is even quieter with the air intake that much further away. And 2. I gained 1.5mpg on the freeway at 80mph! It makes sense that I gained the mileage since it wasn’t pulling timing, but I didn’t do the mod to get a mileage benefit, just a nice bonus! I’m very satisfied with the results. Now I can get some solid baseline data before the swap to 4.10 gears. It’s kind of tempting to start running it on 89 gas and get it retuned to see what more might be gained......
 
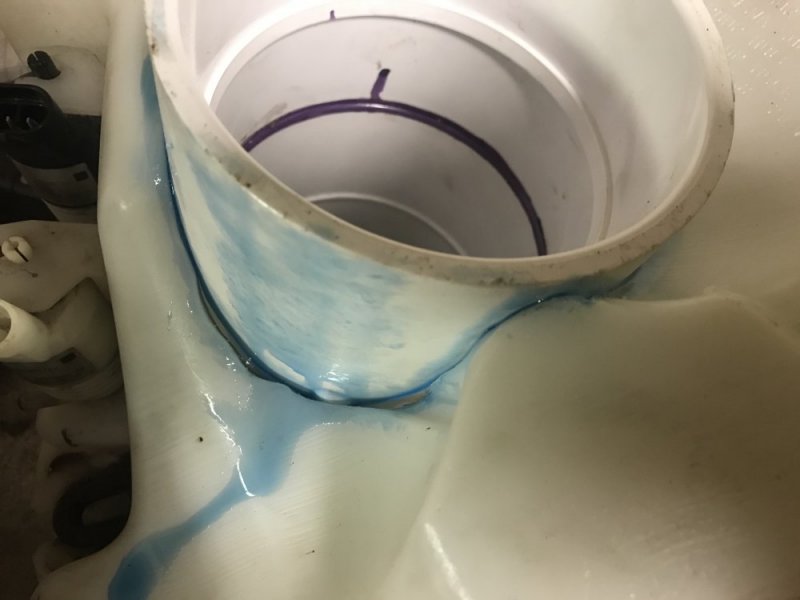
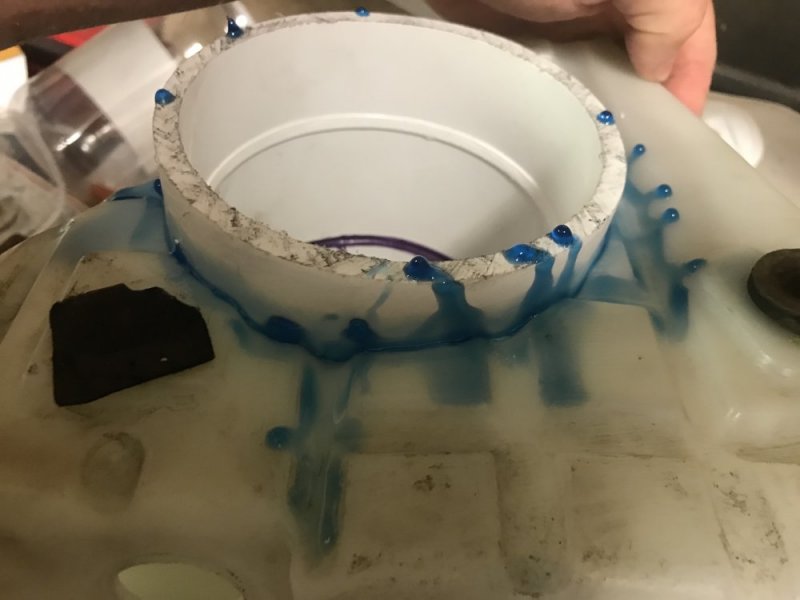
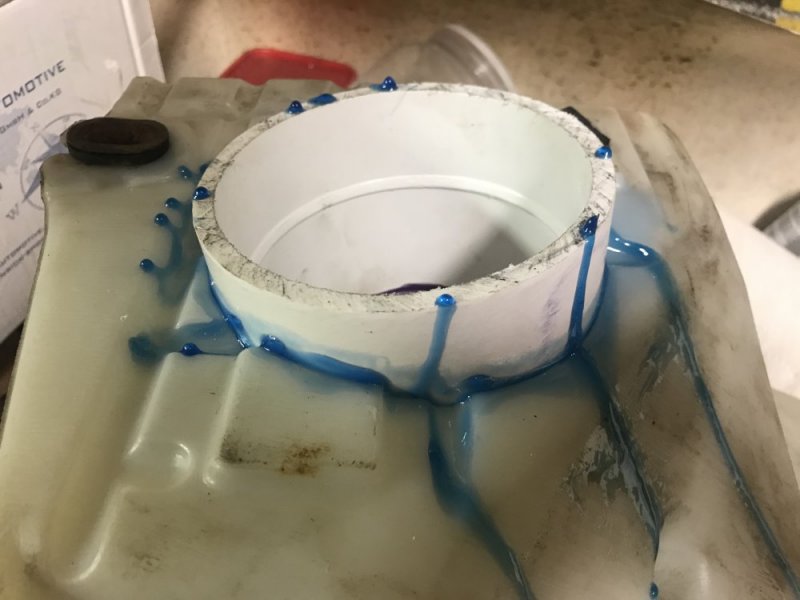
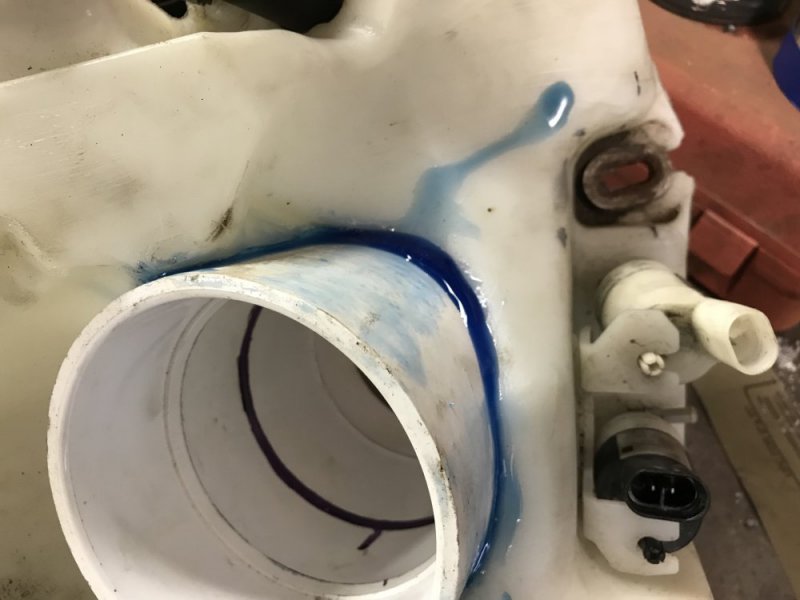
This is what the epoxy dried like. A lot of it ran off, and it’s kind of weird having it the same color as washer solvent.

4A68DF97-0ABE-4D05-8AC1-57885BB955EE.jpeg60BD0B26-6F0B-41E7-A5E8-A6C3F6DA9019.jpeg57FD390F-8084-466D-9EE2-66475CBE6FA9.jpeg36FA27E1-A024-4225-B64D-C9CEB5F8FE33.jpeg

It looked like a good joint except for one spot where I trimmed too much away. Luckily it did give a thin skin over the gap so now I can lay more epoxy on top of that and hopefully build a solid bridge. I have removed the reservoir for adding the additional epoxy and letting it sit 24 hours.

E2280CEF-12D4-4BDA-8318-AFFCF2388244.jpeg

This is what the intake looks like without the reservoir.

FEAB25E2-45D0-426A-BFD6-0272EE9D0AA6.jpeg
 
Kinda surprised you didn't plastic weld it
I’ve never tried plastic welding. Can you weld dissimilar plastics? I assumed the reservoir was ABS and I didn’t have luck finding ABS tubing that size so I went the cheap and readily available PVC route.
 
Ok cool, thanks for the info.
I’ve never tried plastic welding. Can you weld dissimilar plastics? I assumed the reservoir was ABS and I didn’t have luck finding ABS tubing that size so I went the cheap and readily available PVC route.
Pvc will not weld to PE and solvents do not bond well with PE .
 
Back
Top