• Welcome to The Truck Stop! We see you haven't REGISTERED yet.

    Your truck knowledge is missing!
    • Registration is FREE , all we need is your birthday and email. (We don't share ANY data with ANYONE)
    • We have tons of knowledge here for your diesel truck!
    • Post your own topics and reply to existing threads to help others out!
    • NO ADS! The site is fully functional and ad free!
    CLICK HERE TO REGISTER!

    Problems registering? Click here to contact us!

    Already registered, but need a PASSWORD RESET? CLICK HERE TO RESET YOUR PASSWORD!

What did you do with your GMT400 today...or yesterday....

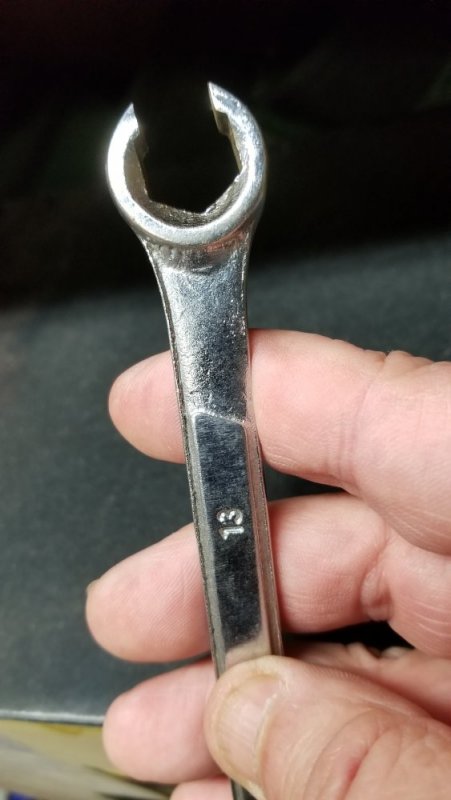
I've always been able to use a 19mm flare nut wrench with an offset handle.

Not familiar with a flare nut wrench.

Anyway, after pulling the IP I cleaned up and showered to go watch the grandson's season opener for T-ball. I got there as they were clearing the field acting as if I saw the whole thing. My wife spent the game talking with in-laws.

I got the crow's foot wrenches after the game. I could have tried to install the pump from the '95, but my foot was screaming from standing on a step stool and leaning over the engine. 80 days out from surgery which included achilles bone spur debridement where the achilles was partially detached from the heel. That type of movement and work really aggravates it. I'll install the IP from the '95 engine next weekend.
 
A flare nut wrench looks like a six-point box wrench, but with an opening in the box on one of the "flats" so that it can be passed over the line the flare nut is on, then slid down over the flare nut. It engages all six corners and five flats and part of the flat on each side of the opening. It is designed to not round off the corners, nor distort the the nut itself, when loosening or tightening flare nuts, which are usually made of brass. Works perfectly for the steel injector line flare nuts on IPs and on the injectors - exactly what it's made for.

The added advantage is that they're much more compact (like the box end of a regular combination wrench) than any Crow's Foot wrench and don't need and extension and ratchet, either. I've always been able the lossen/remove the upper four IP nuts/lines, then rotate the wrench 90° so that the head is parallel to the injection lines, slip it down between the upper lines, then rotate it back 90° so that I can slip the next line down into the box, then slip the box over the flare nut and crack it loose. Then, just like a box wrench, slide it off, reposition back over the next set of flats/points, rotate and repeat until the nut is free of the IP/injector. I repeat the process around the bottom half of the IP head. Takes about five minutes max to remove all eight nuts that way. Installation is the reverse, start with the lowest line and work your way back and forth up the IP head to the uppermost position. About ten minutes max.
 
Last edited:
I always use the 6 point flare nut wrench to loosen the lines then, if they is difficult to get to, use a 12 point FN wrench to finish taking them off. Saves a lot of switching the wrench around to get to the next flat. Sometimes after getting the nuts cracked loose, an open end can be used to get into some weird angles.
Oh yeah, I forgot that the PO on My K3500 had already replaced the oil cooler hoses with Aeroquip steel braid cloth coated hoses, I thought I had better check them hoses only to come to the realization as to what the PO had done. LOL Them oil cooler hoeses I think will be there for a very long time. LOL
 
Which all use some form of. . . .Flare Nut!
Agree 100% and flare nut wrench is the appropriate term imo. Just sharing incase others haven’t herd the term.

@BigT if the added cost isn’t worth the other tools- I get that! Them suckers get spendy! And don’t waste money on cheap ones, that the kinda tool to buyince and cry once.
But it’s good to know what's out there for times you spend 5 hours doing a half hour job, or times you get tired of tearing up your hands, back, and shoulders.

In my truck equipment shop, the same rule applied there as in many aircraft shops- use a normal open end wrench to break free a line once only. The next time will be in someone else shop. Flare nuts are to easy to damage, and often are in the live or die spots.

Tell me about the time lost jerking around on this. In the end I was able to get it done with the driver's side fuel lines removed from the injectors, sliding the pump out and rotating to access the nuts on the bottom lines. Just need to break the nuts free and then they spin off by hand. Did not need to loosen the fuel lines off the passenger side injectors.

Plan was to install the other IP this Saturday, but an emergency arose at our home in Montana. April arrived there this morning and was greeted by a broken supply line to the sink in the master bath. The boiler (yes it had a boiler and we have forced air heating) developed a leak which caused the supply line to fail and so on. Quite a bit of damage as it may have been leaking since she last left at the end of January. It's under control and looks like insurance will be paying for that bathroom she wanted to remodel. I am flying up Saturday to spend a week up there getting things under control.
 
I used one of those fancy flare nut wrenches to remove the stock transmission fluid cooler lines and adapters from the 4L80E to make way for the new custom stainless braided cooler lines. Since I'm losing the internal radiator cooler, I'm upgrading the external cooler to a larger unit with an inline thermal bypass valve. I forget how big of a pain putting AN fittings on stainless braided hoses is, it's so pokey.
 
Time is the big factor most miss in tool selection.
Sucks about the flooded house, but my bet is not really. I’ve seen the work you two do and it is way above most professionals.
Come to think of it, she’s one smart gal. You sure she didn’t mcgyver time bomb it to make it happen before you retire? She is ready to enjoy full time! Haha

On the AN fittings- they sure look nice and hold well. But they are not human friendly.
 
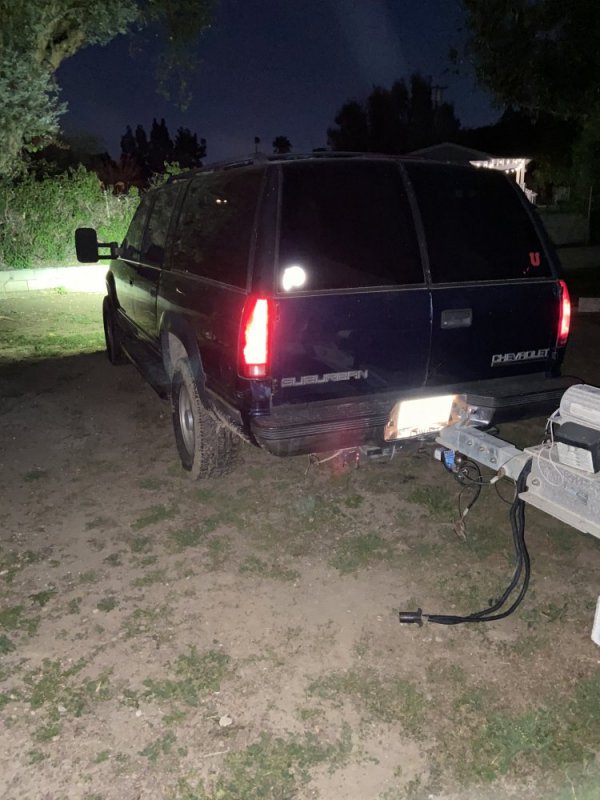
This was over in the electrical forum, but it qualifies here. Thanks to Nanook of the North, aka Les, I fixed my lost running lights by replacing the headlight switch. Very quick and easy job, also due to quick tips by Les.

0310E065-973D-4D77-808A-5CEF649A4CEF.jpeg
 
I used one of those fancy flare nut wrenches to remove the stock transmission fluid cooler lines and adapters from the 4L80E to make way for the new custom stainless braided cooler lines. Since I'm losing the internal radiator cooler, I'm upgrading the external cooler to a larger unit with an inline thermal bypass valve. I forget how big of a pain putting AN fittings on stainless braided hoses is, it's so pokey.
They make a tool for putting AN fittings and hose together, too. Put the fitting in one end, the hose in the other, squeeze the handle and it inserts the fitting into the hose and the stainless braid is under the fitting collar, all nice and neat!;) :joyful:
 
They make a tool for putting AN fittings and hose together, too. ;) :joyful:

I have a pretty good system down. I wrap the hose with a tight single layer of electrical tape then tighten a zip tie next to where I want to cut the hose. That holds the steel fibers pretty well and keeps them from fraying after being cut. I make sure to wear some gloves too to keep from turning my fingers into hamburger.
 
I have a pretty good system down. I wrap the hose with a tight single layer of electrical tape then tighten a zip tie next to where I want to cut the hose. That holds the steel fibers pretty well and keeps them from fraying after being cut. I make sure to wear some gloves too to keep from turning my fingers into hamburger.
I too wrap the steel braid hose with tape before cutting, never tried the pull strap.
A metal cutting chop saw works quite well for the steel braided hose too. I then flush the hose out real good with detergent and water, using a bore brush for scrubbing to remove any grindings.
 
Tell me about the time lost jerking around on this. In the end I was able to get it done with the driver's side fuel lines removed from the injectors, sliding the pump out and rotating to access the nuts on the bottom lines. Just need to break the nuts free and then they spin off by hand. Did not need to loosen the fuel lines off the passenger side injectors.

Plan was to install the other IP this Saturday, but an emergency arose at our home in Montana. April arrived there this morning and was greeted by a broken supply line to the sink in the master bath. The boiler (yes it had a boiler and we have forced air heating) developed a leak which caused the supply line to fail and so on. Quite a bit of damage as it may have been leaking since she last left at the end of January. It's under control and looks like insurance will be paying for that bathroom she wanted to remodel. I am flying up Saturday to spend a week up there getting things under control.
Just seen these ratcheting flare nut wrenches on a fakebook add so I did a innernet search.
Appears to be mighty handy.
 
not same brand but I've seen this video before that shows how to defeat the issue your concerned with. Kinda fat head so tight areas may not work.
In my mind, just use solid wrench to break it free then you can usually spin with fingers. But maybe if it is resistant a long ways the ratchet could be useful. Avoid the ones using plastic heads, all metal only.
 
Back
Top