• Welcome to The Truck Stop! We see you haven't REGISTERED yet.

    Your truck knowledge is missing!
    • Registration is FREE , all we need is your birthday and email. (We don't share ANY data with ANYONE)
    • We have tons of knowledge here for your diesel truck!
    • Post your own topics and reply to existing threads to help others out!
    • NO ADS! The site is fully functional and ad free!
    CLICK HERE TO REGISTER!

    Problems registering? Click here to contact us!

    Already registered, but need a PASSWORD RESET? CLICK HERE TO RESET YOUR PASSWORD!

What did you do with your GMT400 today...or yesterday....

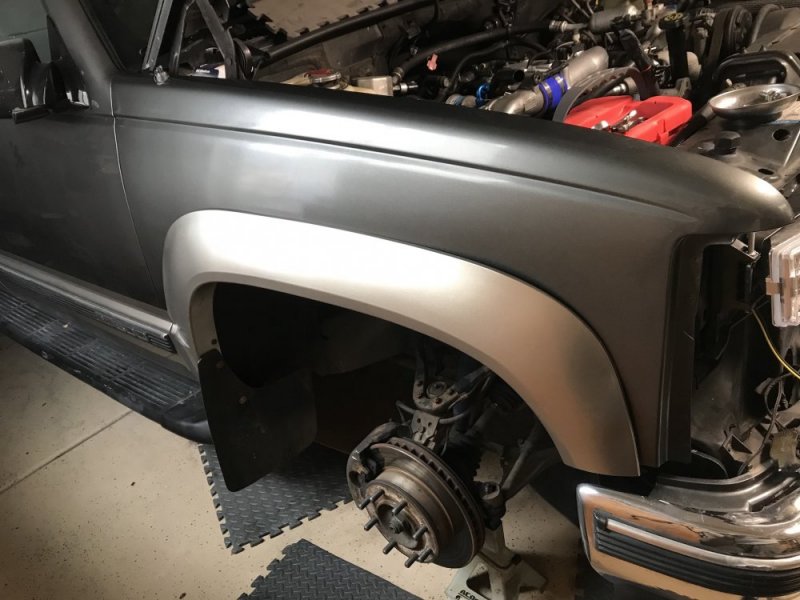
Made a mistake and ended up repainting the fender. Shot it with clear and color sanded with 1000 and 2000 grit before hitting with an aggressive polish and then a fine polish. Flare doesn't quite fit against the fender like it should. I think it may have become disfigured laying weird across all the junk in the shed. Oh well. Its back on and matches the rest of the Burb quite well.
IMG_9758.JPG

Tested the batteries because they wouldn't charge...new batteries.
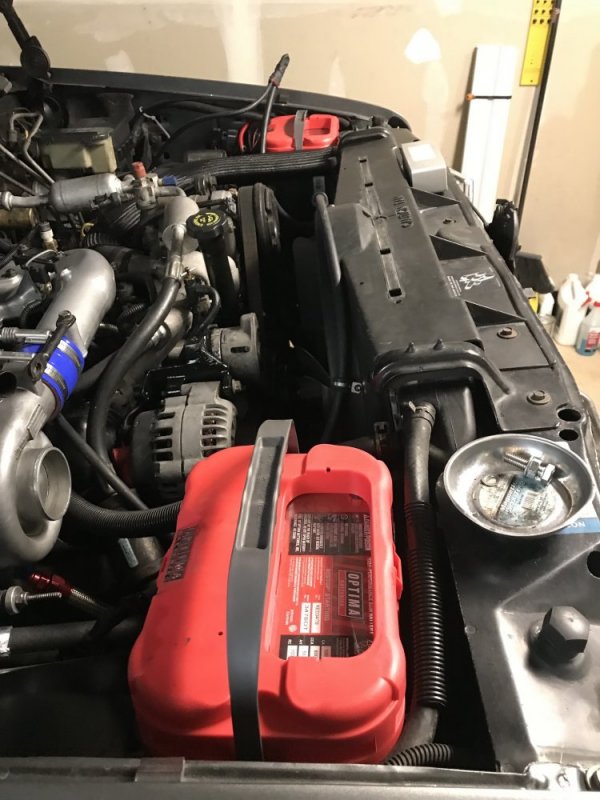
IMG_9759.JPG
 
Keeping side post cables or going to the top post? If you are staying with the old cables till they need swapped, I won’t pick on ya. Just when the new cables go in, consider top post. Even check literature with the new batteries, it shows higher amp draw and better recharge rate through the top posts.
 
Keeping side post cables or going to the top post? If you are staying with the old cables till they need swapped, I won’t pick on ya. Just when the new cables go in, consider top post. Even check literature with the new batteries, it shows higher amp draw and better recharge rate through the top posts.
Good Info on the top post usage but, I'm using the Side Posts. I have the Upgraded Battery Cables from Bruce at PT Wiring Solutions installed. You can see the positive lead on the Driver's Side sticking up. I've got the Positive leads wrapped to prevent arcing while working on everything else. Using the 3/8" nut and bolt routine to attach them. 1" on the negative leads and 1.25 on the positives since there's more going on with those given the double down for the starter side and the added headlight relay connections (Painless HD Harness and 4-Hi Kits) on the driver's side.
 
Bruce makes some great stuff, and go figure with his Nascar experience, right? Only thing is I never saw a single nascar rig use side post, your truck might fail inspection. Haha (guess who I will call when I need glowplug harness)

Yeah, the bolt mod should do great, especially insulting it, but my heart stays true to the top post, where the only “mod” is in the cable upgrade itself.

Nascar may not let you on the track, but your always welcome to stop by in your travels for the burger I owe you.

Thanks. I had the pleasure of meeting Bruce when picking up my first set of cables and glow plug harness. IIRC I also picked up a set for Ted (635) as well. He was working for Rusty Wallace Racing at the time so I also got a tour of the shop. Now that's a garage!

I didn't know you owed me a burger? I'll have to stop in on my next trip through the area.

Refilled the coolant system, hooked up the positive sides to the batteries (only a couple of sparks when one slipped out of my hand and hit the turbo master's threaded rod), then "kicked the [rear] tires and lit the fires" and finally got the Burb started for the first time since, I think, late October. Took a few more cranking cycles than I thought it would. Other than pulling the injectors for testing, I haven't touched the fuel system...yet. But, I checked it over for fuel in the FFM and bled air at #1 injector, found I had a loose fuel return hose at that injector. Still, it finally lit and rattled away happily for a while. Had to really tighten the top transmission coolant line at the radiator.

I also had failed to connect the data cable to the alternator (no tac, no charging) so, out with the 13MM sockets to fix that one. At least I now know what that 'mystery connector' goes too. "This is why we test things."

Guess the Oil Cooler is next. Original owner took the system out when the OEM lines started leaking and didn't replace it with an aftermarket system. Need to fab up a top mounting bracket since he tossed that as well.
 
I could probably come up with a bracket if you want one Paul

I could as well, don't know where the shipping would be the cheapest?

Big thanks to both of you. Shipping would be a pricey thing from Castor so while much appreciated, don't trouble yourself NVW. Alaska would have better shipping but, I could probably swing by AkDiesel's as I owe him a visit anyway. Hey, its only a few miles up the road from Utah right? Seriously, I may be in the area the first part of May as work has me tentatively scheduled to be in Fairbanks through the 10th.

Today's follies:
Swapped out the 1st Generation Heath Air Cleaner (the one S&B sells) from the truck to the Burb. I put the currently marketed unit on the truck. I was going to drop it in the Burb but, the holes were already drilled in the truck's inner fender and the coolant hose on the Burb was giving some negative feed back. Glad I did do the swap because the CDR valve and tube running to the intake was a mess so they got a good cleaning. New CDR's are pricey these days and no, I didn't polish and paint either one of them.
 
Last edited:
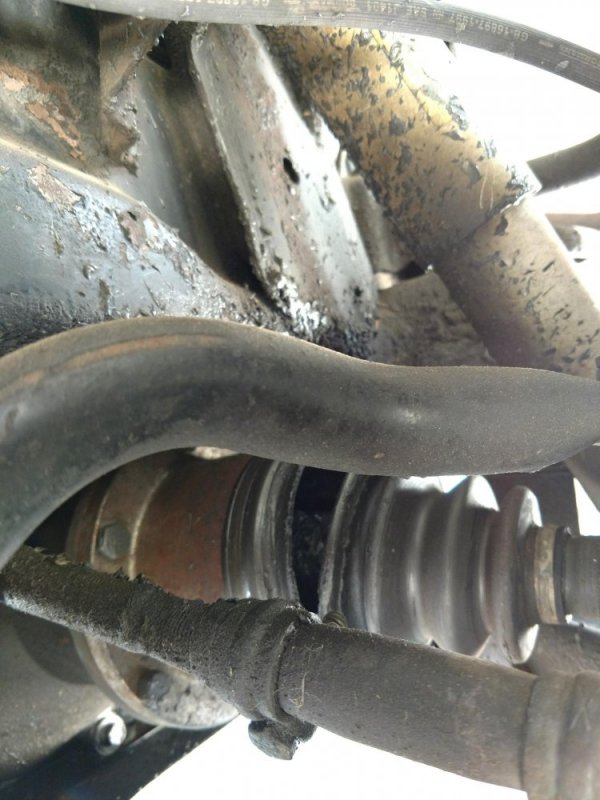
Replaced an inner CV boot on the driver’s side axle. That boot was unique to that axle and the bellows design differed from the outer which was fine. Not a hard job at all.

Note that Rockauto shows an inner and outer boot for the ‘99 K2500 Suburban, 8600 GVW. Moon inner part # 9460 is smaller than the Moog outer part # 9470. The 9470 is the correct sized boot for both, so their site is wrong. Third pic shows the undersized 9460 sitting inside the inner hub. Last pic shows the condition of the outer boot. First two pics show the breach on the inner and the different bellow design that IMO contributed to the failure. Passenger side CV axle was installed the same time and both boots are fine. CV axles on my son's were also installed around the same time and the boots are near failure, so I have more work to do when I get home from NY in two weeks.
 

Attachments

  • C6559597-CA84-4FC4-8BF6-1FE76C91F186.jpeg
    C6559597-CA84-4FC4-8BF6-1FE76C91F186.jpeg
    128.8 KB · Views: 6
  • 2FDD2C83-BA0E-4A18-860C-58B938C1628F.jpeg
    2FDD2C83-BA0E-4A18-860C-58B938C1628F.jpeg
    194.4 KB · Views: 6
  • 416F73D6-C8AA-449C-9FB0-A5AD6E24883A.jpeg
    416F73D6-C8AA-449C-9FB0-A5AD6E24883A.jpeg
    126.2 KB · Views: 6
  • 2A415D7A-F177-46CC-AE6C-0EB6F1D4A46A.jpeg
    2A415D7A-F177-46CC-AE6C-0EB6F1D4A46A.jpeg
    126 KB · Views: 6
  • 080CA8CE-223C-4CD9-9006-D0D4C81C4CF9.jpeg
    080CA8CE-223C-4CD9-9006-D0D4C81C4CF9.jpeg
    93.3 KB · Views: 6
I can't find @THEFERMANATOR notes on the different boot rubber. I thought I read it yesterday... But, exchanging these under warranty is getting old. Edit: oh, there it is: http://www.thetruckstop.us/forum/threads/lets-talk-front-cv-half-axles-1994-k3500.47115/

View attachment 52540
WarWagon, same stye boot that failed on me. The boots with many bellows, like the Moogs I installed, are much better. The one you showed always failes outside the bellow next to the hub.

Note that the new Moog inner that I installed had 6 ribs, while the old outer has 5 ribs. IMO, the more the better.
 
got the brackets cut and welded on the front bumper. welded a stiffener rod between the upper part of the brackets. cut and tacked some sheet to fill in the gap between the upper rod and grille. need to remove the plastic fillers on the fenders and close it with metal. still have a ways to go.
 
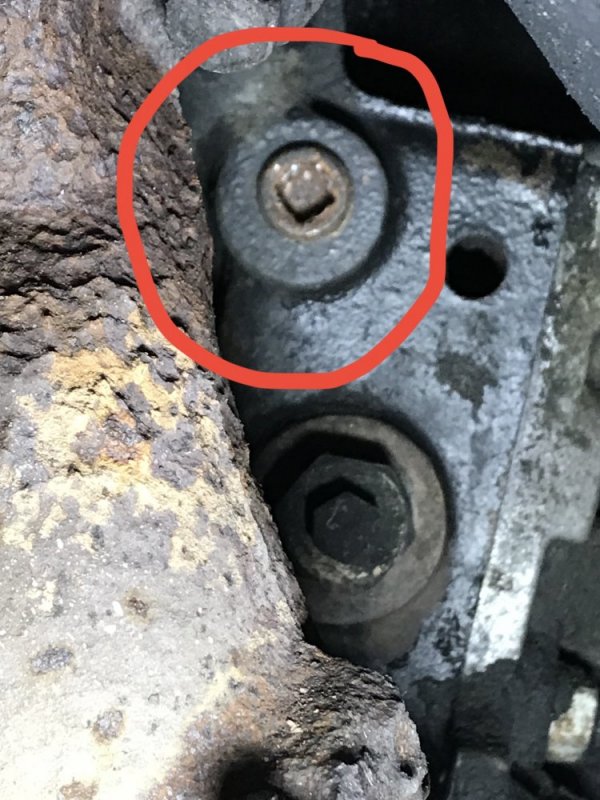
Mud wrestled trying to get this pipe plug out of the block so I can reinstall an oil cooler kit.
IMG_9767.JPG

Original owner removed the oil cooler system when the lines started weeping on the replacement engine (first engine replaced under warranty because of a full blow line out, didn't tow and didn't want to risk another loss so, he yanked it). I'm sure I can get the lower one out but, that square holed plug is tight and I can't get enough torque or leverage with the tool I have. I made a "Rube Goldberg" attempt but, it didn't work. Unable to locate pipe plug socket set locally today, even at harbour freight. Giving up for now and will do a search on line. It's always something.
On Edit, found a set on Amazon. It'll be here Wednesday.
 
Last edited:
Usually just use a 1/2" extension
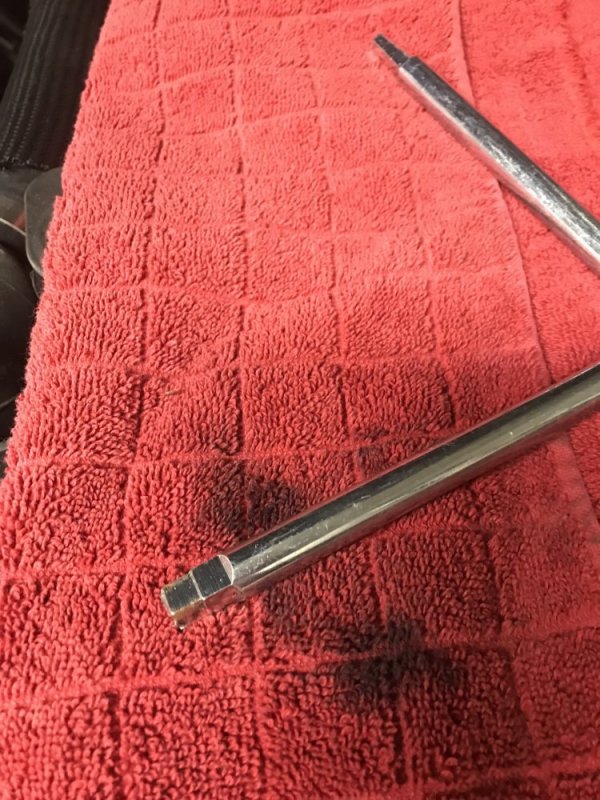
Not this one. 1/2" is much too big. The hole is .28" so a 3/8" extension, which was my first attempt, is too big as well. Second attempt was 1/4" drive...too small. It was starting to feel like a mechanics version of Goldilocks and the the Three Bears. Got an 'L' wrench from a plumbing supply store and cut off the first square step to get at the 2nd which was 'just right.'
IMG_9768.JPG
But, not near enough leverage to budge the plug which the original owner installed at what must be 100 ft. Lbs of torque. Needed the extensions to work, grind something down to size or get the right tool. Were I a welder, I'd have cut the 'L' tool and made that into something...not a welder. No worries, I'm patient and still have to remove some things like the exhaust cross-over (that should be easy), oil filter adapter and then there's the need to fabricate a top bracket for the cooler so I'll wait for Amazon to make my dreams come true. hums "Oh the Wells Fargo man is a coming...."
 
I have a set of those square plug sockets.
Never use a ratchet handle, the square drive will sometimes break right where the ball retainer sticks out of the ratchets drive. Snap On man was kind enough to replace the drive on My 1/2" drive ratchet after I made that mistake.
 
Yes there are a bunch of sizes now unlike it used to be 3/8" or 1/2". idk why- kinda dumb imo.

Often over tightened can be a pain and require heating. Remember impact force loosens threads also, even TAPPING straight onto the fitting with a SMALL hammer helps. Not enough people read and learn how to install npt fittings correctly.
 
yesterday i removed the garage door remote from the visor and mounted it in the overhead console.
raised the back of the repurposed center console to have a better angle for the shifter mounted to it.
cut and welded the end caps for the front bumper but don't like the look so will redo them.
got the speedo working after connecting the correct connector. hasn't worked since i had the trans rebuilt and installing the TCI controller.
 
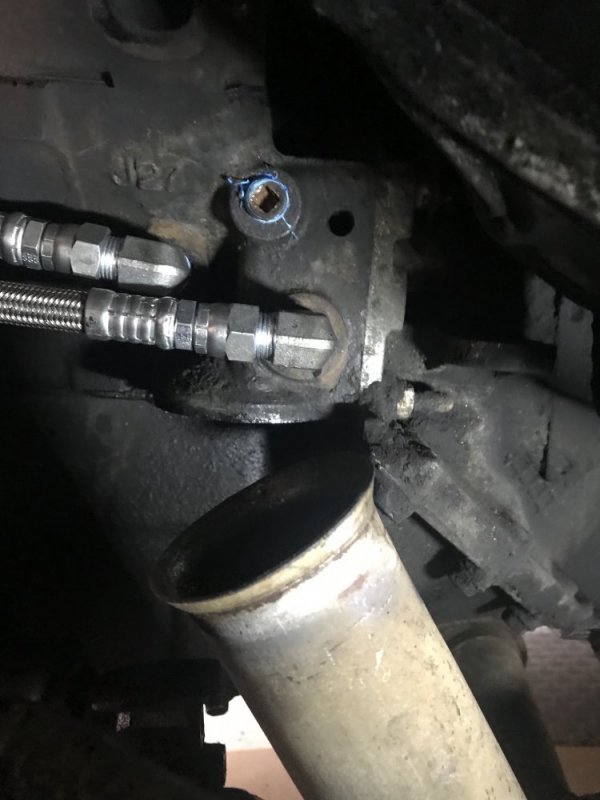
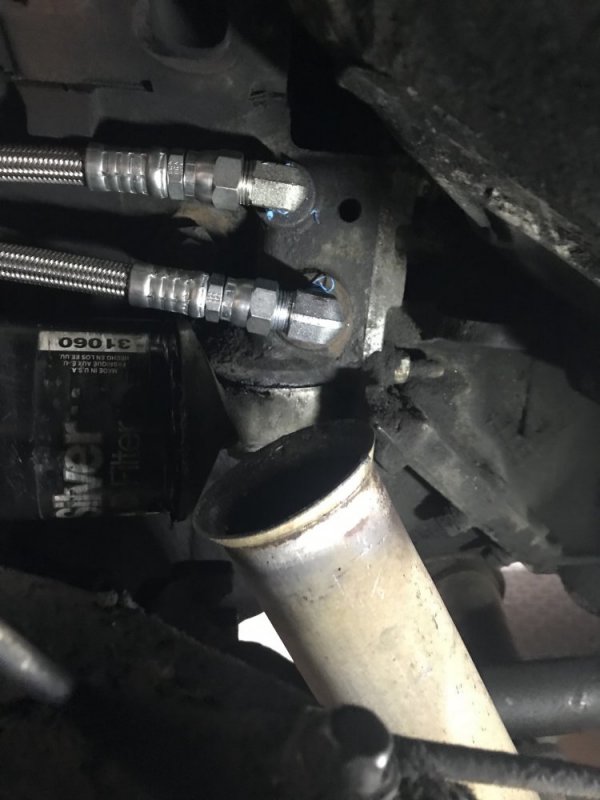
Got the oil cooler in. Removed the cross over and exhaust manifold as well as the 4x4 oil filter adapter. Very glad that I took off the manifold because it revealed the correct oil cooler line port and it isn't the one blocked by the pipe cap. Figures.

Correct:
IMG_9774.JPG

Not correct:
IMG_9773.JPG
Guess which one I did first?

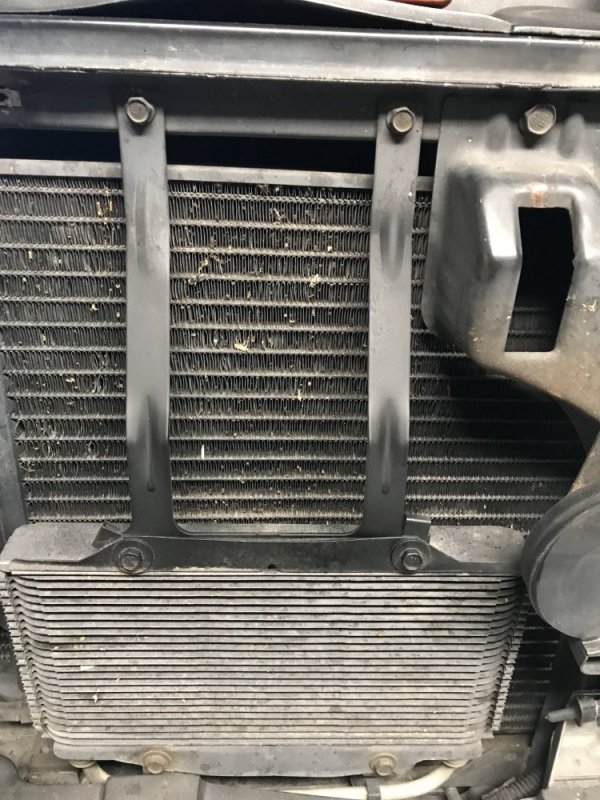
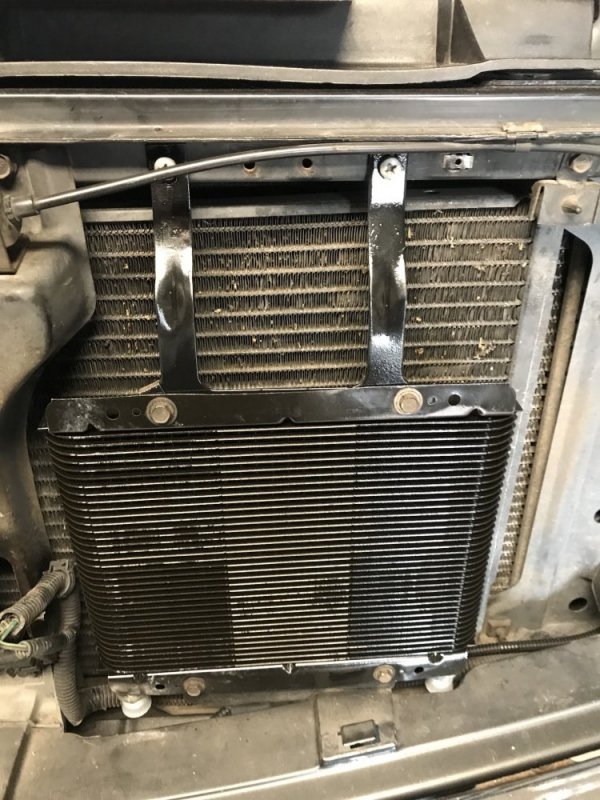
Oil Cooler top bracket fabricated from a spare transmission cooler bracket
Transmission cooler
IMG_9769.JPG

Fabed upper oil cooler bracket
IMG_9772.JPG
 
Back
Top