• Welcome to The Truck Stop! We see you haven't REGISTERED yet.

    Your truck knowledge is missing!
    • Registration is FREE , all we need is your birthday and email. (We don't share ANY data with ANYONE)
    • We have tons of knowledge here for your diesel truck!
    • Post your own topics and reply to existing threads to help others out!
    • NO ADS! The site is fully functional and ad free!
    CLICK HERE TO REGISTER!

    Problems registering? Click here to contact us!

    Already registered, but need a PASSWORD RESET? CLICK HERE TO RESET YOUR PASSWORD!

What did you do with your GMT400 today...or yesterday....

Ten miles to get to the next AZ parts store. WOW.
Ten miles here, in any direction, puts You a good distance from anything besides farm or ranch land. 😵‍💫🤓😹😹😹
Three parts stores in town. All three maybe a mile and a half, two at the most, and all three within a 1/4 mile of each other. 😹😹😹😹
It’s not the distance, its the company.
 
AZ is famous for asking all the questions when your in there getting something for your tractor or farm equipment. LOL I have never seen a real parts man in there! One who you can just walk up to the counter lay the old one there and they know exactly what it is and not have to open a computer or book to get it! ( of course anyone at AZ don't know what a book is) in my home town they have a famous name.... Vato Zone!! every low rider in town including cheech n chong will be there on the weekends with their hoods up and up on jacks pulling engines and what not!!
 
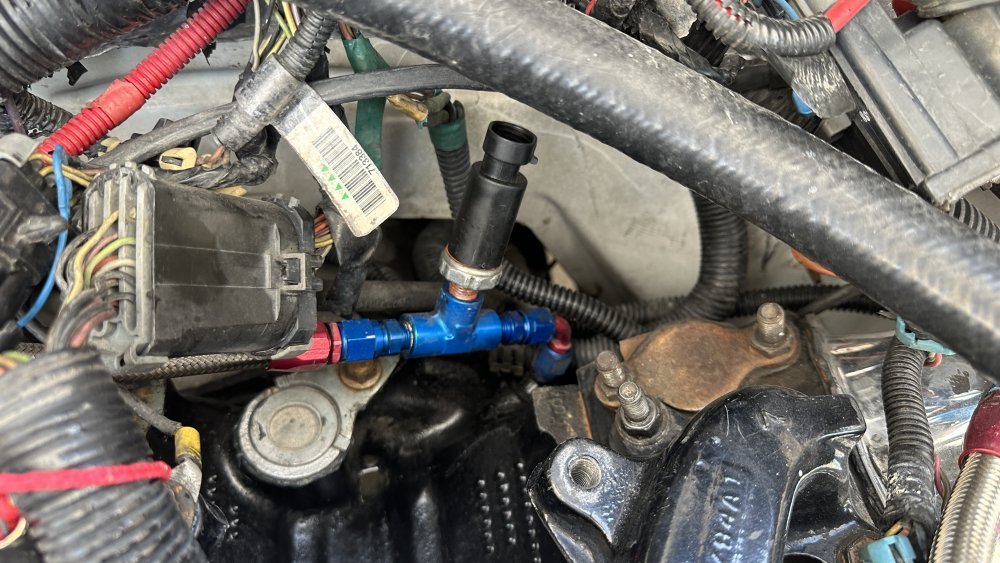
Replaced the Optima Red Tops and, ‘since I’m in there,’ decided to re-do the OPS/Turbo Oil Feed T set up.
Since the block is a 660 (N/A) it doesn’t have a port in the valley for the OPS or one up front for turbo oil feed.

There’s only one “convenient” port…in the back…behind the driver’s side head an inch away from the valley and a couple of inches from the fire wall…under the Glow Plug Relay. Easy to get to when the engine is out and sitting on a stand. Not so much once installed. Wheels off, resting the knuckles on 2x4’s with the hood off helped with the gymnastics but, still a fine definition of ‘royal PIA.’

I went fancy after initially using brass but, it turned out the fittings weren’t metal and didn’t provide a path to ground soI had to cobble up a ground wire for the OPS (1996 means no ground= “no oil pressure” so, no fuel and no start).

The fancy assembly had started leaking enough to mark territory and with the weird starting issues I had tried to re-do things earlier this month. So I suspected the recent attempt to correct things neither fixed the leak nor made a good OPS path to ground.

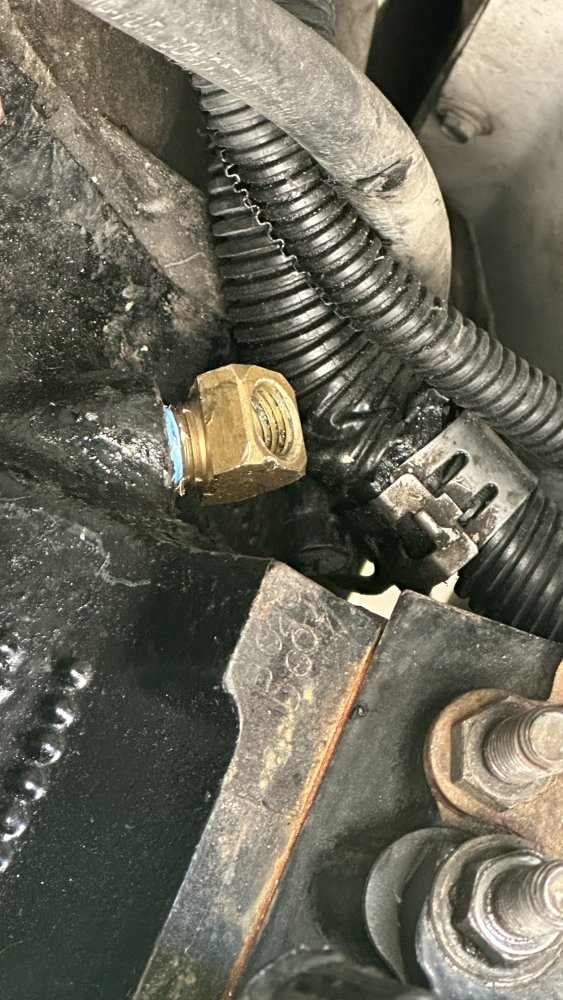
Old set up (ground wire removed).
IMG_7530.jpeg

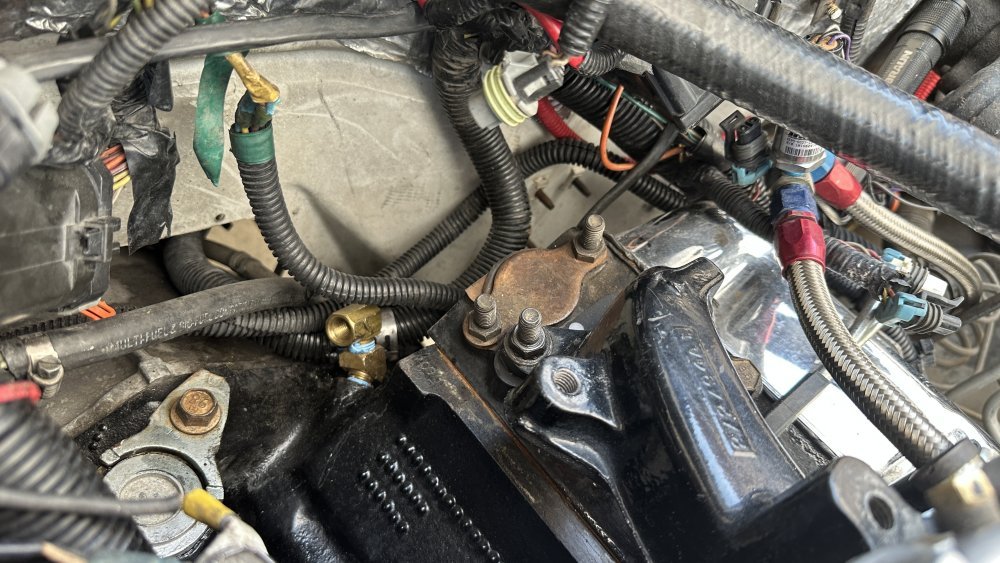
30-40 minute flexibility and agility test getting the 45* fitting at the port.
IMG_7532.jpeg

90* fitting thread into place. Another agility/leverage battle.
IMG_7533.jpeg

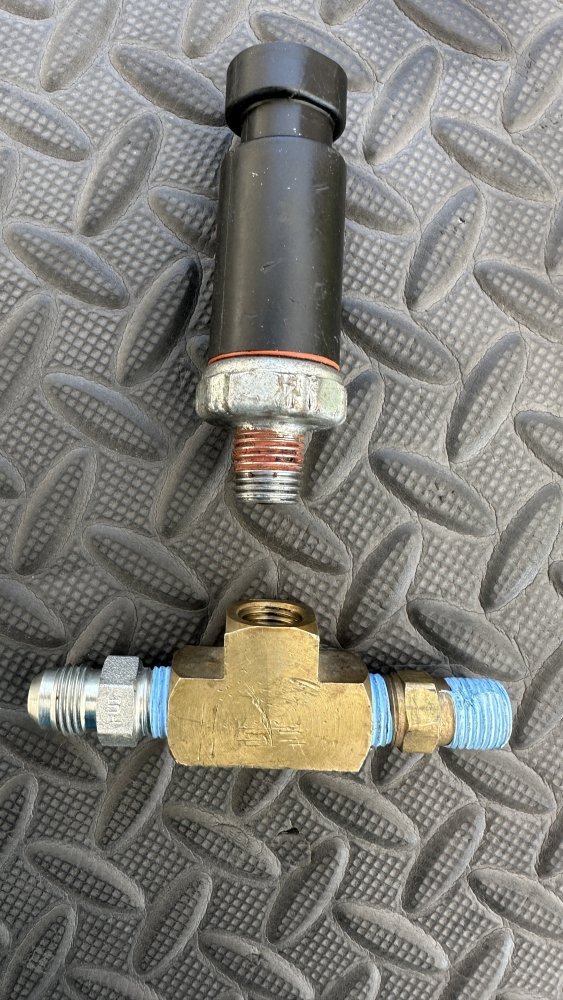
Brass set up
IMG_7534.jpeg
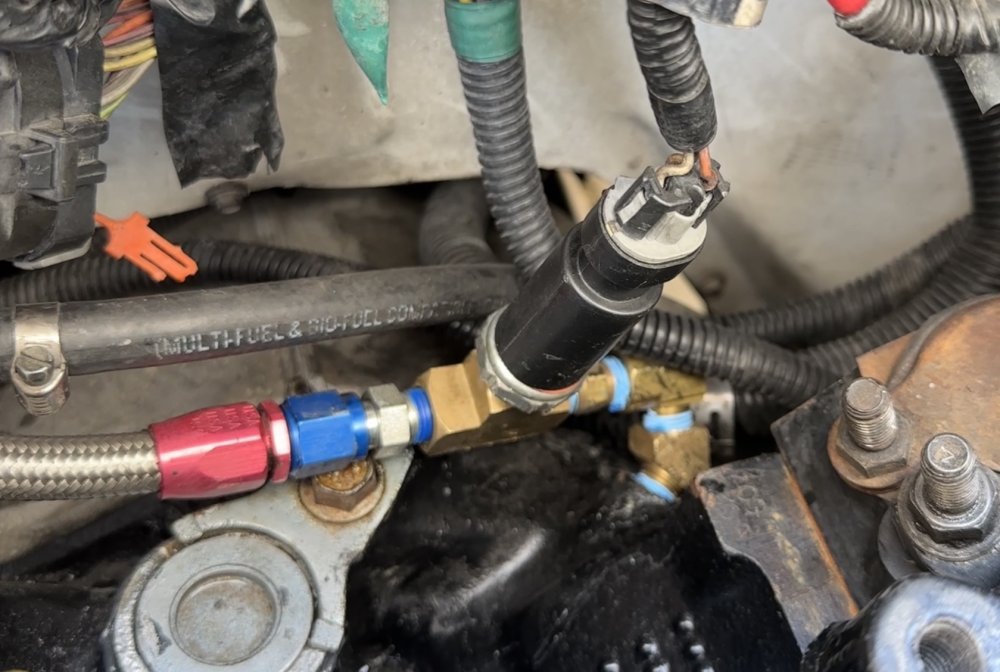
IMG_7540.jpeg


With new Optima‘s and correct OPS set up, the engine spun so fast, like the glow plugs weren’t in, and it lit in about one second flat.

Two more ‘to do’ items off the project list. Down to less than one page with the 4x4 actuator circuit diagnosis and repair being the only real ’priority‘ item.
 
Replaced the Optima Red Tops and, ‘since I’m in there,’ decided to re-do the OPS/Turbo Oil Feed T set up.
Since the block is a 660 (N/A) it doesn’t have a port in the valley for the OPS or one up front for turbo oil feed.

There’s only one “convenient” port…in the back…behind the driver’s side head an inch away from the valley and a couple of inches from the fire wall…under the Glow Plug Relay. Easy to get to when the engine is out and sitting on a stand. Not so much once installed. Wheels off, resting the knuckles on 2x4’s with the hood off helped with the gymnastics but, still a fine definition of ‘royal PIA.’

I went fancy after initially using brass but, it turned out the fittings weren’t metal and didn’t provide a path to ground soI had to cobble up a ground wire for the OPS (1996 means no ground= “no oil pressure” so, no fuel and no start).

The fancy assembly had started leaking enough to mark territory and with the weird starting issues I had tried to re-do things earlier this month. So I suspected the recent attempt to correct things neither fixed the leak nor made a good OPS path to ground.

Old set up (ground wire removed).
View attachment 82454

30-40 minute flexibility and agility test getting the 45* fitting at the port.
View attachment 82455

90* fitting thread into place. Another agility/leverage battle.
View attachment 82456

Brass set up
View attachment 82457
View attachment 82458


With new Optima‘s and correct OPS set up, the engine spun so fast, like the glow plugs weren’t in, and it lit in about one second flat.

Two more ‘to do’ items off the project list. Down to less than one page with the 4x4 actuator circuit diagnosis and repair being the only real ’priority‘ item.
When I was working at the back of the engine, laid a 4X4 block atop of each battery, laid a nice 12” plank across the 4X4s and then I was able to lay on the plank and reach the electrical connectors at the back of the engine to scrub each one of those clean.
I dont know how well that would work in Your situation but it sure made it comfortable for the situation I was working on.
 
Replaced the Optima Red Tops and, ‘since I’m in there,’ decided to re-do the OPS/Turbo Oil Feed T set up.
Since the block is a 660 (N/A) it doesn’t have a port in the valley for the OPS or one up front for turbo oil feed.

There’s only one “convenient” port…in the back…behind the driver’s side head an inch away from the valley and a couple of inches from the fire wall…under the Glow Plug Relay. Easy to get to when the engine is out and sitting on a stand. Not so much once installed. Wheels off, resting the knuckles on 2x4’s with the hood off helped with the gymnastics but, still a fine definition of ‘royal PIA.’

I went fancy after initially using brass but, it turned out the fittings weren’t metal and didn’t provide a path to ground soI had to cobble up a ground wire for the OPS (1996 means no ground= “no oil pressure” so, no fuel and no start).

The fancy assembly had started leaking enough to mark territory and with the weird starting issues I had tried to re-do things earlier this month. So I suspected the recent attempt to correct things neither fixed the leak nor made a good OPS path to ground.

Old set up (ground wire removed).
View attachment 82454

30-40 minute flexibility and agility test getting the 45* fitting at the port.
View attachment 82455

90* fitting thread into place. Another agility/leverage battle.
View attachment 82456

Brass set up
View attachment 82457
View attachment 82458


With new Optima‘s and correct OPS set up, the engine spun so fast, like the glow plugs weren’t in, and it lit in about one second flat.

Two more ‘to do’ items off the project list. Down to less than one page with the 4x4 actuator circuit diagnosis and repair being the only real ’priority‘ item.
I gave up on brass fittings after Will said they don't hold up to the new diesel.
Now I just restock with stainless, if I restock at all.
 
Brass is fine for oil- just not for fuel.

And sad to see only 13 years from the Optima batteries. Ya got ripped off by a couple years, get the feeling ya didn’t charge them fully while the truck was out of commission? Well, at least ya don’t need that trip again until into the 2030s a ways. I keep telling people ignore that Mexico optima= bad nonsense. That was started by people who were mad they closed the USA plant.

My plan is to roll the dice on the Oddessy ones next time but if they fail I will go back to optima.
 
Brass is fine for oil- just not for fuel.
Yep. I never know what I'm going to end up using any fitting for. Could be anything from air to potable water. So stainless has me covered.

..I try to keep some stuff around and I can get by with what's here most of the time.
Otherwise it's a 2 hour round trip to someplace that might have what I need
 
When I was working at the back of the engine, laid a 4X4 block atop of each battery, laid a nice 12” plank across the 4X4s and then I was able to lay on the plank and reach the electrical connectors at the back of the engine to scrub each one of those clean.
I dont know how well that would work in Your situation but it sure made it comfortable for the situation I was working on.
It wasn't laying on top of the motor so much. I had thick rubber padding for that. It was climbing up and down so many times. Too many miles with a pain bag on my back after parachute jumps. Body just doesn't do 'flexibility' so well these days.
 
AZ is famous for asking all the questions when your in there getting something for your tractor or farm equipment. LOL I have never seen a real parts man in there! One who you can just walk up to the counter lay the old one there and they know exactly what it is and not have to open a computer or book to get it! ( of course anyone at AZ don't know what a book is) in my home town they have a famous name.... Vato Zone!! every low rider in town including cheech n chong will be there on the weekends with their hoods up and up on jacks pulling engines and what not!!
Do they ask for gender?
 
I've been driving the Jetta all week and had the truck parked under the pecan tree! pulled the truck out today and decided to wash it since the birds had decorated it!! crawled underneath to start looking for things in preparation for our drive in August to the coast. found an inner tie rod with a slight amount of play. Not bad but will need to be addressed soon, also found that both the rubber bushings on the rear shocks where they connect to the rear axle have squished out to the side. gave them a good look and I soon realized there is nothing there to keep them from sliding out. both are the same, shock slid over to one side and the rubber bushing on the other.

they are ac delco air shocks and other than the bottom bushings they are find. I need to see if I can find replacement bushings or make up something for them.
 
Something else I was looking at while I was under the truck is the rear springs. I want to see what I can do to give it a slightly smoother ride temporarily at least until I decide if I want to replace the springs or install some air bags back there. the air shocks hold the truck quite well with a low amount of air pressure but the leaf packs sit about 1/4" or less away from touching the ends of the overloads.

I think the roughness is coming from the leaf packs bouncing and contacting the overloads. looking at the mounting on the U-bolts and the center pin on the leaf packs, there doesn't seem to be a center pin or bolt at the bottom on the overload. making me think about trying to loosen the U-bolts and see if the overload will slide out where I could flip it up side down.

is there a center bolt or pin holding the overload to the leaf packs? I can see a round hole or cutout on the weldment mount on the rear axle where the springs sit and the U-bolts attach. I can feel a center pin from the top of the leaf packs but there is nothing on the bottom. the overload doesn't even have a hole there, all is flat though the hole on the mount pad where the U-bolts attach.
 
Welp... here we are again lol. I decided to look at the truck checking to see what a popping noise was as I turn the wheel to the right. didn't seem to find anything but I discovered my truck had eaten yet another idler arm bracket! time for another replacement.

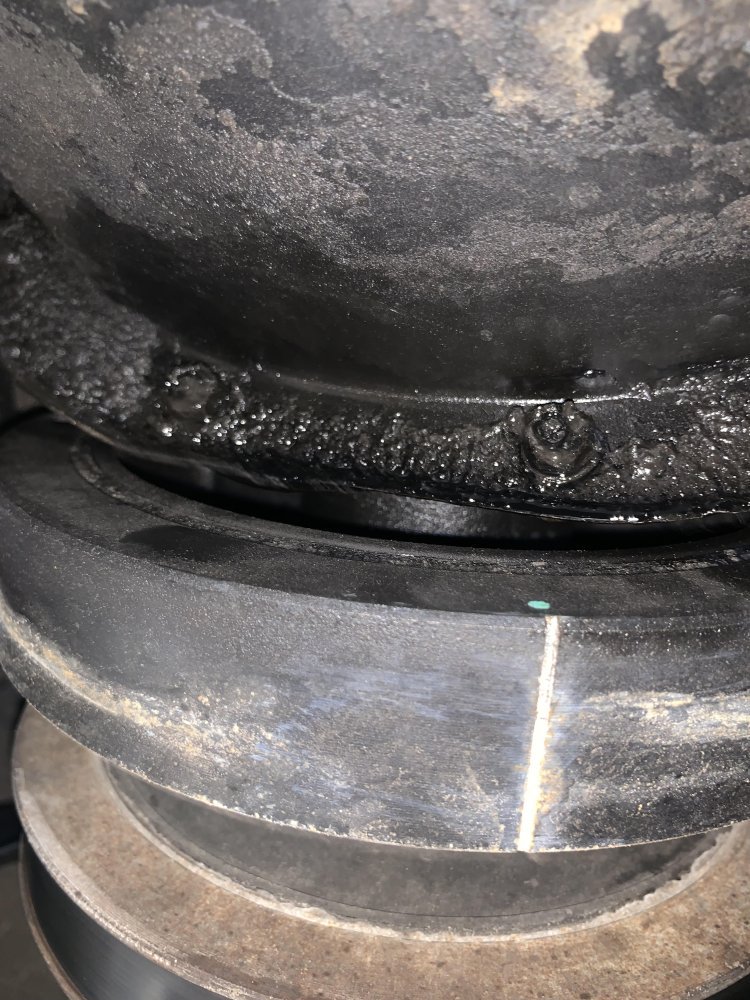
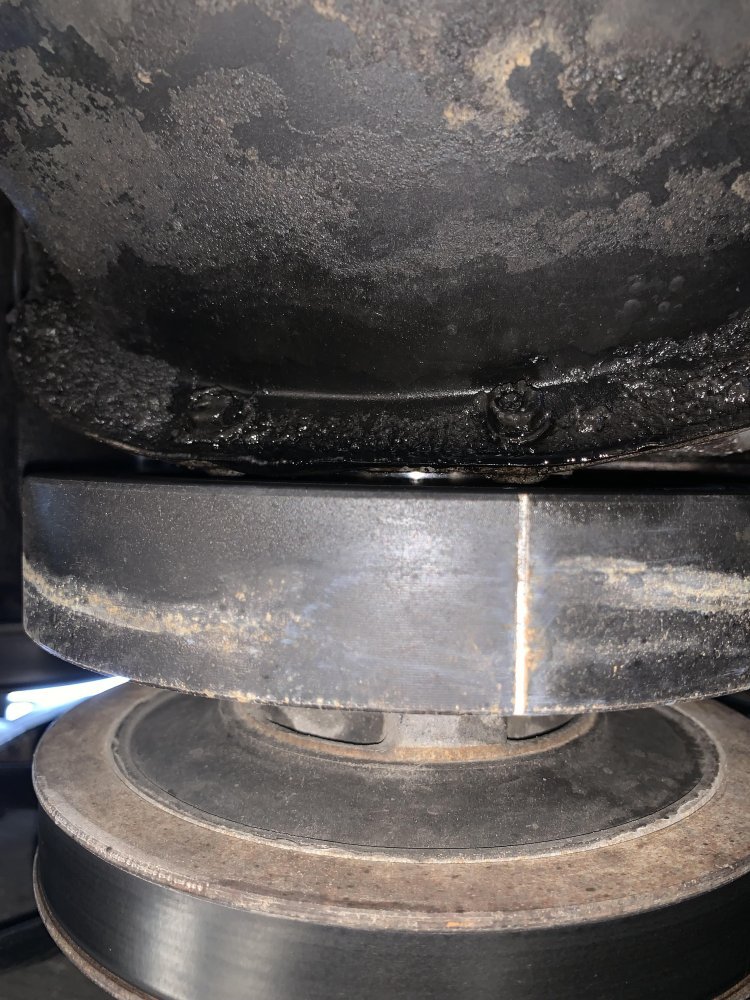
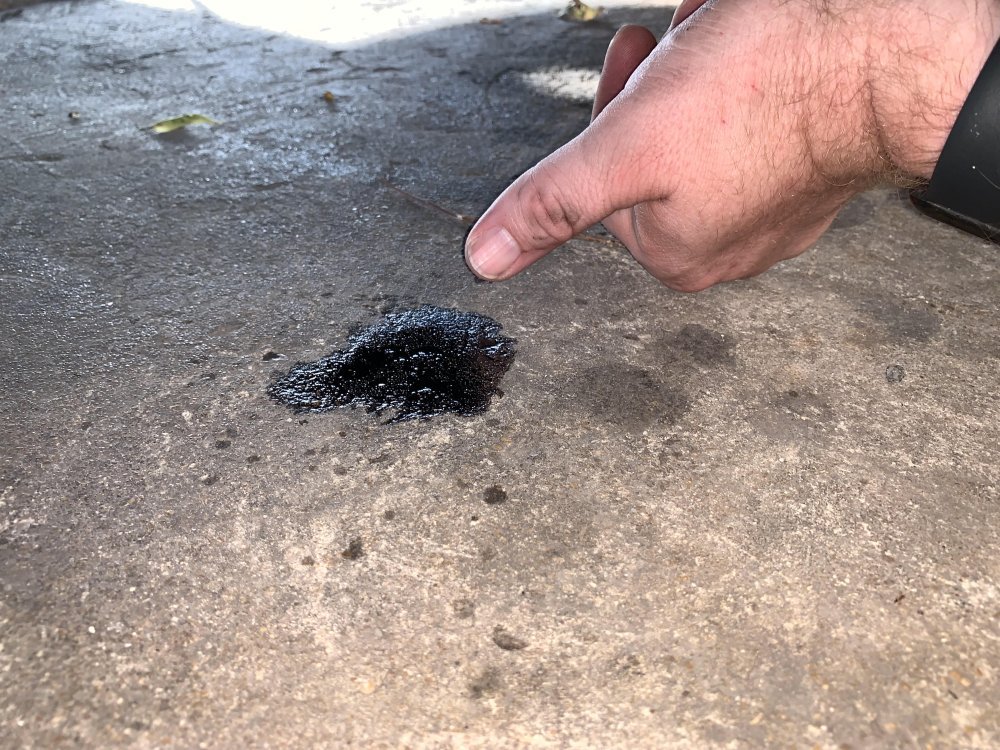
While I was under there inspecting random things, I looked over the new power master starter and it's mounting, that all looks good no issues there but I found a new oil leak!! at first I thought it was the front crank seal again, but looking at it from the side, the timing cover in that area seems dry. this one is the very front of the oil pan. I attempted to snug up on the two pan bolts to make sure they were secure. it's slowly looking more like I am gonna need to pull this engine and re-gasket everything as some point. here's a couple of pics. The last one is the puddle it's made sitting there for maybe 30 minutes with my thumb next to it for a size comparison.

Pan leak 1.jpgPan leak.jpgPan leak 2.jpg
 
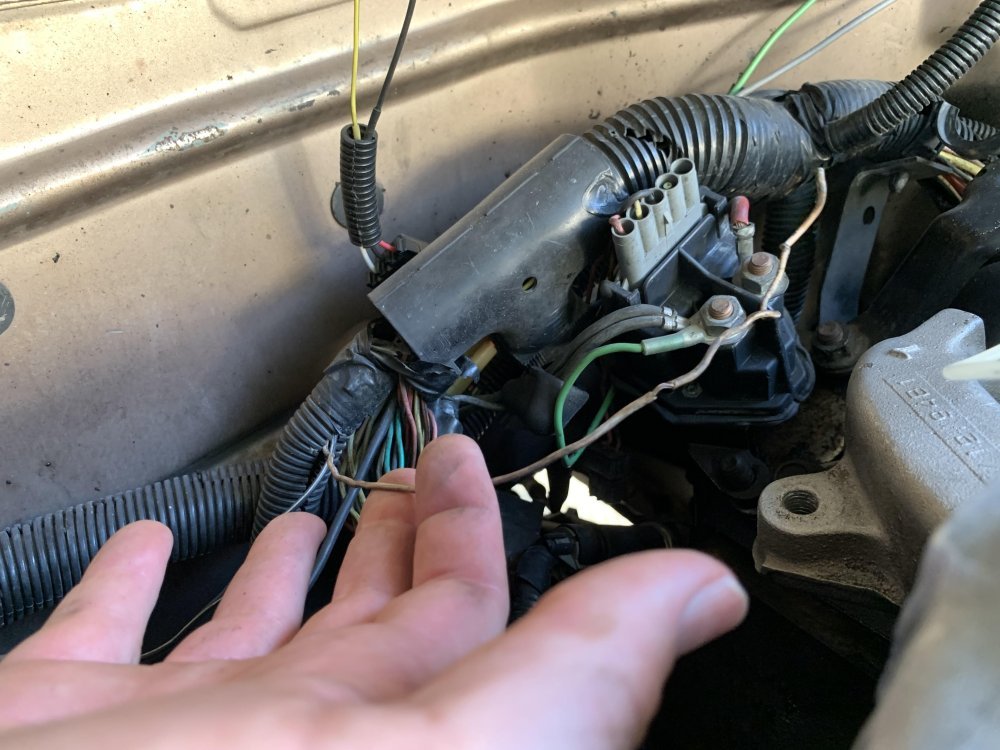
While looking at other things I found a random wire tucked into the loom not connected to anything! it looks to be a tan with a white stripe and heading towards passenger side of the engine. would anyone know what this wire was supposed to be connected to or where it goes?

I'm not sure where to start looking in the schematic. as far as I know everything other than the ABS is all working. I have the ABS unplugged only because I'm too lazy to pull the right side hub and replace the speed sensor. at some point I will do that and see if I can get the ABS to work.

Unknown Wire.jpg
 
Welp... here we are again lol. I decided to look at the truck checking to see what a popping noise was as I turn the wheel to the right. didn't seem to find anything but I discovered my truck had eaten yet another idler arm bracket! time for another replacement.

While I was under there inspecting random things, I looked over the new power master starter and it's mounting, that all looks good no issues there but I found a new oil leak!! at first I thought it was the front crank seal again, but looking at it from the side, the timing cover in that area seems dry. this one is the very front of the oil pan. I attempted to snug up on the two pan bolts to make sure they were secure. it's slowly looking more like I am gonna need to pull this engine and re-gasket everything as some point. here's a couple of pics. The last one is the puddle it's made sitting there for maybe 30 minutes with my thumb next to it for a size comparison.

View attachment 82565View attachment 82567View attachment 82566
That’s a blood trail during fall deer hunt.
 
Thanks @Glagulator I need to probe it and see to make sure there isn't any pos voltage on it and try it as a ground. there is another black with white stripe there that I think goes to one of those eyelets on the intake. also need to find something to pull up that loom and hold it so it's not just hanging there on the engine.

If I ever get to the point of pulling the engine for fixing leaks I want to open up the harness and fix it all to make it nice. re-wrap it all too.
 
Back
Top