• Welcome to The Truck Stop! We see you haven't REGISTERED yet.

    Your truck knowledge is missing!
    • Registration is FREE , all we need is your birthday and email. (We don't share ANY data with ANYONE)
    • We have tons of knowledge here for your diesel truck!
    • Post your own topics and reply to existing threads to help others out!
    • NO ADS! The site is fully functional and ad free!
    CLICK HERE TO REGISTER!

    Problems registering? Click here to contact us!

    Already registered, but need a PASSWORD RESET? CLICK HERE TO RESET YOUR PASSWORD!

My HX40 Cold Air Intake

n8in8or

I never met a project I didn’t like
Messages
4,405
Reaction score
8,818
Location
Kalamazoo, MI
It's finally time to make a box to enclose my air filter. In previous threads I have installed a CKO HX40, relocated the battery and installed a big air filter.....so everything I'm doing here is one-off for my application.

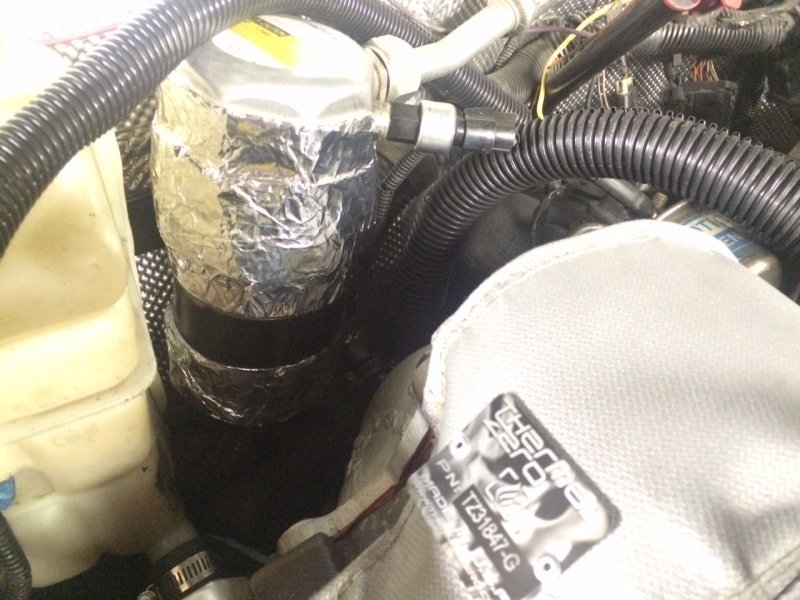
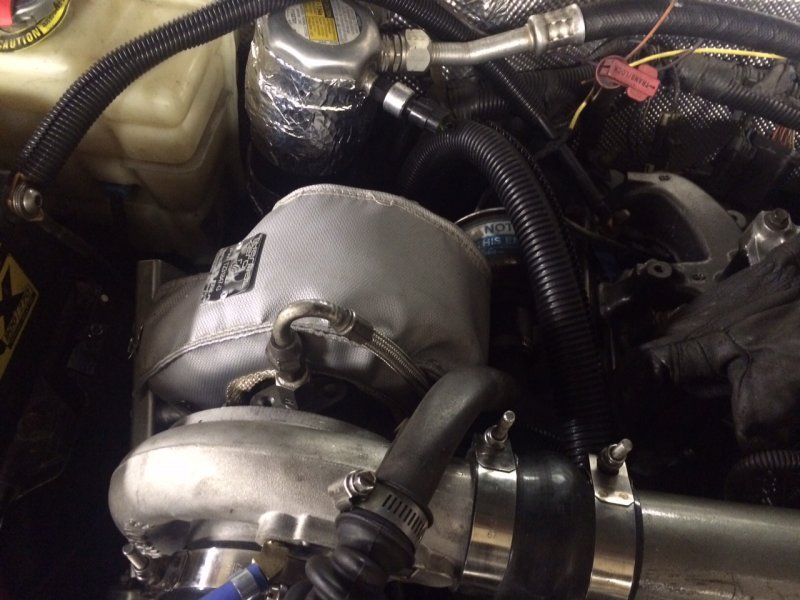
The first thing I did was do some wrapping of the AC line and accumulator, this was for 2 reasons: 1. I thought the AC line would be running through my intake box so I didn't want the added heat in my intake tract and 2. while I was at it I figured I might as well wrap the accumulator to keep turbo heat out of my AC system. Wrapping the line in insulation all the way to the firewall would also help this.

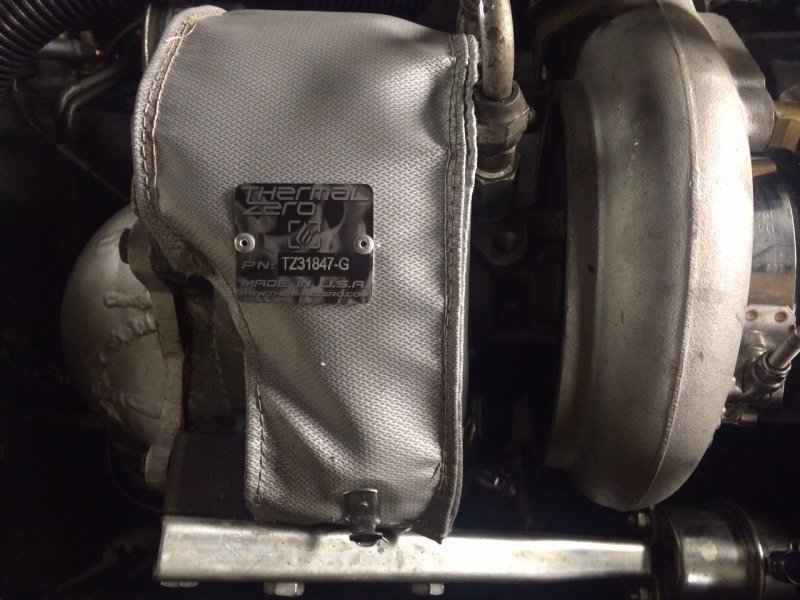
The next thing I did that seemed kind of related just because it should hopefully keep a little heat out of the engine bay was to put a turbo blanket on finally. I contacted the seller on Ebay to ask them if the one they had listed would fit on my HX40 with the wastegate actuator...he said it would fit ok, but that he had one for an HX35 that would be a snug fit, but work with the actuator. So that's the one I bought. I really like the way it fits and the gray goes well with my color scheme :D

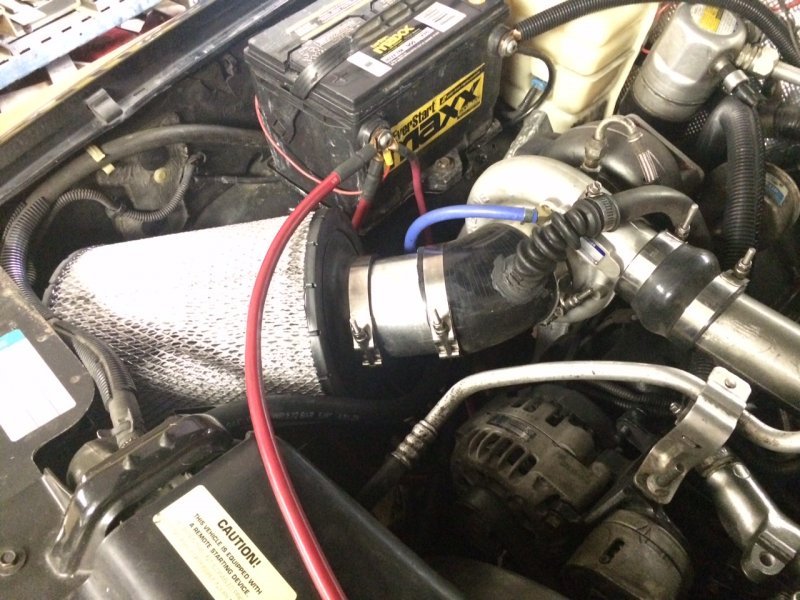
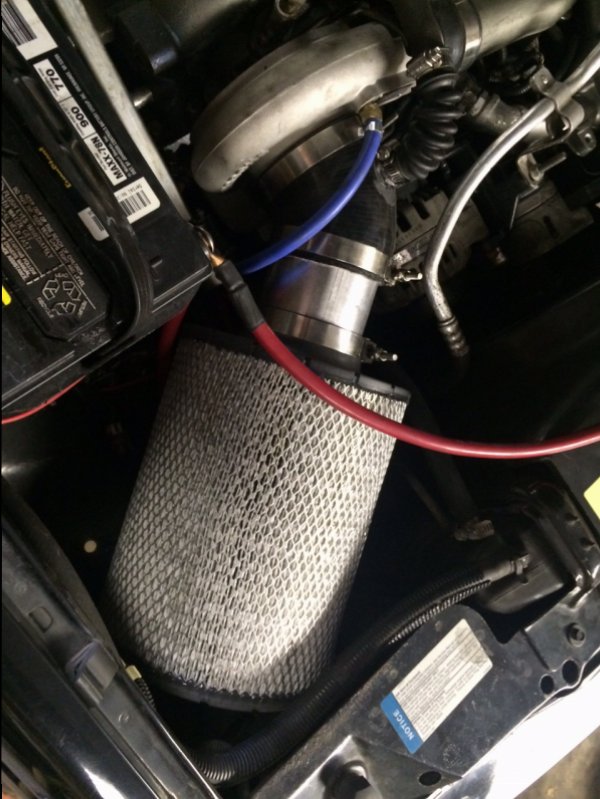
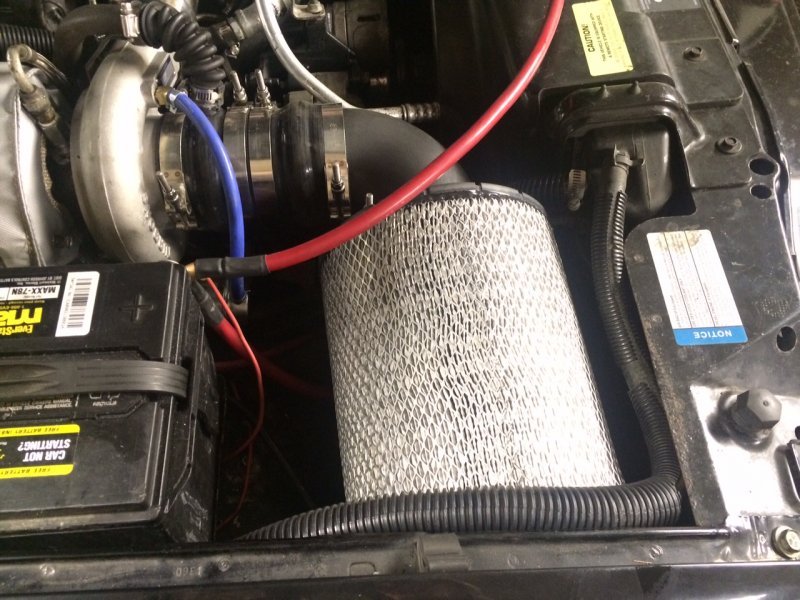
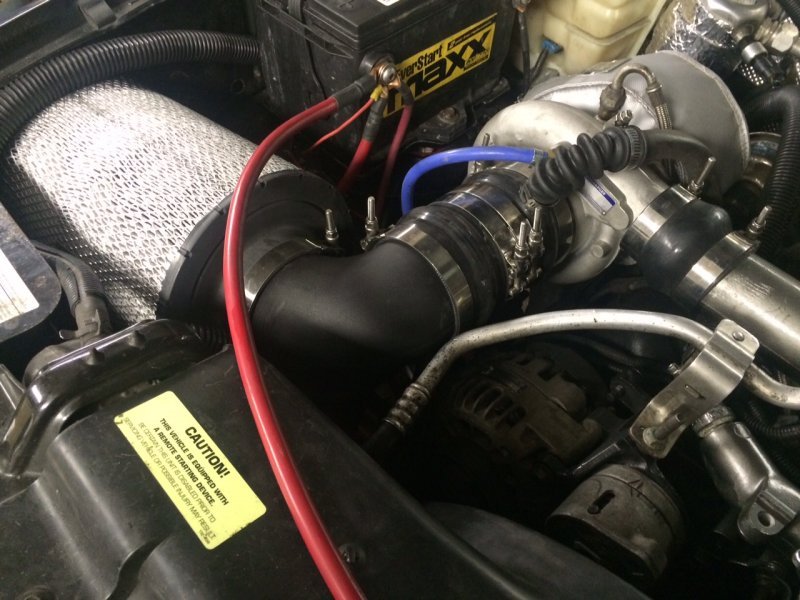
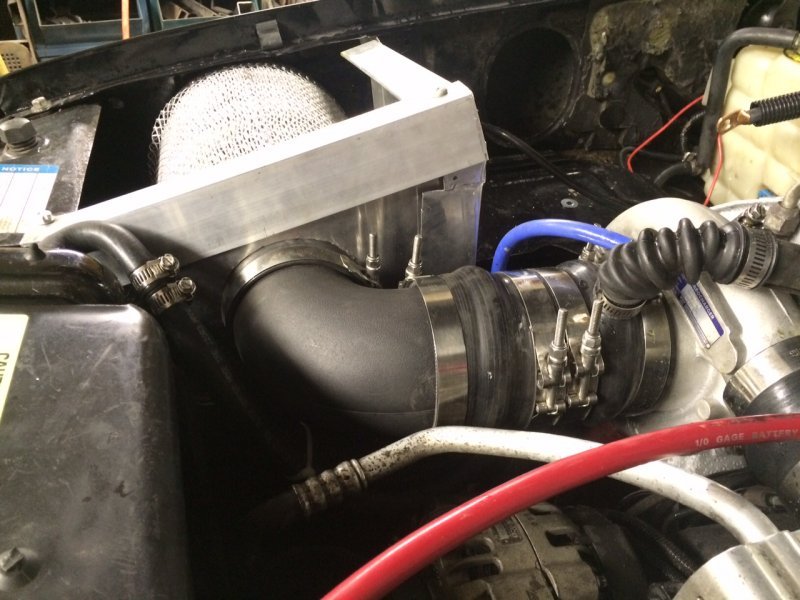
Then I had to reroute the intake tract itself. I didn't figure I'd be able to make a box around the existing setup with its weird angle, so I made a plan to make the filter fit 90* to the turbo. I found a 4" plastic elbow by AirRaid that would fit nicely in the filter, then I got 2 4" silicone hump connectors to finish the connection. The hump connectors would allow some flexibility since it wasn't going to be a perfectly straight shot and it would reduce vibration transmission down the intake tract to the fender (which I've already struggled with). The connections worked as well as I hoped and what I really like now is that I don't have any metal in the tract to easily conduct heat into the intake air.
Line1.jpg Line2.jpg Accum1.jpg Blanket1.jpg Blanket2.jpg Initial1.jpg Initial 2.jpg Intake1.jpg Intake2.jpg
 
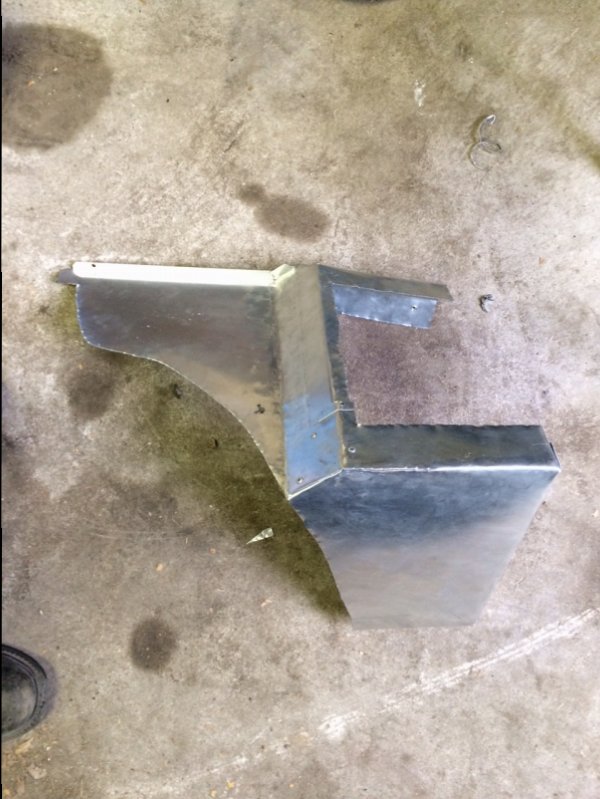
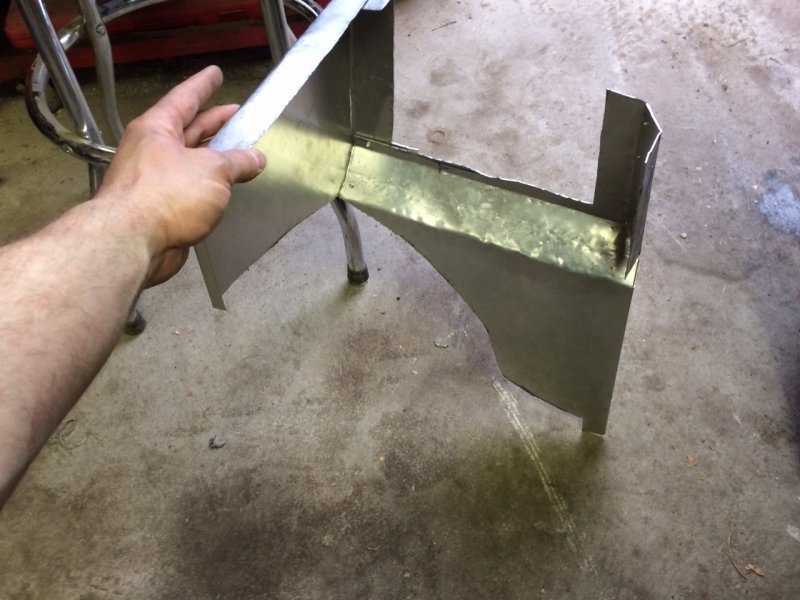
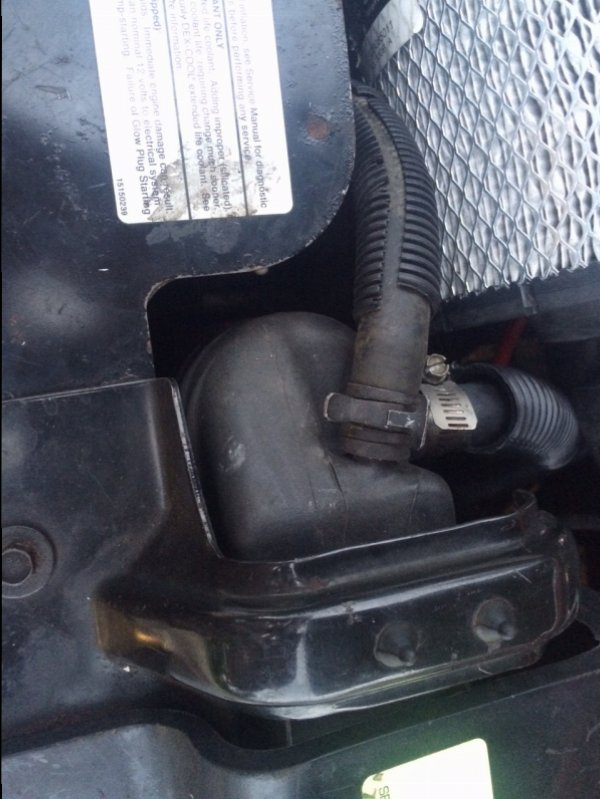
Finally it was time to make a box. This is where it's becoming very time consuming. So far I have 2 evenings into this project and I still have a ways to go. I managed to make the box go around the AC lines fine, but the thing that is proving difficult to work around is the 1/2" hose between the radiator and the overflow. I have a few ideas I'm working on, but it still isn't 100% solved. I'm going to try to find a preformed 90* elbow so I can run the hose down along the tank of the radiator and then run along the AC lines....but that's just my latest thought. Today during lunch I'm going to go get some aluminum angle and flat stock so I can make the top flange that the lid will attach to.

I'm not sure if the pictures of the box show how it works very well, but it should become more clear as I continue to fab it. It's also proving difficult building a box that allows the filter to be serviced and seal....the result should hopefully be worth it though. Oh FYI, I'm making the box out of some aluminum sheets they were throwing away at work, then once I have it formed I'm going to cover it in the DEI Tunnel Shield that I covered the firewall in so the engine heat stays out of the intake.
Boxside1.jpg Box1.jpg Box2.jpg Hose1.jpg
 
It's finally time to make a box to enclose my air filter. In previous threads I have installed a CKO HX40, relocated the battery and installed a big air filter.....so everything I'm doing here is one-off for my application.

The first thing I did was do some wrapping of the AC line and accumulator, this was for 2 reasons: 1. I thought the AC line would be running through my intake box so I didn't want the added heat in my intake tract and 2. while I was at it I figured I might as well wrap the accumulator to keep turbo heat out of my AC system. Wrapping the line in insulation all the way to the firewall would also help this.

The next thing I did that seemed kind of related just because it should hopefully keep a little heat out of the engine bay was to put a turbo blanket on finally. I contacted the seller on Ebay to ask them if the one they had listed would fit on my HX40 with the wastegate actuator...he said it would fit ok, but that he had one for an HX35 that would be a snug fit, but work with the actuator. So that's the one I bought. I really like the way it fits and the gray goes well with my color scheme :D

Then I had to reroute the intake tract itself. I didn't figure I'd be able to make a box around the existing setup with its weird angle, so I made a plan to make the filter fit 90* to the turbo. I found a 4" plastic elbow by AirRaid that would fit nicely in the filter, then I got 2 4" silicone hump connectors to finish the connection. The hump connectors would allow some flexibility since it wasn't going to be a perfectly straight shot and it would reduce vibration transmission down the intake tract to the fender (which I've already struggled with). The connections worked as well as I hoped and what I really like now is that I don't have any metal in the tract to easily conduct heat into the intake air.

Nice work, only consideration is a cover for the downpipe. On my setup I used the DEI thermal barrier and folded it over itself so the adhesive from both pieces went together then formed it 2/3 around the downpipe because of the forming it did not require fasteners.
 
Finally it was time to make a box. This is where it's becoming very time consuming. So far I have 2 evenings into this project and I still have a ways to go. I managed to make the box go around the AC lines fine, but the thing that is proving difficult to work around is the 1/2" hose between the radiator and the overflow. I have a few ideas I'm working on, but it still isn't 100% solved. I'm going to try to find a preformed 90* elbow so I can run the hose down along the tank of the radiator and then run along the AC lines....but that's just my latest thought. Today during lunch I'm going to go get some aluminum angle and flat stock so I can make the top flange that the lid will attach to.

I'm not sure if the pictures of the box show how it works very well, but it should become more clear as I continue to fab it. It's also proving difficult building a box that allows the filter to be serviced and seal....the result should hopefully be worth it though. Oh FYI, I'm making the box out of some aluminum sheets they were throwing away at work, then once I have it formed I'm going to cover it in the DEI Tunnel Shield that I covered the firewall in so the engine heat stays out of the intake.

Nice, as the edges go so they will not cut hoses use vacuum hose or fuel line split on its length to slide over the edges its actually better to glue them using 3m super weather strip adheasive just a little bead inside hose before installing is all you need.

As airflow goes in that area it's limited to what can get past radiator support and from heated air flowing off of the radiator fan into that air filter which is not good so if I may suggest; the area below where the battery use to sit should be cut out so cool frontal air can flow in easier to the filter from here you can make some type of ram-air scoop w/ducting to capture airflow just under the bumper level so it is forced up and into the area you cut open.

That truck of yours I'm liking it.
 
Nice work, only consideration is a cover for the downpipe. On my setup I used the DEI thermal barrier and folded it over itself so the adhesive from both pieces went together then formed it 2/3 around the downpipe because of the forming it did not require fasteners.
Interesting idea, thanks. I hesitate putting a covering of some kind on the pipes though because salt could get trapped there. I really want to coat the pipes in the White Lightning coating, but I'd rather save that for when I make my own headers and crossover pipe. :cool:
 
Nice, as the edges go so they will not cut hoses use vacuum hose or fuel line split on its length to slide over the edges its actually better to glue them using 3m super weather strip adheasive just a little bead inside hose before installing is all you need.

As airflow goes in that area it's limited to what can get past radiator support and from heated air flowing off of the radiator fan into that air filter which is not good so if I may suggest; the area below where the battery use to sit should be cut out so cool frontal air can flow in easier to the filter from here you can make some type of ram-air scoop w/ducting to capture airflow just under the bumper level so it is forced up and into the area you cut open.

That truck of yours I'm liking it.
Another good idea, thanks. Yeah I'm going to address all sharp edges when I'm done with the fab. When done I won't be taking in any air from the cooling stack on the engine compartment side, but I guess it's possible I could get a little from the other side. We'll see. I'm going to do some monitoring of the IAT to see what I have going on. Water/Meth and WTA intercooling are both in the plans as well, so this is just phase 1.

Thank you for the compliment! Some day this thing will hopefully have as much thought put into it as that rig of yours.
 
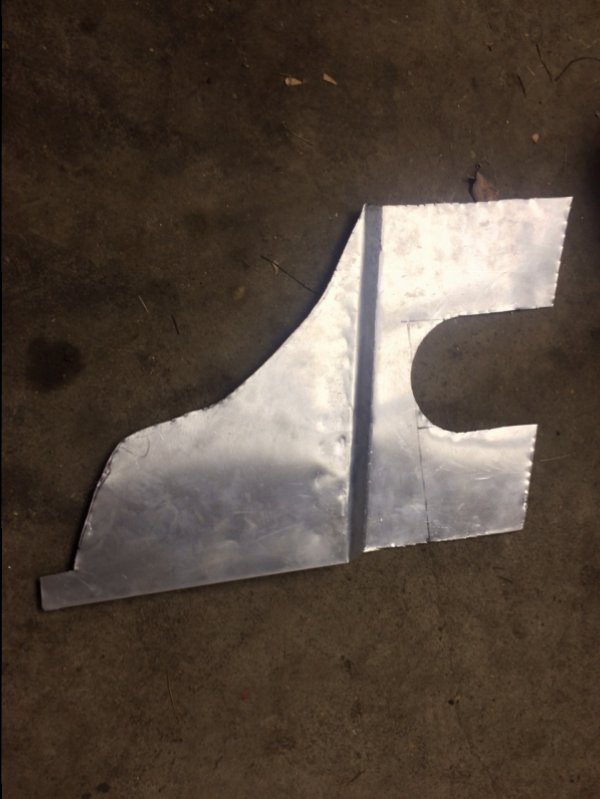
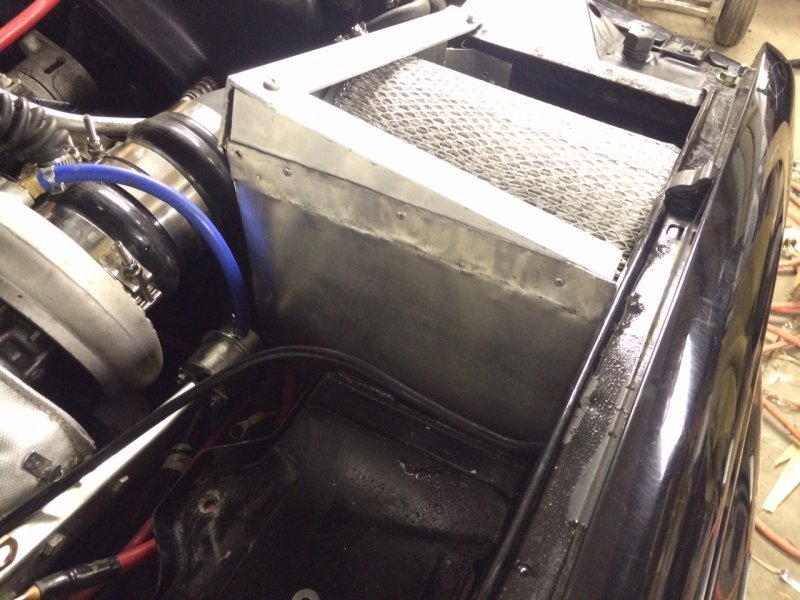
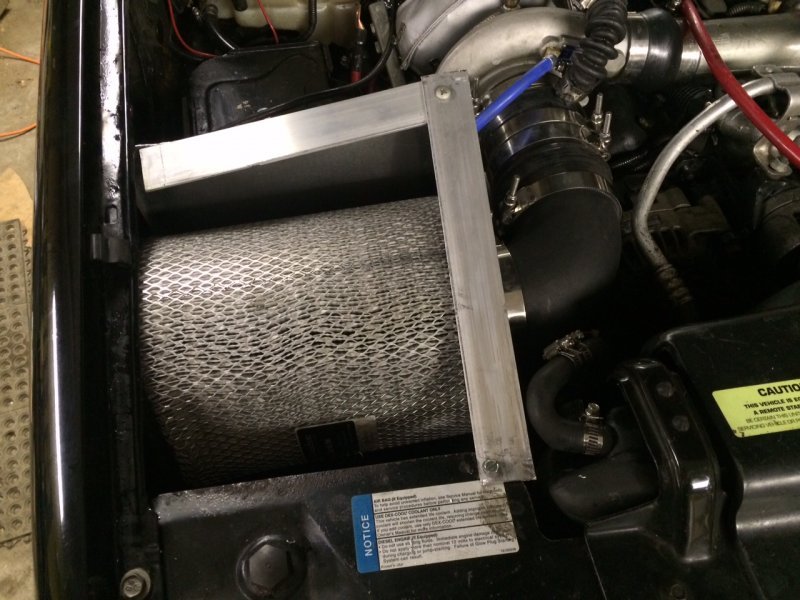
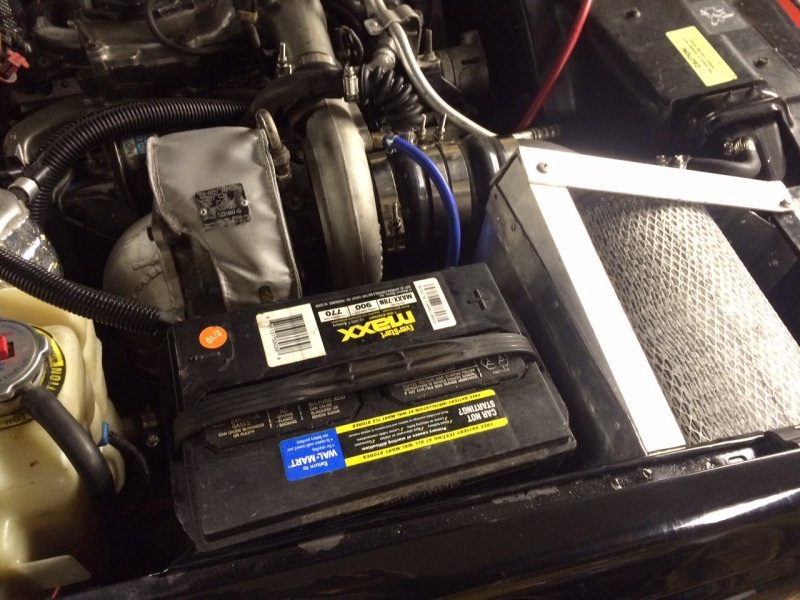
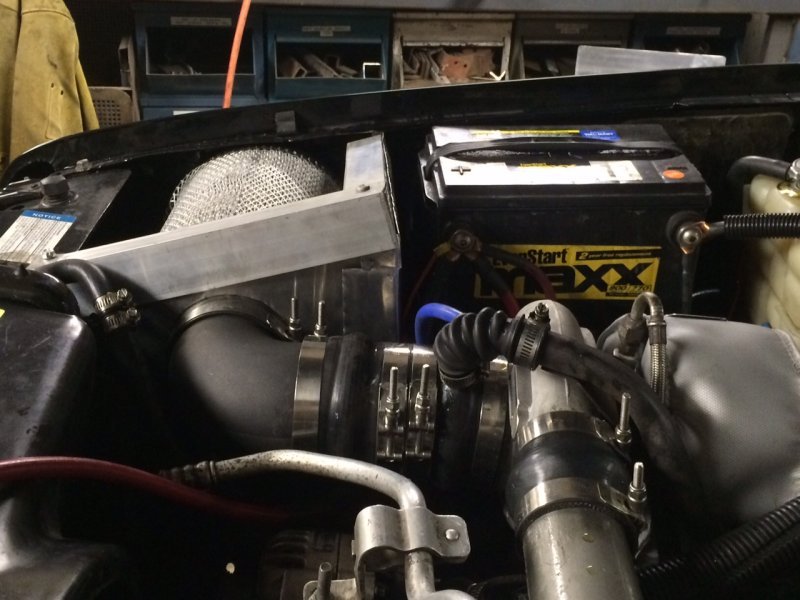
More progress last night. I got them main construction of the box done. Now I'm going to run it as-is for a few days to see how I like it. Then I'll make final tweaks before doing the insulating and sealing. First of all, this isn't the most elegant thing I've ever made, and I fully recognize that. It was a lot more difficult to get the function that I wanted than I anticipated. However, once I tweak it a little bit more and then get it insulated, it will look ok. I guess I'm most interested in function with this thing and I will do my best to make it look good before I call it done. Who knows, maybe this is the prototype and I'll use it to make a better one in the future? I'm not set up to weld aluminum at home so that was one hurdle - I had to do all of my fabricating using pop rivets...which in the end turned out to be kind of fun. Even so, with how thing the aluminum was, I doubt I could have done much successful welding anyhow. Also, making the intake so the filter can be easily replaced and seal relatively well was a really difficult task. I'm still not sure how much I love my solution because I don't feel that it's going to seal really great, but I do think it's going to be good enough to get the job done. I may do a final seal with foil tape that I have to cut to replace the filter and then retape...that wouldn't be too bad to do and it would be functional. We'll see. When I do the insulating/sealing I'll take some pics of the interior of the box to give a better idea of what's going on in there.

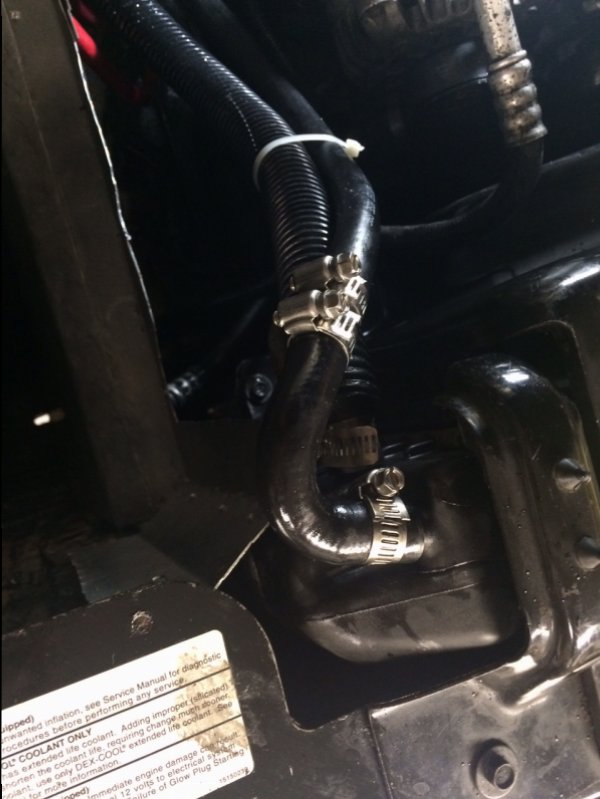
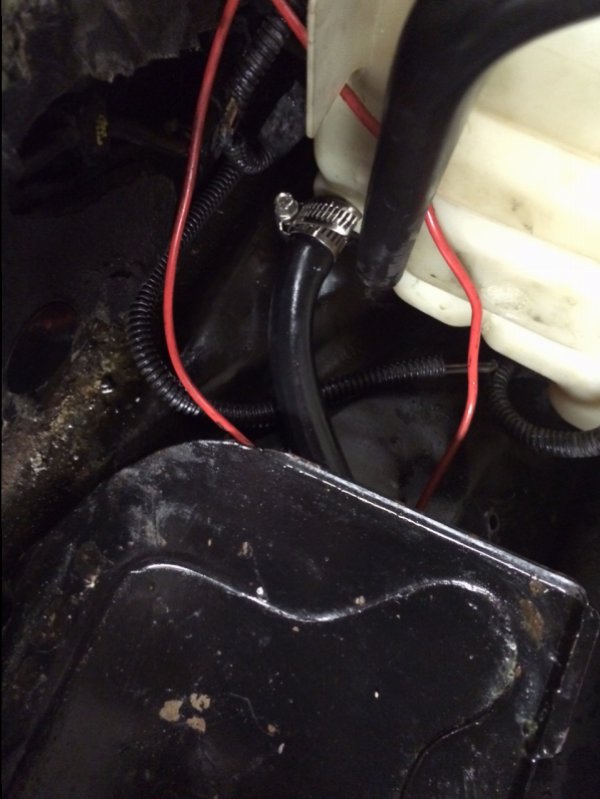
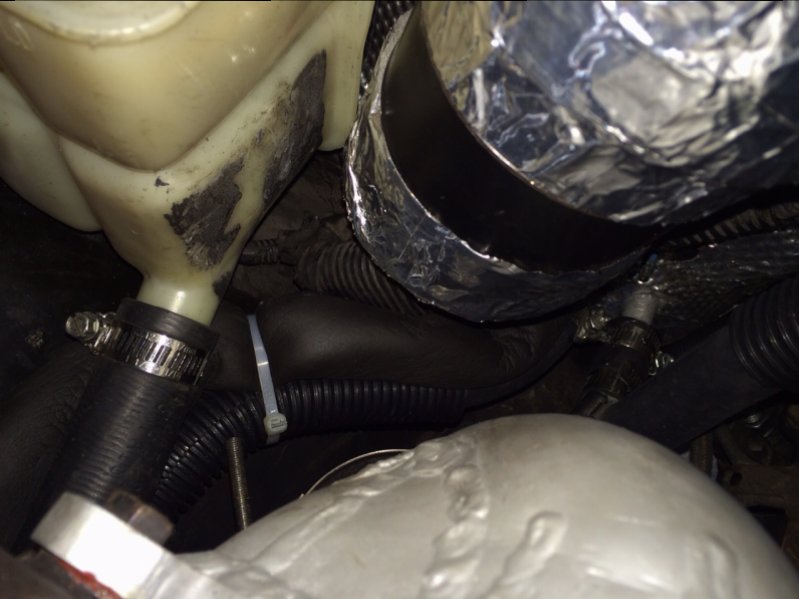
First thing I did was reroute that pesky coolant line from the top of the radiator to the bottom of the overflow can. I found a nice 120*, 1/2" hose at Autozone yesterday, so I used that with a brass male-male barb to make a new hose assembly. It got the hose out of the way enough that I didn't have to deal with it affecting the box too badly, so that makes me happy. I still need to cover it in protective sheathing, and I'll be doing that tonight. Yes, everything is shiny from antifreeze....I thought I could pull the hose off and plug the end with my cat-like speed and reflexes, but I guess not so much.....the Avengers won't be calling me anytime soon. :wtf:

My initial plan was to make a lid for the box that screwed and unscrewed, but I have since changed my mind and decided to have the top of the box open for 2 reasons: 1. it will make visual inspection of the filter a lot easier and I will easily see the filter any time I open the hood rather than having to do a deliberate inspection with tools and 2. I realized that by having a lid, I was blocking off the little bit of air that could come under the front of the hood....every little bit of cool air counts so no reason to block some. I always hated seeing the aftermarket cold air kits that just sealed to the hood, but maybe they have some merit after all! So as part of the final insulating/sealing, I will get some thick foam and put it on the top rails of the box so it will seal to the hood.

Hose2.jpg Hose3.jpg Box3.jpg Box4.jpg Box5.jpg Box6.jpg Box7.jpg
 
Another good idea, thanks. Yeah I'm going to address all sharp edges when I'm done with the fab. When done I won't be taking in any air from the cooling stack on the engine compartment side, but I guess it's possible I could get a little from the other side. We'll see. I'm going to do some monitoring of the IAT to see what I have going on. Water/Meth and WTA intercooling are both in the plans as well, so this is just phase 1.

Thank you for the compliment! Some day this thing will hopefully have as much thought put into it as that rig of yours.

Your welcome, I think you are already there you have improved this vehicle and its powertrain way beyond what GM had in mind and will give you a great and reliable vehicle.
 
I just noticed that the rear inner fender vent looks to be blocked w/insulation.
Not yet. When I finish the sealing/insulating job I plan to plug the old hole so it forces more air to my new box area...if there is any pressure, not sure, but it can't hurt.
 
I just found the receipt for the 120* hose - it's Dayco part# A71359 in case anybody wants to try the same hose routing.
 
Looking really good Nate. Something that I wanted to do with my old rig but never got around to. I assume you took out the snorkel from the fender? Did you have any plans to open up the metal hole in the radiator support where the snorkel used to be to allow more air to be rammed in?
 
Looking really good Nate. Something that I wanted to do with my old rig but never got around to. I assume you took out the snorkel from the fender? Did you have any plans to open up the metal hole in the radiator support where the snorkel used to be to allow more air to be rammed in?
Hmm I haven't seen a snorkel but I'll do some more looking around and if I find it and it's blocking airflow then I will for sure be removing it. I'll look at opening up holes in the core support too.
 
Hmm I haven't seen a snorkel but I'll do some more looking around and if I find it and it's blocking airflow then I will for sure be removing it. I'll look at opening up holes in the core support too.


Snorkel might be the wrong term to use. There is a plastic piece that mounts in the front radiator support just behind the passenger marker light that directs airflow from there to opening in the fender where the old intake used to pull from. Removing that would just open the hole and direct airflow right to your filter
 
That is the fender intake (plastic) mounted in the far left radiator support to direct air into fender intake runner. I suggested opening the area in front of the filter in the radiator support simply because the factory setup limits available air then fabricate a duct to go down to a ram type cold air intake this would force air into filter area at speed and make it easy for cool air to get to the new filter box.
 
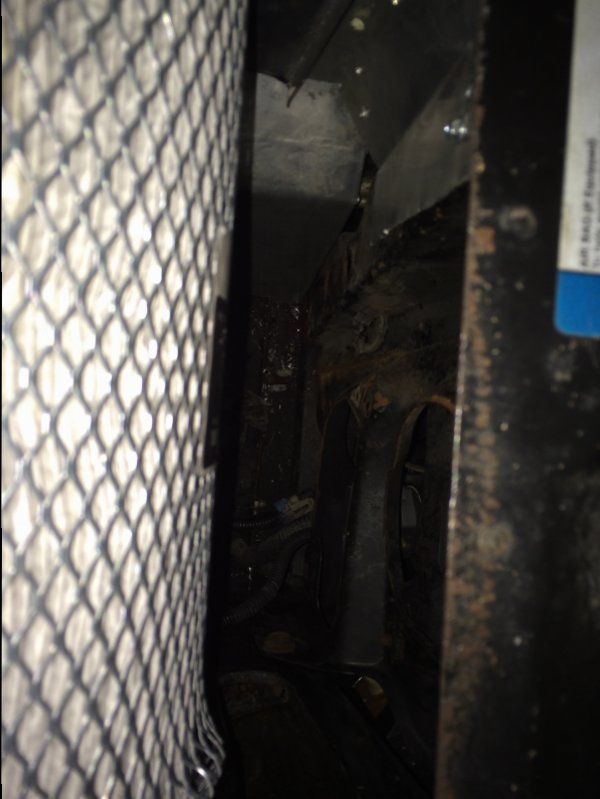
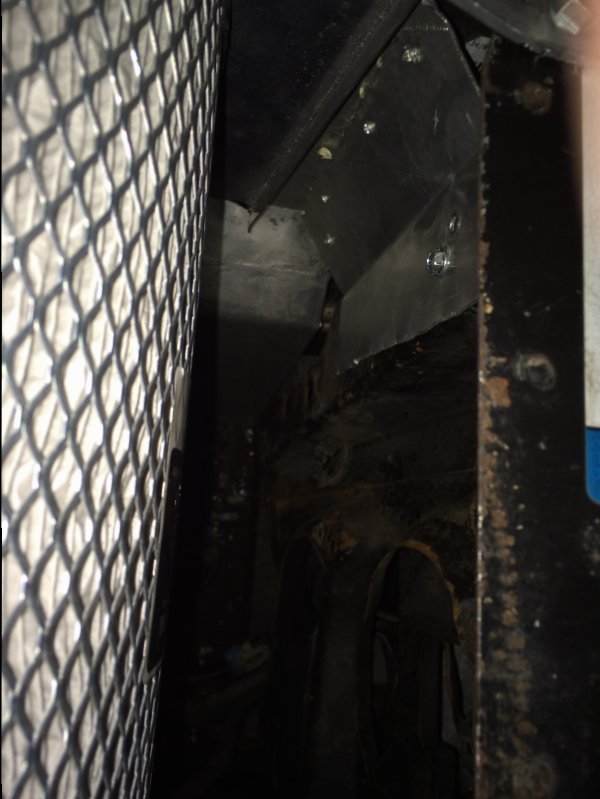
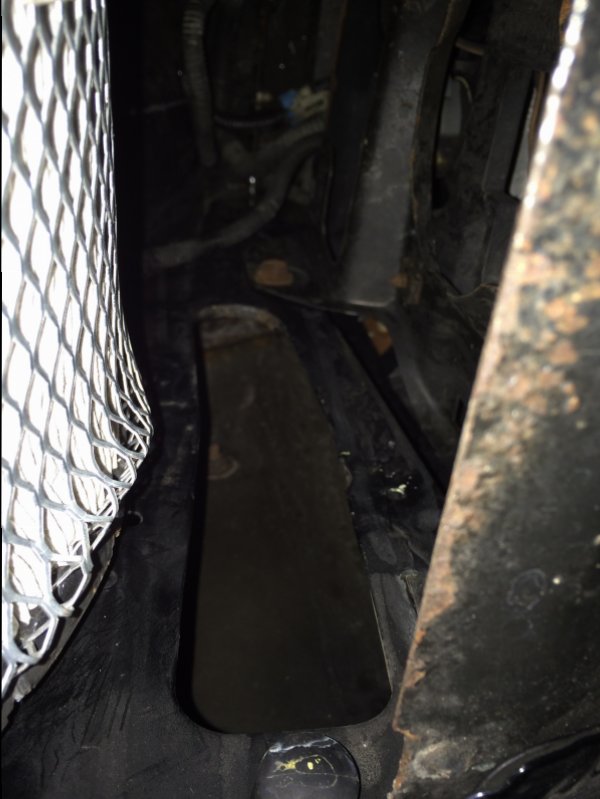
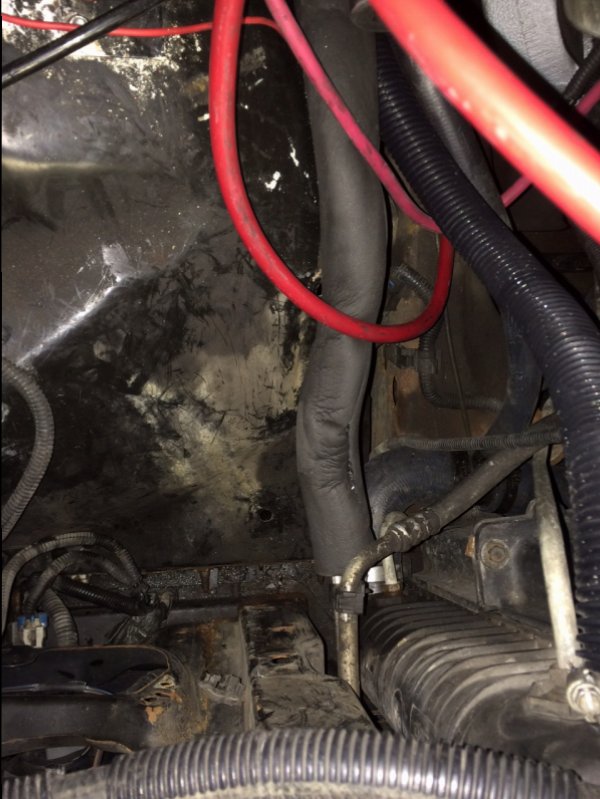
I just took a quick look and I think someone beat me to the removal of the snorkel. I see a couple areas I'll probably open up to try to get a little more air in there but overall it doesn't look too bad. The pictures don't really show a lot due to the dark. Sorry. image.jpgimage.jpgimage.jpg
 
Back
Top