Just read through the thread looks like fun. What is the total cost of the build going to be?
Navigation
Install the app
How to install the app on iOS
Follow along with the video below to see how to install our site as a web app on your home screen.
Note: This feature may not be available in some browsers.
More options
-
Welcome to The Truck Stop! We see you haven't REGISTERED yet.
Your truck knowledge is missing!
- Registration is FREE , all we need is your birthday and email. (We don't share ANY data with ANYONE)
- We have tons of knowledge here for your diesel truck!
- Post your own topics and reply to existing threads to help others out!
- NO ADS! The site is fully functional and ad free!
Problems registering? Click here to contact us!
Already registered, but need a PASSWORD RESET? CLICK HERE TO RESET YOUR PASSWORD!
You are using an out of date browser. It may not display this or other websites correctly.
You should upgrade or use an alternative browser.
You should upgrade or use an alternative browser.
motors motors motors
- Thread starter red
- Start date
sshewins
Jesus Freak
I was just messing with ya. PLEASE don't rush!! Do it right, take your time.
red
Being a lake bum in Texas
haha no worries will be taking my time with this, reliability is one of the key factors in this build so slow and steady is how this build will go.
I have not run an estimate yet of what the build will cost. So far:
Running engine with DB2: $800
Angle iron: $35
ARP inner main studs: $120
Injector socket: $65
Cam kit and Fluid Damper: $1017
Gasket set: $90 (minus head gaskets)
Waiting for the bill to arrive from ARP for the outer studs then I'll add that to it. Other things that will cost me some money are:
-injector rebuild
-Head studs
-Pre-cup machine work
-Water pump
-ATT Turbo
-FTB mod
red
Being a lake bum in Texas
got started on one of the girdles tonight
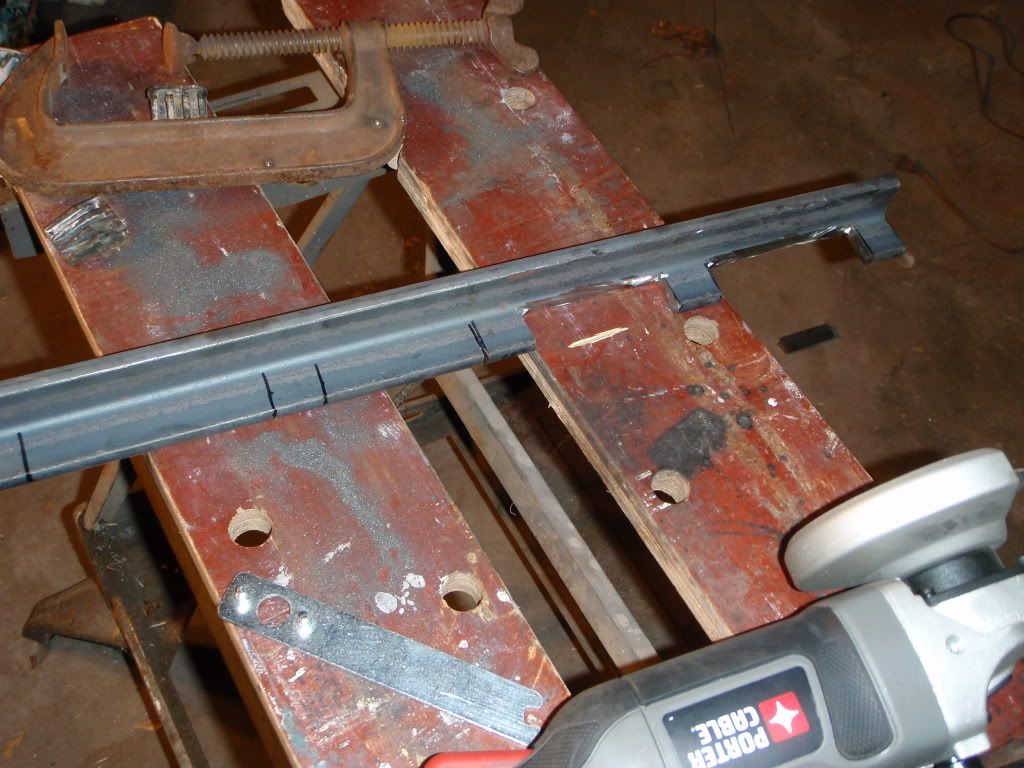
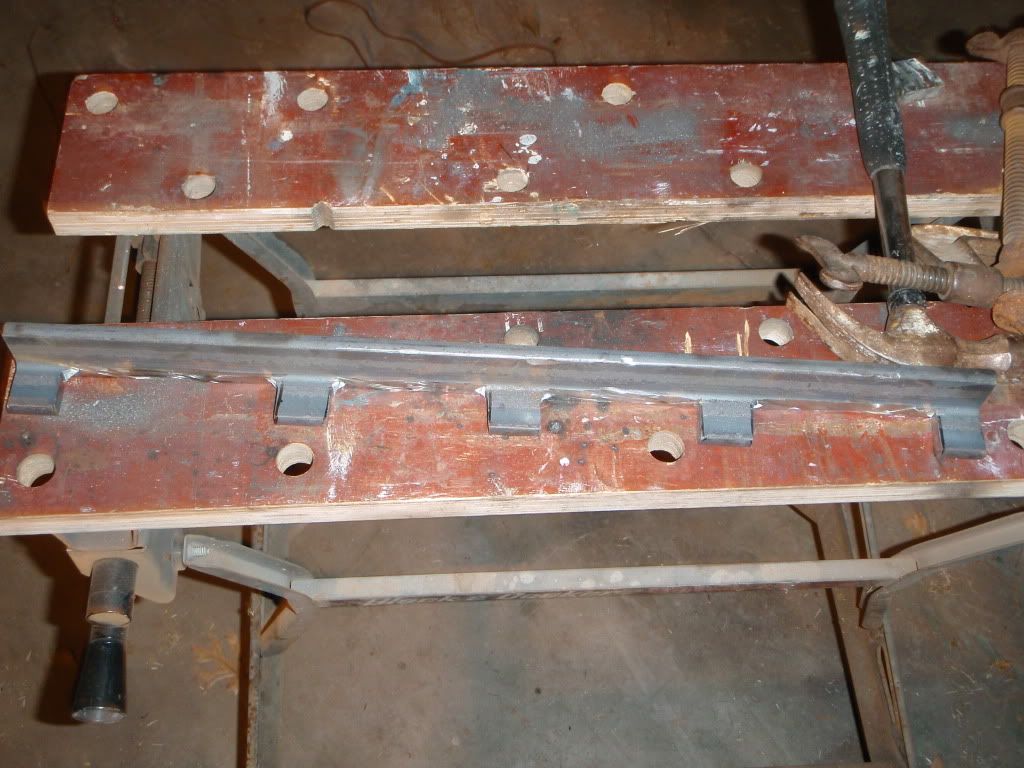
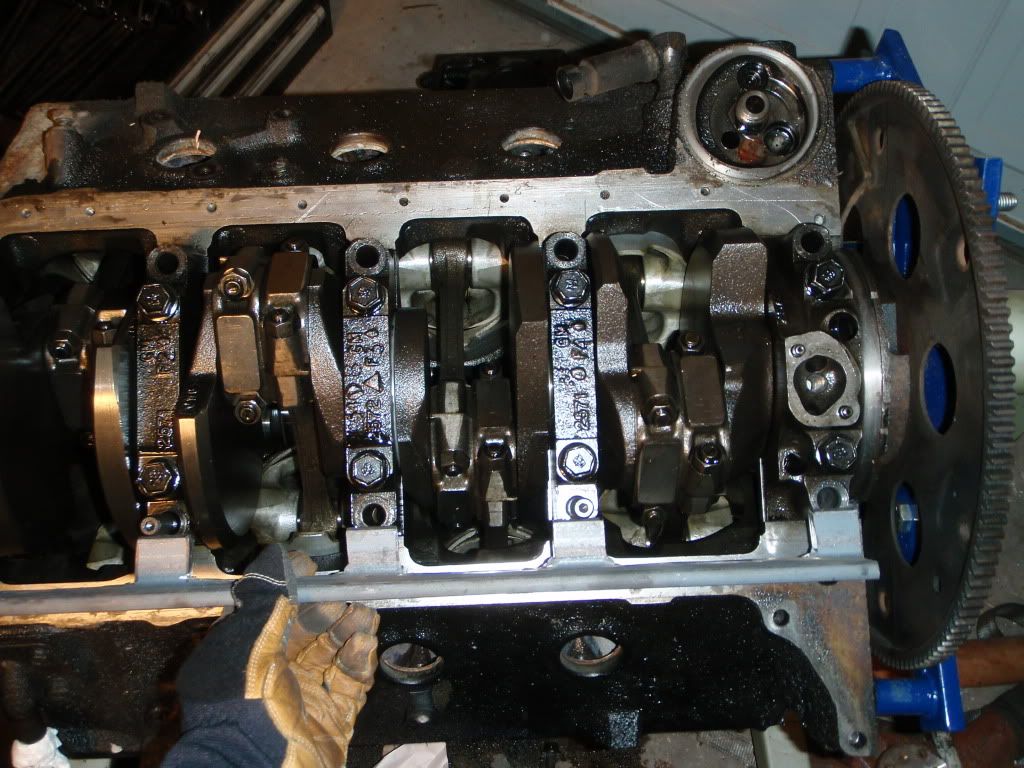
Hopefully I can finish this one tomorrow. Used a cutoff wheel on my grinder, all that took me about 45 minutes. I left an excess at each anchor point for now, hence why its ugly at the moment.


Hopefully I can finish this one tomorrow. Used a cutoff wheel on my grinder, all that took me about 45 minutes. I left an excess at each anchor point for now, hence why its ugly at the moment.
turbonator
Member
Looks good Red, get ready now to break out the files.....BTW, does not look ugly to me at all.....LOL.
tanman_2006
Just a farm kid...
Looks good Red, get ready now to break out the files.....BTW, does not look ugly to me at all.....LOL.
x2! no one will know the difference once the pan goes on! haha
red
Being a lake bum in Texas
eh the messy cuts (to me), fact that it hasnt been ground smooth yet, ugly to me haha. Needs to be ground no matter what for clearance with the rotating assembly which I plan to take care of today.
red
Being a lake bum in Texas
now it looks a little more presentable :agreed:
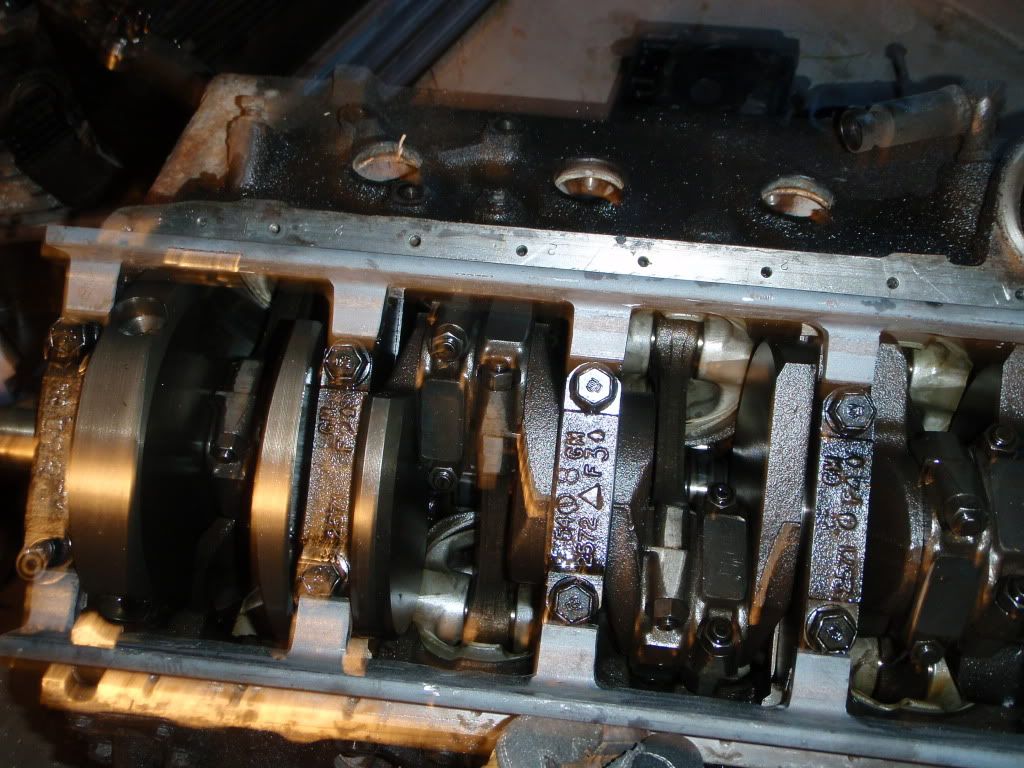
Cleaning up
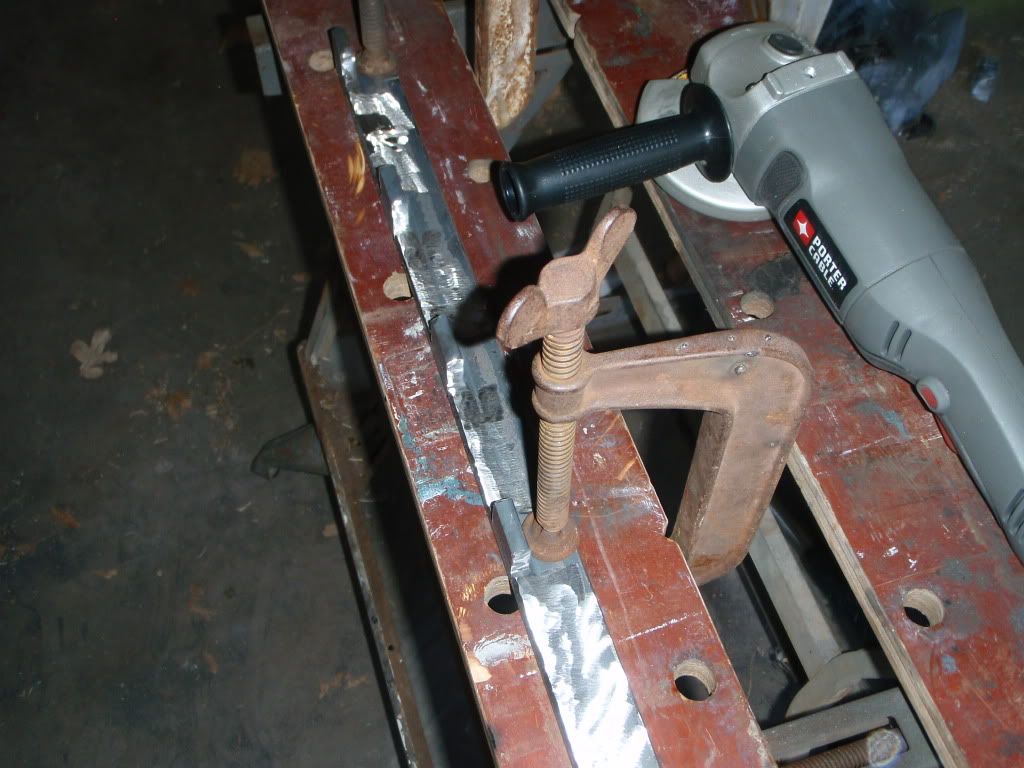
Figuring out how much to grind off each tab to make it fit
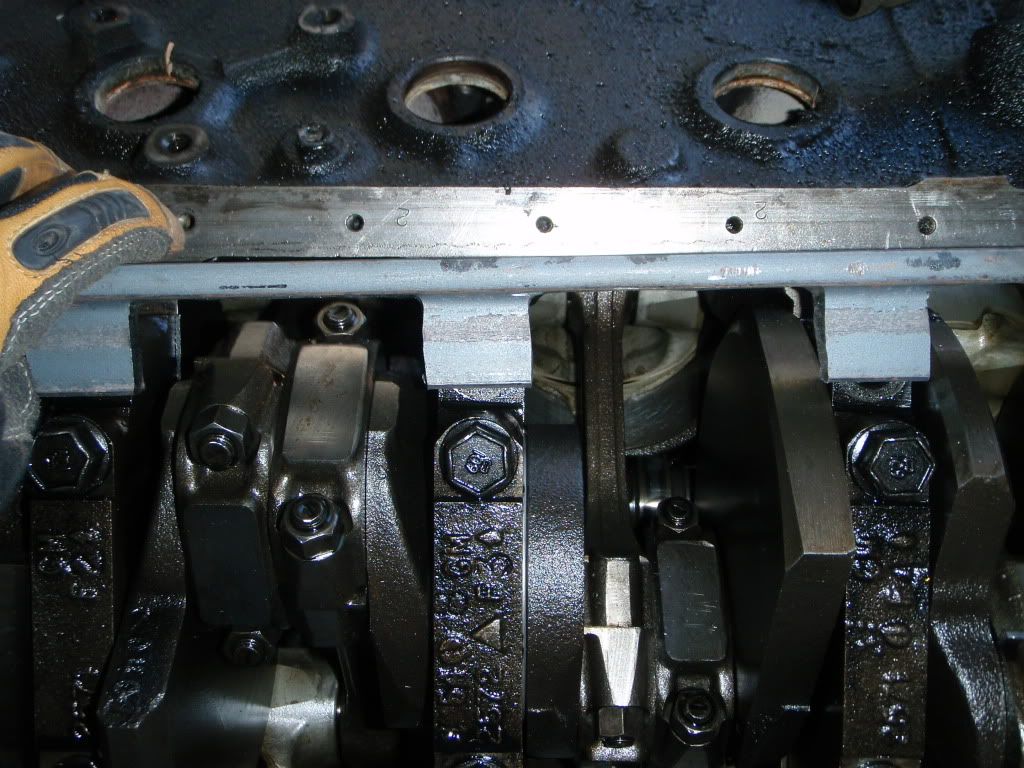
Current product
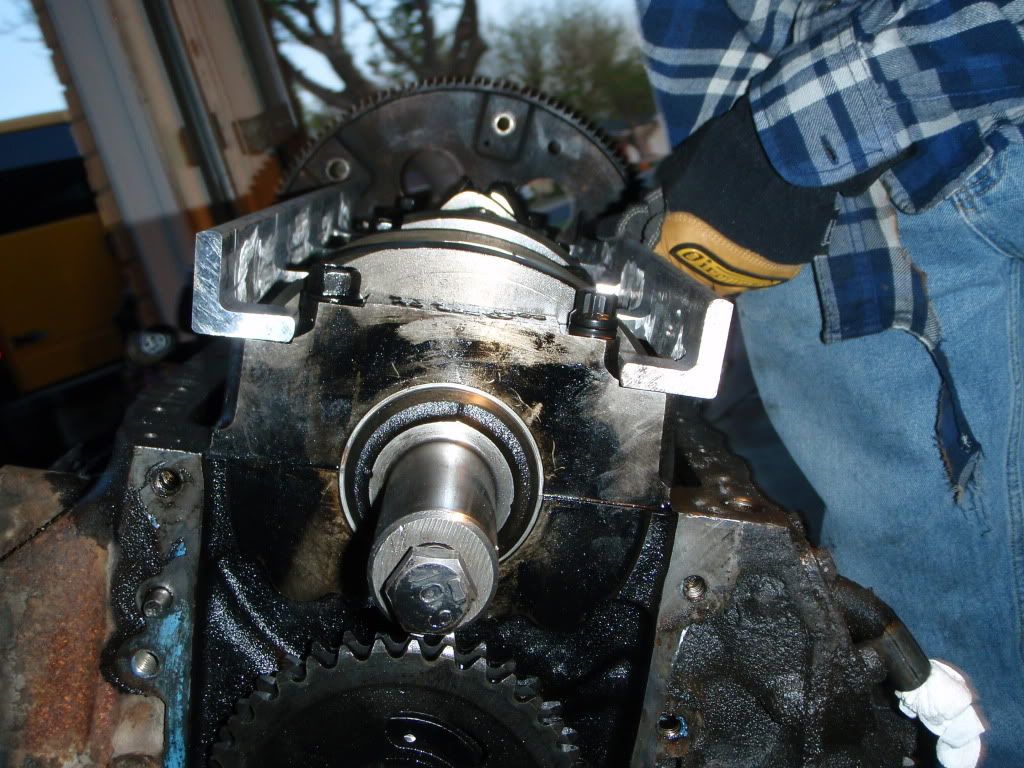
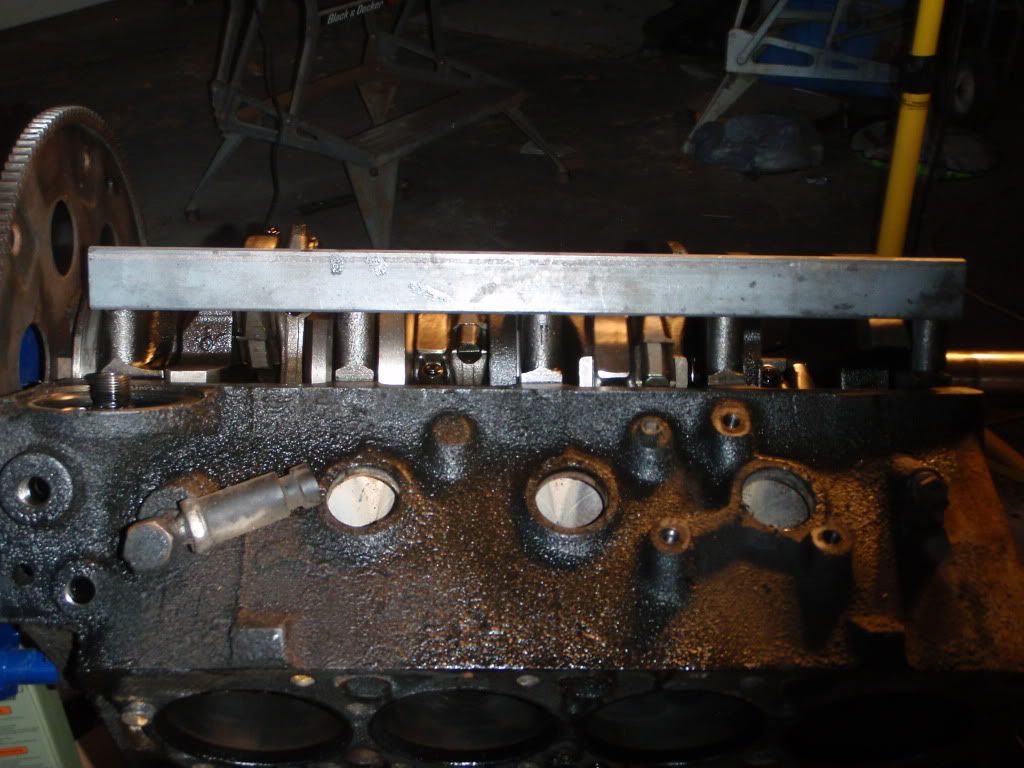
Will drill the holes for the studs tomorrow. Studs wont be in until later this week so can't install them until the end of the week most likely. One thing I can take care of though is installing the new freeze plugs. Is there any particular sealant to use with them?
Cleaning up

Figuring out how much to grind off each tab to make it fit

Current product


Will drill the holes for the studs tomorrow. Studs wont be in until later this week so can't install them until the end of the week most likely. One thing I can take care of though is installing the new freeze plugs. Is there any particular sealant to use with them?
red
Being a lake bum in Texas
looks like I'll have the bottom end buttoned up this evening!! waiting for the drill batteries to recharge so I can finish.
Paveltolz
Доверяй, но проверяй
You do good work Amigo, keep it up.
red
Being a lake bum in Texas
thank you.
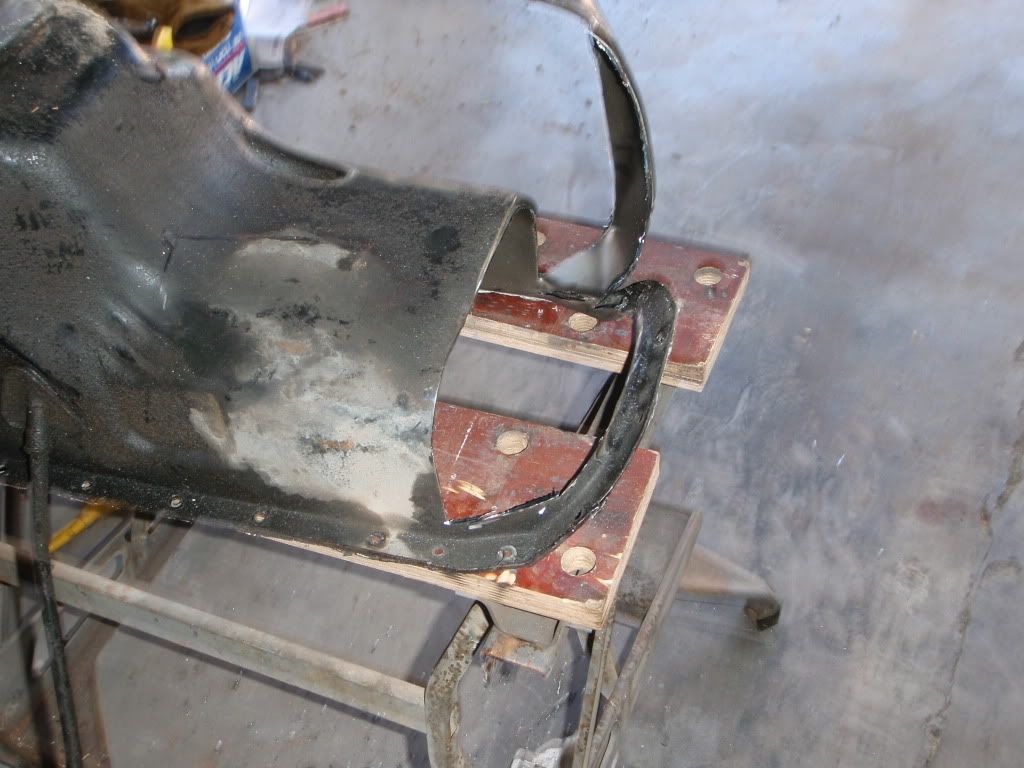
well ran into an unexpected issue so I wont be able to rotate the motor right side up yet. the studs i'm using for the girdle are too long for the oil pan to clear the front, so I need to modify the pan for clearance. Nothing crazy but need to get rid of the shallow curve thats at the front of the pan.
some more test fitting. when I drilled the mounting holes I was slightly off
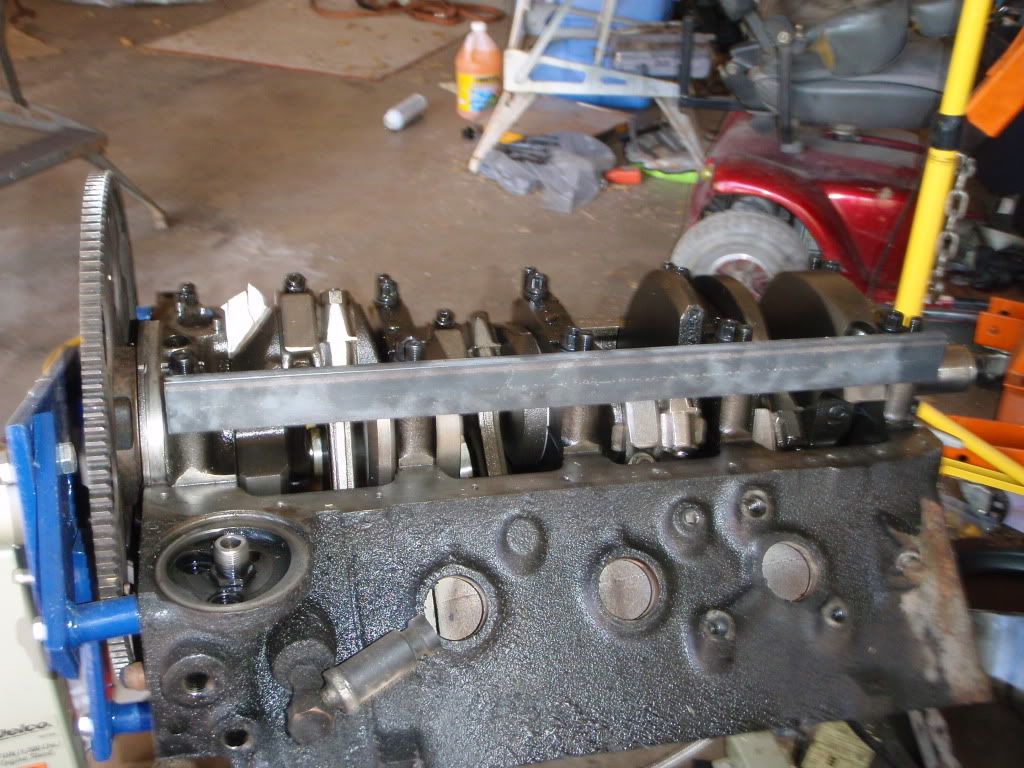
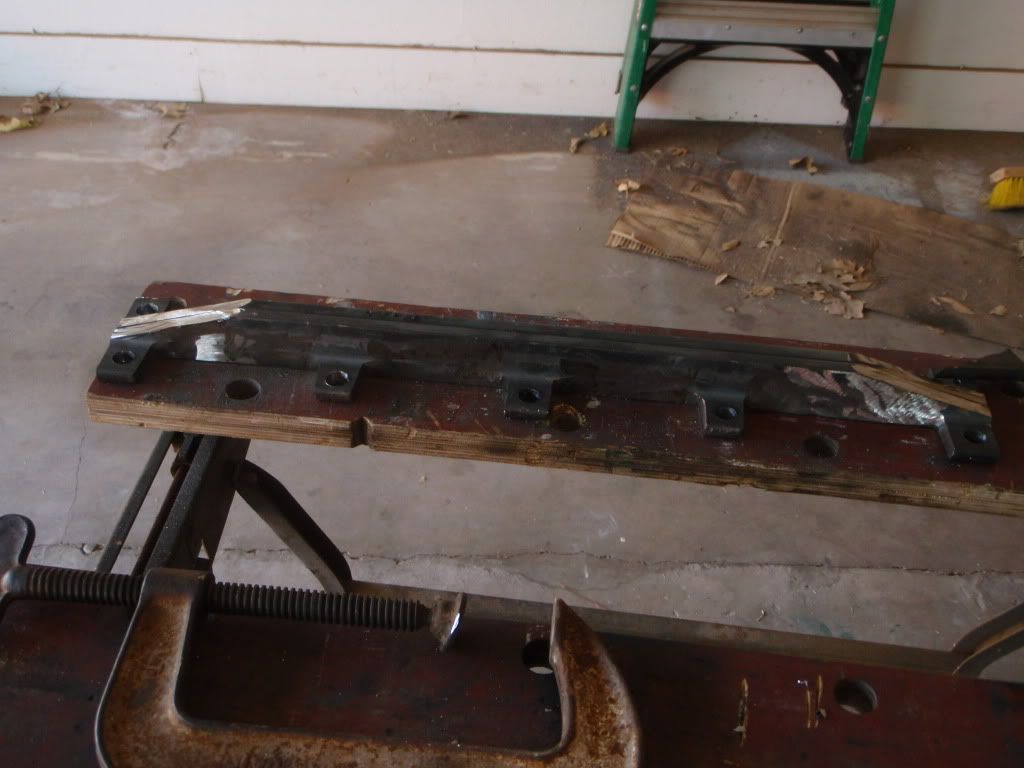
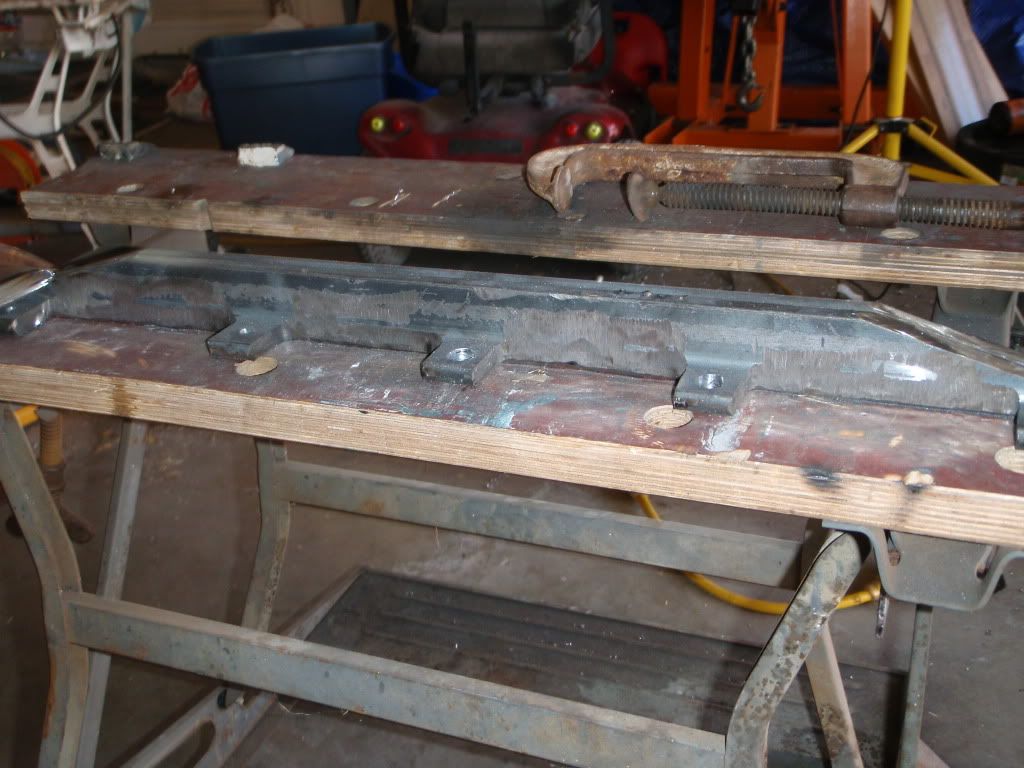
The oil dipstick side is complete and mounted, the other side needs a mounting hole enlarged a little for the stud then its complete.
On a side note I discovered an issue when I was installing the studs. the studs i'm using for the inners are the same length as the stock bolts. When installing them I noticed that they can be screwed in 1cm further into the block. In another spot I decided to figure out exactly how deep the hole is and discovered this
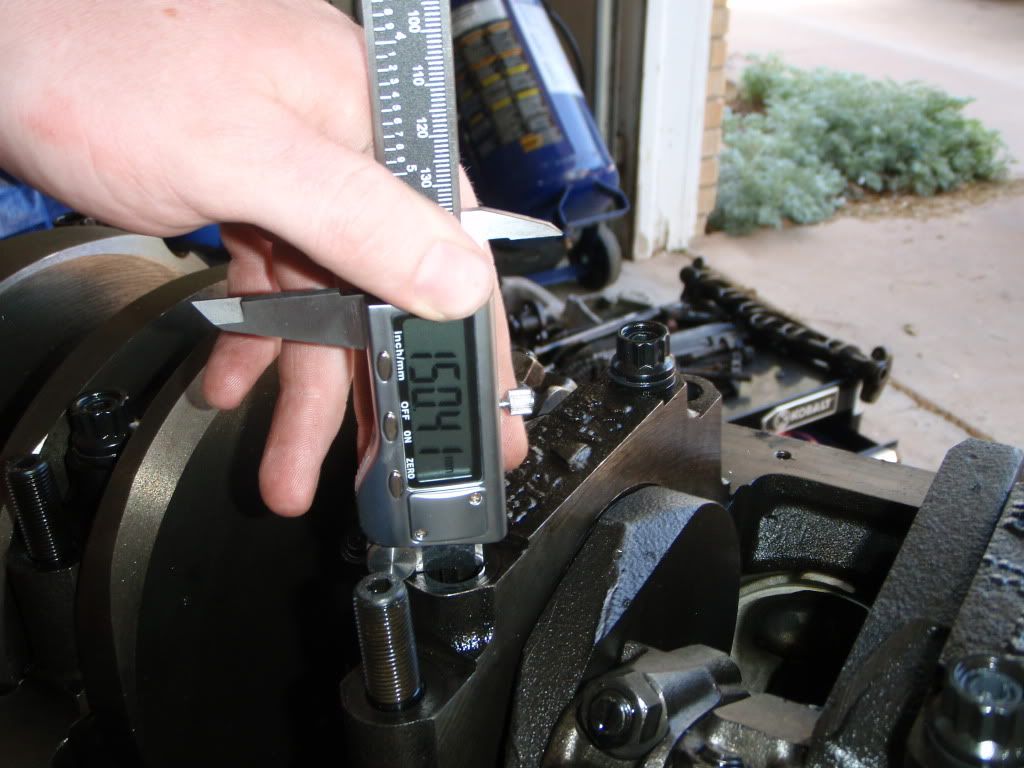
I'm not an expert by any means but wouldnt having the bolts/studs only partially threaded in leave the potential for the main caps to 'tweak' when under stress and cause main cracks? not to mention the absurdly deep hole that is left unfilled?
well ran into an unexpected issue so I wont be able to rotate the motor right side up yet. the studs i'm using for the girdle are too long for the oil pan to clear the front, so I need to modify the pan for clearance. Nothing crazy but need to get rid of the shallow curve thats at the front of the pan.

some more test fitting. when I drilled the mounting holes I was slightly off


The oil dipstick side is complete and mounted, the other side needs a mounting hole enlarged a little for the stud then its complete.
On a side note I discovered an issue when I was installing the studs. the studs i'm using for the inners are the same length as the stock bolts. When installing them I noticed that they can be screwed in 1cm further into the block. In another spot I decided to figure out exactly how deep the hole is and discovered this

I'm not an expert by any means but wouldnt having the bolts/studs only partially threaded in leave the potential for the main caps to 'tweak' when under stress and cause main cracks? not to mention the absurdly deep hole that is left unfilled?
NVW
Well-Known Member
The more threads used the better.
btfarm
America First!
I'd bet there is a reason for a ~3" deep hole in that location. Your 150mm minus the main cap height It may have to do with stress relief, casting risers/gates, machining fixturing, or something else but there would be a reason for it.
red
Being a lake bum in Texas
I hope there is a reason for the empty space, is very odd to me though.
Torqued to 85ft/lbs so far, will keep stepping it up to at least the 115 ARP recommends.
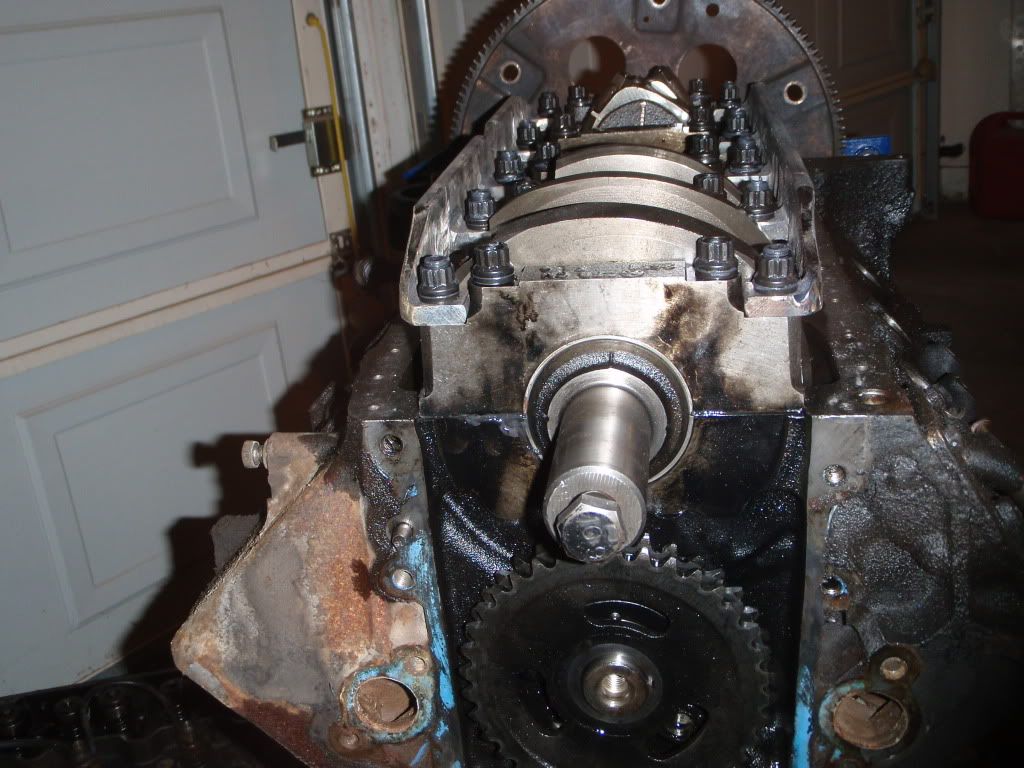
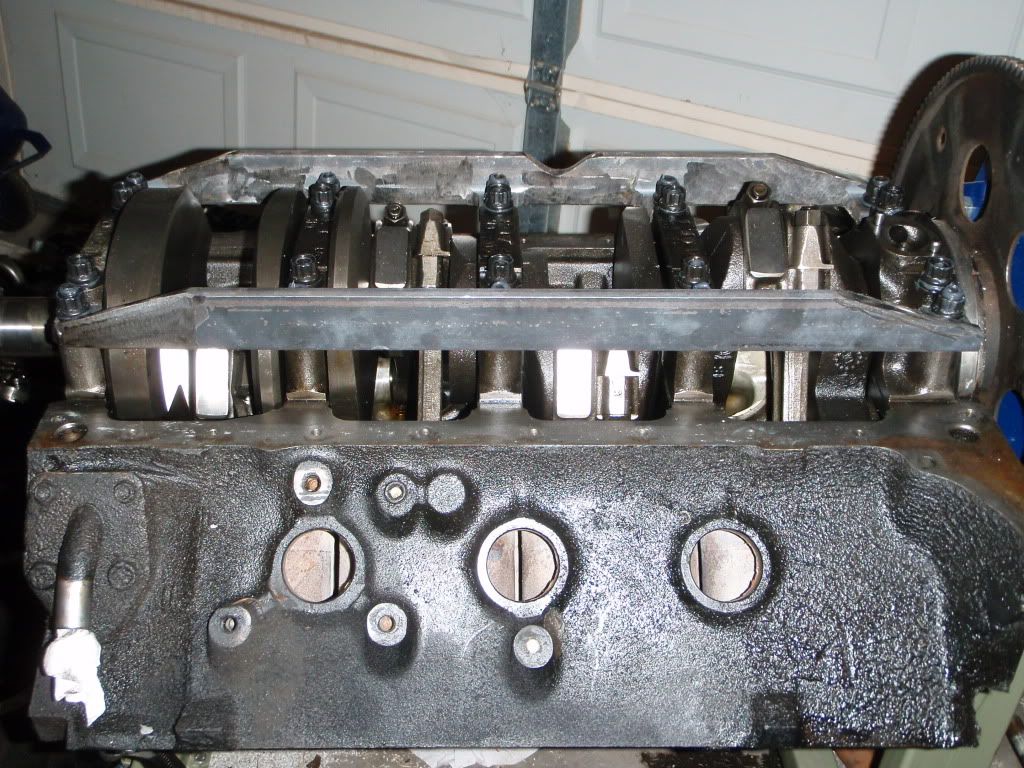
Other things left before the motor gets rotated upright are modifying the oil pan, installing the pan/starter, and the freeze plugs. Then it's time to swap out the cam!
Torqued to 85ft/lbs so far, will keep stepping it up to at least the 115 ARP recommends.


Other things left before the motor gets rotated upright are modifying the oil pan, installing the pan/starter, and the freeze plugs. Then it's time to swap out the cam!
dieselfuelonly
Active Member
That is sweet, quality work! Very nice bottom end girdle and would love to build one like it.
red
Being a lake bum in Texas
Thank you, I based the girdle off of the one Turbonator designed. Hopefully by the end of this weekend I'll have the oil pan finished so the stud girdle will be outta sight and the bottom end completed. Time to get started on it haha
red
Being a lake bum in Texas
couple pics of the oil pan modifcation that I'm working on. The issue was the studs and girdle were not clearing the front of the pan so that was cut off
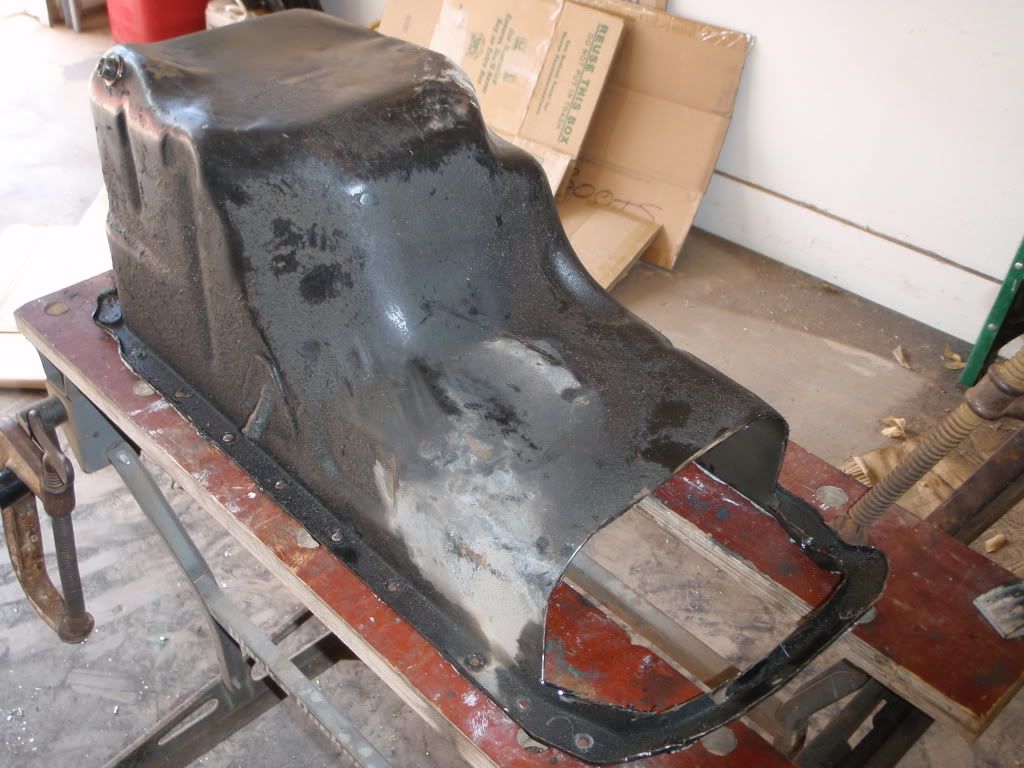
After cleaning it up a little bit I figured the sides would be a good place to start
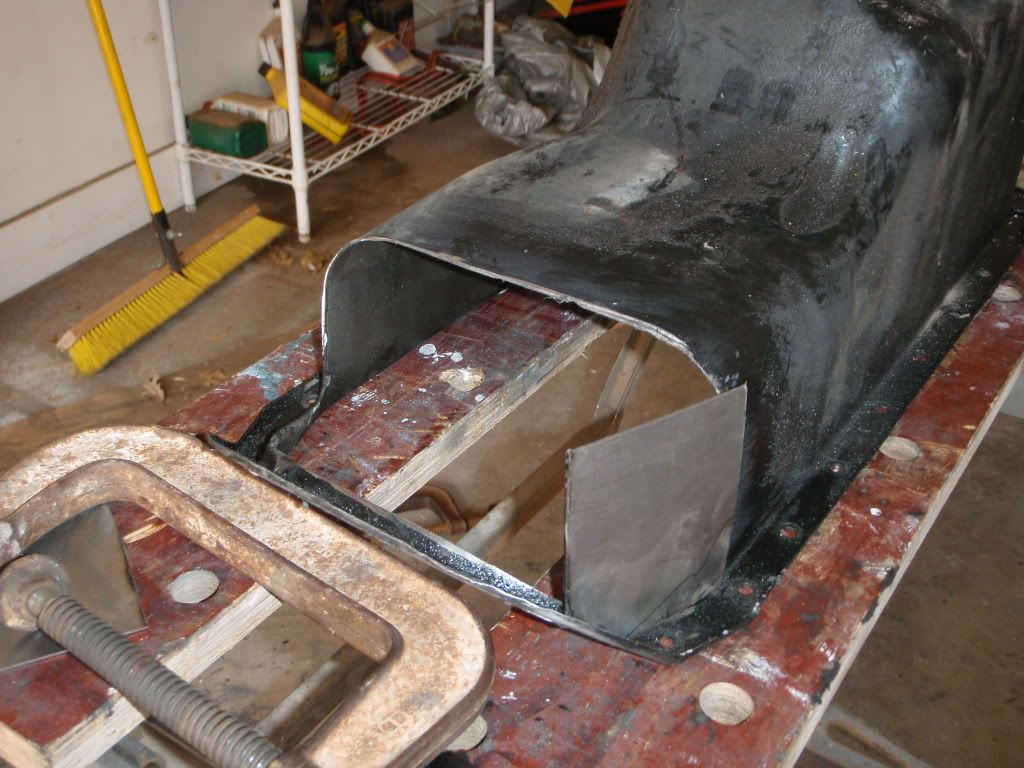
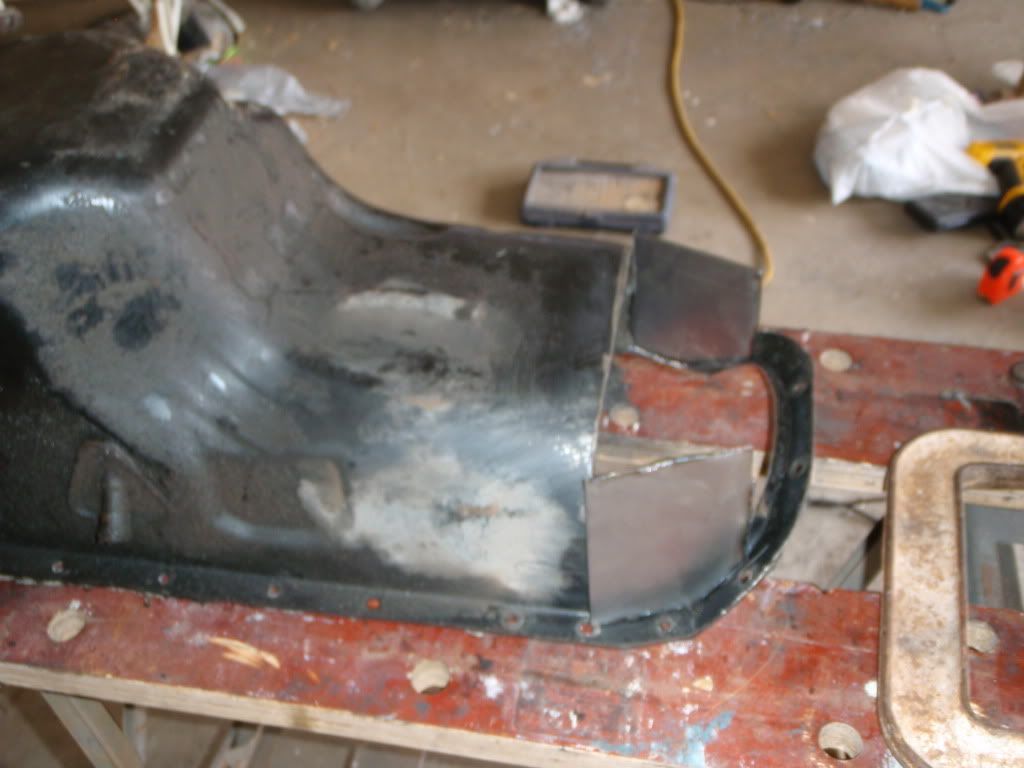
Then next came the rough outline of the front piece
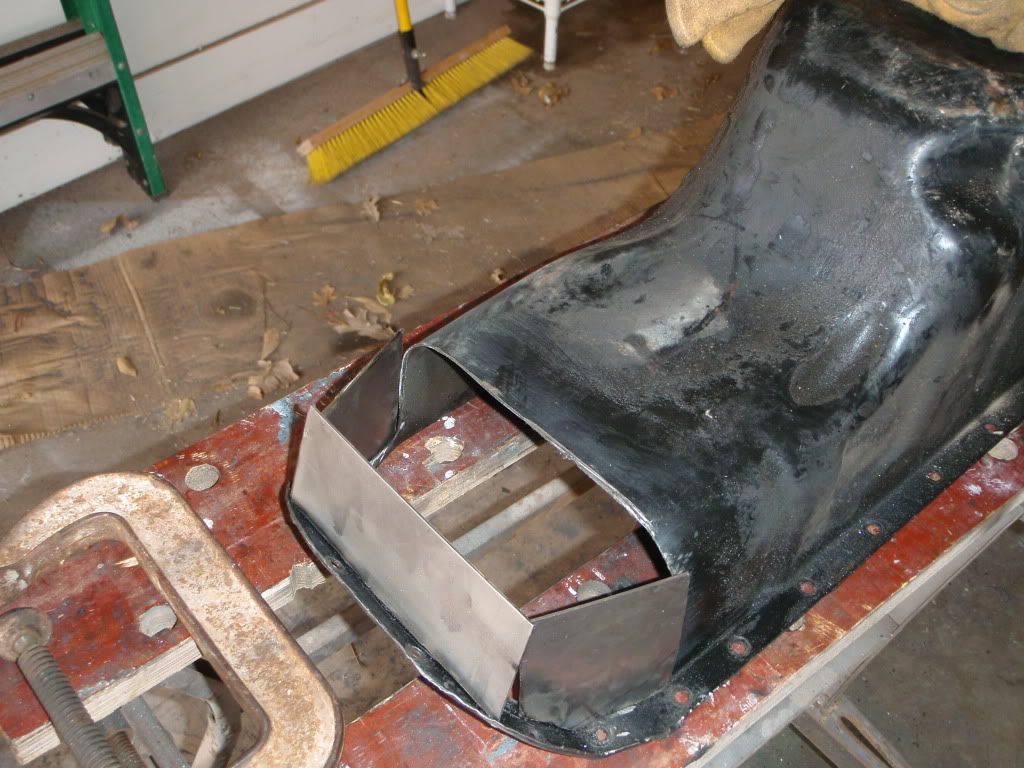
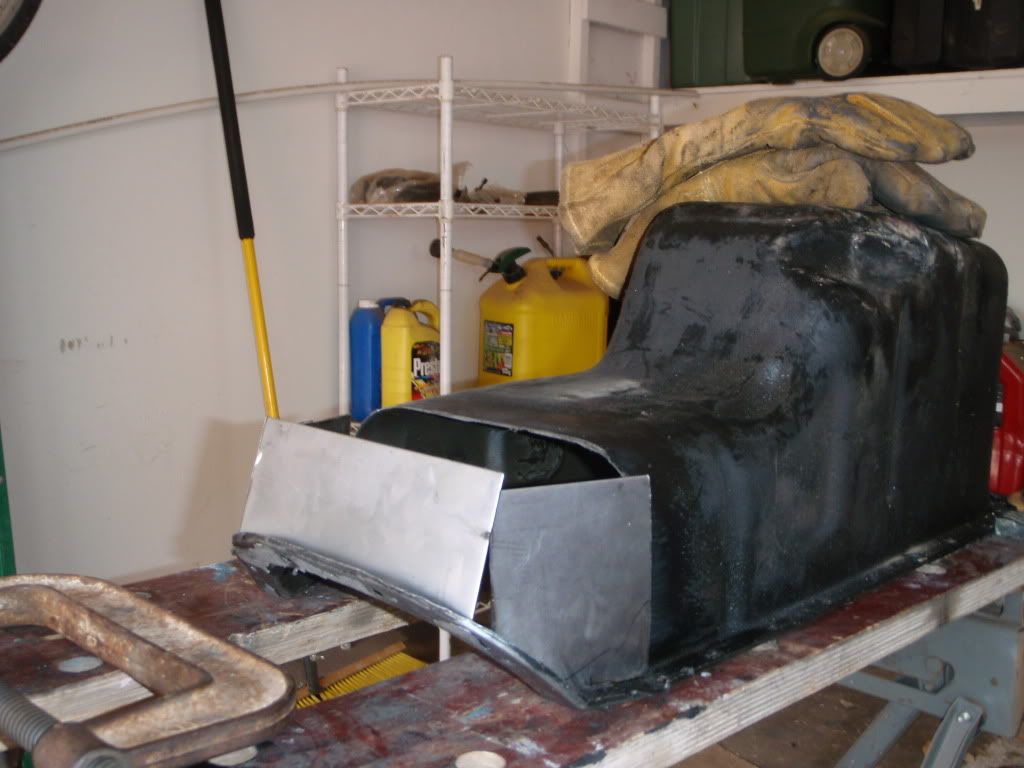
3rd step was the bottom, another initial rough cut
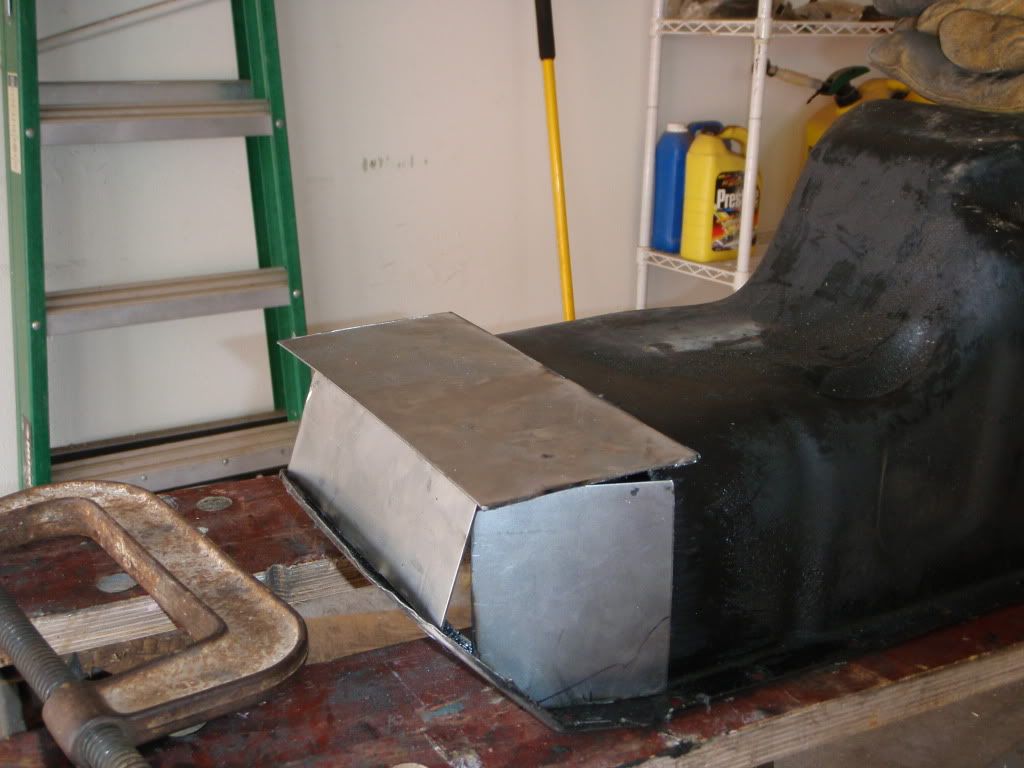
Now I need to get my welder hooked up and do a few tack welds of the sides into place so that the more precise cuts for the front/bottom can be made

After cleaning it up a little bit I figured the sides would be a good place to start


Then next came the rough outline of the front piece


3rd step was the bottom, another initial rough cut

Now I need to get my welder hooked up and do a few tack welds of the sides into place so that the more precise cuts for the front/bottom can be made
dieselfuelonly
Active Member
Question...would a Hummer oil pan clear the girdle and studs since it's totally different than the pickup engine pans? Or would you still have to do cutting and welding?
Mike K3500
Member
The Hummer pan would probably be a good option... BUT, you need the hummer pick up tube and if it's a 4x4 it would need a lift to clear the front diff.
turbonator
Member
The Hummer pan would probably be a good option... BUT, you need the hummer pick up tube and if it's a 4x4 it would need a lift to clear the front diff.
When we do our girdles, we were able to fit any of the three pans with the girdle. Originally, we used the hummer pan in the "Pugg", the pick-up and the dipstick are the same. The positioning of the dipstick in the different pans varies by about 3/4". Possibly your holes for the studs, were not far enough out to the outer edge of the girdle. The inner side of the angle needs to be relieved to allow the washer to sit flat on the tongue of the girdle. Our first, we had to machine (grind and file...LOL) alot for the pans to fit, consequently, just moved the holes out, and it resolved the problem.
