Navigation
Install the app
How to install the app on iOS
Follow along with the video below to see how to install our site as a web app on your home screen.
Note: This feature may not be available in some browsers.
More options
-
Welcome to The Truck Stop! We see you haven't REGISTERED yet.
Your truck knowledge is missing!
- Registration is FREE , all we need is your birthday and email. (We don't share ANY data with ANYONE)
- We have tons of knowledge here for your diesel truck!
- Post your own topics and reply to existing threads to help others out!
- NO ADS! The site is fully functional and ad free!
Problems registering? Click here to contact us!
Already registered, but need a PASSWORD RESET? CLICK HERE TO RESET YOUR PASSWORD!
You are using an out of date browser. It may not display this or other websites correctly.
You should upgrade or use an alternative browser.
You should upgrade or use an alternative browser.
Bringing 1993 Patch back from the dead...
- Thread starter WarWagon
- Start date
tanman_2006
Just a farm kid...
Got it dropped in yet? Times a wastin. Santa needs his sleigh!
BIGR
Lucky To Be Here
Got it dropped in yet? Times a wastin. Santa needs his sleigh!
I bet he is like a little kid with a new Christmas present, probably installing it right now...……...
n8in8or
I never met a project I didn’t like
I hope he’s busy opening it up and inspecting it first 
MrMarty51
Well-Known Member
Curious minds is wanting to know.
Whats a going on over there wit the enjun. LOL
Whats a going on over there wit the enjun. LOL
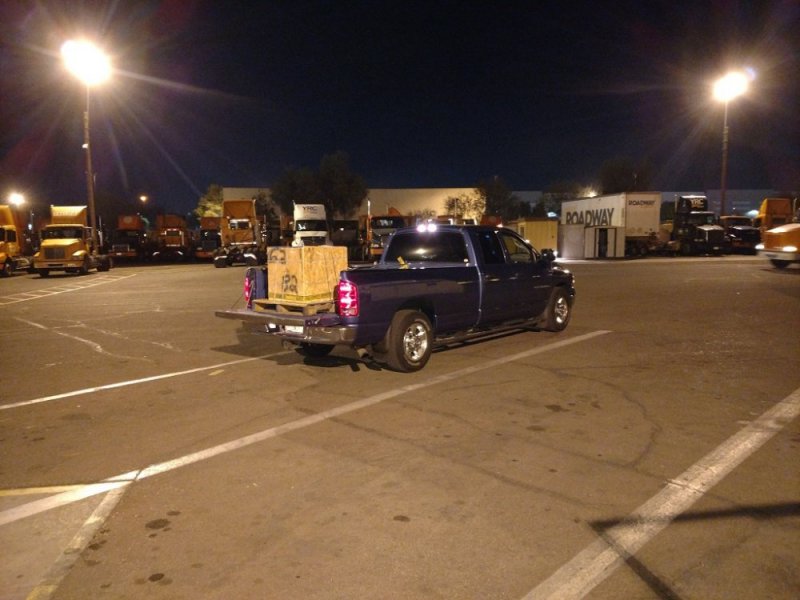
Well the Dodge rides better with 700# in the back. It's still in the back... Had to play it forward and help my Marine buddy not exceed his medication. You know the individuals medicated for others protection by the Phoenix VA? The very serious situation not his fault... It had a happy ending so worth the two days spent on it. That's all I can say on it.
I have to get the rest of the stuff of the scrap metal block, remove it from the stand, and then figure out how to back the Dodge up the grade of my driveway to unload the engine.
Then I get to see what heads are actually on the 6.2 engine otherwise I am going to rebuild the 6.5 heads I have.
Oh yeah, pray "82" on the crate doesn't mean 1982!
MrMarty51
Well-Known Member
Good on You for helping out the Marine vet. That to me, in itself is an act of valor.
So I got to open my Christmas Present!
No really it goes beyond Just The Box...
Valve cover says 1990 Emissions Exempt. Oil pan will have to be swapped. Heads appear to be 6.5 heads so I will rebuild them. Valves have coolant or water pitting on them. Possible Teds swapped heads rather than just pre-cups and that's fine with me as the 6.2 heads would have been scrap to me. Cylinders appear to have some miles on them as the crosshatch is fading. Compression is ~550. Maybe it will start without drama, ya think?
WTF is this?
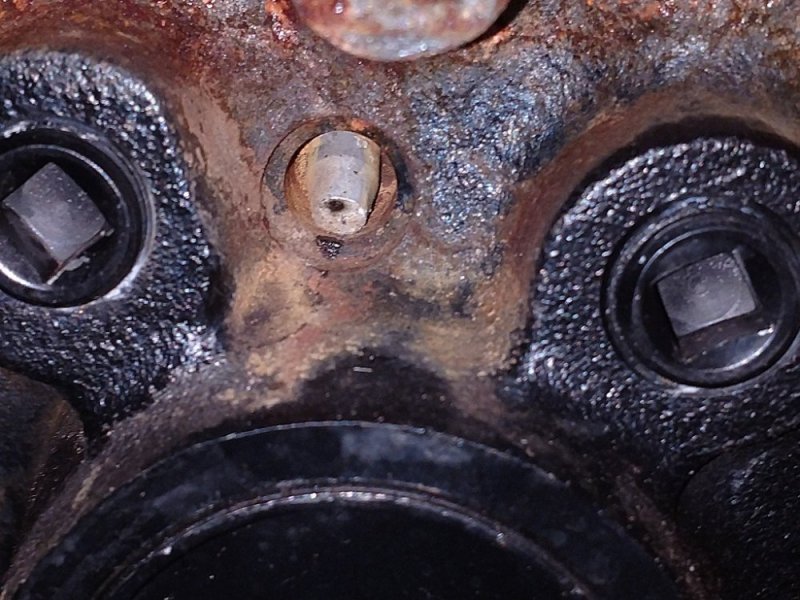
Drain hole in valley
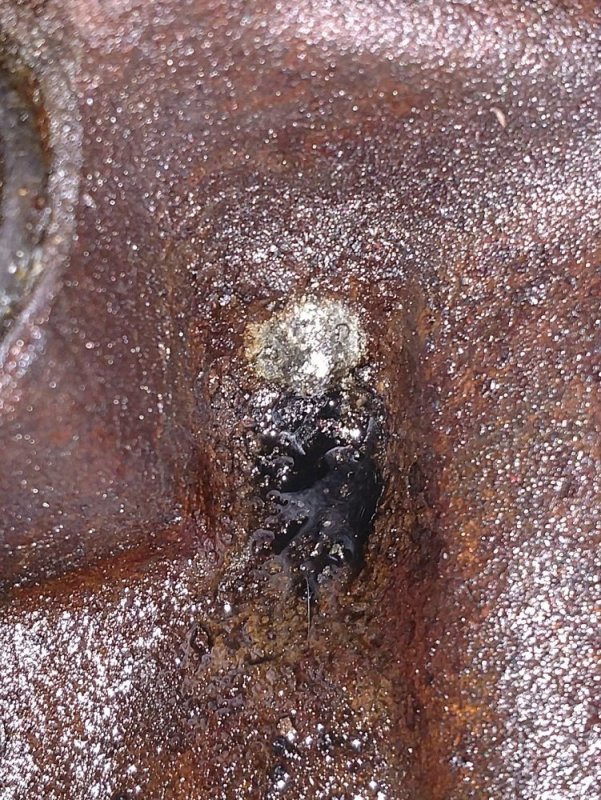
Knocked out.
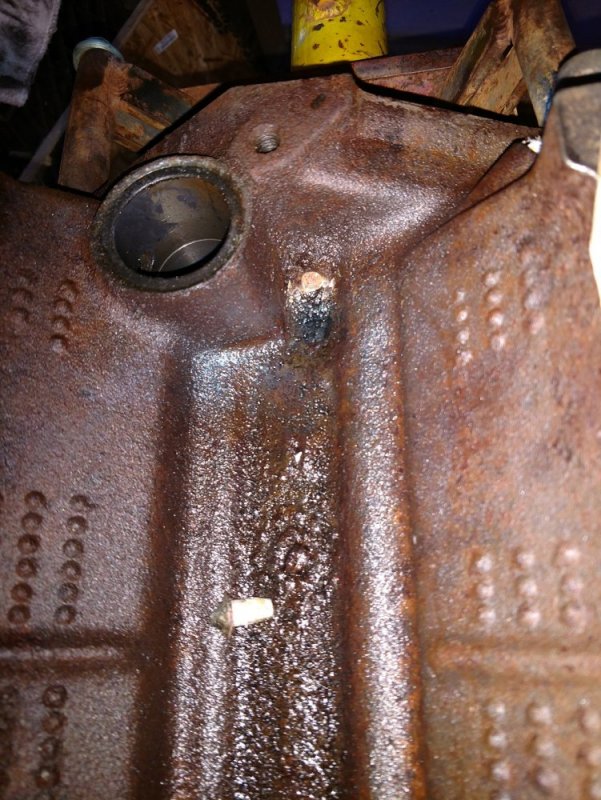
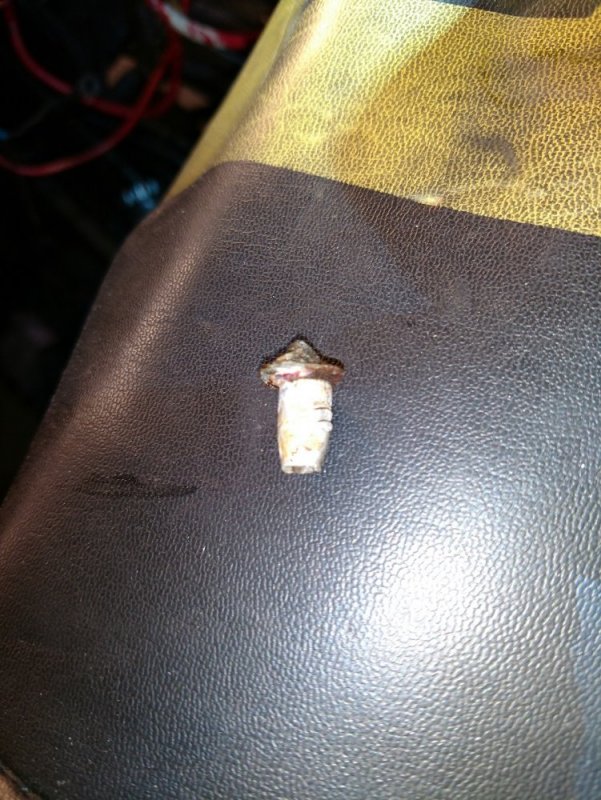
Head casting number indicates 6.5 or maybe newer GM replacement 6.2 engine.
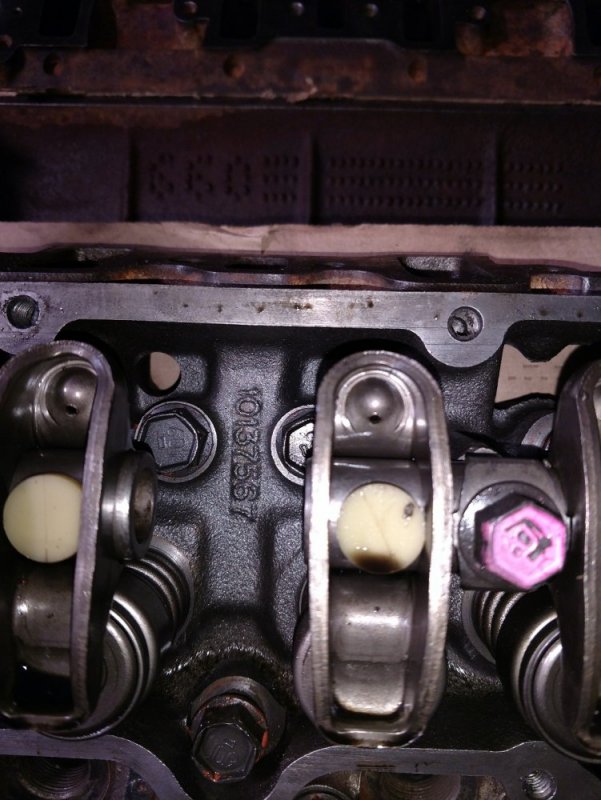
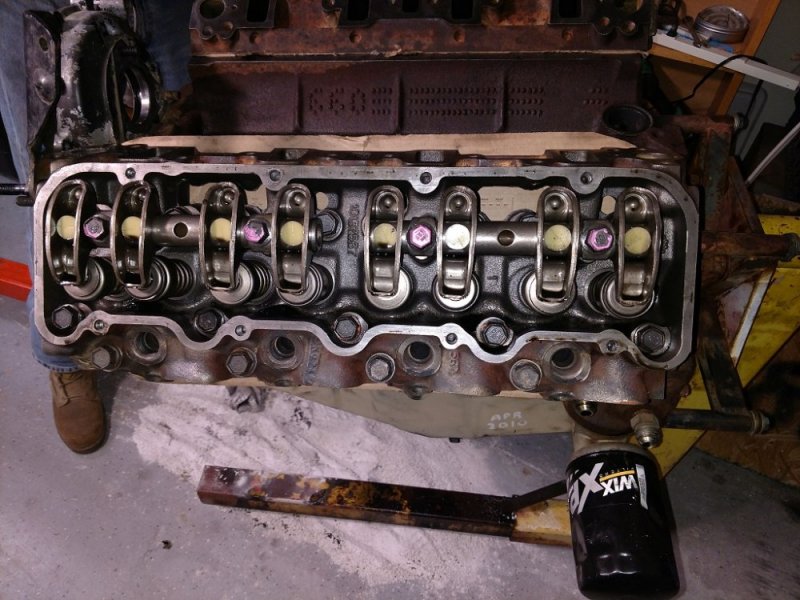
Dear Fel-Pro,
About your head gasket kit...
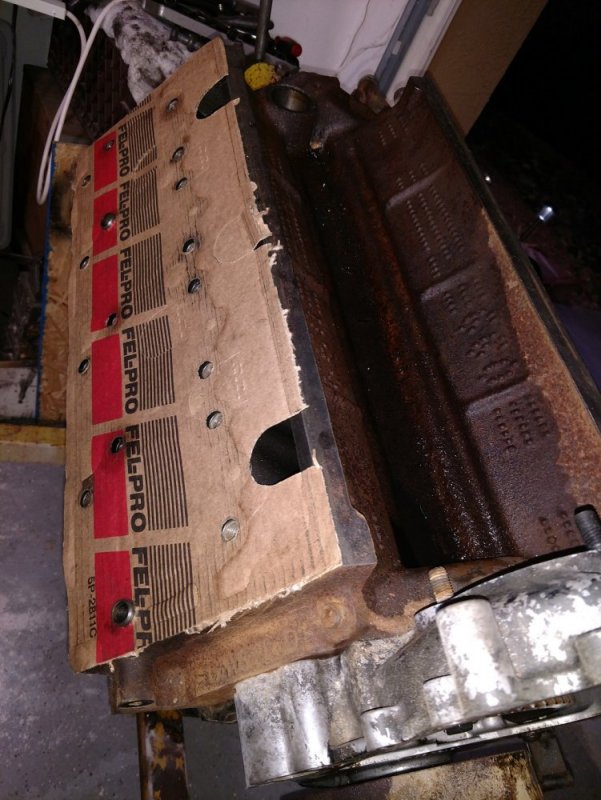
These engines like to smash stuff into pistons... I am tossing the pistons so NBD.
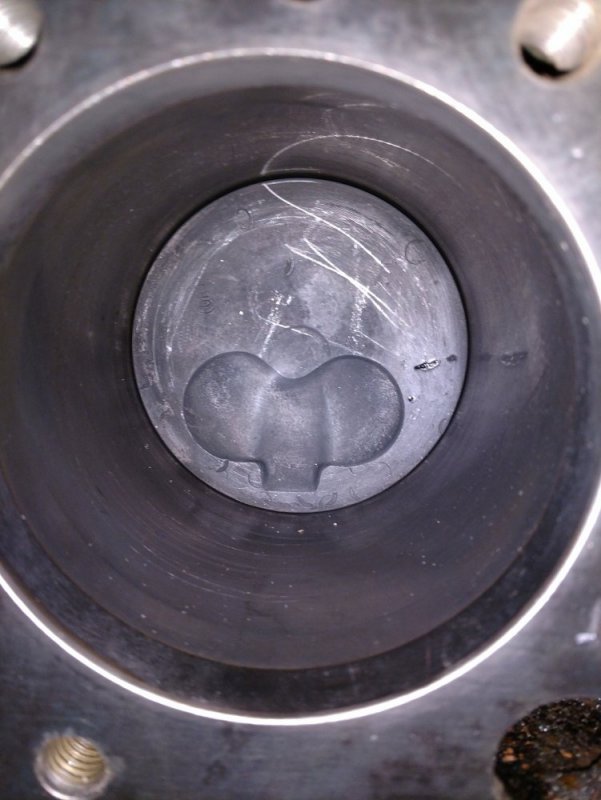
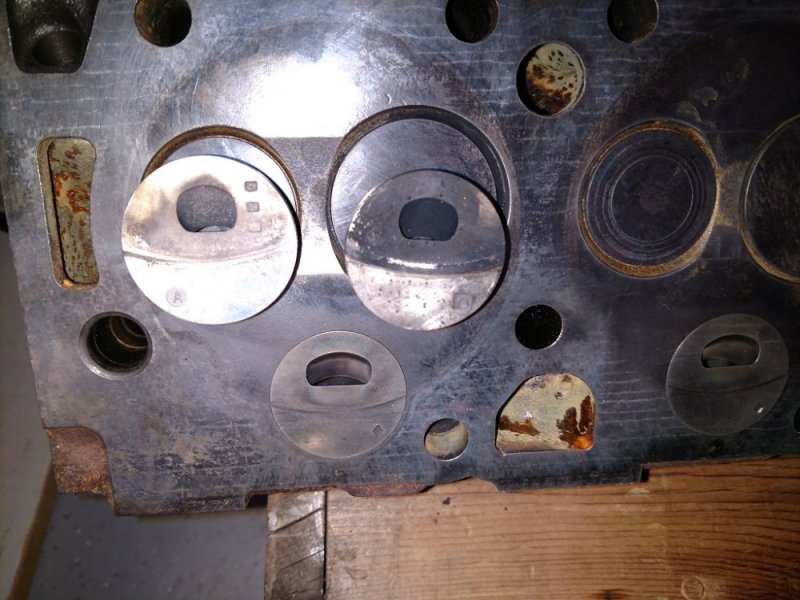
Precups… 3 Bars came out of a replacement NA 6.2 engine, Square was in Patch when I bought it assumed 6.5 NA precup. And Diamonds. Finally got some dammed Diamonds! Oh yeah that funky exhaust valve is. Finger deep grooves.
No really it goes beyond Just The Box...
Valve cover says 1990 Emissions Exempt. Oil pan will have to be swapped. Heads appear to be 6.5 heads so I will rebuild them. Valves have coolant or water pitting on them. Possible Teds swapped heads rather than just pre-cups and that's fine with me as the 6.2 heads would have been scrap to me. Cylinders appear to have some miles on them as the crosshatch is fading. Compression is ~550. Maybe it will start without drama, ya think?
WTF is this?

Drain hole in valley

Knocked out.


Head casting number indicates 6.5 or maybe newer GM replacement 6.2 engine.


Dear Fel-Pro,
About your head gasket kit...

These engines like to smash stuff into pistons... I am tossing the pistons so NBD.

Precups… 3 Bars came out of a replacement NA 6.2 engine, Square was in Patch when I bought it assumed 6.5 NA precup. And Diamonds. Finally got some dammed Diamonds! Oh yeah that funky exhaust valve is. Finger deep grooves.

The above is "before" head pics. After Diesel Head machine shop got done. New valve springs and valves. The valve stem seals were so much fun on my last project I was happy to let the shop deal with that.
The machine shop noted they had to cut the exhaust valve seats twenty thousands for the valves to fit proper. They ordered in some aftermarket valves and same thing. So some Hummer 6.5/6.2 heads may have had different exhaust valves. The shop said they had seen this before on Hummers and I am like Um... what do you think this came out of? I really didn't see a difference when I dropped the valves that came out in the old heads. Maybe height rather than diameter?
Painted silver. I will have to scrape the paint off the valve cover gasket surface.
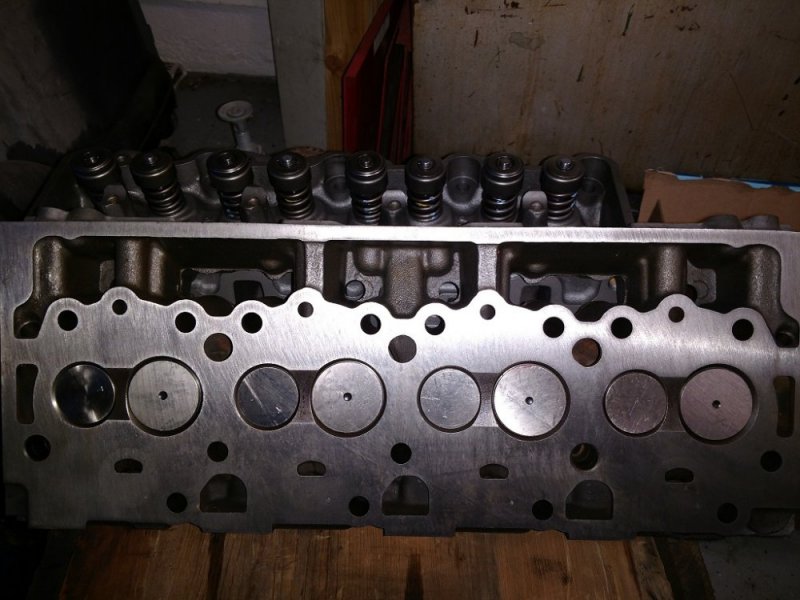
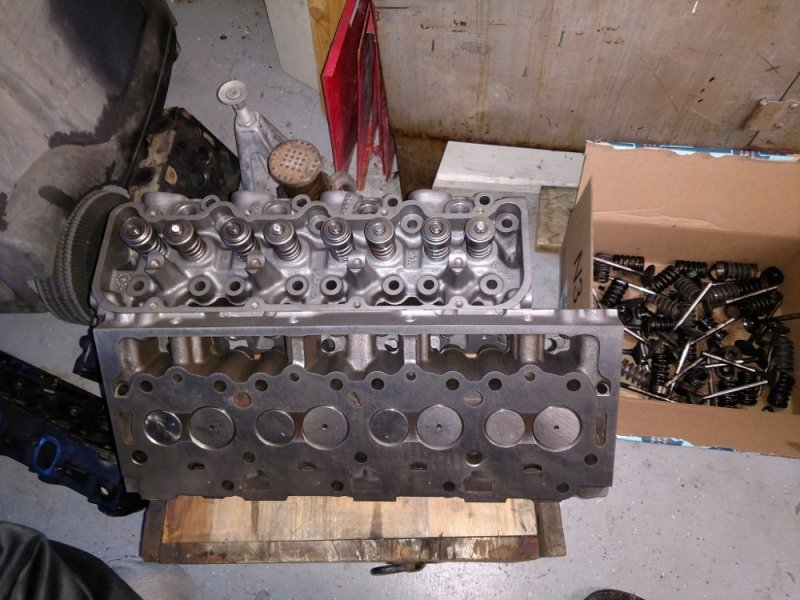
The machine shop noted they had to cut the exhaust valve seats twenty thousands for the valves to fit proper. They ordered in some aftermarket valves and same thing. So some Hummer 6.5/6.2 heads may have had different exhaust valves. The shop said they had seen this before on Hummers and I am like Um... what do you think this came out of?
Painted silver. I will have to scrape the paint off the valve cover gasket surface.


The valve stem seals were so much fun on my last project I was happy to let the shop deal with that.
It's funny you mentioned that...
I was about to post a how to video showing how to cut the valve stem seal seats for different seals.
I also will be renting the tools out and will list what seal numbers are needed. I install .530" diameter seals on both intake & exhaust on heads I work on now.. These seals are common and much easier to deal with and are Vinton double lip seals.
Well any updates on your build?
So I got the gaskets I need in stock. (Per the valve spring discussion I am going stock head gaskets.) The Right Stuff to glue it together, and need just a couple more parts. Oil pump as the pickup assy is different for the hummer oil pan - that won't clear the front diff on my 4x4 pickup. And with the pistons popped out it looks like I need rod bearings. I will be checking the mains as well in a day or so. The chain isn't as slack as I am used to seeing so IMO this has under 30K since it was touched last. IMO it's been gone through.
Select Fit info would be interesting. I have Red, Yellow, and Green paint splashes on the block and crankshaft. Upper shell reads (and bottom is diffrent number ):
GM
A - 250
9 94
C101
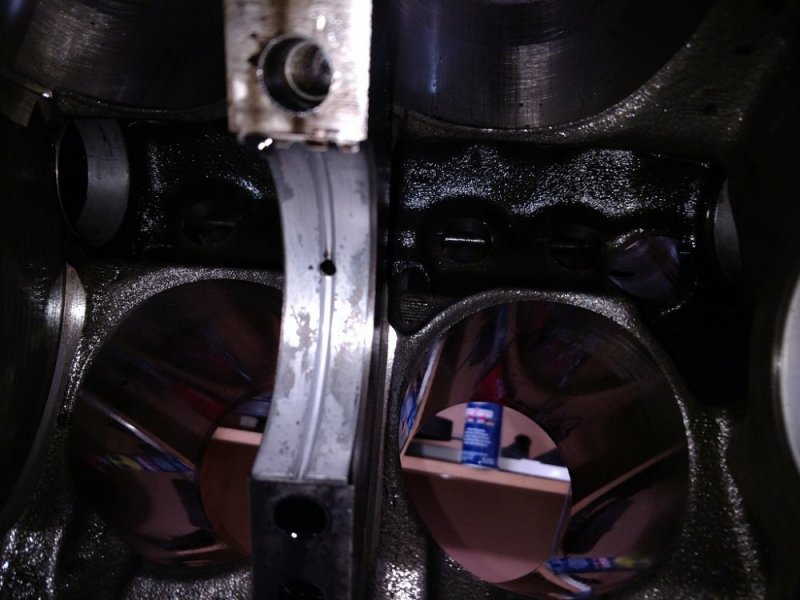
#3 rod bearing looks the worst.
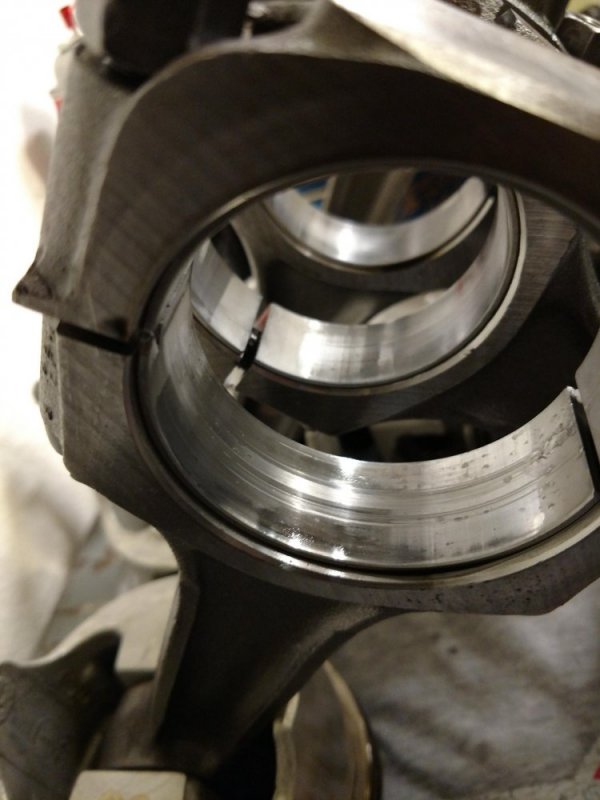
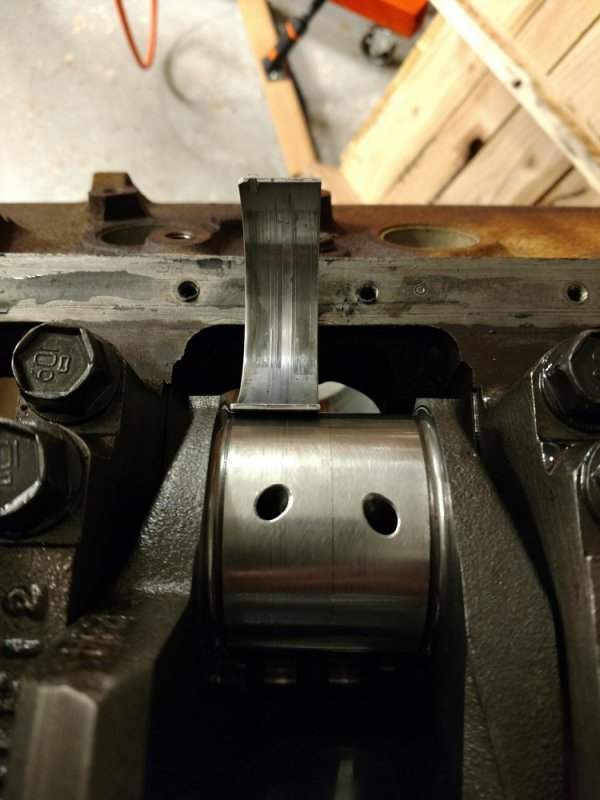
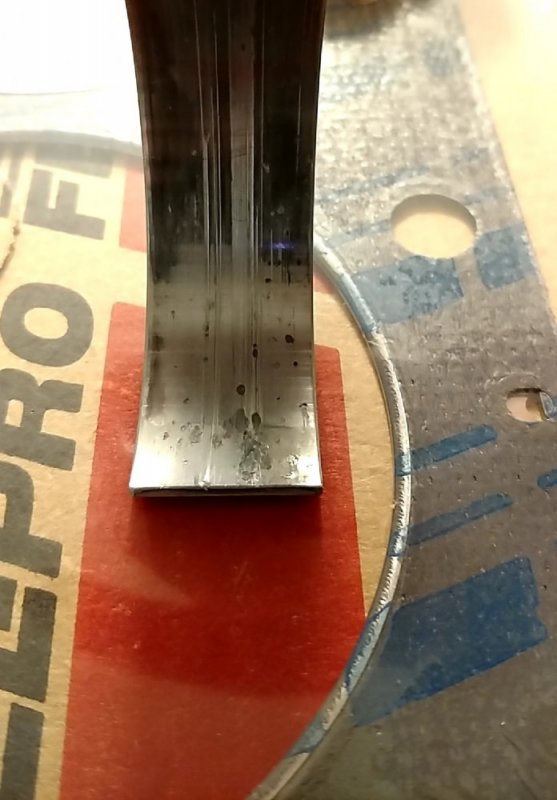
Patch in the garage, but, note the long pickup and extra support to stud on the HMMWV (Humvee) oil pump I can't use with the pickup oil pan.
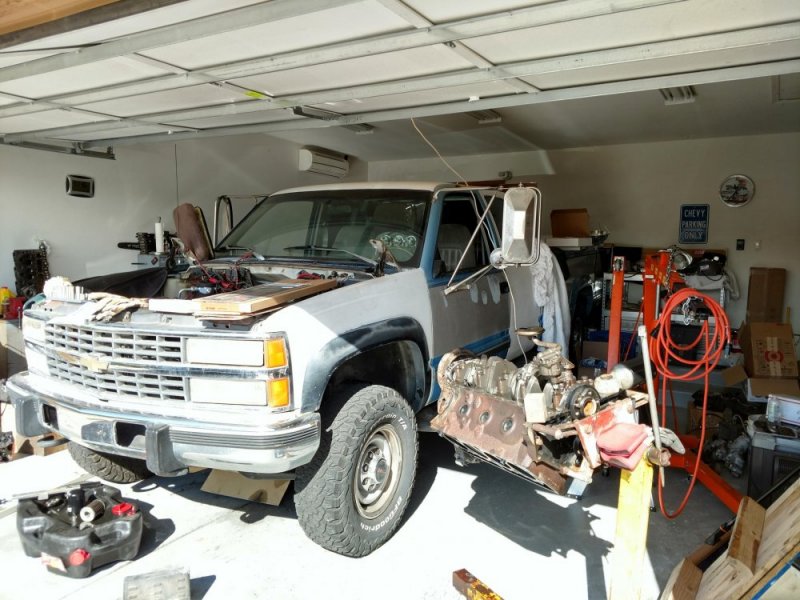
Select Fit info would be interesting. I have Red, Yellow, and Green paint splashes on the block and crankshaft. Upper shell reads (and bottom is diffrent number ):
GM
A - 250
9 94
C101
#3 rod bearing looks the worst.


Patch in the garage, but, note the long pickup and extra support to stud on the HMMWV (Humvee) oil pump I can't use with the pickup oil pan.

Will L.
Well-Known Member
Sorry. Now that you have a part, you have to get a hummer or hmmwv.
Waitin for those main bearing pics
Waitin for those main bearing pics
Can You snap and post a pic of that oil ring, just for clarification, I never ever did see a one piece unit before. LOL
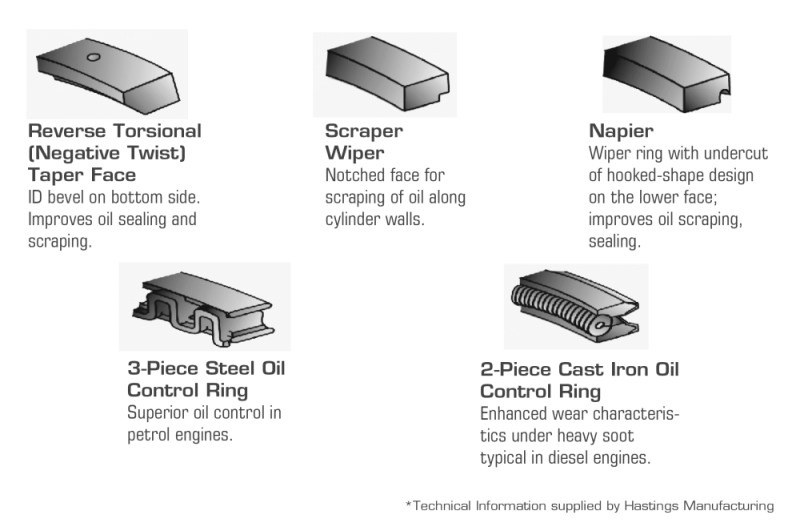
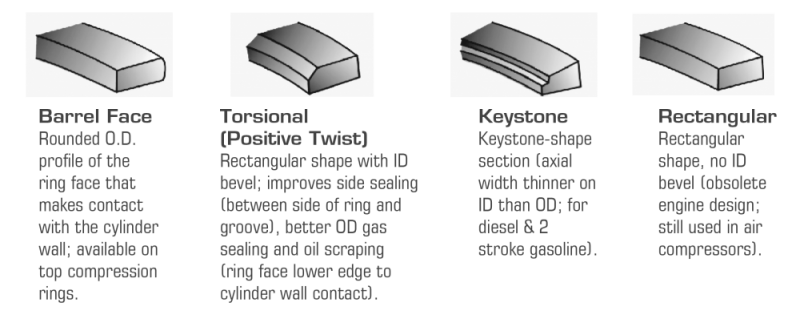
Here is an idea of the oil control rings I am talking about. My first gapless ring set from Total Seal has the 3 piece oil control on the left. More or less two rails and an expander in the middle. My replacement set has the oil control ring on the right. (Yeah, 2 piece technically. Ring and expander.)
For fun including top ring info as we (6.5/6.2) use a Keystone ring - unlike the picture both sides taper thick on outside and thin on the ID, inside diameter. Keystone design prevents ring sticking.
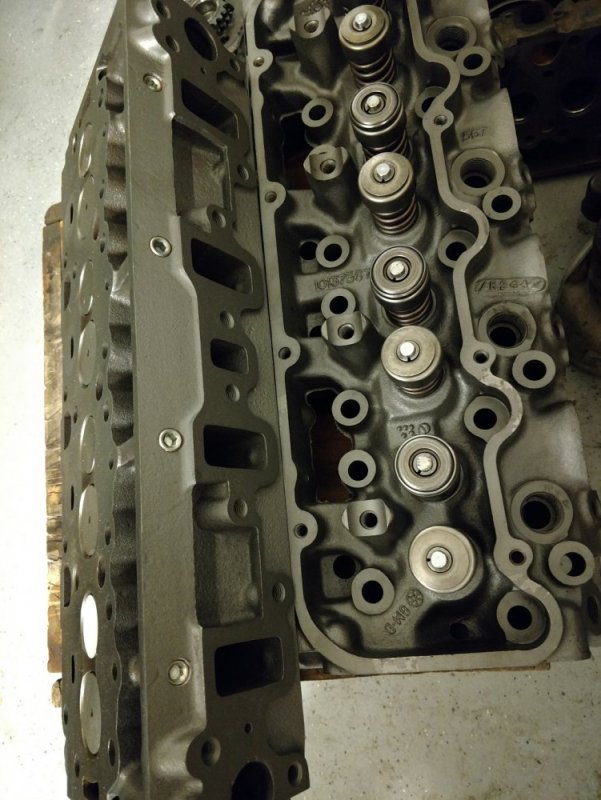
Detail of tubes put in heads to stop coolant if they crack. Part of a complete head rebuild by a good head shop. Another discussion made me aware this is what was done vs 'just new plugs'.
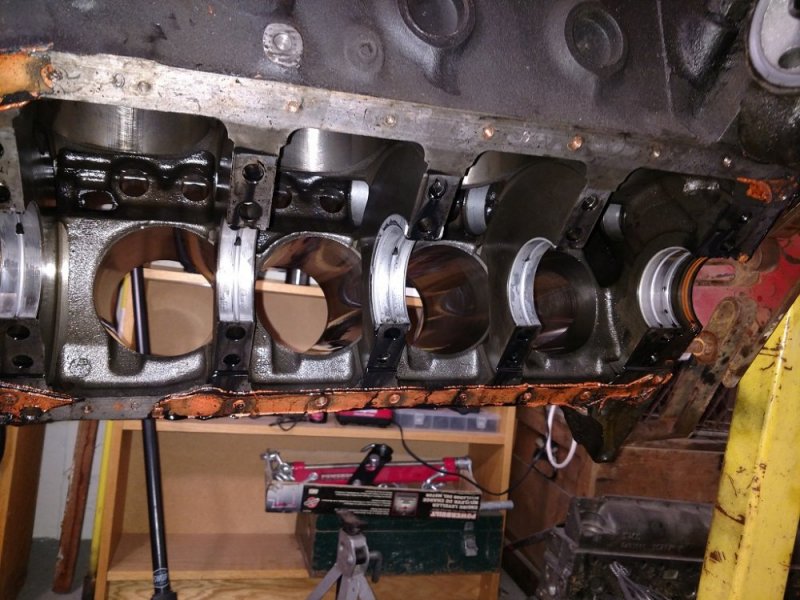
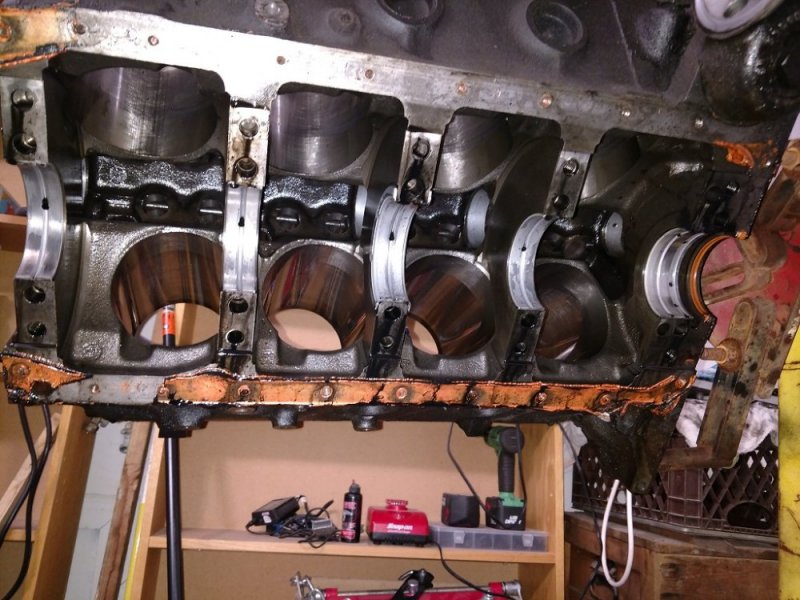
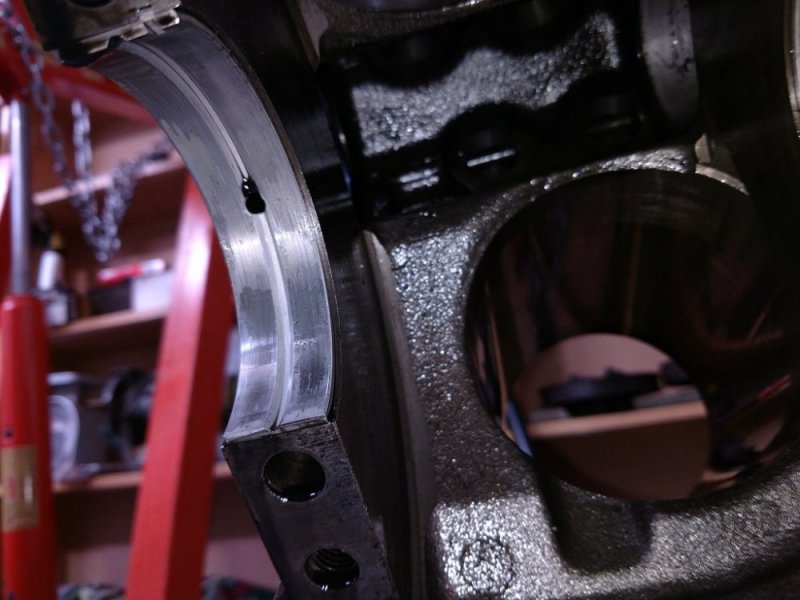
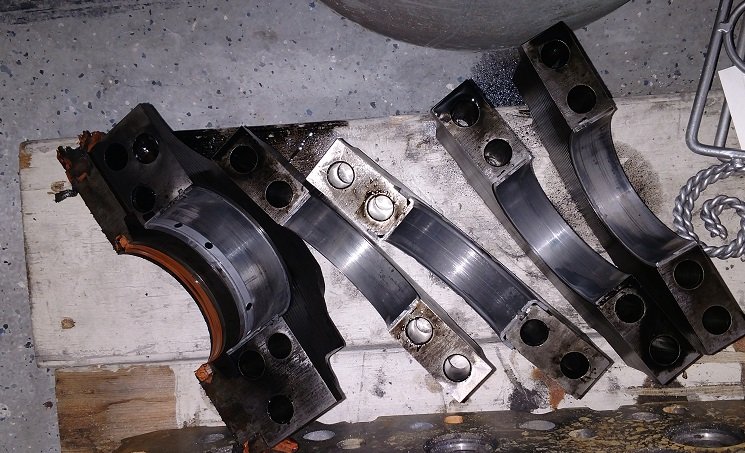
Pulled the mains and tracked down debris that came from mains area to the #3 rod bearing. Bearings shells took the damage, via embedded debris, saved the crank here.
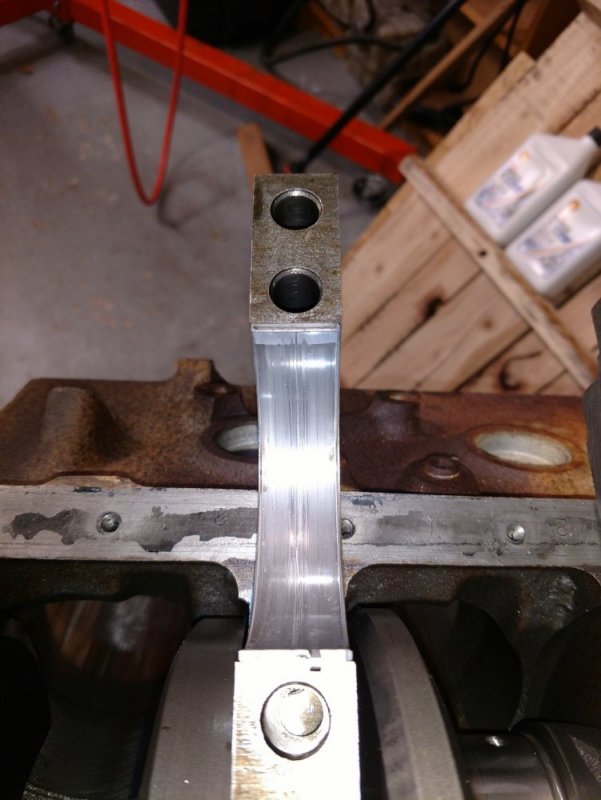
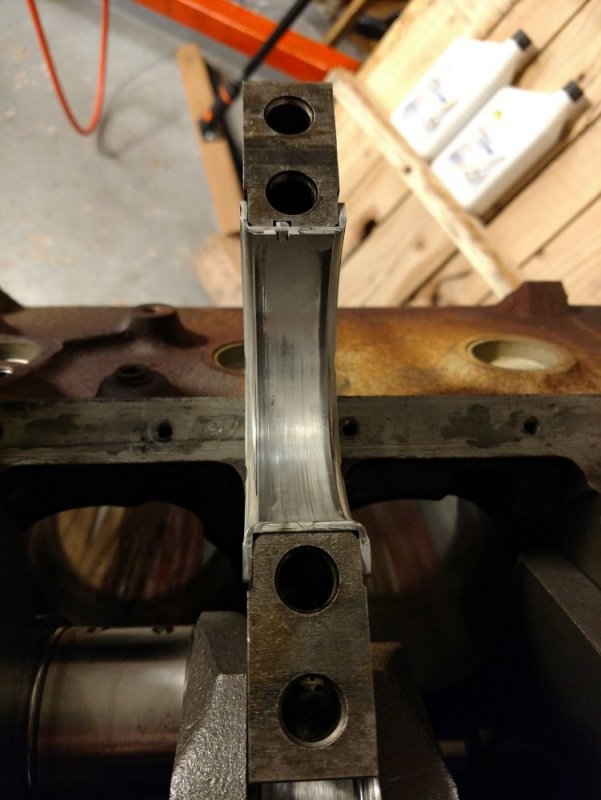
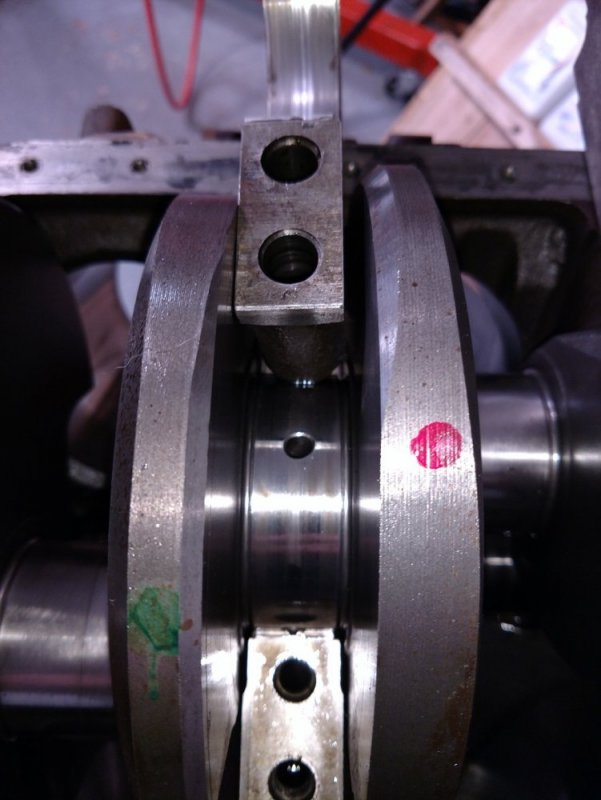
Little rust near rear seal. Should clean up easy.
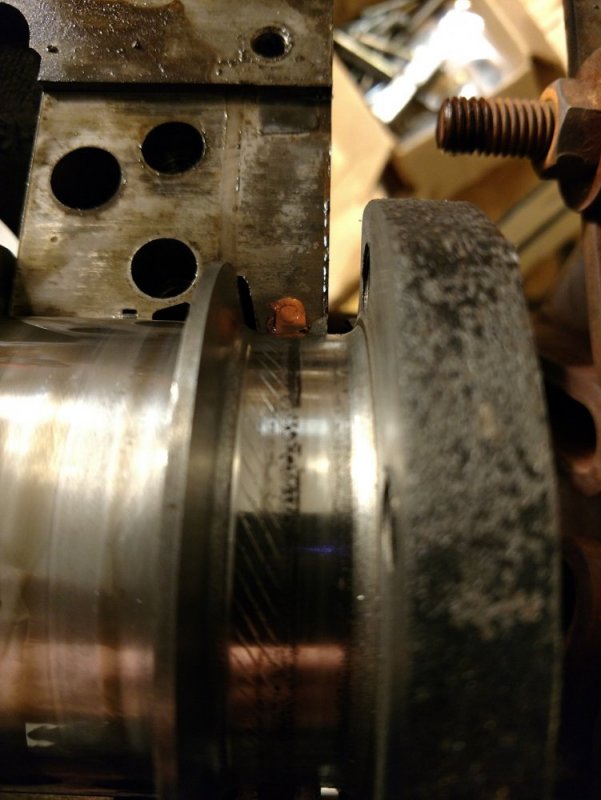
No sealant on crank to damper gets you oil where it doesn't need to be leaking.
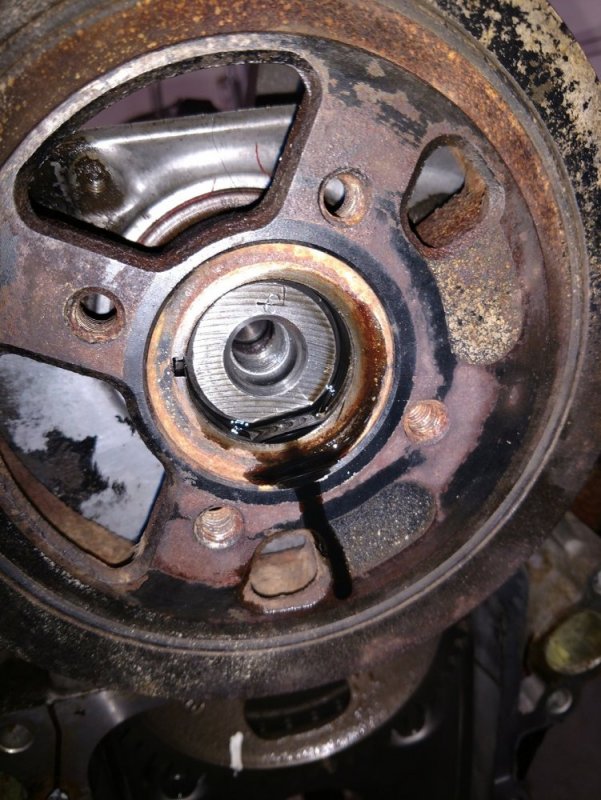

Pulled the mains and tracked down debris that came from mains area to the #3 rod bearing. Bearings shells took the damage, via embedded debris, saved the crank here.


Little rust near rear seal. Should clean up easy.

No sealant on crank to damper gets you oil where it doesn't need to be leaking.

Last edited:
Might as well take the block and have the shop hot tank it and replace the plugs and clean all the oil galleys..
MrMarty51
Well-Known Member
I apply no. 1 Permatex to the H. Balancer side of the washer and also to the underside of the bolt head to keep oil in where it belongs.
Seems to have worked well for about 40 years of wrenching. LOL
Seems to have worked well for about 40 years of wrenching. LOL
This is what I see on the backs of bearings: (I left the 1994 dates off.)
Main Bearings:
Bottom
#1 .013US
#2 .013us A250 A785
#3 0.013us A200 5
#4 0.013us A250 8785
#5 0.013us A200 194A
Top
#1 0.026 A250 A082
#2 0.013 A200 A362
#3 0.013 A200 4
#4 0.013 A200 A362
#5 0.013 A250 160B
Connecting Rods:
Bottom
#1 026MMUS A250 A861
#2 0.026 A250 A861
#3 A250 A102
#4 A250 C305
#5 A250 C101
#6 A250 C305
#7 A250 C101
#8 A250 C305
Top:
#1 A250 C101
#2 A250 C305
#3 C101 A250
#4 A250 C305
#5 A250 A102
#6 A250 C305
#7 A250 C101
#8 A250 C305

