NVW
Well-Known Member
LOL, Paul ( Sunshine) will be sad to hear this

Follow along with the video below to see how to install our site as a web app on your home screen.
Note: This feature may not be available in some browsers.
LOL, Paul ( Sunshine) will be sad to hear this
I am going to blame Limey for this episode of travel!
")
Check the wiring on the transfer case. Mine broke. I fixed it by running a switch into the cab to engage the actuator. Now I have 2LO if I need it.
Let's get together when you're back in town and I'll give you a hand with it.
I hope it is just the camera angle. The left hole looks a little pushed to the upper left as well. "Positive waves man."
Yes, they are geared to match and mine, unfortunately, are 3:73. While the internal components such as that now half-mooned disc would be of use, I can't see ruining a complete unit for that part. It's now special order but the unit is working fine, even with a bite out of the disc.Paul, I know where a good front differential is. Are they geared to match the rear? The '95 has 4.10 rears.
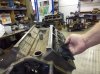
 Block Cleaned
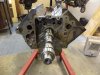
 Cam stuff
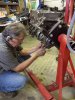
 Cylinder Prep
 Cross Hatching
 Studded Mains
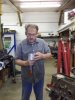
 That's the Bonneville Racer's (LSR) P-400 getting dialed-in in the background.


 :thumbsup:, it has a 1/3 sweep arch face with letters so small as to be invisible regardless of light. It was very slow to respond to changes and always a little low compared to ECM readings on the Palmer Dash Command.