Navigation
Install the app
How to install the app on iOS
Follow along with the video below to see how to install our site as a web app on your home screen.
Note: This feature may not be available in some browsers.
More options
-
Welcome to The Truck Stop! We see you haven't REGISTERED yet.
Your truck knowledge is missing!
- Registration is FREE , all we need is your birthday and email. (We don't share ANY data with ANYONE)
- We have tons of knowledge here for your diesel truck!
- Post your own topics and reply to existing threads to help others out!
- NO ADS! The site is fully functional and ad free!
Problems registering? Click here to contact us!
Already registered, but need a PASSWORD RESET? CLICK HERE TO RESET YOUR PASSWORD!
You are using an out of date browser. It may not display this or other websites correctly.
You should upgrade or use an alternative browser.
You should upgrade or use an alternative browser.
2008 GMC Envoy Denali
- Thread starter n8in8or
- Start date
BIGR
Lucky To Be Here
Very nice, looking good, we know it takes time, but we are so anxious to see it running, with flames coming out the exhaust...…
MrMarty51
Well-Known Member
Can I break it in for You ? LOLOLOL
n8in8or
I never met a project I didn’t like
Not a chance.....Can I break it in for You ? LOLOLOL
MrMarty51
Well-Known Member
Not a chance.....
n8in8or
I never met a project I didn’t like
Weekend update time.
Yesterday I only had time to make a quick junkyard run. I needed a cam sensor just to plug the hole in the block since I converted to the Gen 4 sensor in the cam cover. I also grabbed the plugs for the knock sensor holes in the valley cover.
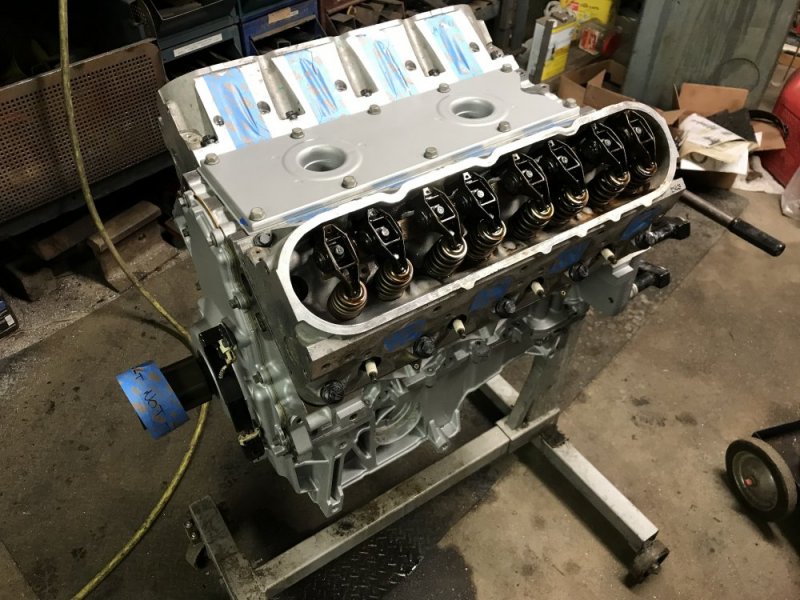
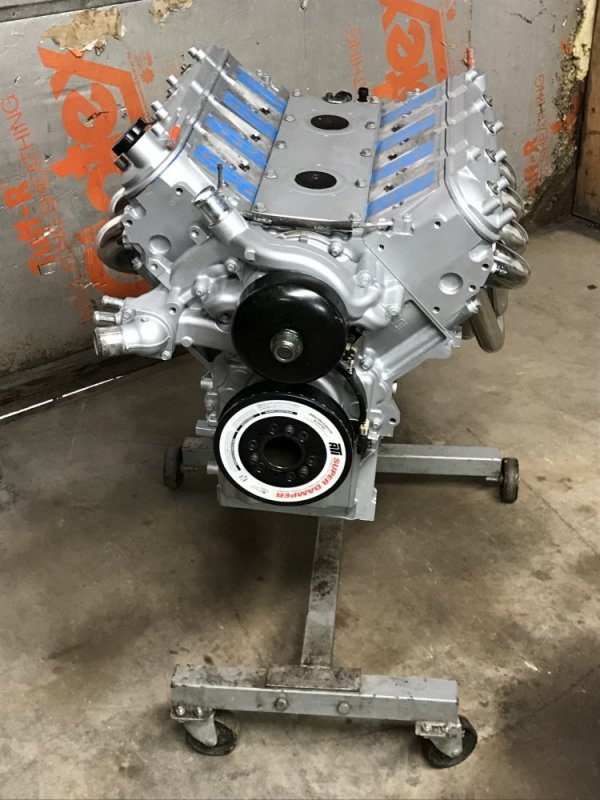
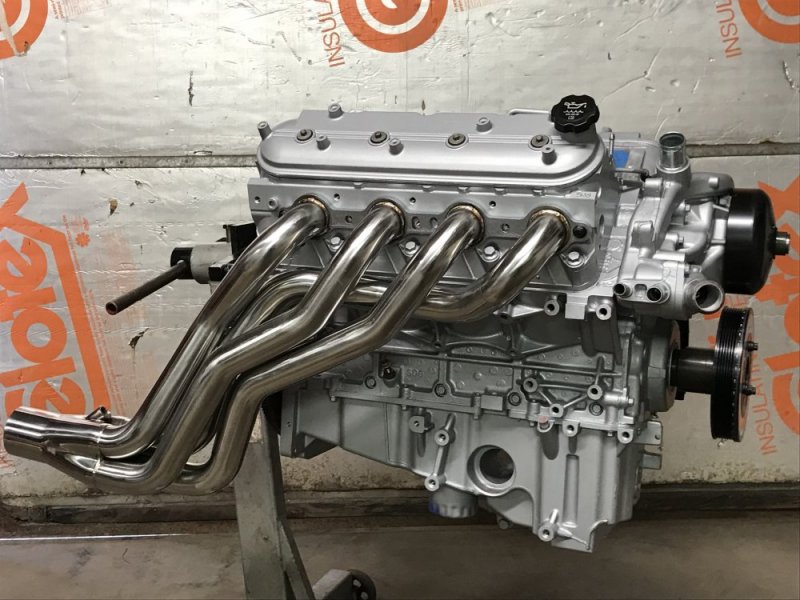
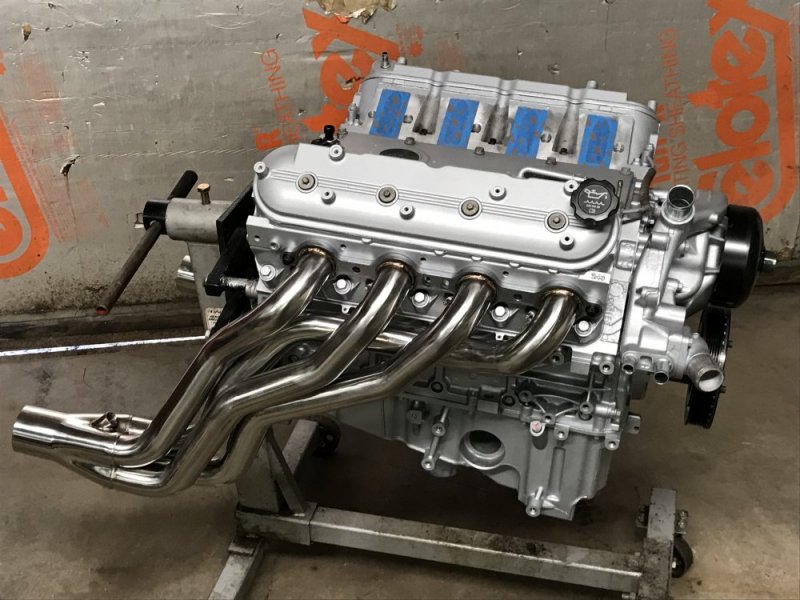
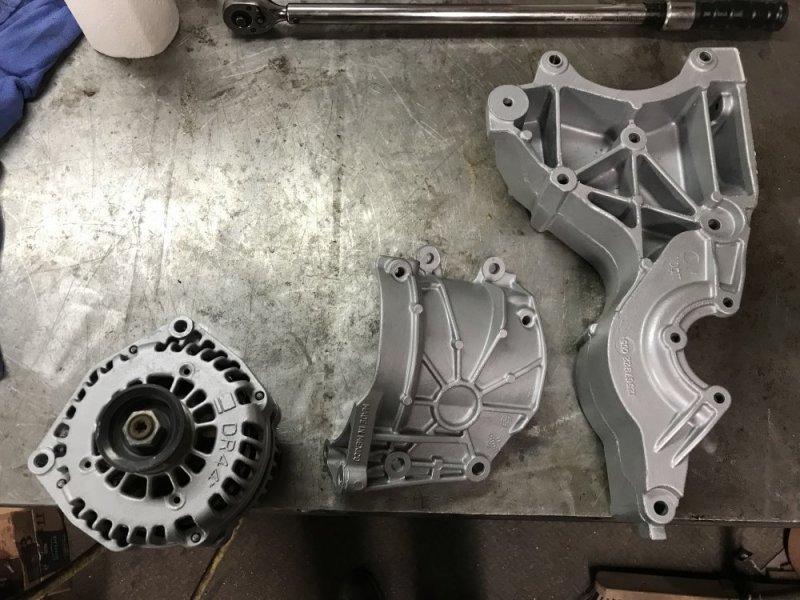
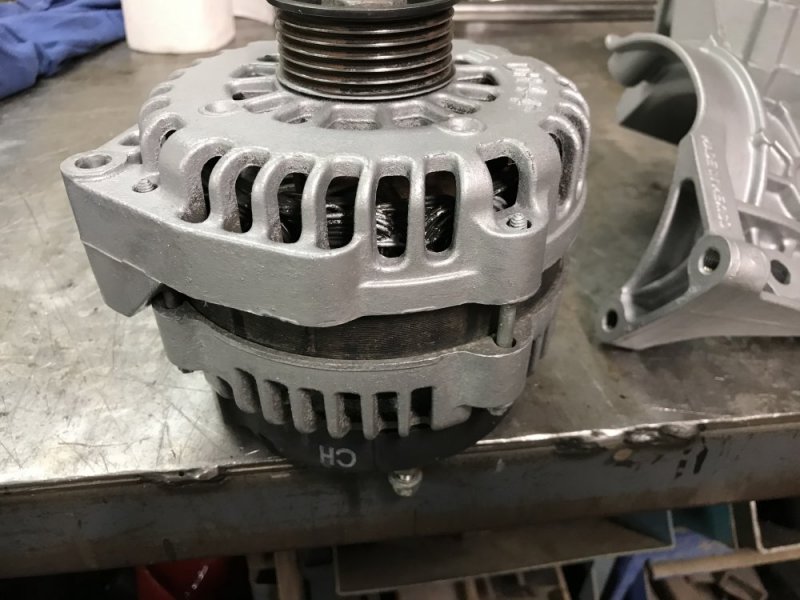
Today I continued sealing the engine up. I installed the valve covers and all the rest of the sensors and plugs needed to fill all the holes. Once sealed up I degreased the heads, water pump and a couple brackets. I also cleaned up the alternator. I should have taken a “before” pic - it was pretty cruddy and since the rest of the engine compartment was coming together nicely I figured I should clean it up, too. I didn’t use degreaser on it because I didn’t want to damage the internals. I popped off the rear plastic cover and then went over the case with a scotchbrite pad. Then I wiped it down with general purpose cleaner (409). For the engine, I installed the water pump and then slapped paint on the heads and any other bare areas.
Here are the brackets and alternator:
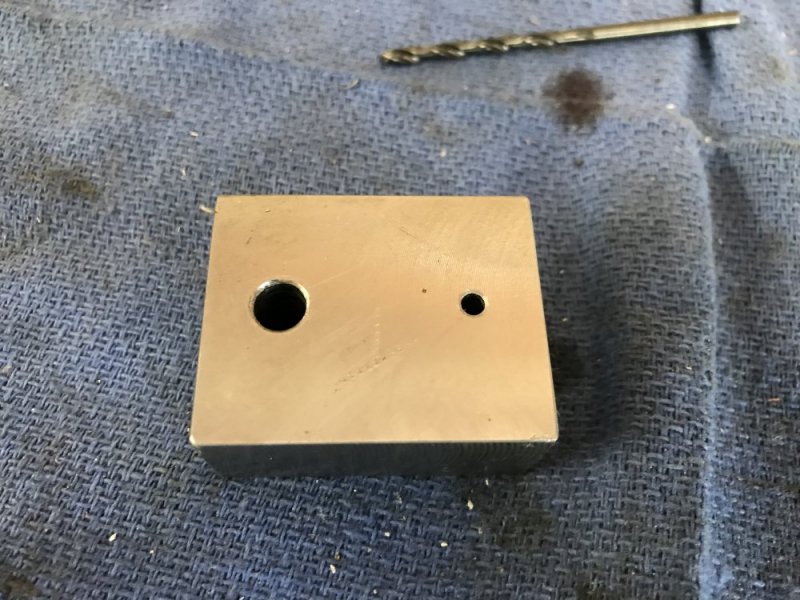
Then I moved on to mods for installing the knock sensors. The other night I installed all of the accessories so I could see what areas were free for mounting the knock sensors on the sides of the block. The driver side was easy because there was a big cast boss in the perfect location. I used the drill bushing I made for the oil pan bolt hole to drill this hole too - I wanted to make sure it was square to the face.
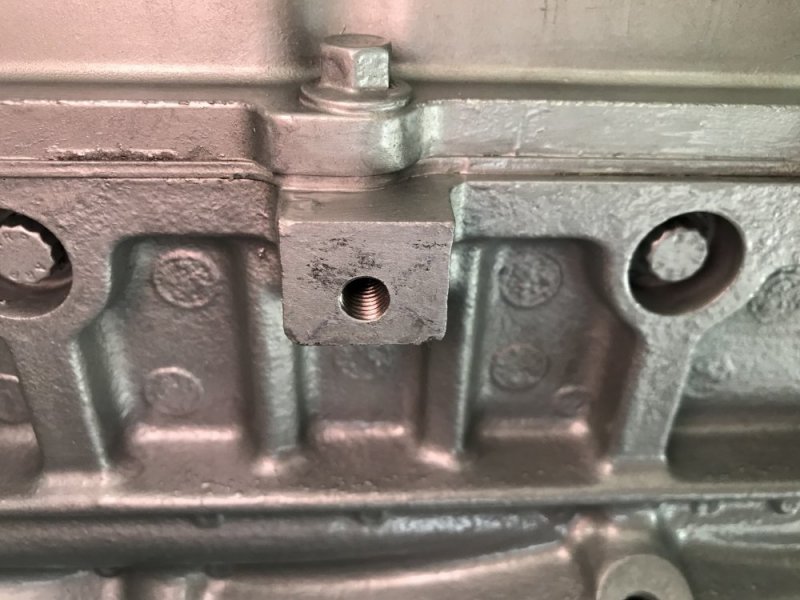
The passenger side was a bit more tricky. There were a couple cast bosses that I could have drilled and tapped, but they had large holes bored in the middle of them and I wasn’t sure how that would affect the acoustics for the sensors. Then I noticed the dipstick tube boss in the block. This needed to be plugged anyway since the Envoy uses a hole in the oil pan and not the one in the block. The hole was the perfect size for a 7/16-14 tap. So Friday at work I put a 7/16 bolt in the lathe and bored a 17/64” hole through it. Today I tapped it with an M8x1.25 tap and this made a threaded adapter so I could bolt the knock sensor there. I installed the insert with red Loctite and threaded it in with an 8mm bolt. I’m leaving it to sit overnight so the Loctite sets up well. Tomorrow I’ll grind the boss smooth so the sensor has a flat surface to seat on.
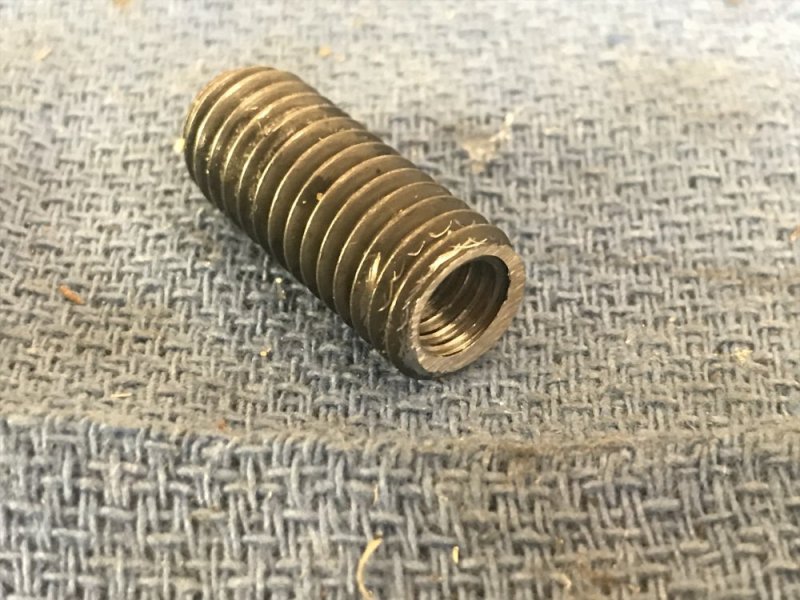
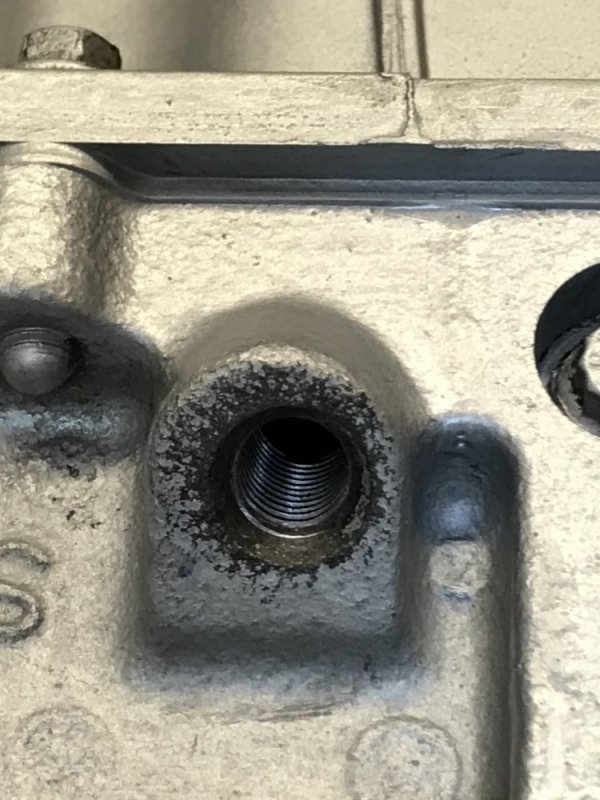
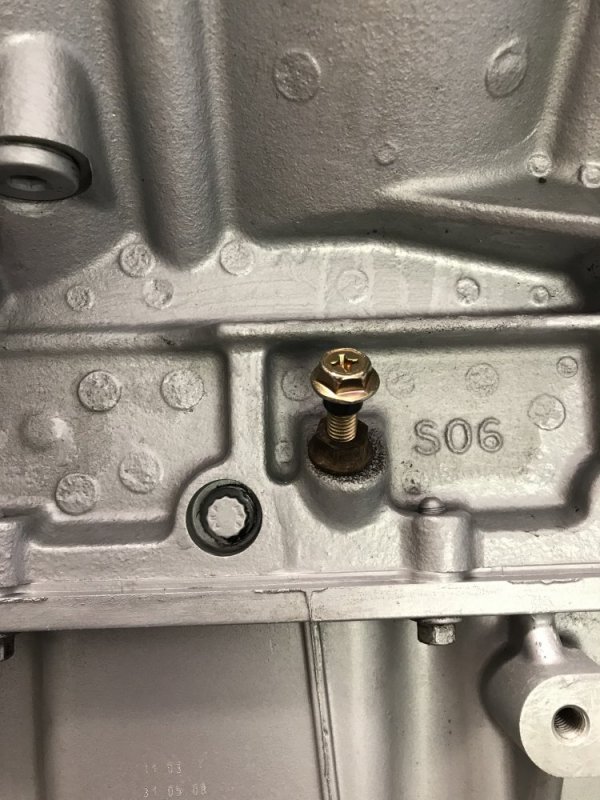
Oh by the way - since the oil pan was already installed, I tapped the hole with the engine upside down and with the tap coated in grease so I wouldn’t get any chips in the engine. I sure wish I had thought of this before installing the pan, but it wasn’t that much of an inconvenience.
Yesterday I only had time to make a quick junkyard run. I needed a cam sensor just to plug the hole in the block since I converted to the Gen 4 sensor in the cam cover. I also grabbed the plugs for the knock sensor holes in the valley cover.
Today I continued sealing the engine up. I installed the valve covers and all the rest of the sensors and plugs needed to fill all the holes. Once sealed up I degreased the heads, water pump and a couple brackets. I also cleaned up the alternator. I should have taken a “before” pic - it was pretty cruddy and since the rest of the engine compartment was coming together nicely I figured I should clean it up, too. I didn’t use degreaser on it because I didn’t want to damage the internals. I popped off the rear plastic cover and then went over the case with a scotchbrite pad. Then I wiped it down with general purpose cleaner (409). For the engine, I installed the water pump and then slapped paint on the heads and any other bare areas.
Here are the brackets and alternator:


Then I moved on to mods for installing the knock sensors. The other night I installed all of the accessories so I could see what areas were free for mounting the knock sensors on the sides of the block. The driver side was easy because there was a big cast boss in the perfect location. I used the drill bushing I made for the oil pan bolt hole to drill this hole too - I wanted to make sure it was square to the face.


The passenger side was a bit more tricky. There were a couple cast bosses that I could have drilled and tapped, but they had large holes bored in the middle of them and I wasn’t sure how that would affect the acoustics for the sensors. Then I noticed the dipstick tube boss in the block. This needed to be plugged anyway since the Envoy uses a hole in the oil pan and not the one in the block. The hole was the perfect size for a 7/16-14 tap. So Friday at work I put a 7/16 bolt in the lathe and bored a 17/64” hole through it. Today I tapped it with an M8x1.25 tap and this made a threaded adapter so I could bolt the knock sensor there. I installed the insert with red Loctite and threaded it in with an 8mm bolt. I’m leaving it to sit overnight so the Loctite sets up well. Tomorrow I’ll grind the boss smooth so the sensor has a flat surface to seat on.


Oh by the way - since the oil pan was already installed, I tapped the hole with the engine upside down and with the tap coated in grease so I wouldn’t get any chips in the engine. I sure wish I had thought of this before installing the pan, but it wasn’t that much of an inconvenience.
n8in8or
I never met a project I didn’t like
ak diesel driver
6.5 driver
I see some dyno time coming up. 
n8in8or
I never met a project I didn’t like
Yeah, the tuner I’m using is the shop that dyno’d the Tahoe. I’m hoping I can go over there when he dynos it so i can get some video.I see some dyno time coming up.
BIGR
Lucky To Be Here
Really looking good, cant wait to hear it run.
n8in8or
I never met a project I didn’t like
Thanks, me too!!Really looking good, cant wait to hear it run.
n8in8or
I never met a project I didn’t like
Tonight I finished the mod of the dipstick boss to a knock sensor boss. This is what it looked like after I removed my makeshift insert installation tool. I installed a set screw in the hole to keep grinding dust out of the engine.
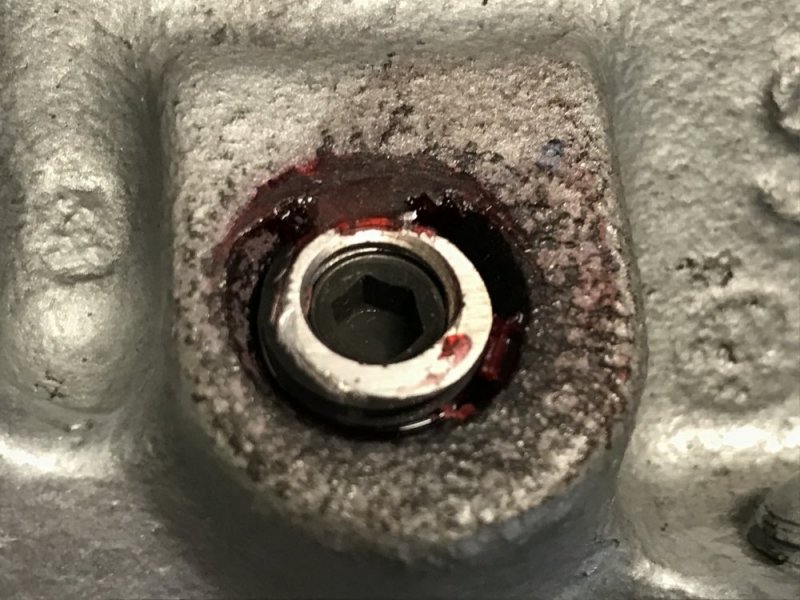
Then I hit it with a disc grinder until it was flat and square.
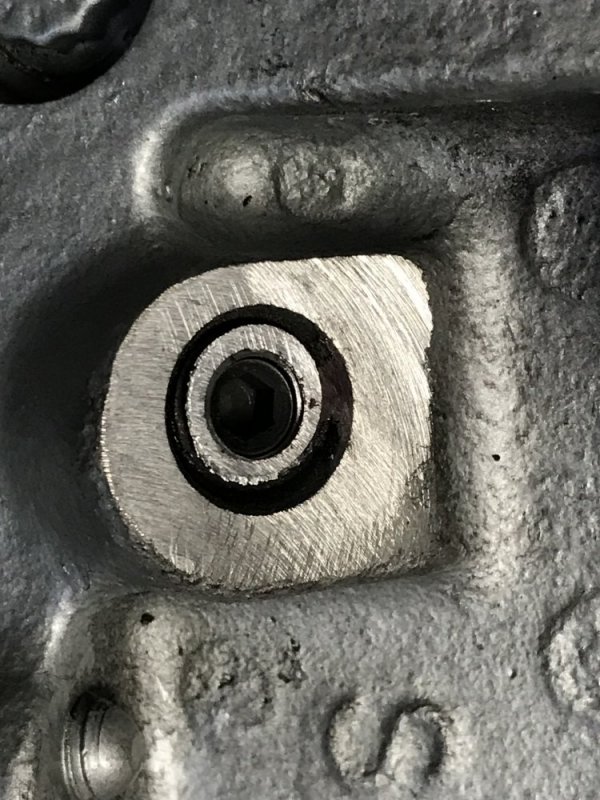
Then I installed the knock sensor. I applied a thin layer of dielectric grease on the block surface to keep corrosion between the sensor and the block at bay. I did the same when I installed the driver side sensor.
Next I installed the bolts that I had left in the old engine when I removed it. I had taken pictures of the bolts before removal and labelled the baggies I put them in and that made finding where they went easy. Easy until I found that the block didn’t have a hole where a bolt was supposed to go.
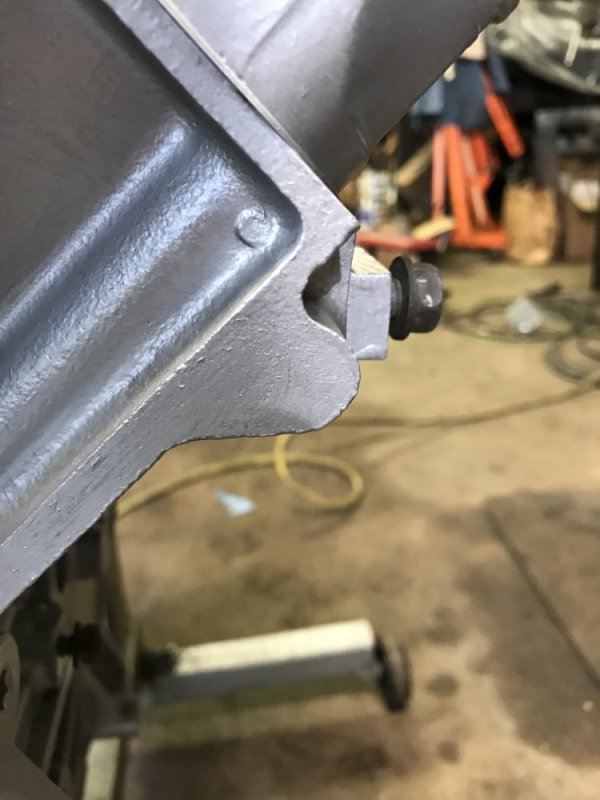
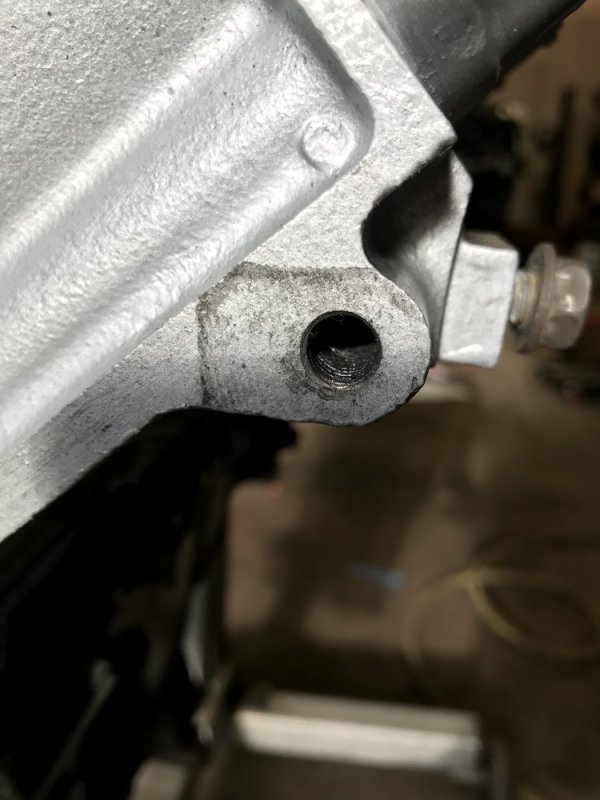
So I used my good old 1/8 / 17/64 drill bushing and then free-hand drilled it to 21/64 so I could tap it M10x1.5.
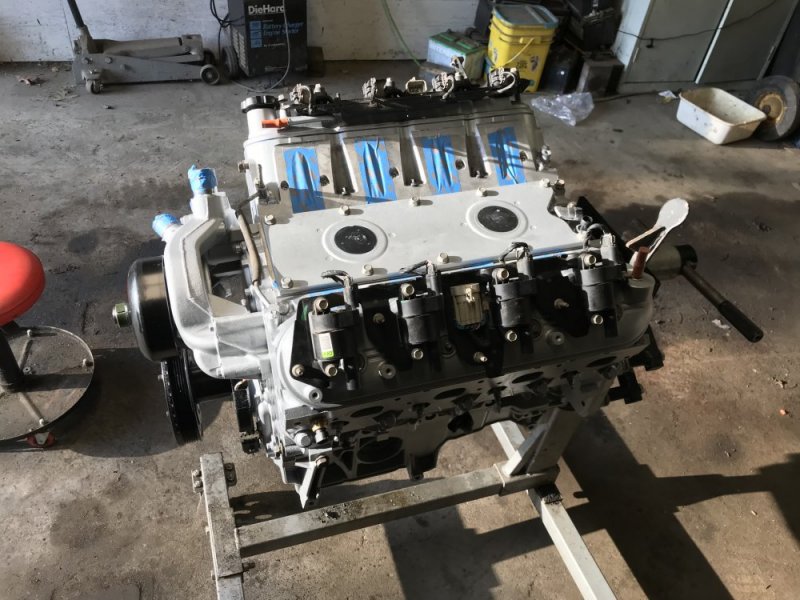
After that I installed the coil packs.
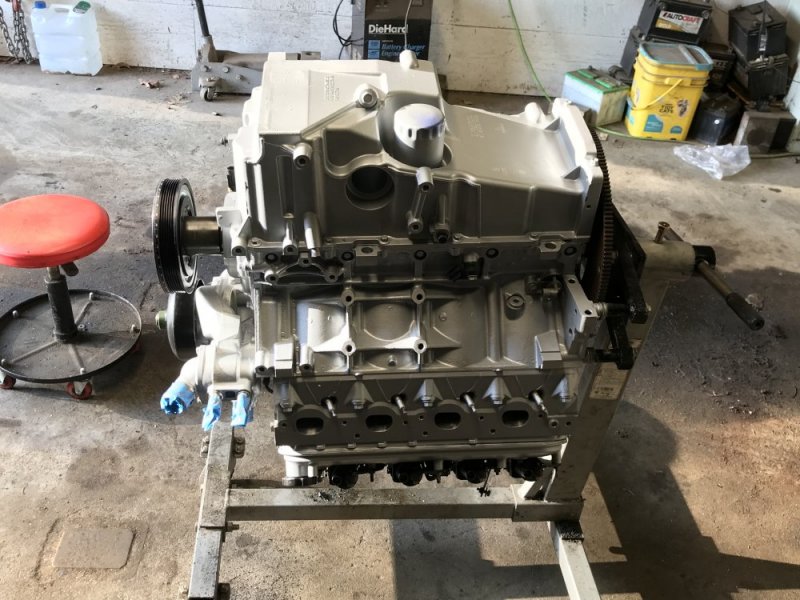
Last step of the night was flipping it over so I can install the front axle stuff to the oil pan tomorrow night.

Then I hit it with a disc grinder until it was flat and square.

Then I installed the knock sensor. I applied a thin layer of dielectric grease on the block surface to keep corrosion between the sensor and the block at bay. I did the same when I installed the driver side sensor.
Next I installed the bolts that I had left in the old engine when I removed it. I had taken pictures of the bolts before removal and labelled the baggies I put them in and that made finding where they went easy. Easy until I found that the block didn’t have a hole where a bolt was supposed to go.

So I used my good old 1/8 / 17/64 drill bushing and then free-hand drilled it to 21/64 so I could tap it M10x1.5.

After that I installed the coil packs.

Last step of the night was flipping it over so I can install the front axle stuff to the oil pan tomorrow night.

BIGR
Lucky To Be Here
Can I break it in for You ? LOLOLOL
Oh come on, I will be gentle, I have had years of experience in a Chevy Tahoe at very high speeds, I never wrecked or blew it up.....
n8in8or
I never met a project I didn’t like
Really? You’ll be gentle? Then what’s the point???Oh come on, I will be gentle, I have had years of experience in a Chevy Tahoe at very high speeds, I never wrecked or blew it up.....
n8in8or
I never met a project I didn’t like
Tonight I got the rest of the accessories and junk installed. She’s not so pretty with the jewelry off and the work clothes on.
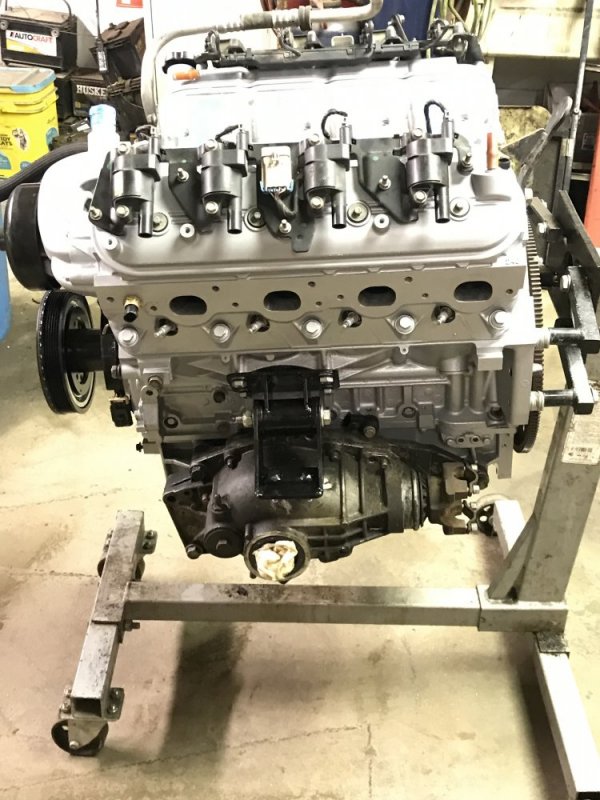
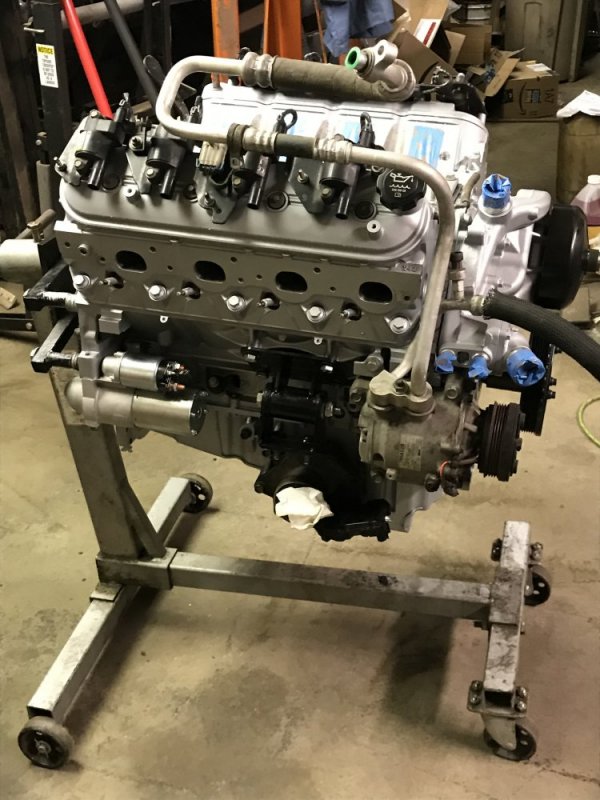
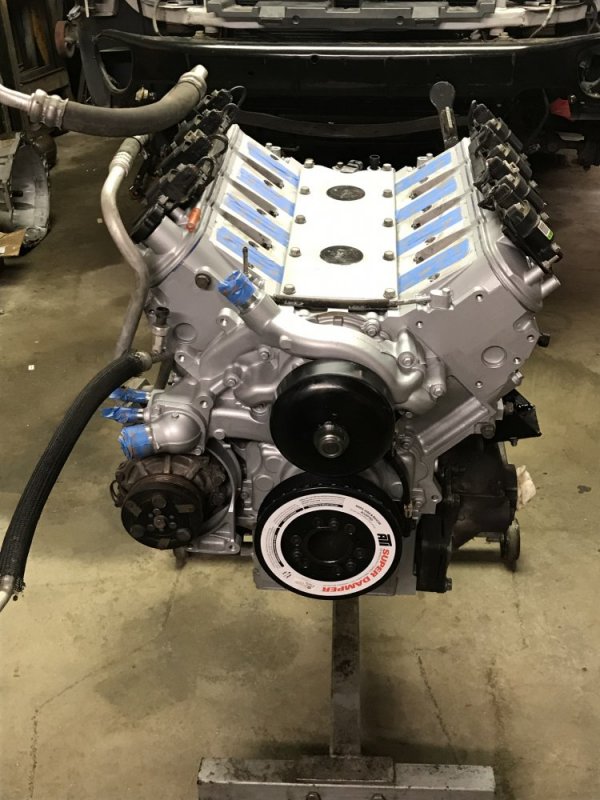
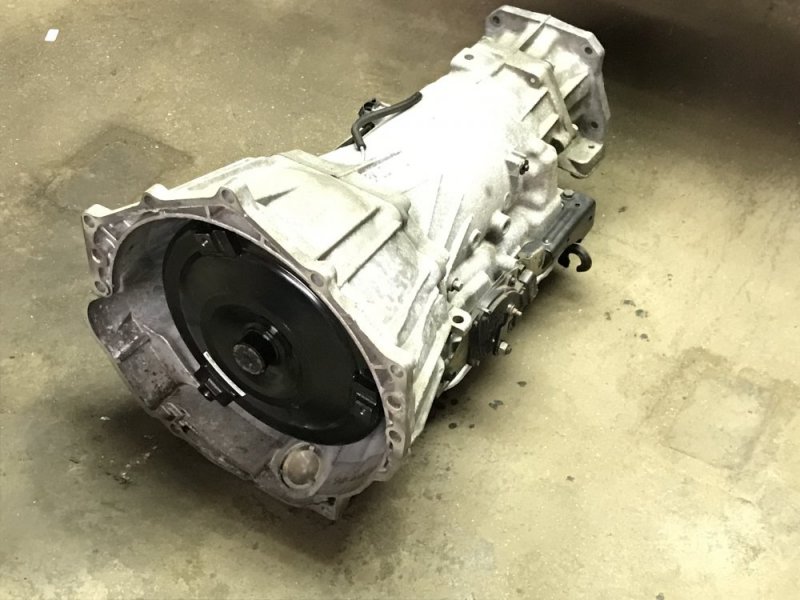
I also got the trans dug out and after pouring 1/2 quart of fluid in I slid it in place.
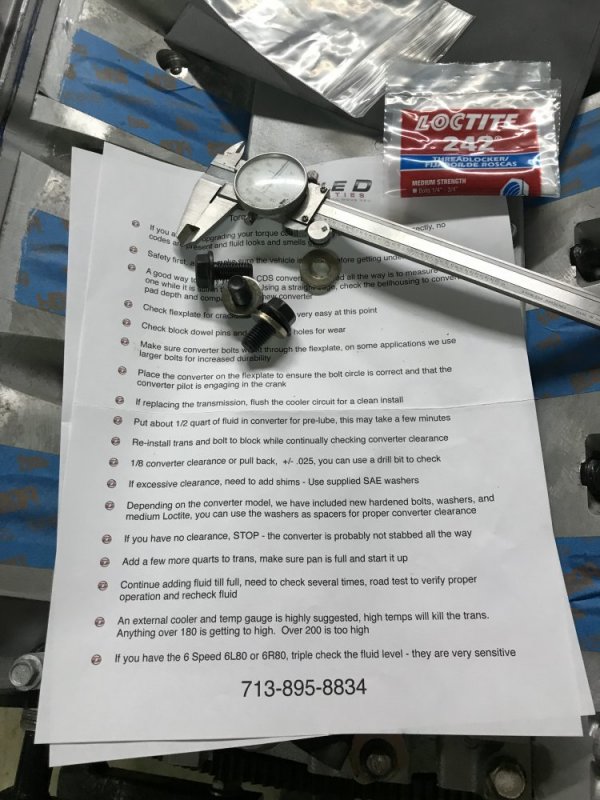
Circle D provides some SAE washers for shims in case you need them and in fact I’m going to need the thick ones they provided to stay in the .125 +/- .025 converter pullout spec they specified.
Tomorrow the engine and trans get bolted together. After that the last few bits get installed. I also need to make a new starter cable.......so it may not quite be going in tomorrow night, but it will be damn close.


I also got the trans dug out and after pouring 1/2 quart of fluid in I slid it in place.

Circle D provides some SAE washers for shims in case you need them and in fact I’m going to need the thick ones they provided to stay in the .125 +/- .025 converter pullout spec they specified.

Tomorrow the engine and trans get bolted together. After that the last few bits get installed. I also need to make a new starter cable.......so it may not quite be going in tomorrow night, but it will be damn close.
- Staff
- #196
Did you happen to check to see if the 6.0l used the same knock sensors as the 5.3l? Knock sensors are tuned to detect certain frequencies because detonation/knock changes frequencies depending on bore diameter. So the 6.0l may need a different knock sensor since it is a larger bore than the 5.3l.
n8in8or
I never met a project I didn’t like
Hmmm, no I didn’t look..... just did. Luckily they’re the same. Thanks for thinking of that, though - a lot simpler to change them out now.Did you happen to check to see if the 6.0l used the same knock sensors as the 5.3l? Knock sensors are tuned to detect certain frequencies because detonation/knock changes frequencies depending on bore diameter. So the 6.0l may need a different knock sensor since it is a larger bore than the 5.3l.
n8in8or
I never met a project I didn’t like
Last night I got everything done that I needed to for the next phase to happen.
First thing I did was get the trans bolted up to the back of the engine. Then I attached the last few things waiting for that to happen: trans dipstick, trans lines and starter.
After that I started working on the new starter cable. During my lunch I had gone home and taken the positive cable completely out of the truck.
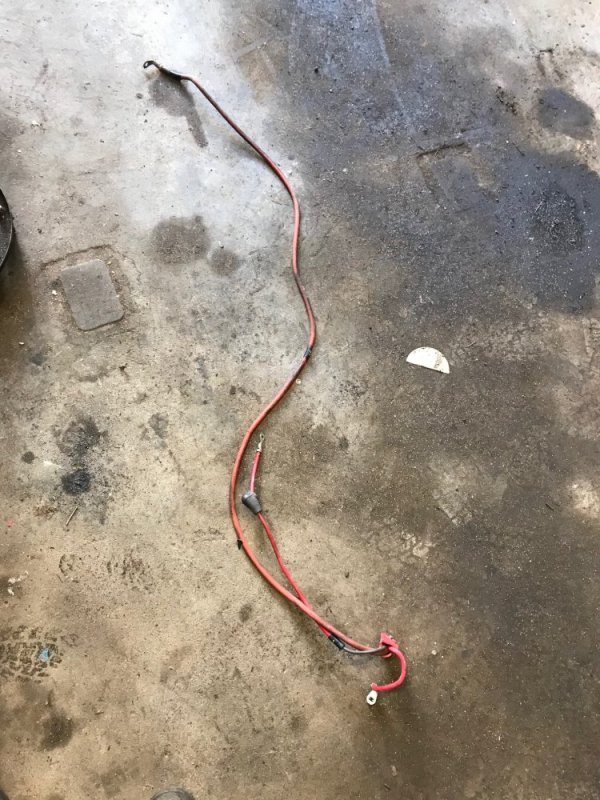
I bought some 2 gauge cable with PVC insulation from McMaster-Carr previously. I crimped an end on it, then soldered it and then put heat shrink tubing on it. After that I rerouted it through the factory engine harness so it will fit just like the factory one did.
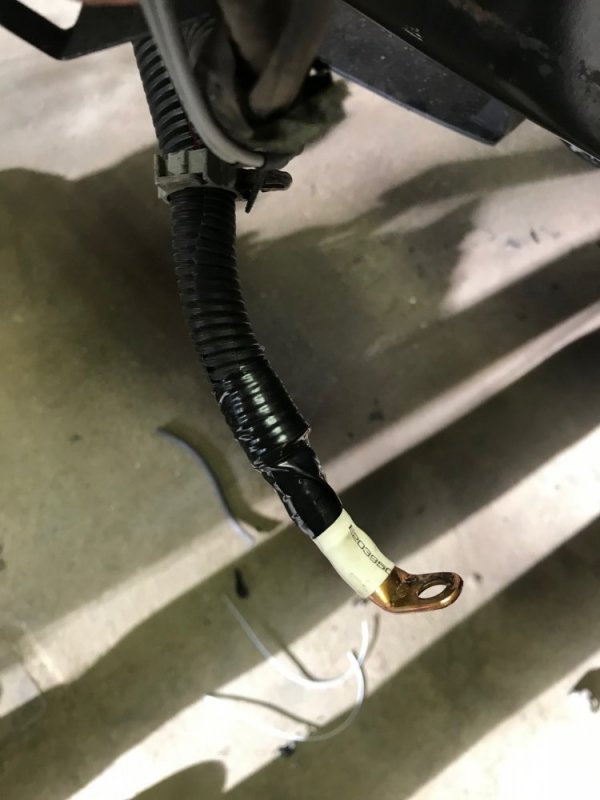
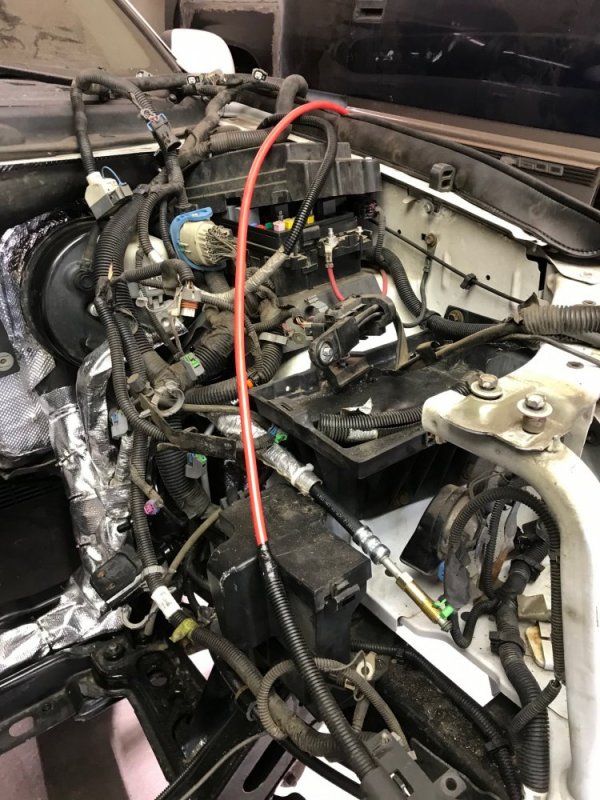
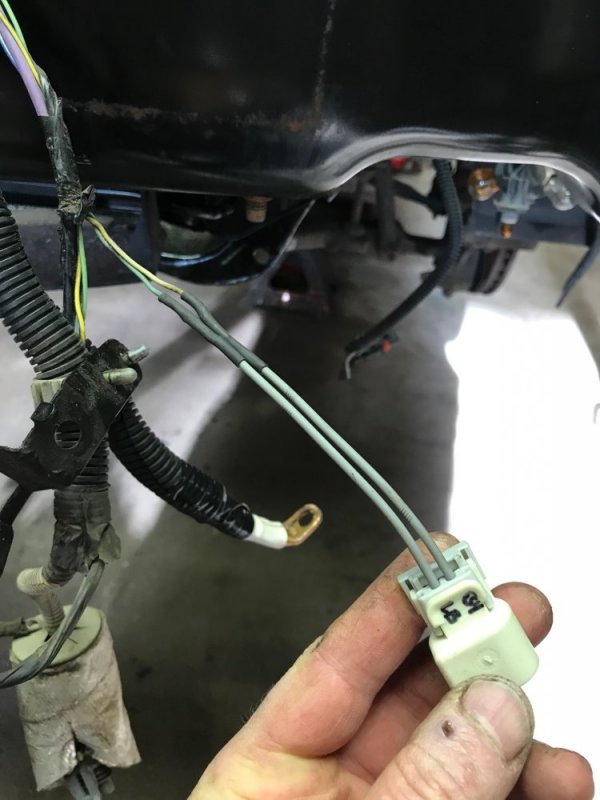
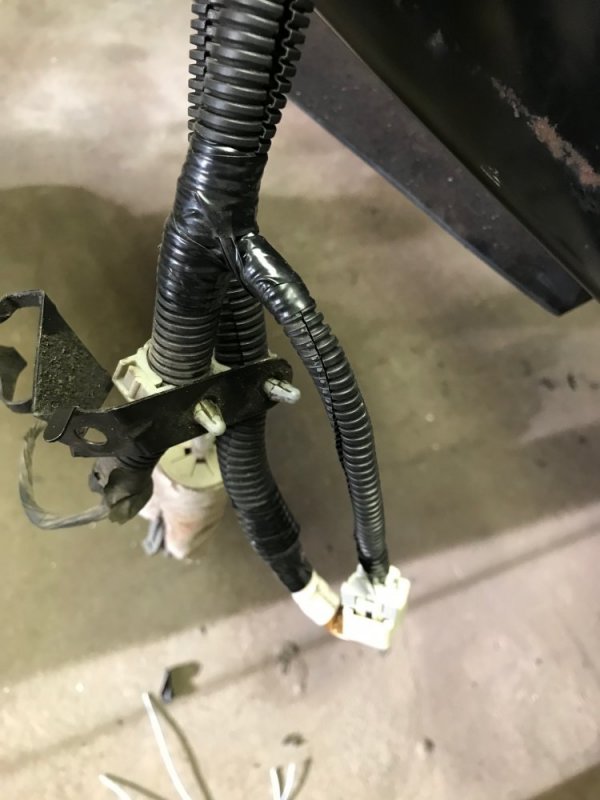
Then I repaired the knock sensor plug on the passenger side. During engine removal I had accidentally ripped the plug off of the wires so I bought a new pigtail. I looked in the service manual to determine the proper wiring orientation and then soldered the wires and again hit them with heat shrink. Then it got re-loomed. Just in case, I made it a couple inches longer than the factory wiring since the sensor isn't in the exact location as factory. Hopefully the driver side is close enough to factory location that the factory wiring reaches it ok.
Now here it is.....all ready to go in.....☺
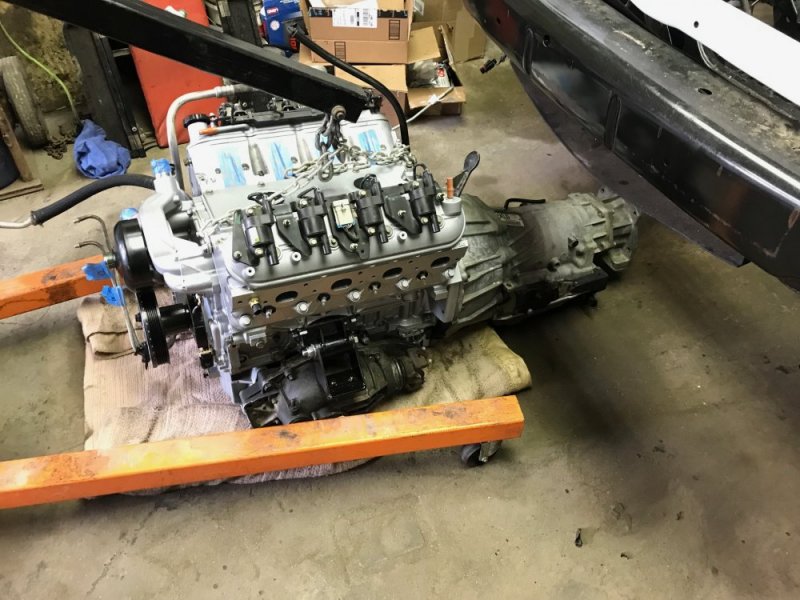
First thing I did was get the trans bolted up to the back of the engine. Then I attached the last few things waiting for that to happen: trans dipstick, trans lines and starter.
After that I started working on the new starter cable. During my lunch I had gone home and taken the positive cable completely out of the truck.

I bought some 2 gauge cable with PVC insulation from McMaster-Carr previously. I crimped an end on it, then soldered it and then put heat shrink tubing on it. After that I rerouted it through the factory engine harness so it will fit just like the factory one did.


Then I repaired the knock sensor plug on the passenger side. During engine removal I had accidentally ripped the plug off of the wires so I bought a new pigtail. I looked in the service manual to determine the proper wiring orientation and then soldered the wires and again hit them with heat shrink. Then it got re-loomed. Just in case, I made it a couple inches longer than the factory wiring since the sensor isn't in the exact location as factory. Hopefully the driver side is close enough to factory location that the factory wiring reaches it ok.


Now here it is.....all ready to go in.....☺

n8in8or
I never met a project I didn’t like
Last night worked out exactly like I hoped.
Of course first is the obligatory, "hey look, it's going in" shot.
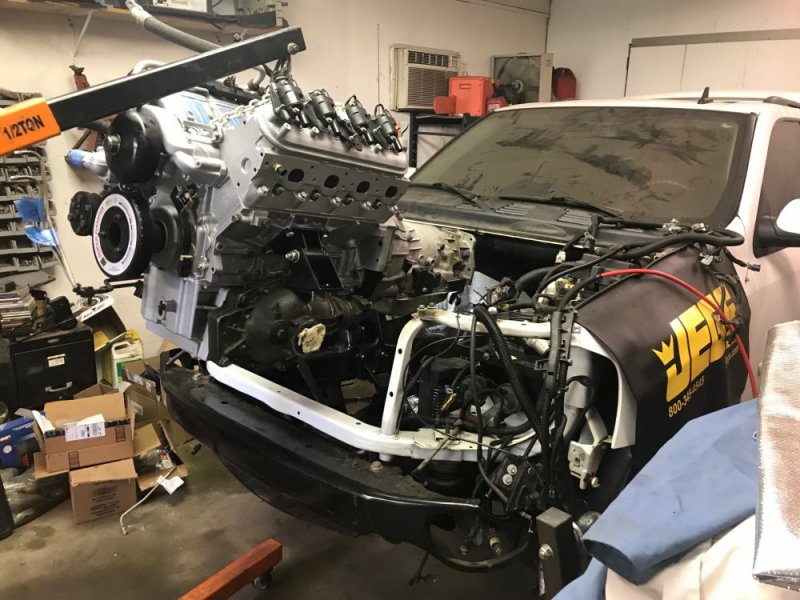
At this point I installed the passenger side wiring while it was easily accessible.
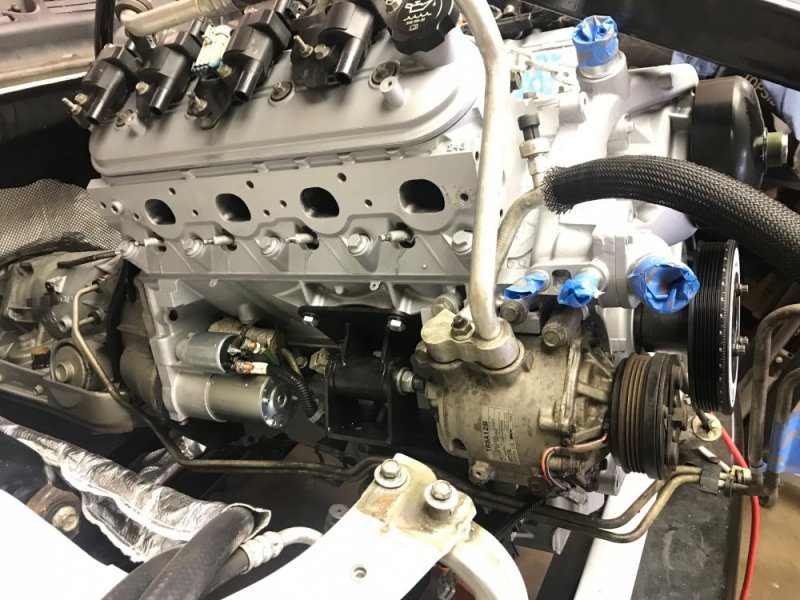
Then I made a starter blanket out of the DEI Heat Screen. At this time I noticed that I should have wrapped the trans cooler lines too, but I didn't have any of that on hand. I ordered it and will do that later this weekend.
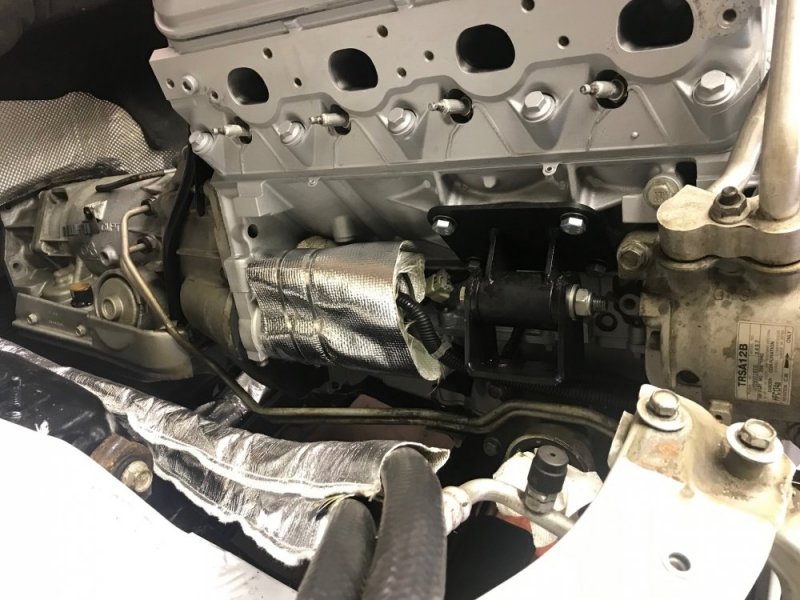
Then I installed the driver side wiring.
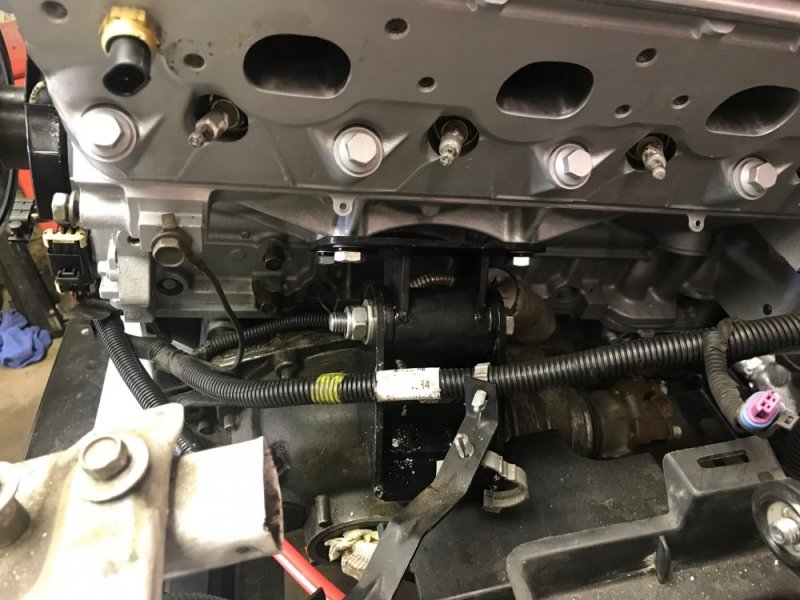
It slid in really easily. The custom motor mounts made install super easy with no hang-ups. In hindsight I may have been able to stick it in with the headers already installed, but since it was already a tight fit with the extra complication of having the front diff parts I didn't want to push it.
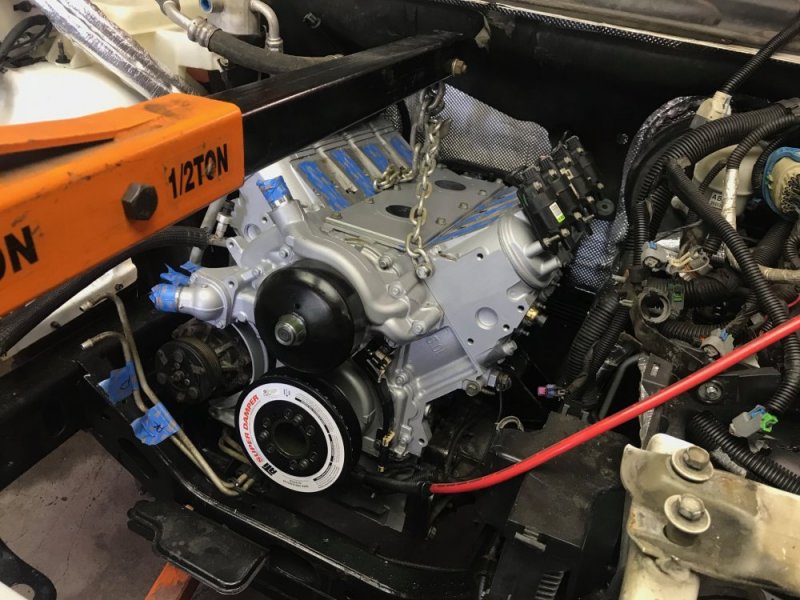
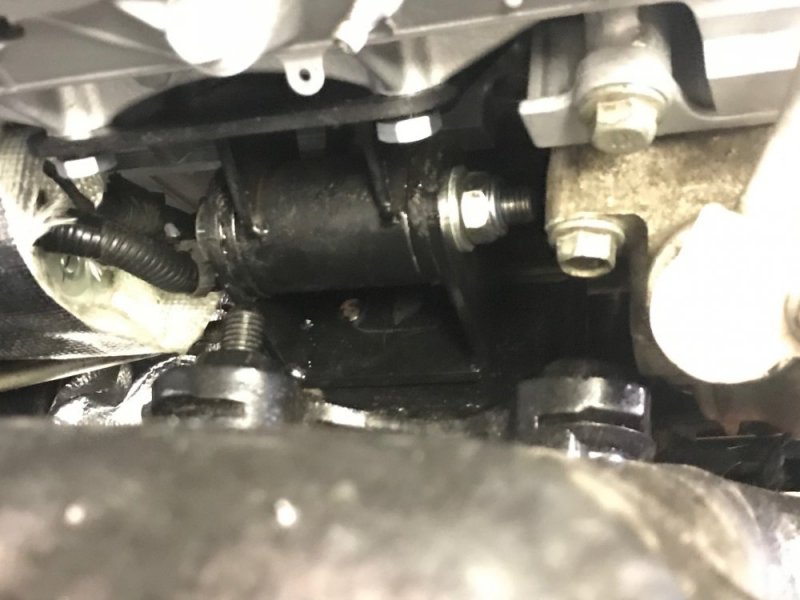
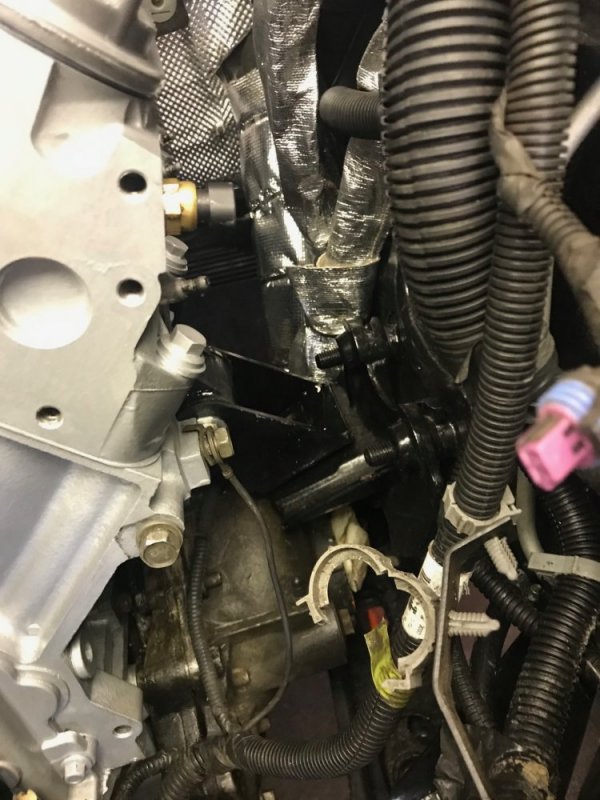
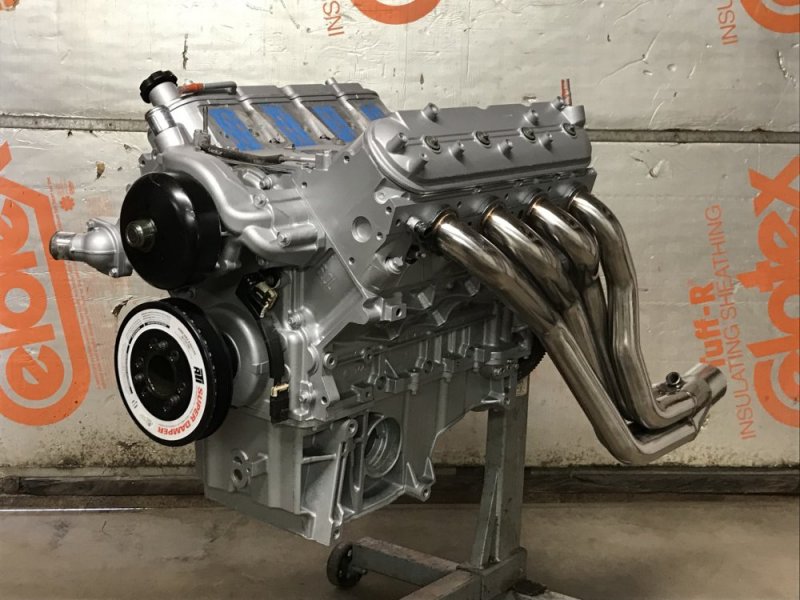
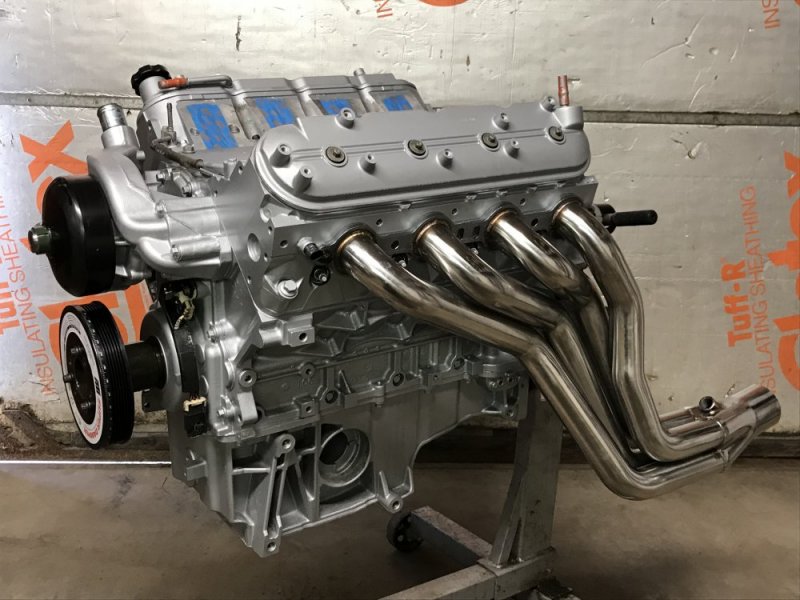
Next was header installation. They went in pretty easily from underneath. I did have to raise the engine a little to get them to slide in, but nothing too terrible really. Once up there I hung them on the old spark plugs I had preinstalled while I moved back up on top for installing bolts. I used GM MLS exhaust manifold gaskets and ARP bolts so I don't have a broken bolt problem in the future.
After that I installed the new Delco plugs.
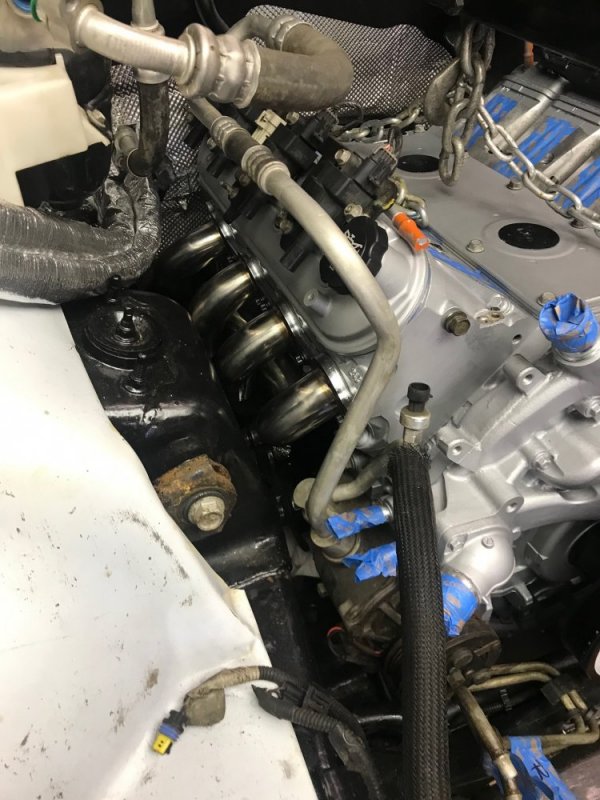
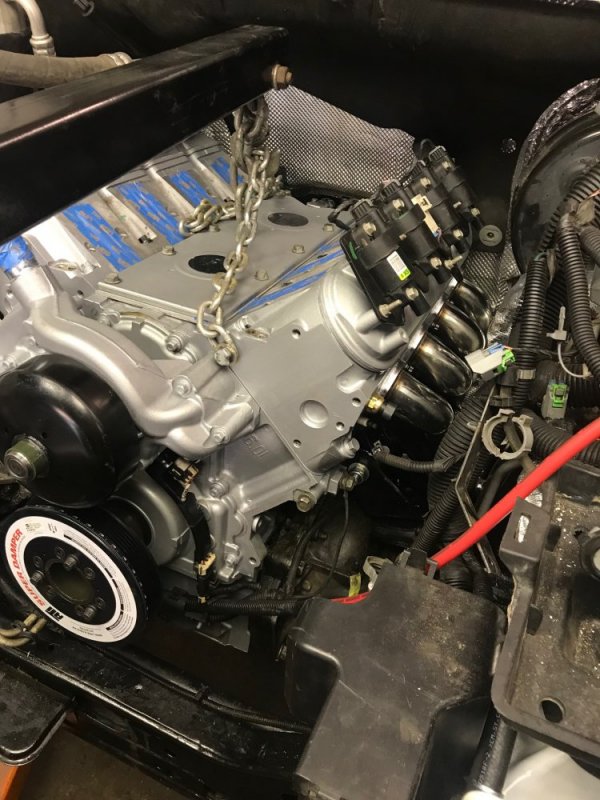
I got exactly what I hoped to get done and with the benefit of more clearance from the mounts I was able to get the engine and trans in, headers installed and spark plugs installed in just the time it took me to remove it last time!
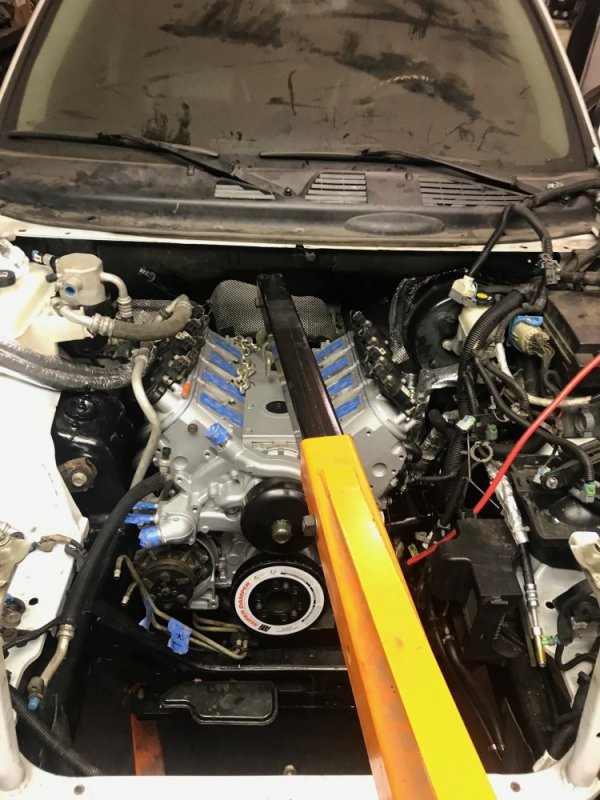
Of course first is the obligatory, "hey look, it's going in" shot.

At this point I installed the passenger side wiring while it was easily accessible.

Then I made a starter blanket out of the DEI Heat Screen. At this time I noticed that I should have wrapped the trans cooler lines too, but I didn't have any of that on hand. I ordered it and will do that later this weekend.

Then I installed the driver side wiring.

It slid in really easily. The custom motor mounts made install super easy with no hang-ups. In hindsight I may have been able to stick it in with the headers already installed, but since it was already a tight fit with the extra complication of having the front diff parts I didn't want to push it.


Next was header installation. They went in pretty easily from underneath. I did have to raise the engine a little to get them to slide in, but nothing too terrible really. Once up there I hung them on the old spark plugs I had preinstalled while I moved back up on top for installing bolts. I used GM MLS exhaust manifold gaskets and ARP bolts so I don't have a broken bolt problem in the future.
After that I installed the new Delco plugs.


I got exactly what I hoped to get done and with the benefit of more clearance from the mounts I was able to get the engine and trans in, headers installed and spark plugs installed in just the time it took me to remove it last time!

BIGR
Lucky To Be Here
Wow, very nice indeed, making great progress and getting closer to turning the key...


