• Welcome to The Truck Stop! We see you haven't REGISTERED yet.

    Your truck knowledge is missing!
    • Registration is FREE , all we need is your birthday and email. (We don't share ANY data with ANYONE)
    • We have tons of knowledge here for your diesel truck!
    • Post your own topics and reply to existing threads to help others out!
    • NO ADS! The site is fully functional and ad free!
    CLICK HERE TO REGISTER!

    Problems registering? Click here to contact us!

    Already registered, but need a PASSWORD RESET? CLICK HERE TO RESET YOUR PASSWORD!

1994 K3500 extended cab dually

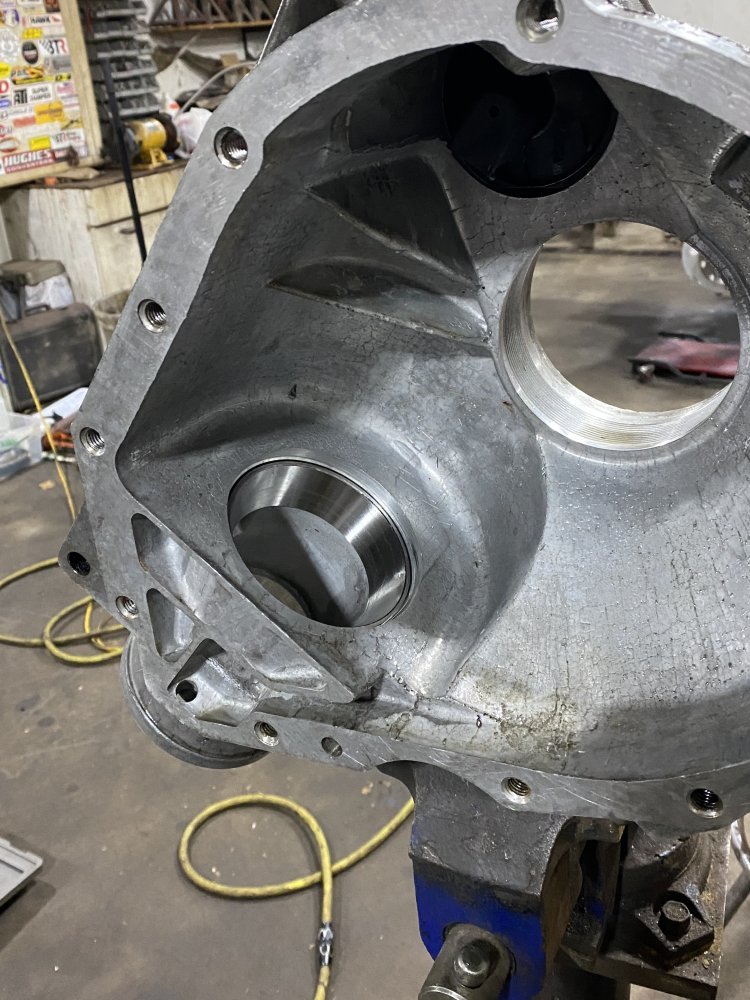
Check the ID of where the sector shaft rides. from what I have found, the main failure is the housing becomes stretched or egged causing the sector shaft where the pitman arm attaches to have side to side play. when I rebuilt mine I found this after installing a new roller bearing into the housing. if you can find a machine shop that will do it, the best fix for them is to have to bore reamed out so that a steel insert can be installed with tighter tolerances then the new bearing installed.

the older gear boxes used a bronze bushing instead of a roller bearing. for ours, there are two bearings made. one that is a solid needle bearing and one that has a plastic roller carrier or cage which puts spacing between each needle. the type that has the plastic cage is the one to avoid as the cage allows for sloppyness.

I have a perfectly good box sitting in the garage that I rebuilt but has this issue with the side to side play on the sector shaft. I wish there was a fix for them like an over size bearing or something. it's just a poor design all together.
Thank for the tip, I'll check that out when I go back out there.
I rebuilt several steer boxes from the 7000 and 7500 series GM trucks, Dodge and Ford too.
IIRC that those balls are two different sizes and the larger ones were stained black, had to look real close as the ones I did there was not much black left on them balls.
Yeah, these boxes also have black and plain chrome balls in them.
 
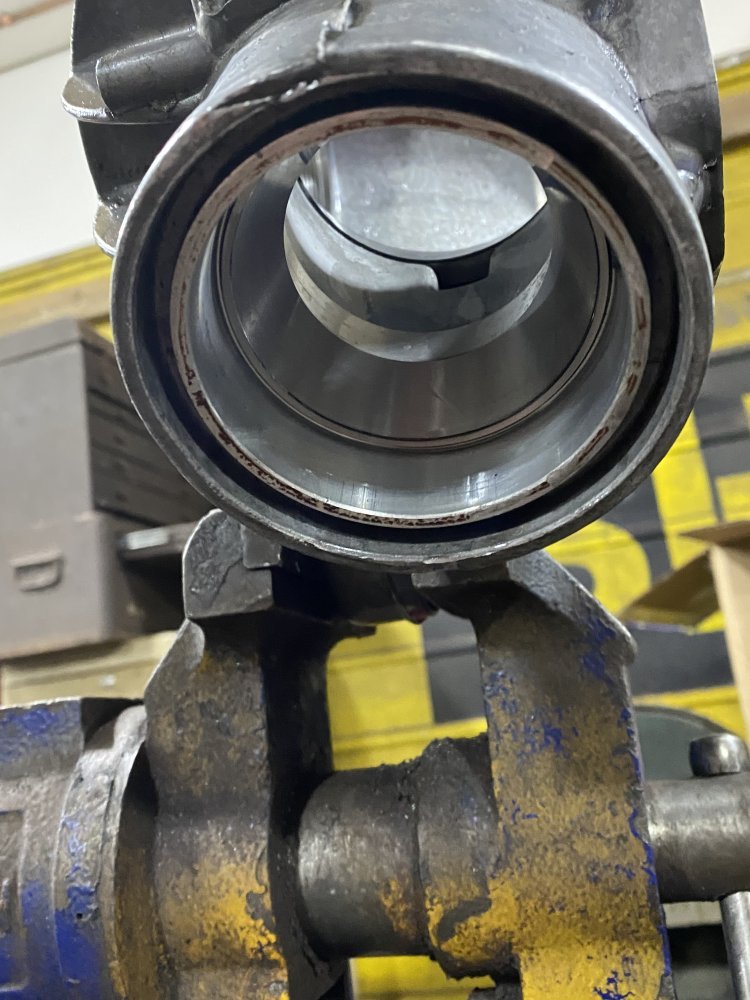
Here is a good example of the sector shaft play caused by the housing getting wallered out or egged.

 
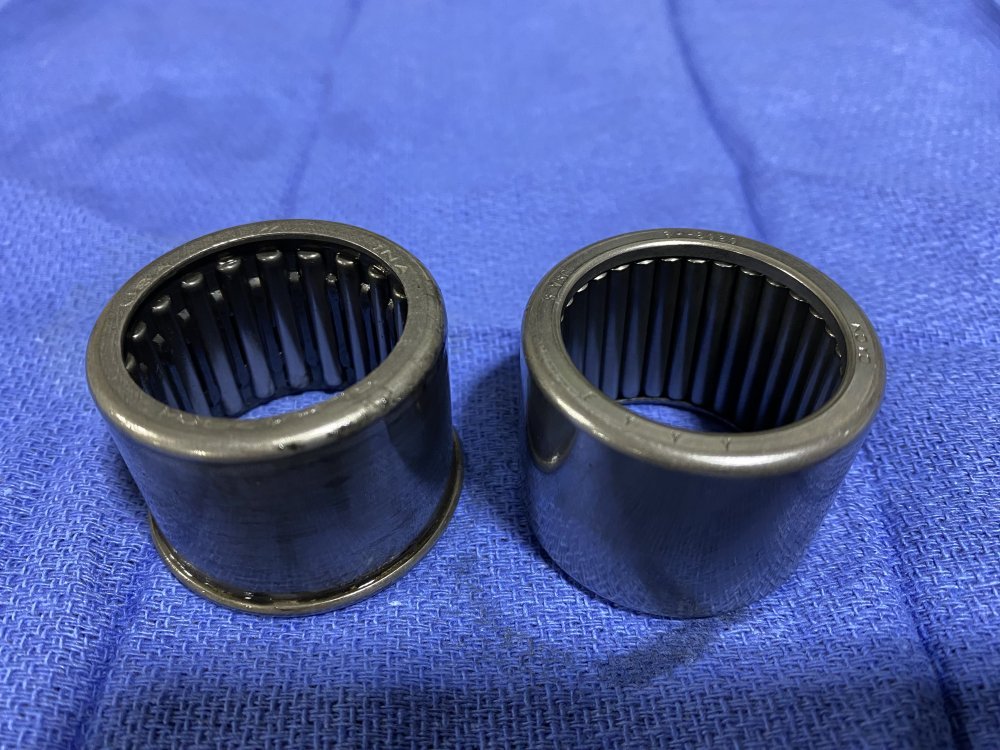
Old bearing (left) had the plastic cage. New bearing (right) is solid needles.

IMG_1299.jpeg

I checked the bore with a Starrett telescoping gauge and it felt concentric.

I didn’t notice any problems with this box when I was driving the truck, I just wanted to do some proactive work so it hopefully lasts me a long time.
 
check the new and old bearing on the sector shaft for play, also once the bearing is back into the housing, before installing the pitman seal, install the sector shaft with the back housing. sinch down the 4 bolts and snug the adjusting nut. then check the side to side play. sadly this tiny amount of movement equates to a lot of slop in the steering.

there is a preload procedure that Ferm posted here in the forum on how to set it all up. in involves setting the input shaft before setting the sector shaft preload. the way I did it was by locking the housing down in a vice, then once the input shaft was set, place the pitman arm on the box and snug up the big nut. make slight adjustments on the sector shaft while moving the pitman arm back in fourth feeling the lash in the gears. once I could not feel any lash, rotate the input shaft lock to lock several times while using your hand on the pitman arm to give a little resistance. re-center the box and double check the feel of lash. I would get it to the point I could not feel any lash when centered but there was no resistance when spinning the input shaft. if you start to feel resistance turning the input shaft, back off the sector shaft adjustment.

it's almost like setting up a ring and pinion but with much tighter tolerances.


when assembling the box, the most challenging part is getting the BB's in to place properly, on my first go-round I goofed and somehow ended up getting one of the bb's past the keeper where it worked it's way down the worm gear into the bottom of the piston cavity which caused the box to bind up while out on a trip to the beach! luckily I was able to drive it back home where I pulled it and discovered what had happened.
The factory manual has the procedure for setting the adjustments.

I did a test installation of the balls last night to get a feel for it and will be doing the full assembly today. I did have one fall past the shaft during my test. Good to know how bad that could be!
 
Enjoying your write up and build, I just powder coated all my front end parts.
Did you powdercoat them yourself or have them done by someone?

I got a quote from a local guy to powdercoat the HD handles - he wanted $100. That seemed pricey. I looked at the Eastwood stuff and thought about using that money to invest in powdercoating equipment instead, but the space for an oven is an issue for me. In the end, I just decided to paint them.

Powdercoating the front end parts would be nice. The electrical charge drawing the powder into those nooks would be an advantage over paint.
Try that Krylon HAMMERED paint.
Many colors to choose from and it dont require primer. Paint and primer in one shot.
Mighty tough stuff too. Holds up real well.
 
Try that Krylon HAMMERED paint.
Many colors to choose from and it dont require primer. Paint and primer in one shot.
Mighty tough stuff too. Holds up real well.
I already painted them along with the other parts last weekend. I had already stripped them to bare aluminum so I did a couple coats of self-etching primer, then a coat of regular primer and then 2 coats of the KBS Maxx in Hot Rod Black. I’m really liking how this KBS Maxx is feeling as I’m working with these parts. It seems really durable so far.

I have used that Rustoleum Hammered before and it has worked well for a spray bomb.
 
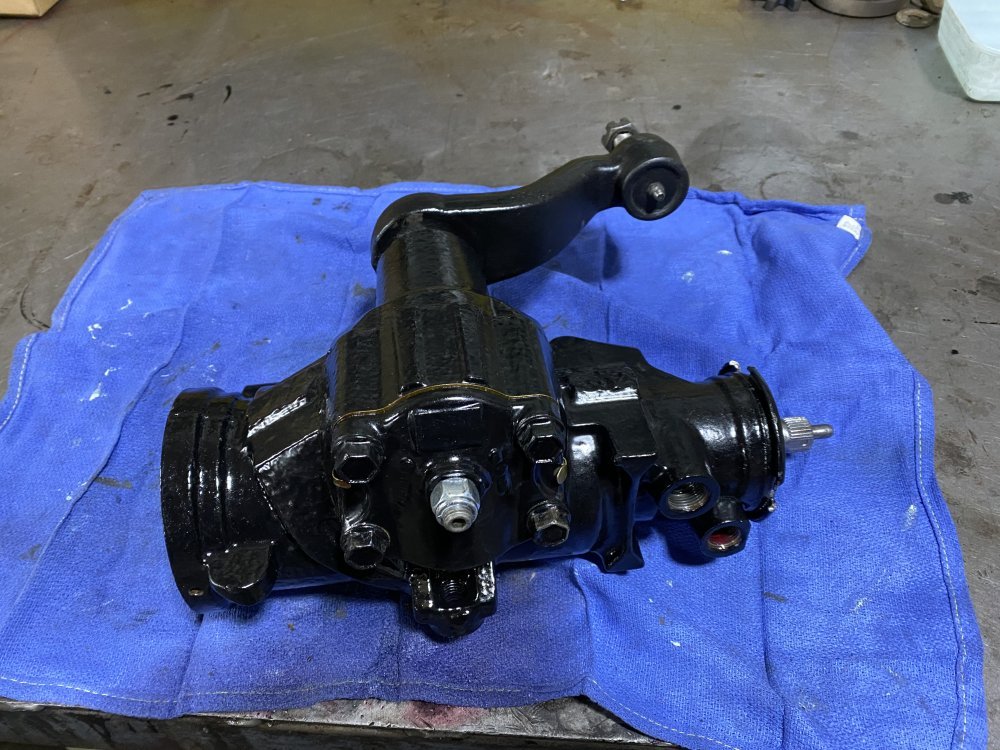
I got the box finished up today. I decided to watch a video on YouTube to get some tips on installing the balls and that helped a lot - one tip I used was to smear grease on the inside of the rack to help hold the balls in place, the other tip was to use a piece of 3/8 fuel hose to help hold the balls in place until assembly. To install the balls I used the worm shaft to guide the balls into place, which was what the service manual said to do, but then use a special tool to hold the balls into place, so the fuel hose tip helped a lot here. Once all assembled I followed the adjustment procedure in the manual and all seems good now.

IMG_1302.jpeg

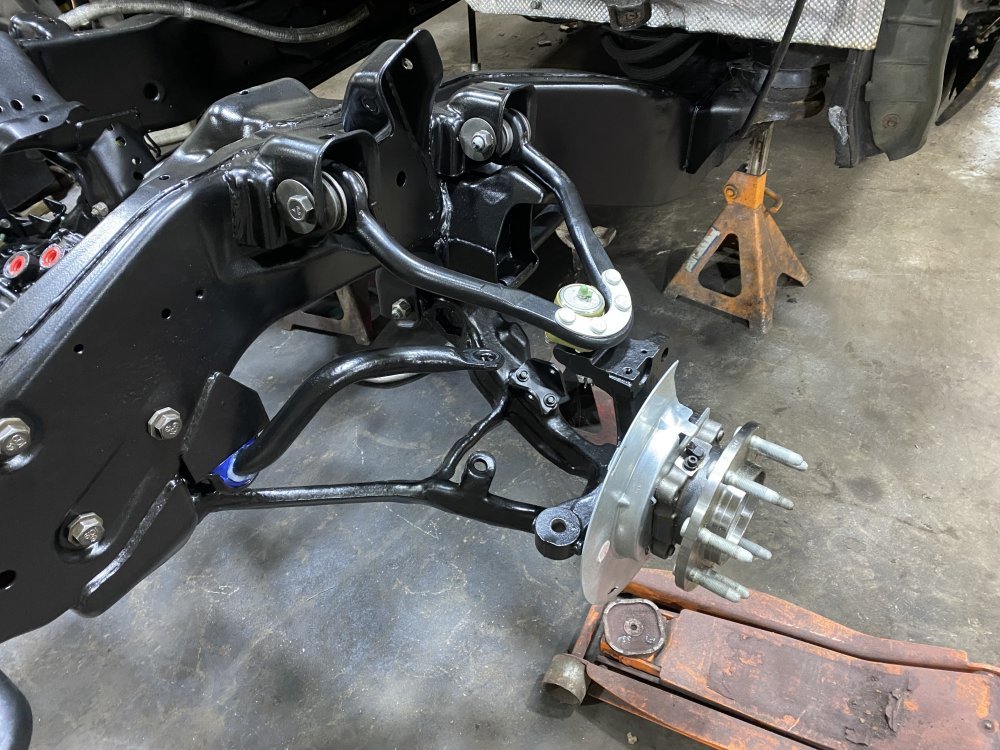
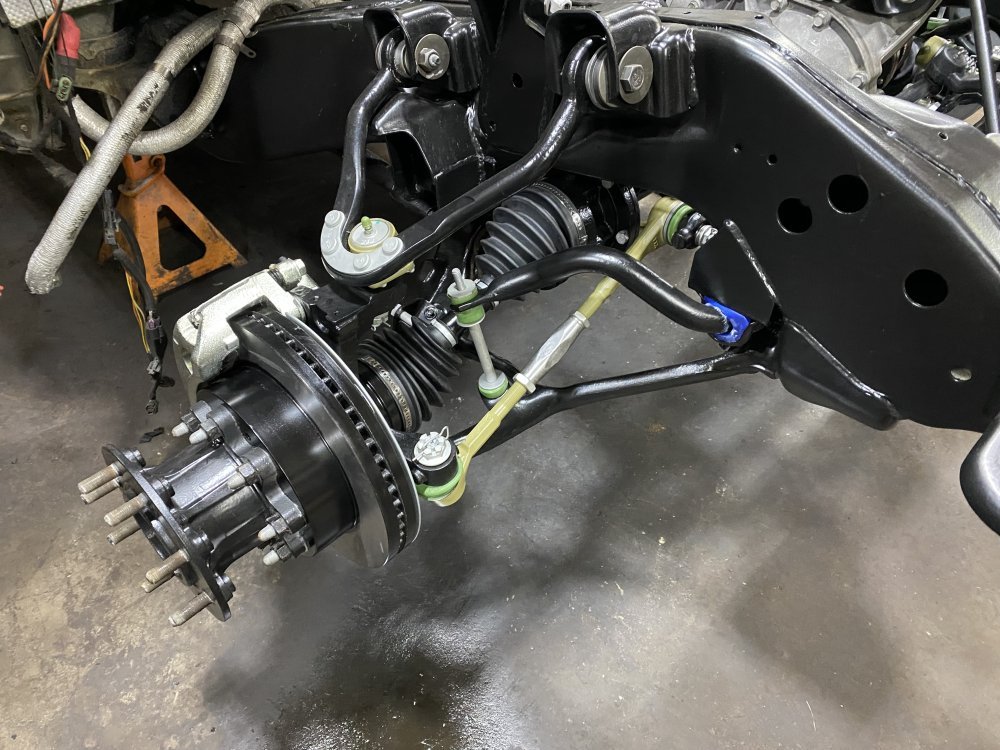
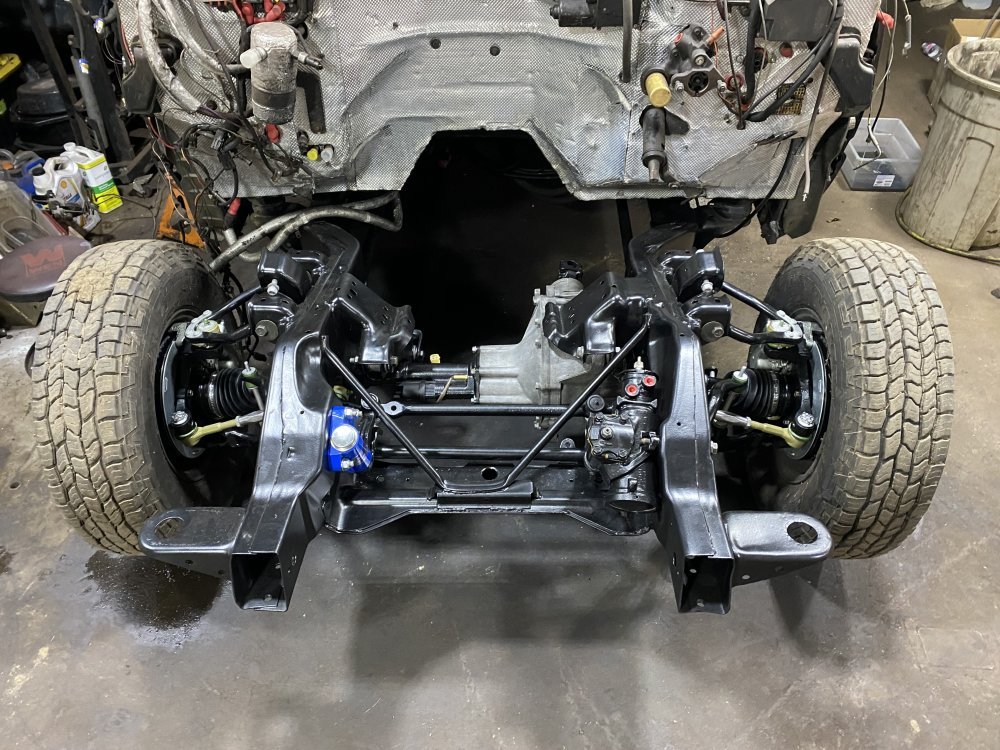
I spent the rest of today starting to assemble the front suspension - I got the torsion bars reinstalled to the frame and bushings installed in the upper diff mount and the upper control arms. This paint is holding up well to the tooling for pressing the bushings in, so that makes me happy. More assembly tomorrow.
 
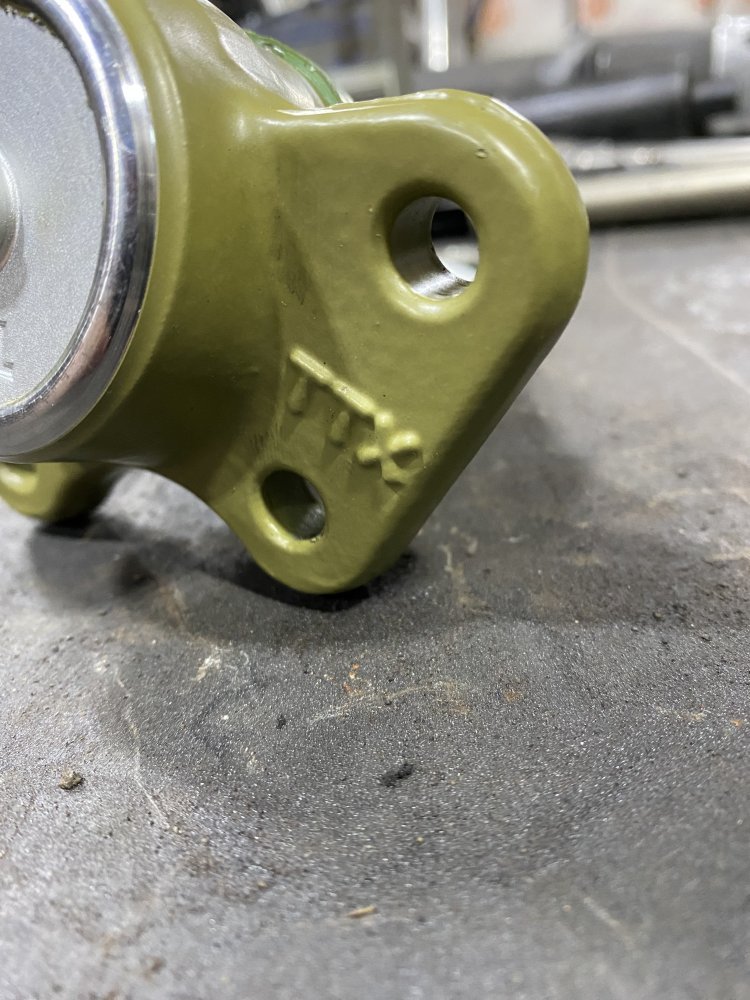
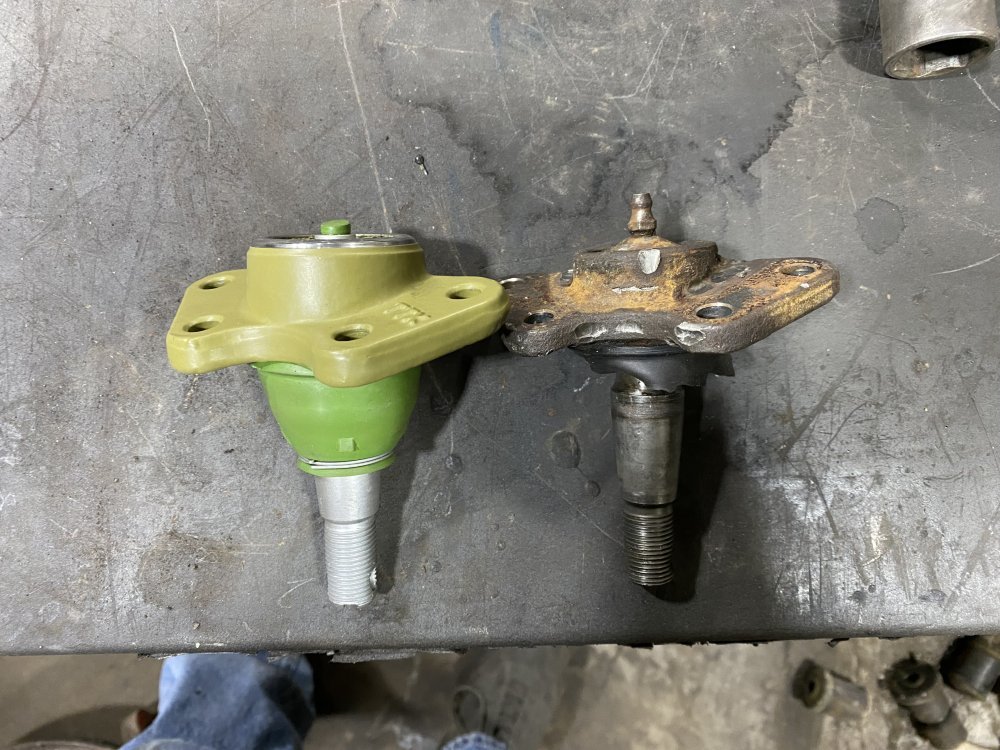
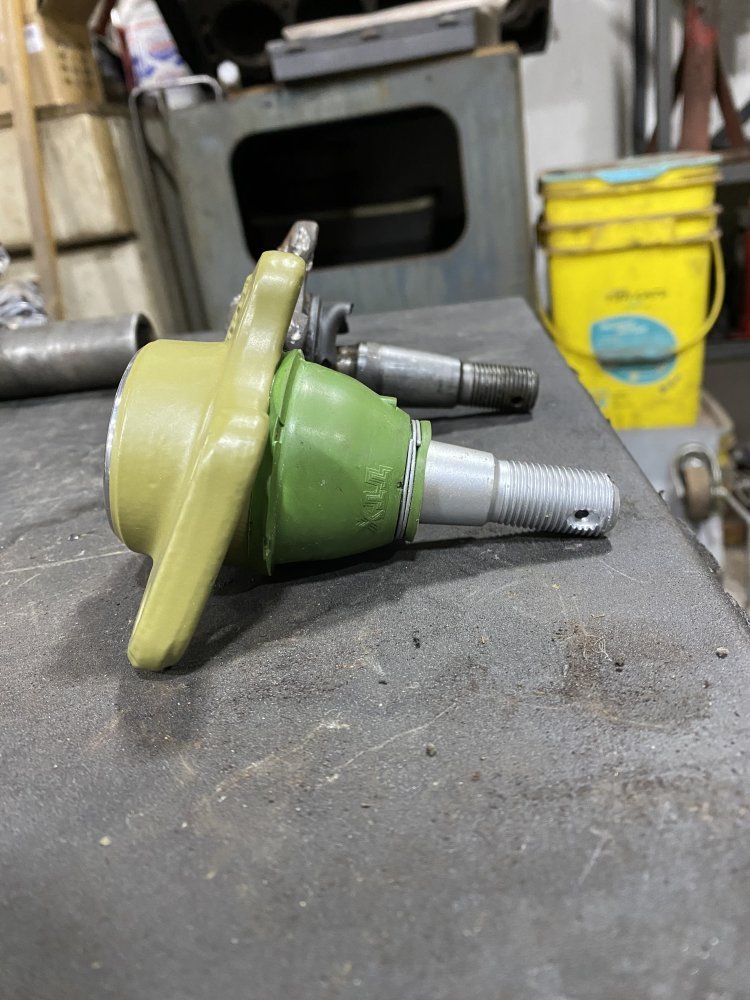
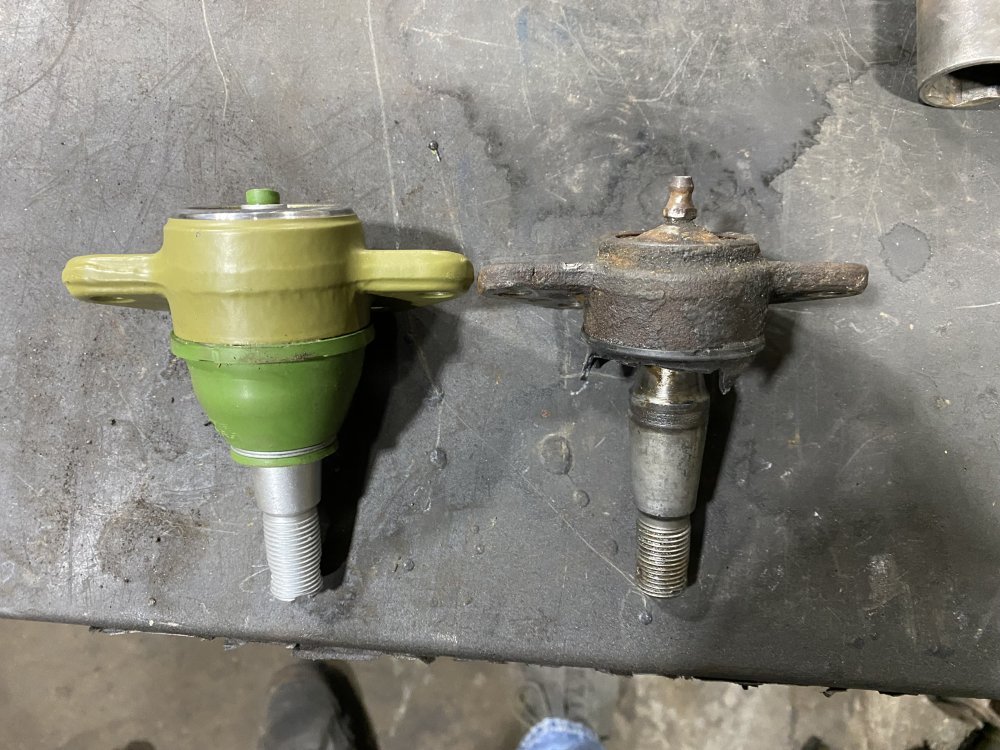
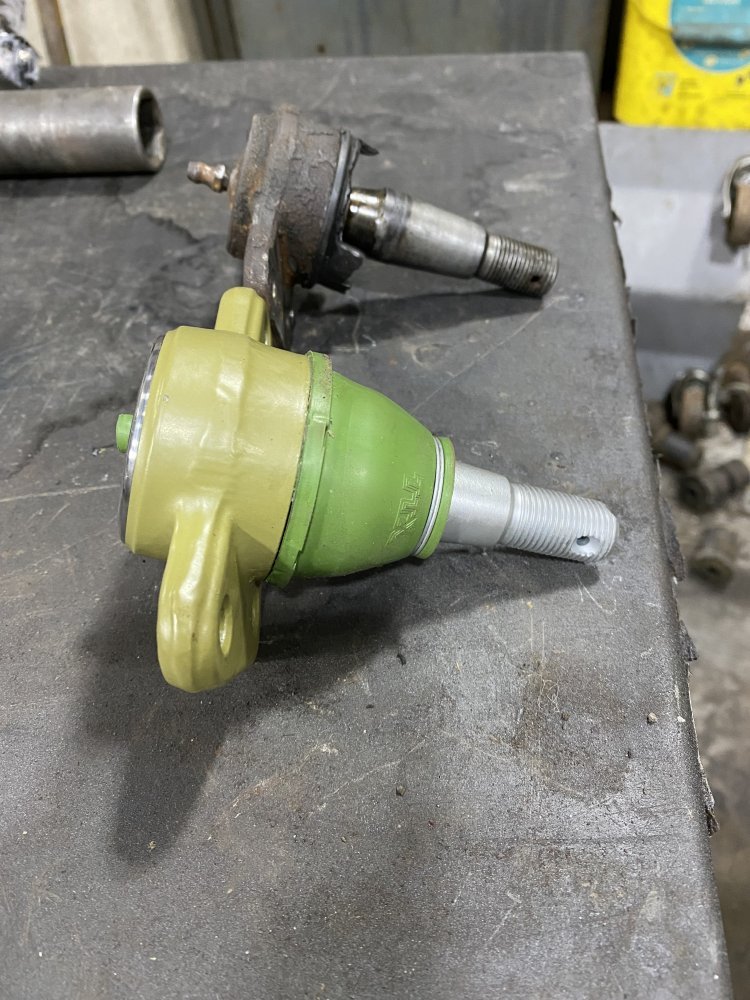
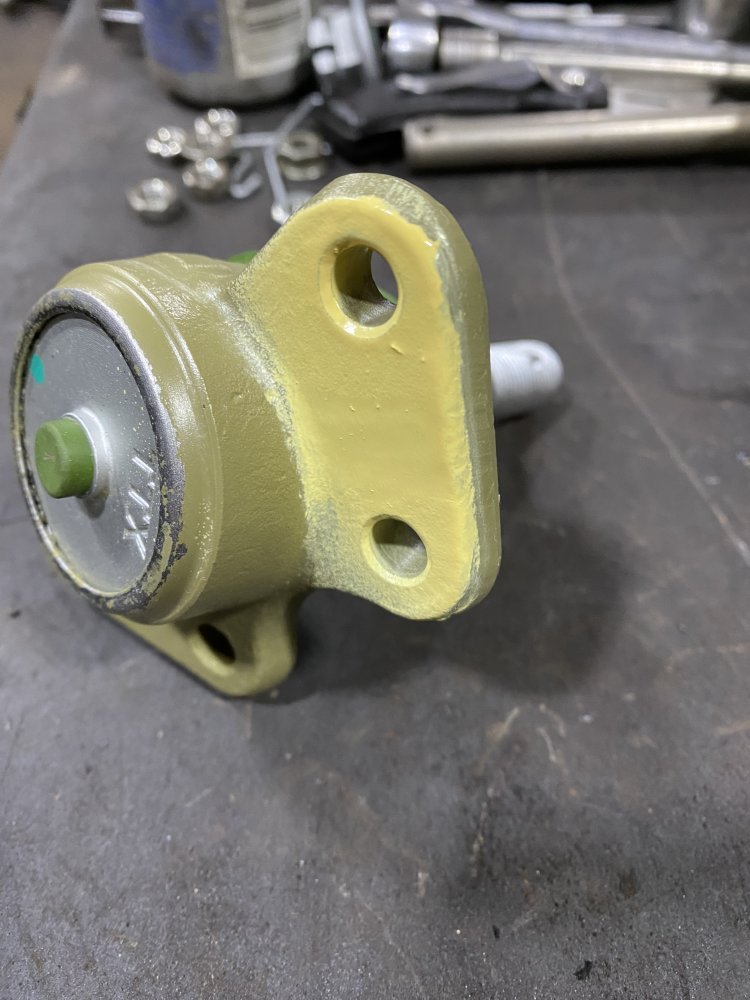
Yesterday I continued front suspension assembly. I got the bushings and lower ball joints all pressed in. After wire wheeling fasteners I started installing parts. The last thing I did was start to install the Mevotech TTX upper ball joints. I noticed there was a raised logo on the surface that mates to the control arm. Hmm.

IMG_1313.jpeg

I did some researching online and comparing to the ball joints I removed and that confirmed the ball joints were correct.

IMG_1309.jpegIMG_1310.jpegIMG_1311.jpegIMG_1312.jpeg

The simple solution was to buzz the logo off with the Dynafile and then spray a little paint over the bare metal.

IMG_1314.jpeg

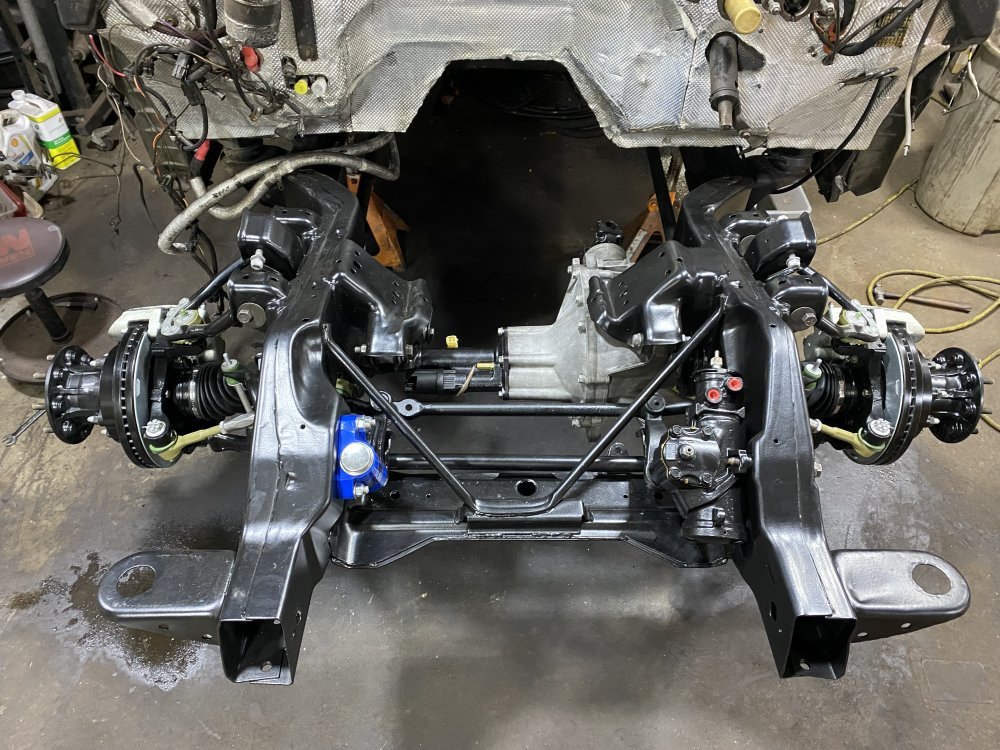
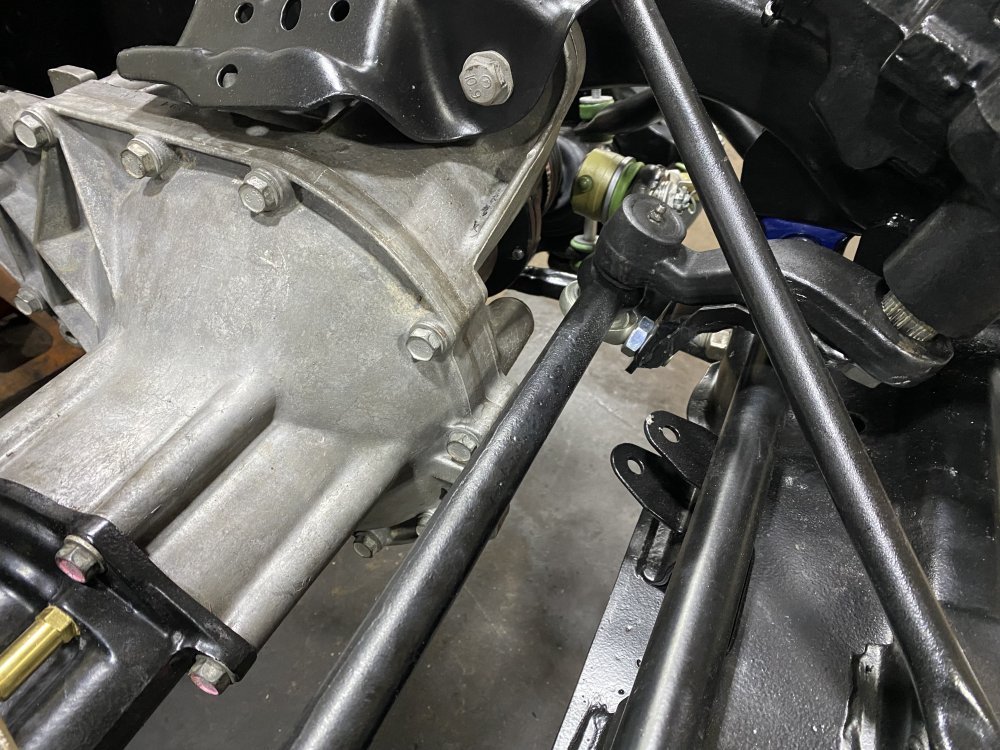
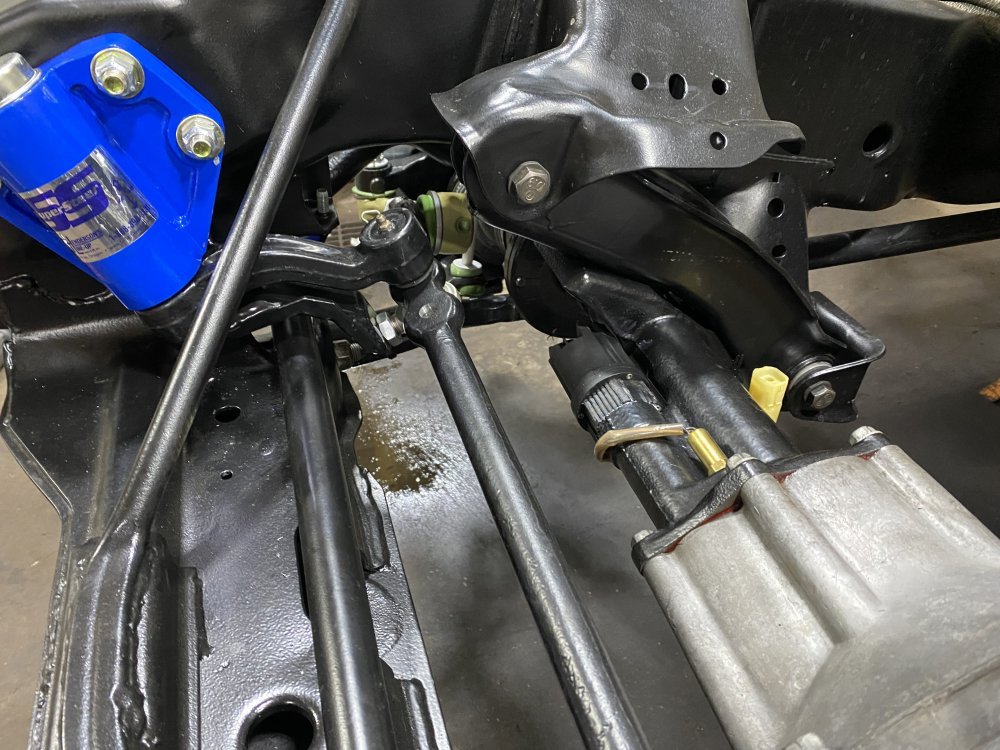
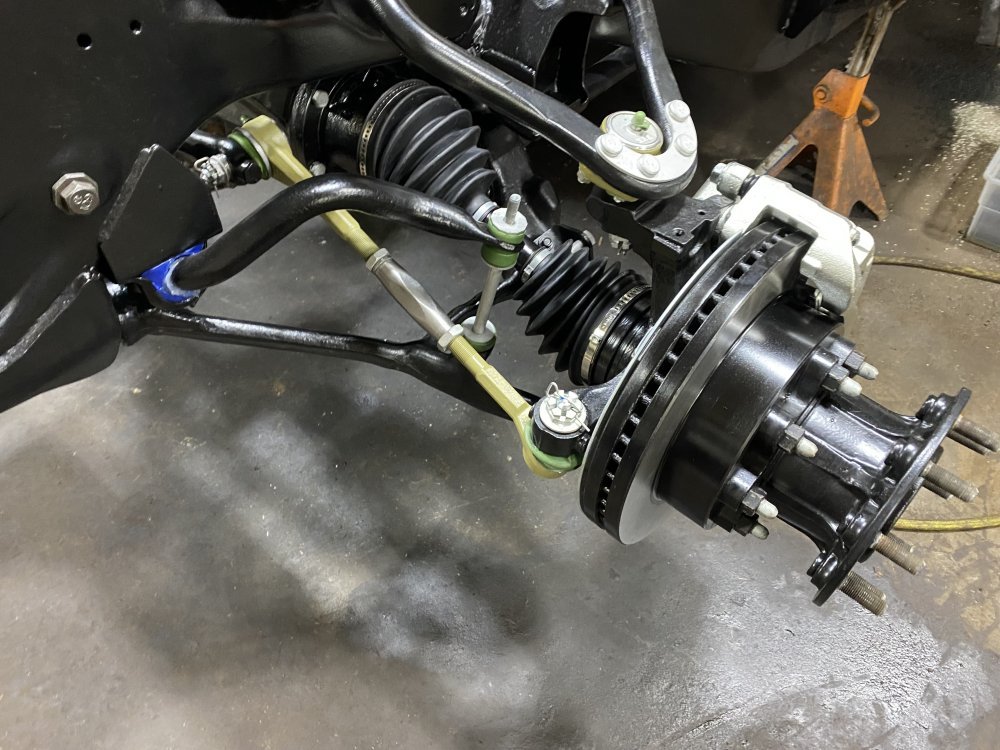
Now the suspension is installed and I’m moving on to CV axle refurbishment.

IMG_1316.jpeg
 
Back
Top