• Welcome to The Truck Stop! We see you haven't REGISTERED yet.

    Your truck knowledge is missing!
    • Registration is FREE , all we need is your birthday and email. (We don't share ANY data with ANYONE)
    • We have tons of knowledge here for your diesel truck!
    • Post your own topics and reply to existing threads to help others out!
    • NO ADS! The site is fully functional and ad free!
    CLICK HERE TO REGISTER!

    Problems registering? Click here to contact us!

    Already registered, but need a PASSWORD RESET? CLICK HERE TO RESET YOUR PASSWORD!

The Boat Thread

For some reason the transom does not seem to be waterlogged. I have had a 75 watt bulb in a trouble light warming things up for about a month so I think maybe it might all be dried out.
There is no swelling of any wood too, I just do not understand that as much water as what was leaking into the back end of this boat how it avoided all of the carnage.
I do think that this boat has not seen water for several years and that may be one reason why there is not so much damage.
there are some hairline cracks in the gel coat. I talked to a friend that runs a body shop, vehicle restoration shop about the cracks in the gel coat.
he said is what He does is use a hand held bead blaster and cleans along the cracks with that, then, blows it out real good with compressed air and coats it all with that flex seal stuff.
he said that has held up real well for his boats and the first one He sealed up is still going about ten years later.
i guess thats worth a try.
Good plan on sealing them saddles real well. I believe I have a good solution for such as that, besides checking the bolts after each use, and, before the first use after transporting with the transom saver in place.
Oh yeah, one other thing the transom and engine mounts is getting, reinforced with steel.
I got a length of 3/8ths angle steel for the inside of the upper mounting bolt holes and a length of 3/8thsX3" flat for the inside of the lower mounting bolt holes and a length of 1/4" flat for the outside of the lower mounts.
That too will help to tilt the engine slightly forwards and keep the steering arm a little closer to the center cup affair that the steering arm extends into when the wheel is steered fully to the port side, counter clock wise. LOL
 
For some reason the transom does not seem to be waterlogged. I have had a 75 watt bulb in a trouble light warming things up for about a month so I think maybe it might all be dried out.
There is no swelling of any wood too, I just do not understand that as much water as what was leaking into the back end of this boat how it avoided all of the carnage.
I do think that this boat has not seen water for several years and that may be one reason why there is not so much damage.
there are some hairline cracks in the gel coat. I talked to a friend that runs a body shop, vehicle restoration shop about the cracks in the gel coat.
he said is what He does is use a hand held bead blaster and cleans along the cracks with that, then, blows it out real good with compressed air and coats it all with that flex seal stuff.
he said that has held up real well for his boats and the first one He sealed up is still going about ten years later.
i guess thats worth a try.
Good plan on sealing them saddles real well. I believe I have a good solution for such as that, besides checking the bolts after each use, and, before the first use after transporting with the transom saver in place.
Oh yeah, one other thing the transom and engine mounts is getting, reinforced with steel.
I got a length of 3/8ths angle steel for the inside of the upper mounting bolt holes and a length of 3/8thsX3" flat for the inside of the lower mounting bolt holes and a length of 1/4" flat for the outside of the lower mounts.
That too will help to tilt the engine syou lightly forwards and keep the steering arm a little closer to the center cup affair that the steering arm extends into when the wheel is steered fully to the port side, counter clock wise. LOL

Run your finger into the hole to see if it's wet, age old male practice.

I'm just real leary of water intrusion into wood transoms.

There are better ways to clean up gel coat cracks, but you need to address the underlying cause. Google it.
 
Did the finger trick into the hole, it all seems very dry.
There is a brass bung for the transom drain plug, I removed the bung and the wood around the hole is dry too. of course, thats after being warmed for several weeks or a month. I want this thing to be dry, very dry, and sealed up before it hits the water once again.
 
Got the steel for the transom drilled and fit, some paint on it too. Sealed down everything that I had removed the old sealant from and closed up a couple of holes. Ready now to bolt back on the tilt/steering unit.
Get that done today then, probably get the rods removed from the pistons and get the new pistons transferred over to the rods.
Ordered a new bearing for the lower portion of the drive shaft, through Oriellys, special order, cost of the bearing plus freight, got the bearing home, wrong one. LOL Got online and now have the proper bearing coming in. Guess I`ll hang onto that one new bearing, costly to mail it back, $9.00 and some change, bearing was $14.00, have more in freight than the cost of the bearing. LOL Just what happens when working with outdated and obsolete equipment. LOL
 
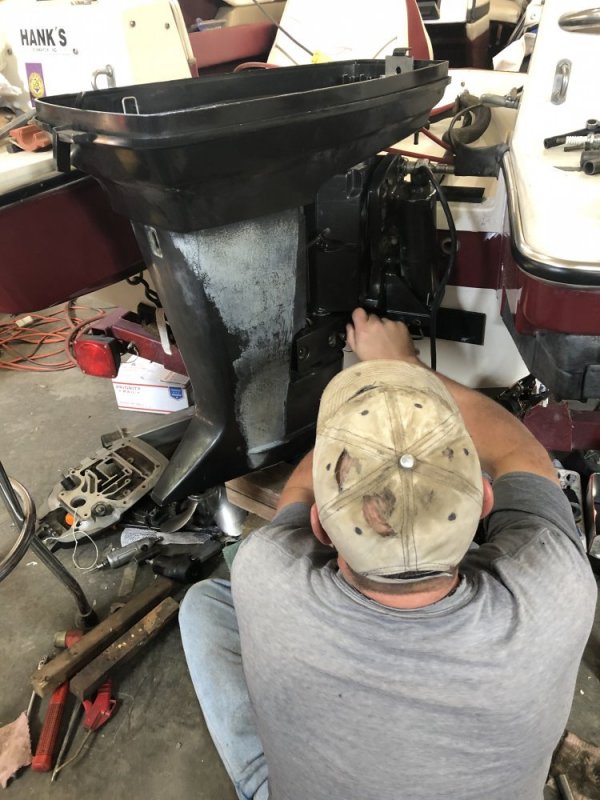
Transom is put back together. The mount/tilt mechanism installed and steering rod hooked up. I can bounce on the transom and there is no give whatsoever. The nut on the end of the steering rod, where it goes through that cup affair on the side of the transom, does not even come close to touching the edge of the cup, even with me bouncing on the drive shaft housing. 👍😹😹😹
the boy child hard after it. Got the connecting rods removed from the old pistons and one rod installed onto a new piston. Might not get much more done until next weekend when the son is off work again.
G” 58D1EFE1-DA96-47BC-9613-35BB5D6232DF.jpeg
 
Transom is put back together. The mount/tilt mechanism installed and steering rod hooked up. I can bounce on the transom and there is no give whatsoever. The nut on the end of the steering rod, where it goes through that cup affair on the side of the transom, does not even come close to touching the edge of the cup, even with me bouncing on the drive shaft housing. 👍😹😹😹
the boy child hard after it. Got the connecting rods removed from the old pistons and one rod installed onto a new piston. Might not get much more done until next weekend when the son is off work again.
G” View attachment 62193

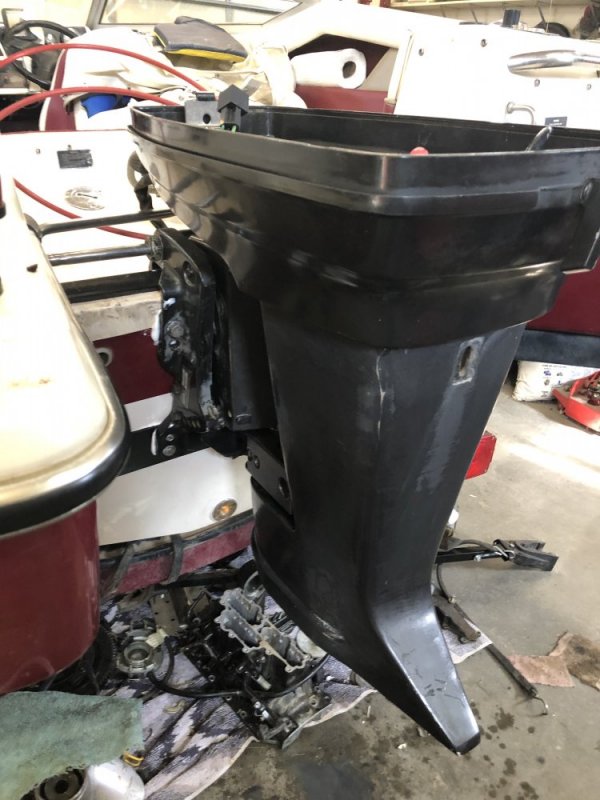
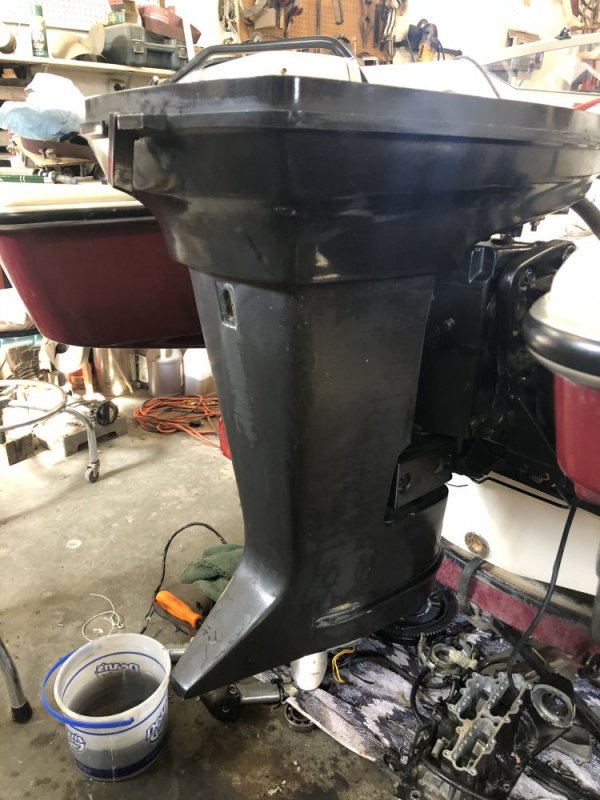
Are you going to buff out that mess on the drive shaft cowling?:angelic:
 
About that 12 gallon tank. I suspect it will do just fine with three healthy cylinders. And might even drink less than when it fed two struggling cylinders ;)

If you want to baby the motor, consider feeding it some synthetic 2 stroke oil and use higher octane fuel.
 
Are you going to buff out that mess on the drive shaft cowling?:angelic:

I think He has plans to do that, Not sure yet. I do know there is some of that hammered style of paint that will match the color quite well. Not quite a black color but close.

About that 12 gallon tank. I suspect it will do just fine with three healthy cylinders. And might even drink less than when it fed two struggling cylinders ;)

If you want to baby the motor, consider feeding it some synthetic 2 stroke oil and use higher octane fuel.
Yup, that all We run is the higher octane fuel, without that dirty E word mixed in. LOL
For the break in, I have some good old fashioned regular type of two stroke oil, after a tank of that, then, I dont care what He runs in it. LOLOLOL
He said He took today off of work to do some house cleaning. I imagine Hewill get that done before noonish then come over. Get them other two pistons and rods assembled.
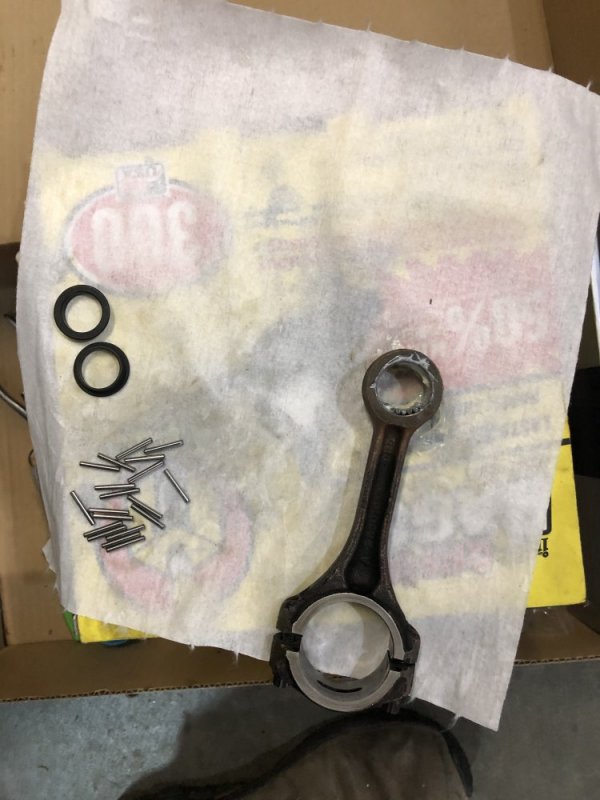
What a beast, the wristpin rollers are not caged, grease them in and try to get the wrist pin slid through then the spacer shoved over the wristpin without upsetting a bunch of needle rollers.
I have some very small, very powerful magnets I stuck around the small end of the rod, that really helped hold in them needle rollers.
Thats about all for now. LOL
 
Are you going to buff out that mess on the drive shaft cowling?:angelic:
I got out the 600 grit sanding paper. That crap I think may have been saline. A white mineral that is common in the soil in these parts. Its a white substance that looks a lot like baking soda. This boat/engine came from Jordan Montana, an area where this saline is mighty plentiful, Fort Peck Dam, the largest earth fill dam in the world is 25 miles north of there, where every Jordanite spends most every weekend of their life. And I believe from the heat of the exhaust and the saline in the water, it baked that saline mineral right on there.
E6C9D4DC-763A-491B-8DFE-B34C03ECF7A4.jpeg
 
Almost at the bottom, an area where the sanding went through the paint. Might touch it up, might leave it be. Seems I get to screwing with things, then they get real screwed up. Especially paint. 😹😹😹😹
 
Well,’here is mechanical.
Loose needle rollers into the small rod ends, then, wristpin into the piston, then, sliding the pin through the pin bore without disturbing the needle rollers. 😹😹😹
Oh yeah, and have the piston to rod correlation correct. 😥 I got the second rod attached to the piston, took a second look and, oh no, rod was wrong side to. 😹😹😹
Slid it apart and right back together without a problem. 😹😹😹
DF2B3516-C4DE-454D-8845-8966C9EAF13B.jpeg
 
For the life of Me I could not think of the name of that mineral that is in so much of the ground and ponds in these parts. It comes out of the ground in the saline seeps, fancy name for a spring I guess.
the name of the mineral is alkalye. Hard to imagine a reservoir with over 1200 miles of shoreline has so much alkalye in the water that it can be tasted when swimming in there. 😳😹
When going through a town that is amidst the alkaline territory, stop at a restaurant for a meal, they set the water before You, do not drink the water or coffee, it will give You the screaming *+#+€ 😹😹😹
 
Unless your picture make it look bigger than real life those rods are much bigger than I was expecting
Too lae to get a tape measure along side of them now, but, yeah, they are a fairly sizable unit.
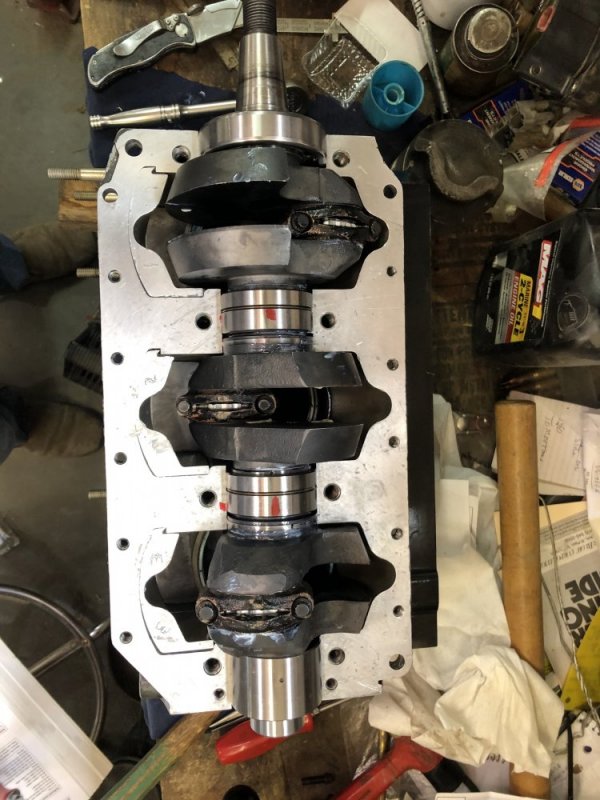
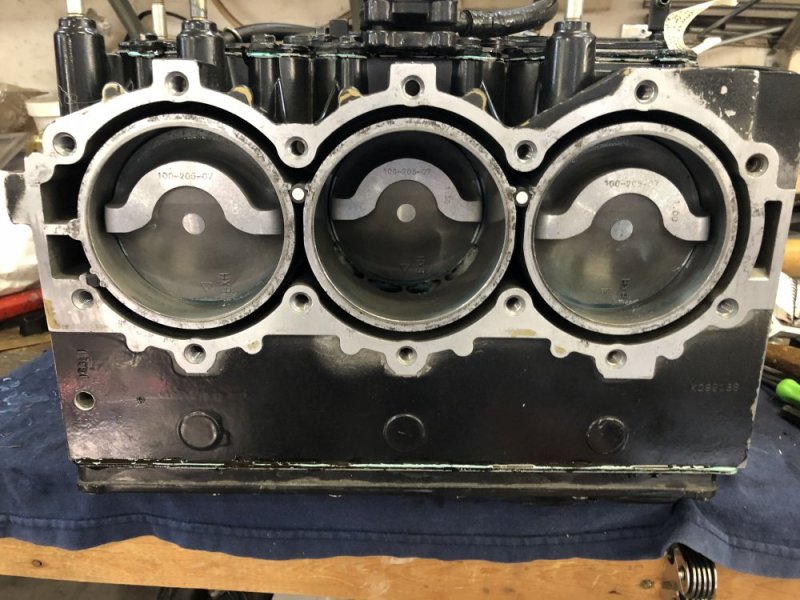
Got the pistons and rings lubed and the assemblies shoved into the block. Got the new ball bearing main installed onto the end of the cranking shaft.
After dragging the press out to where it is usable, pressing on the bearing then shoving and wrestling the press back into it cubby hole, I decided it is break time.
Turned on the TV and one of My favorite shows is on. LOL
Life Below Zero. LOL
 
Pistons are in the bores, kind of at a dilemma though, I thought I had some regular old fashioned two stroke oil to lube components with, all I could find was the TC-W3 stuff, I hope that will be okay for the initial fire up.
I will have some regular old dino two stroke stuff for the brak in run, probably run the dino stuff until the entire quart is used up.
The surface area where the top ball bearing main bearing rests in the block, almost appears to be like it had possibly spun in the block, going to rough up the outer surface of the bearing and block and use some bearing/sleeve retainer in the Loktite brand on that. A tough call there, it kind of looks like the race had spun in the housing, but, at the same time might possibly be just from pressure of having the intake manifold torqued against it. Yuppers, the intake manifold is the main bearing caps. LOL
 
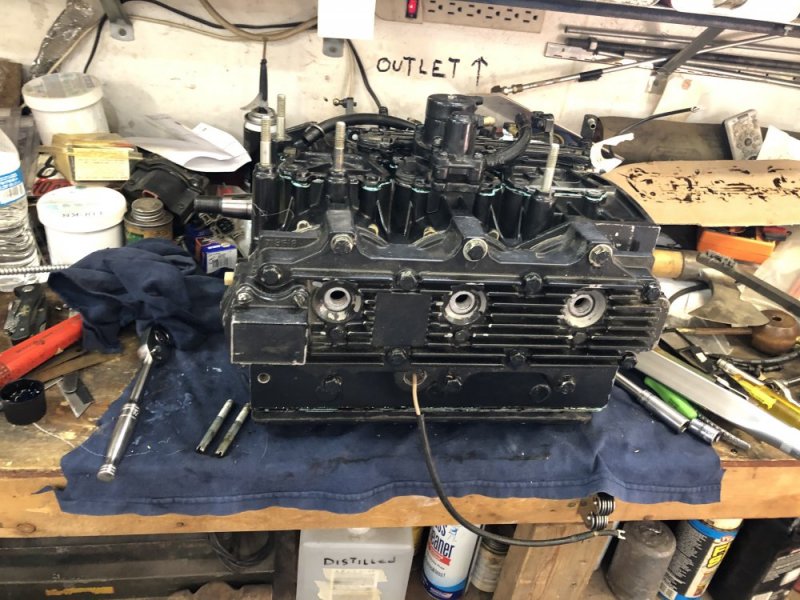
Exhaust manifold device attached along with a couple of other weird side covers that goes over the intake side of the cylinders.
Head attached and torqued.
Still have a few items to attach then it’ll be a wait for the lower leg gasket. Coming UPS, if its like the last several UPS deliveries, they dump the freight onto the USPS in Billings, then, it adds at least one day and most times two. That means gasket probably will be here Monday. 😳😹
BBFEC6B0-2ED3-4AFC-866E-CA20525FC10E.jpeg
D35B3452-6916-4E11-A3DE-8CCCBDF8EF14.jpeg
 
Back
Top