• Welcome to The Truck Stop! We see you haven't REGISTERED yet.

    Your truck knowledge is missing!
    • Registration is FREE , all we need is your birthday and email. (We don't share ANY data with ANYONE)
    • We have tons of knowledge here for your diesel truck!
    • Post your own topics and reply to existing threads to help others out!
    • NO ADS! The site is fully functional and ad free!
    CLICK HERE TO REGISTER!

    Problems registering? Click here to contact us!

    Already registered, but need a PASSWORD RESET? CLICK HERE TO RESET YOUR PASSWORD!

Rocker Arm/Valve Covers, Brands ?

And I’m wondering if it would make any sense, and be worth the money, to go with a set of those neoprene rocker cover gaskets ? Slightly over $100.00 with postage.
Leroy has a set, he said he sells those with the girdle set. I already have that so He probably woulnt mind parting with a set.
 
Buick is gone. Truck is in.
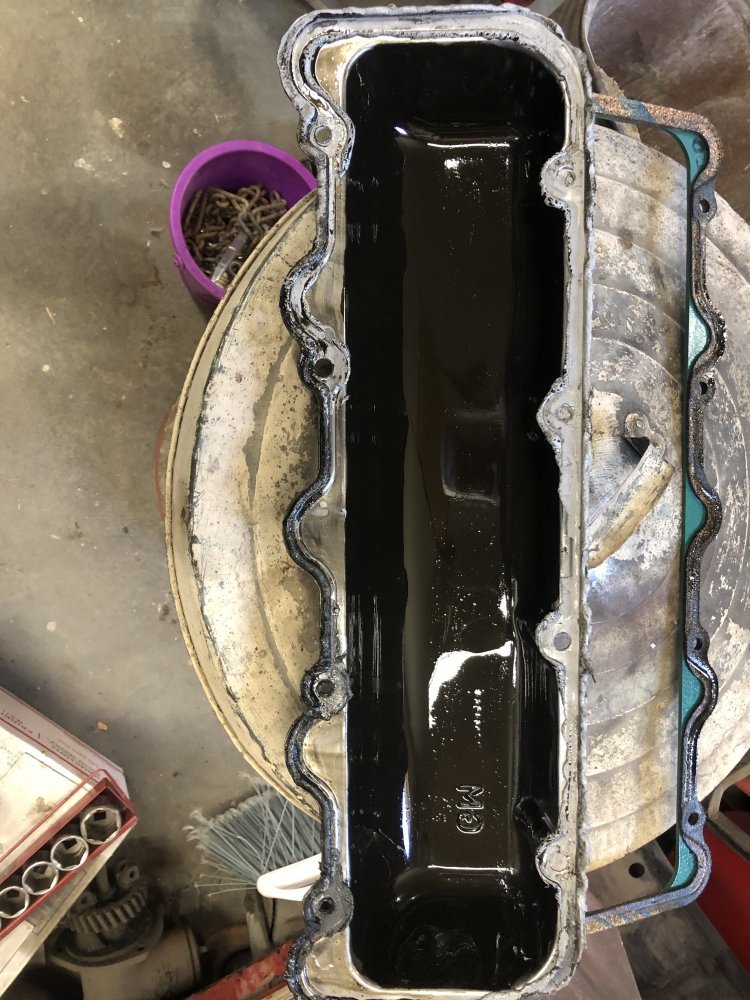
Rocker arm/valve cover for LH side is removed.
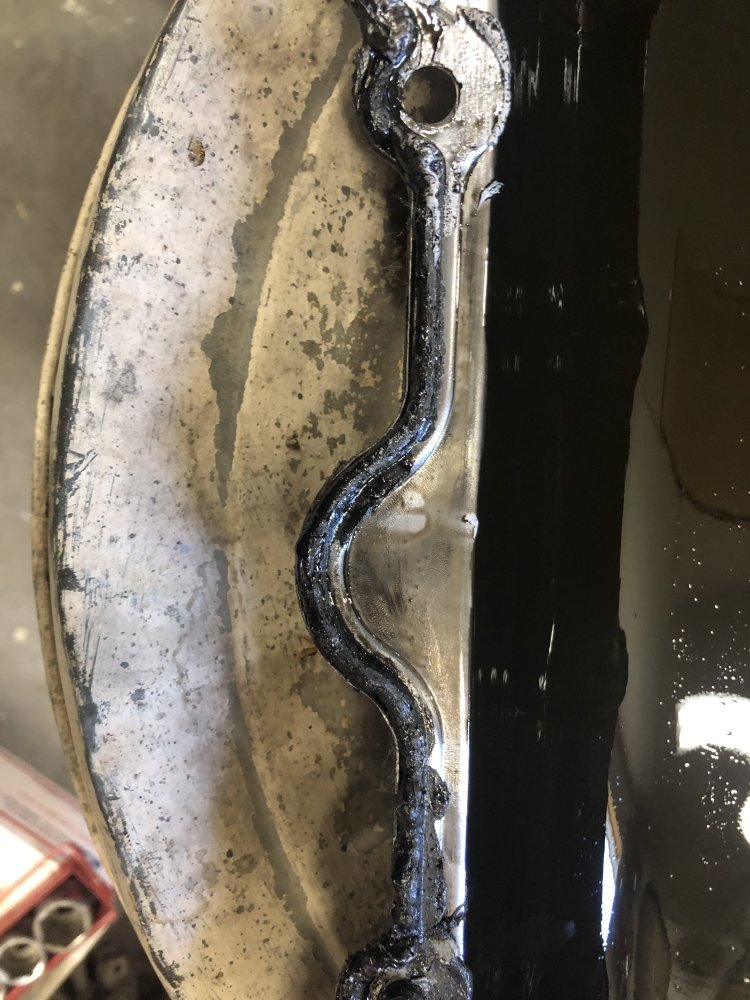
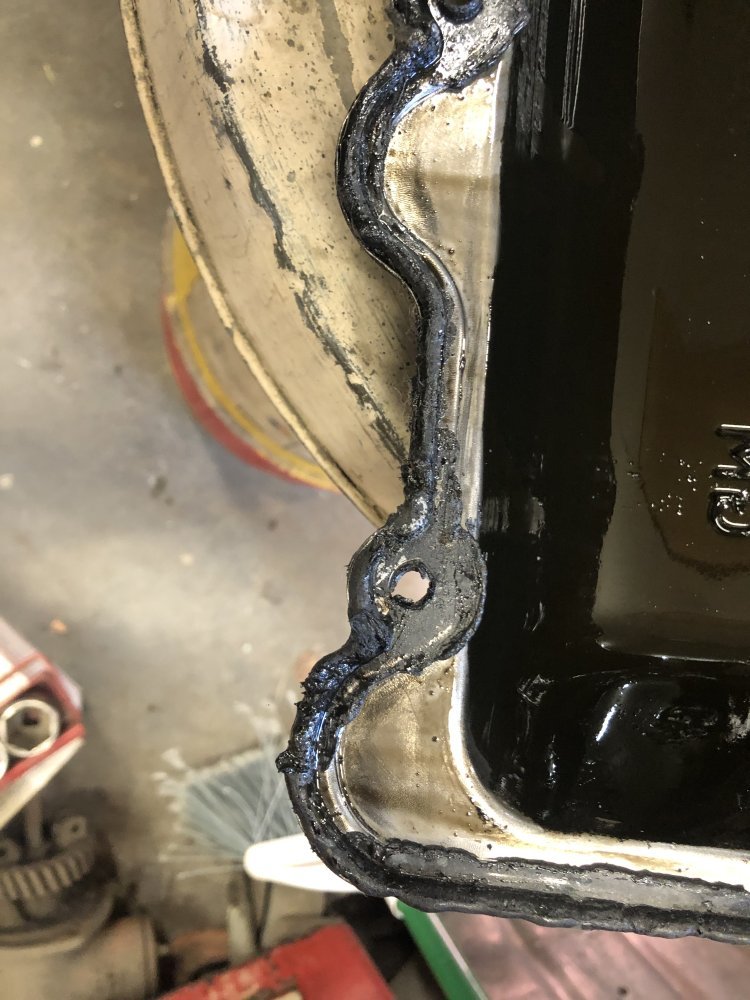
What I found, my thinking is all flawed.
Nice pretty little bead along the bottom edge. Flawed thinking that the ridge atop of the cylinder head would be to the edge of the valve cover.
WRONG ! ! ! !
It is this kind of thinking that goes in my head that costs Me a lot of grief.
And so, this time, whatever it takes, remove rear rocker arm assembly 🤷‍♂️ the sealer is going to go onto the heads.
I heated the upper edge of the cover, worked a screw driver into the front upper corner, give it a pry and the cover popped right off. There was no hold down at all along the lower edge. 😧😖😢
IMG_6813.jpeg
IMG_6814.jpeg
IMG_6815.jpeg

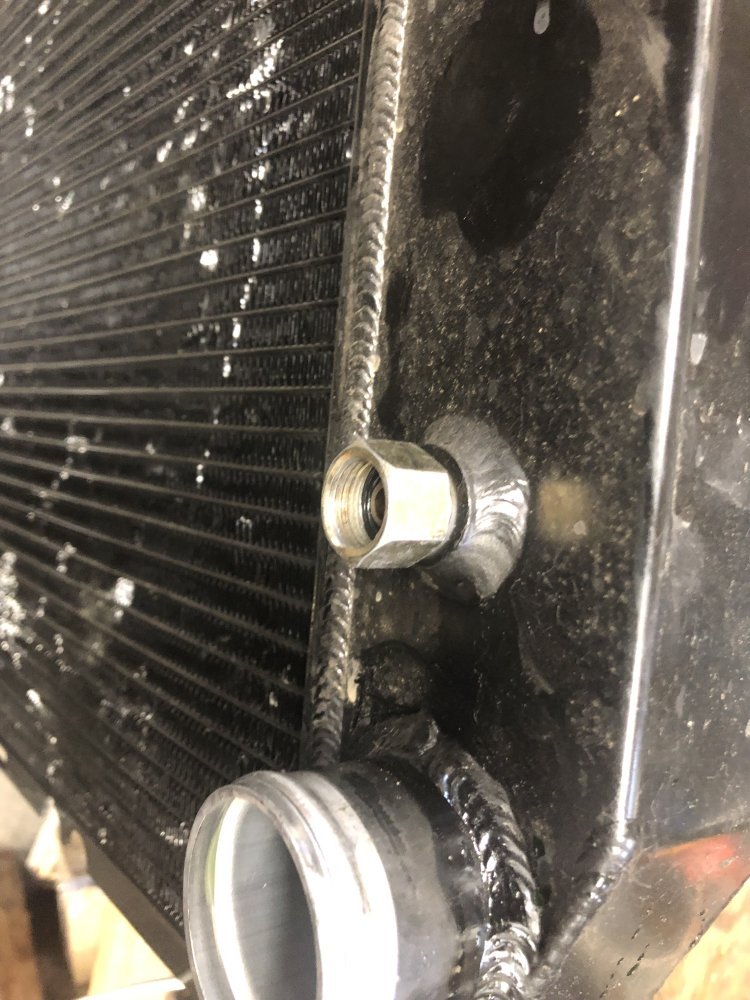
I also had a slight ATF leak from the transmission cooler portion of the radiator. Pulled the radiator so the support channel could get cleaned out, the lower flare nut fitting adapter had loosened.
IMG_6818.jpeg
Removed the both of them, cleaned them real good, a little anti seize to lube the threads a little and screwed them back in.
The leak was so slight that the fluid it was leaking didnt leave much of a trace below the fitting.
Did a bunch of scrubbing and cleaning on the cross member, lubed all the zerks while they were so visible, made some hose/plugs to fit the injectors and scrubbed the head below the rocker cover.
Maybe tomorrow, pull the forward drive line, the oil cooler hoses and replace the seals/gaskets on the oil filter adapter.
 
“Nice pretty little bead along the bottom edge. Flawed thinking that the ridge atop of the cylinder head would be to the edge of the valve cover.
WRONG ! ! ! !”

Not quite sure I understand? Are you saying the sealing surface of the cylinder head does not exactly line up to the sealing surface of the valve cover?

FWIW I put sealant all over the sealing surface of the valve cover, including all sides of the bolts.

Also, what did you use to heat the upper valve cover edge?
 
Last edited:
“Nice pretty little bead along the bottom edge. Flawed thinking that the ridge atop of the cylinder head would be to the edge of the valve cover.
WRONG ! ! ! !”

Not quite sure I understand? Are you saying the sealing surface of the cylinder head does not exactly line up to the sealing surface of the valve cover?

FWIW I put sealant all over the sealing surface of the valve cover, including all sides of the bolts.

Also, what did you use to heat the upper valve cover edge?
Bernzomatic torch. Upper edge is dry, clean and free of any flammables.
I guarantee I will not use that flawed thinking again, about the placement of the sealing surfaces. 😹😹😹
 
Now thinking, remove the rear rocker arms assemblages, install the gasket goop atop of the heads sealing ridge, rocker arms back on, then rocker covers.
I will be following the suggestions that has been placed in this thread to assure of a good tight seal.
I know that when I used the right stuff sealer on the intake manifold of the 88 Buick, a week later when I had to dismantle it again because of the same leak, the manifold must have sealed down so tight that the right stuff didnt cure out.
That was when I used the regular old black RTV and it then sealed up.
I got me a brand new dispenser of the right stuff that I’ll be trying out on this.
 
Covered the valve train area of the heads.
Scraped off the previous sealer. Mineral spirits and scotch brite and scrubbed until they were clean. B&P cleaner on a rag and wiped away any residue of mineral spirits.
Using a finger put a healthy coating of right stuff on the rear of the cover ridge of the head.
Dispensed it out on the rest of the head.
A healthy bead around the sealing surface of the cover and set them on. Screwed in the studs, set the girdle down over the studs, added the stiffeners to the top side, fuel line brackets to the lower side.
Made sure the covers was seated down and started the nuts against the covers.
Time for a sammich. Giving the goop about an hour then go out and snug down the nuts a little more. Install the fuel pipes and also new transmission cooler hose, radiator hoses, fill/over flow tank hose, etc.
Might be nap time first though. I keep dozing just trying to get this wrote out and posted.😹😹😹
Not placing the cork gasket under the cover?
 
after it's cooled off, run your fingers along the back side of the heads in the areas you can't see feeling for an oil slick!

I just found another oil leak under mine. for a moment I thought it was the front crank seal again. no it seems the very front of the oil pan has developed a leak!
 
after it's cooled off, run your fingers along the back side of the heads in the areas you can't see feeling for an oil slick!

I just found another oil leak under mine. for a moment I thought it was the front crank seal again. no it seems the very front of the oil pan has developed a leak!
The front of the pan on My engine has that area all wet. I too at first thought front cranking shaft seal.
I maybe should have pulled the engine and done a total reseal but it just seems that the energy just is not there right now.
If something happens that the engine would need to get pulled then so be it, I will get that done then.
@dbrannon79 I will run my finners along the back side of the heads. I will most likely wet a rag with B&P cleaner the have to fire up and run the engine through several heat/cool cycles first though.
 
A rag soaked in mineral spirits and washed the back of both heads.
I could feel The Right Stuff had squished out from under the covers at the backs of both heads.
Maybe the third time is the cure.
Got the intake manifold placed over the valley and heads, next, make sure there is no wires or hoses has managed to finagle their ways between the heads and manifold.
Thats about all for now. More to come later.
 
Truck is back together.
Took it for a ten mile run. Let it idle outside the garage for a while. No visible drips from any where.
Heads below rocker covers are now dry.
Run the truck into the garage.
Almost immediately there was one drip, a very small drip.
Need to get the underneath cleaned so I can see if there is any new leaks and if so where they are at.
Hopefully the one drip was just residue running off from the old leak!
 
Hopefully the one drip was just residue running off from the old leak!
I think the front of the pan gasket is a part of it.
I now have the entire truck up on jack stands.
Stopped at the lumber store and got two gallons of mineral spirits. From somewhere I had acquired a hazmat suit. Going to don on that suit, put on the big green gauntlet gloves that seems to be chemical proof, get on the creeper with a handful of rags and various scrub brushes and give this thing an undercarriage bath. Get it all dried off real niice with a couple of cans of brake and parts cleaner, then drop it back to the floor and give it another short test run. Lets see what drips reappear.
One thing about now as compared to pre sealing the rocker arm covers, oil no longer steadily drips under the truck. At least now it could be drove great distances with an occasional check on the oil level.
The PO had replaced the engine oil cooler pipes with some sort of a hydraulic hose.
Just to be safe I am going to replace those hoses and install a new oil cooler adapter gasket kit.
Probably do that before the great wipe down as there is a lot of oil hanging on those hoses.
As wet as the front of the pan is I am guessing that there might be a mist of oil coming from that area too.
I once did have to timing cover off of the engine and part of the process of replacing the timing chain and reinstalling the cover was to install a short piece of gasket at the front of the pan, and to use some sealer at the back edges of that gasket. That portion of the gasket may have gave out too.
If that is so, maybe start a thread on if anyone has raised up and blocked the engine, then, lowered the pan and replaced the entire pan gasket ?
Just trying to avoid having to pull the engine from this beast, at least for this crucial moment in the frame of time.
The wifey wants to go to the cabin and I do not want to have to borrow a truck again to make that journey.
Oh yes, I had previously purchased and installed the fluid dampener and also installed a new front cranking shaft seal at that time, so, that should not be one of the culprits.
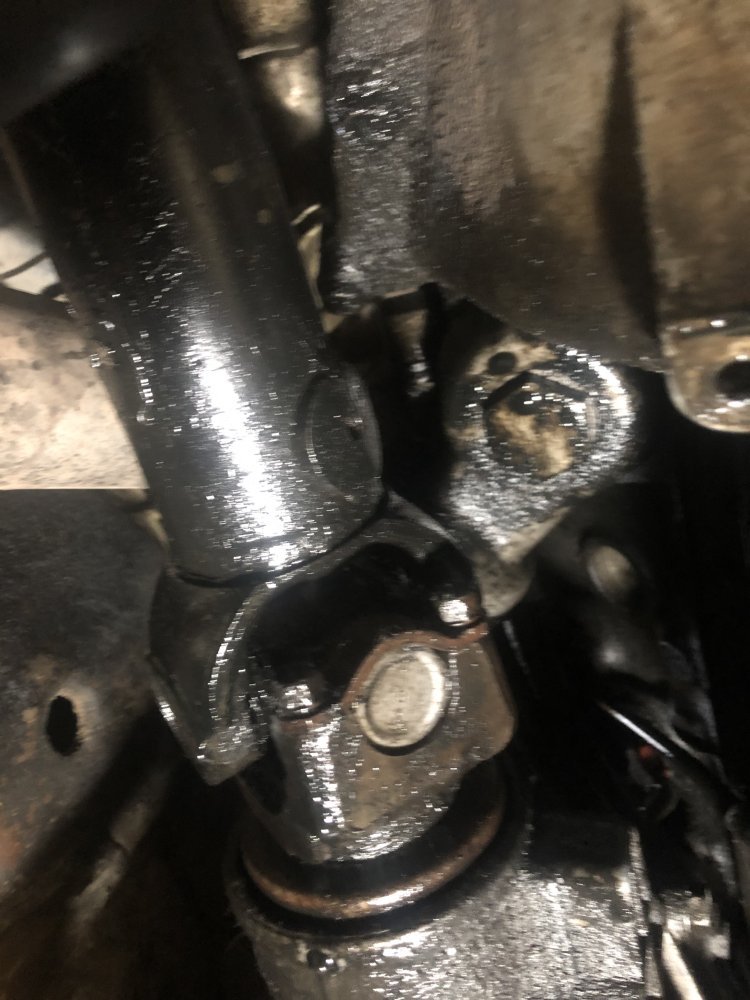
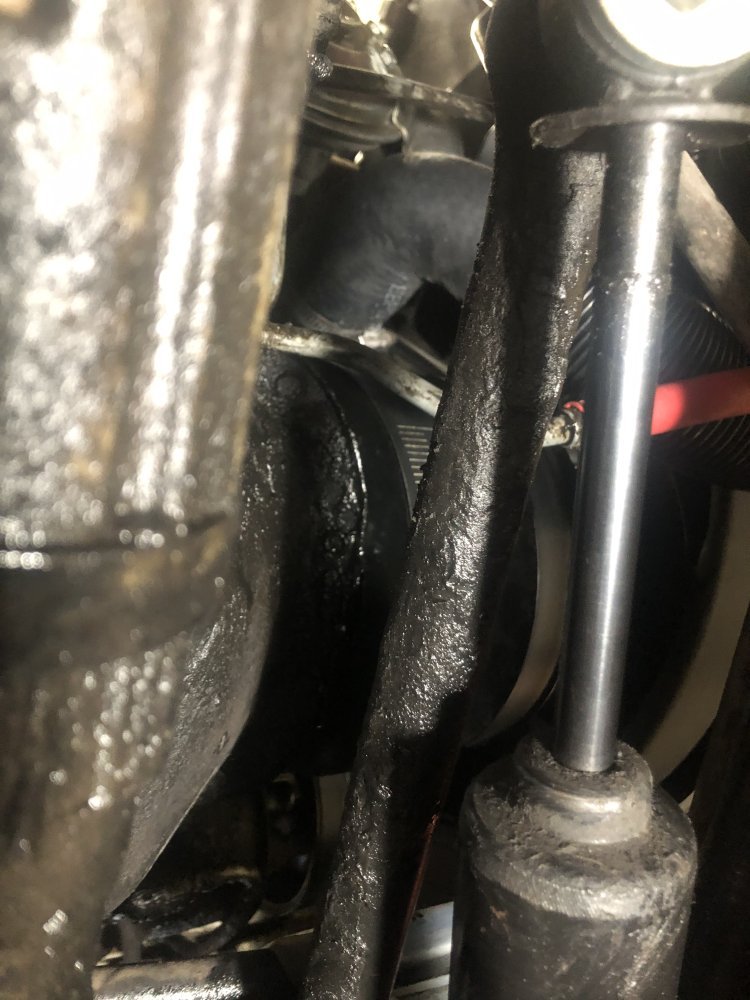
A view of the oil cooler adapter and the front of the pan gasket.

IMG_6847.jpeg
IMG_6848.jpeg
 
I think the front of the pan gasket is a part of it.
I now have the entire truck up on jack stands.
Stopped at the lumber store and got two gallons of mineral spirits. From somewhere I had acquired a hazmat suit. Going to don on that suit, put on the big green gauntlet gloves that seems to be chemical proof, get on the creeper with a handful of rags and various scrub brushes and give this thing an undercarriage bath. Get it all dried off real niice with a couple of cans of brake and parts cleaner, then drop it back to the floor and give it another short test run. Lets see what drips reappear.
One thing about now as compared to pre sealing the rocker arm covers, oil no longer steadily drips under the truck. At least now it could be drove great distances with an occasional check on the oil level.
The PO had replaced the engine oil cooler pipes with some sort of a hydraulic hose.
Just to be safe I am going to replace those hoses and install a new oil cooler adapter gasket kit.
Probably do that before the great wipe down as there is a lot of oil hanging on those hoses.
As wet as the front of the pan is I am guessing that there might be a mist of oil coming from that area too.
I once did have to timing cover off of the engine and part of the process of replacing the timing chain and reinstalling the cover was to install a short piece of gasket at the front of the pan, and to use some sealer at the back edges of that gasket. That portion of the gasket may have gave out too.
If that is so, maybe start a thread on if anyone has raised up and blocked the engine, then, lowered the pan and replaced the entire pan gasket ?
Just trying to avoid having to pull the engine from this beast, at least for this crucial moment in the frame of time.
The wifey wants to go to the cabin and I do not want to have to borrow a truck again to make that journey.
Oh yes, I had previously purchased and installed the fluid dampener and also installed a new front cranking shaft seal at that time, so, that should not be one of the culprits.
A view of the oil cooler adapter and the front of the pan gasket.

View attachment 82605
View attachment 82606
That oil cooler/filter adapter has always leaked for me no matter how many times I’ve replaced the seals.
 
Back
Top