Navigation
Install the app
How to install the app on iOS
Follow along with the video below to see how to install our site as a web app on your home screen.
Note: This feature may not be available in some browsers.
More options
-
Welcome to The Truck Stop! We see you haven't REGISTERED yet.
Your truck knowledge is missing!
- Registration is FREE , all we need is your birthday and email. (We don't share ANY data with ANYONE)
- We have tons of knowledge here for your diesel truck!
- Post your own topics and reply to existing threads to help others out!
- NO ADS! The site is fully functional and ad free!
Problems registering? Click here to contact us!
Already registered, but need a PASSWORD RESET? CLICK HERE TO RESET YOUR PASSWORD!
You are using an out of date browser. It may not display this or other websites correctly.
You should upgrade or use an alternative browser.
You should upgrade or use an alternative browser.
Fuel Manager Leak
- Thread starter Hill Top
- Start date
SnowDrift
Ultra Conservative. ULTRA!
My truck is sitting in a "winter cabin" away from the evils of salt, but if I remember correctly, There's an ABS module over there on my fender-well. Will the filter still fit in that area with this? I really can't remember. I found a picture online - not my engine bay, but mine is set up like this. Where can the bracket go that it won't be in the way of something else?


jrsavoie
Recruit
Can you post a further away picture? I'm still not figuring out erxactly where you have it mounted
jrsavoie
Recruit
My truck is sitting in a "winter cabin" away from the evils of salt, but if I remember correctly, There's an ABS module over there on my fender-well. Will the filter still fit in that area with this? I really can't remember. I found a picture online - not my engine bay, but mine is set up like this. Where can the bracket go that it won't be in the way of something else?
View attachment 49654
That is where I mounted my bypass filters on the 98 and one other. I made them so you could remove the whole ball of wax to change the filter easily with minimal mess
SnowDrift
Ultra Conservative. ULTRA!
That is where I mounted my bypass filters on the 98 and one other. I made them so you could remove the whole ball of wax to change the filter easily with minimal mess
Photo?
it works great. i have 4:10's and at 70 mph i turn 1900-2000 rpm. i only get about 5 psi on the ATT but only going up a bridge. normal is 1-2.Thanks Guys! DEEJAA I was thinking about a GV overdrive with a ATT, how you like that setup?
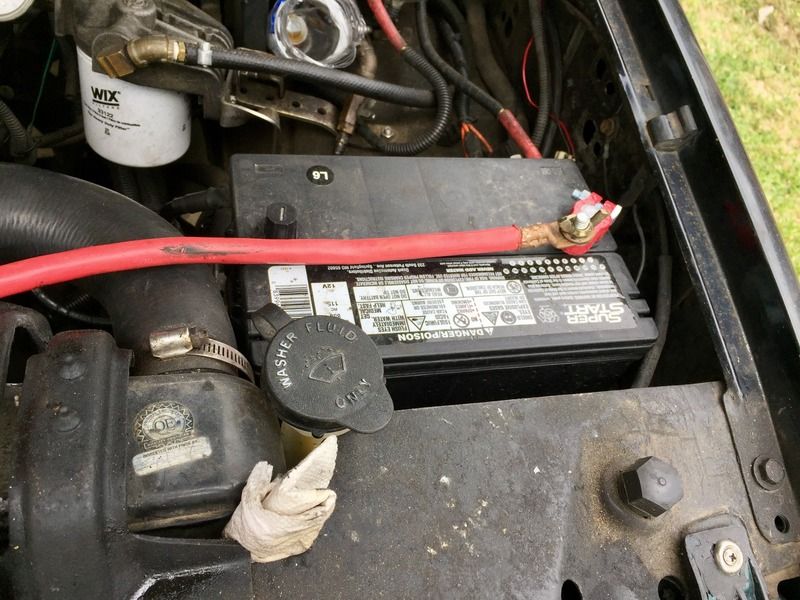
what you CAN do: get a washer bottle from a later model that mounts under the battery. all the room you need will be opened up. i did that. might have to bend the bracket some.......a picture online - not my engine bay, but mine is set up like this. Where can the bracket go that it won't be in the way of something else?
View attachment 49654
i can get one in the daylight.Can you post a further away picture? I'm still not figuring out erxactly where you have it mounted
SnowDrift
Ultra Conservative. ULTRA!
Thanks!
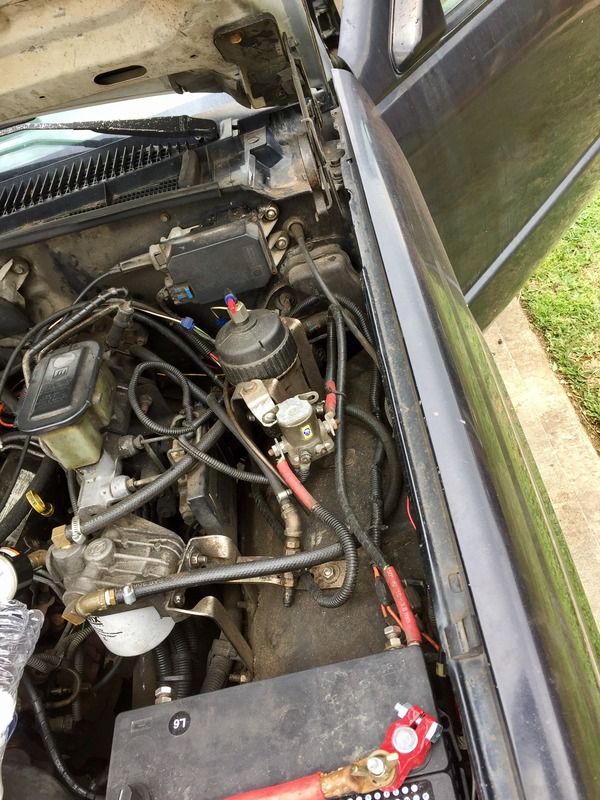
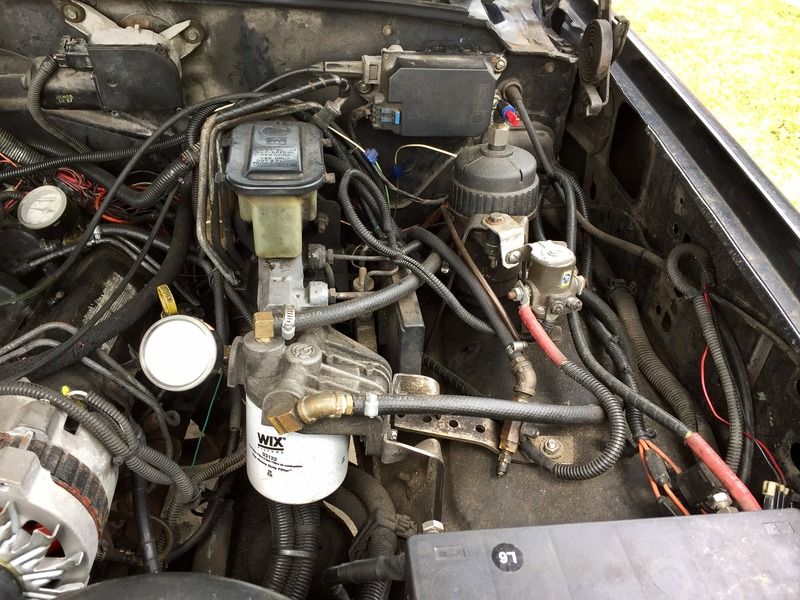
here they are:

here's the reservoir. be sure to get mounts, harness, pump and a good lid with water level.

there's room for GP override, spin on filter, FFM and all the wiring, hoses, gauges, etc. i will clean it up when the bugs are worked out.

spin on has the same type of bracket: stainless, bent in a vise with a BFH, stainless bolts mounted to wheel well. stainless is hard to drill so i use a punch then grind off the surface. i've wasted so many drill bits trying to put a hole in the stuff but i love it for it's durability.

here's the reservoir. be sure to get mounts, harness, pump and a good lid with water level.

there's room for GP override, spin on filter, FFM and all the wiring, hoses, gauges, etc. i will clean it up when the bugs are worked out.

spin on has the same type of bracket: stainless, bent in a vise with a BFH, stainless bolts mounted to wheel well. stainless is hard to drill so i use a punch then grind off the surface. i've wasted so many drill bits trying to put a hole in the stuff but i love it for it's durability.
Last edited:
jrsavoie
Recruit
For stainless, use a good quality drill bit and trigger it with lots of pressure. I have found Anchor Lube to be a very good drill lube for stainless drilling and tapping.here they are:
here's the reservoir. be sure to get mounts, harness, pump and a good lid with water level.
there's room for GP override, spin on filter, FFM and all the wiring, hoses, gauges, etc. i will clean it up when the bugs are worked out.
spin on has the same type of bracket: stainless, bent in a vise with a BFH, stainless bolts mounted to wheel well. stainless is hard to drill so i use a punch then grind off the surface. i've wasted so many drill bits trying to put a hole in the stuff but i love it for it's durability.
The key is lots of pressure. Then turn the drill on and off to keep the bit from heating up. If you try pulling the trigger and drilling like a piece of wood, you will smoke the bit. Just pull the trigger, let off and repeat.
I get the gold bits from Fastenal or Lawson
https://www.amazon.com/dp/B00FQQ3JWY/?tag=jhdiesel-20
As an Amazon Associate we earn from qualifying purchases.
jrsavoie
Recruit
what's the best speed? i use an old drill press.
On a drill press, I use the Slowest speed.
Will L.
Well-Known Member
For drill bits, I still point everyone towards Mac Tools. They are the only company that has a replacement warranty for broken bits. Even their l ft hand bits for removing broken bolts.
As for speed and material, there are tons of charts, print one out and post newr your drill press and another one wherever you keepmyour portable bit index.
http://www.irwin.com/uploads/documents/11_Decimal_Equivalents_Guide.pdf
As for speed and material, there are tons of charts, print one out and post newr your drill press and another one wherever you keepmyour portable bit index.
http://www.irwin.com/uploads/documents/11_Decimal_Equivalents_Guide.pdf
jrsavoie
Recruit
For drill bits, I still point everyone towards Mac Tools. They are the only company that has a replacement warranty for broken bits. Even their l ft hand bits for removing broken bolts.
As for speed and material, there are tons of charts, print one out and post newr your drill press and another one wherever you keepmyour portable bit index.
http://www.irwin.com/uploads/documents/11_Decimal_Equivalents_Guide.pdf
I agree on Mac tools drill bits and taps. I just recently found out abut their guarantee.
I haven't tried any of their bits yet, but they came highly recommended
Will L.
Well-Known Member
Yeah, same warranty on thier taps and dies.
Iirc those are made for them by Irwin, but not 100%.
Iirc those are made for them by Irwin, but not 100%.
Husker6.5
135' diagonal 16:9HD, 25KW sound!
Having worked extensively with stainless steel as a Maintenance Technician in an organic cereal processing plant I will give you these tips:
ALWAYS use either cobalt or titanium coated drill bits (gold colored), as regular tool steel bits are too soft for the harder stainless steel.
ALWAYS use cutting oil or other light oil when drilling to both keep the face and flutes cool and to float away metal chips and sharf.
ALWAYS drill slower than you think, and while using more pressure than on mild steel, do NOT use so much that you cause the drill bit to deflect (especially on diameters under 1/4") or the bit will shatter. The larger the diameter of the bit, the slower the rpm speed.
ALWAYS center punch the spot to keep the bit from trying to "walk" when starting and ALWAYS drill a pilot hole (3/32-1/8") to start and step up to the final size hole. Example: if you need a 5/8" hole through 3/8" bar stock, drill a 1/8" pilot, then step up to 1/4, 7/16 and then 5/8". Use PLENTY of cutting oil! Your drill bits will thank you and you will have a clean, round hole, too.
You will know you are doing it right when you have either a long corkscrew of metal spiraling up from the material or large chips floating out of the hole as you're drilling. Lots of small, fine "filings" indicates that the bit has been over heated and is now dull and needs resharpening or replacing.
Oh, use the shallowest bit face angle you can, 130-135° face angle, to prevent both spalling of the cutting face of the bit (chipping of bit) and walking of the bit. Steeper (pointier) face angles lead to spalling and bit overheating.
