• Welcome to The Truck Stop! We see you haven't REGISTERED yet.

    Your truck knowledge is missing!
    • Registration is FREE , all we need is your birthday and email. (We don't share ANY data with ANYONE)
    • We have tons of knowledge here for your diesel truck!
    • Post your own topics and reply to existing threads to help others out!
    • NO ADS! The site is fully functional and ad free!
    CLICK HERE TO REGISTER!

    Problems registering? Click here to contact us!

    Already registered, but need a PASSWORD RESET? CLICK HERE TO RESET YOUR PASSWORD!
Gonna tackle a couple other small maintenance items this weekend.
  • Replace front sway bar end link bushings
  • Lube rear leaf springs (started squeaking after first rain :shifty:)
  • Heat shield on exhaust near RR shock (it's a bit close and pretty sure the heat killed the seals prematurely).
  • Replace heater core T fittings with metal versions (have had a small weep at those connections for a few months)
Other than that, look stuff over again and check torque on all the bolts we touched 2 months ago with all the suspension and body mount work.
Then she's ready for the rest of the year.
 
Last edited:
Alright so I got the little
Maintenance stuff done a month or so back.

However as we start going through these heat waves the A/C is acting up again. I paid a shop to diagnose the system last fall when it was having trouble. I don’t think they did a very thorough diagnosis. Just blamed the code in the hvac controller for the recirc door motor out of spec. They wanted to replace all bland door actuators for ~$3600. Obviously I said no. I ended up flashing the hvac controller with the tech 2 to an updated software number and the recirc door has been fine ever since.

Now I’m no a/c expert but I’m gonna take my chances. Currently we’re back to no cooling until after I’ve been driving for a while. Usually I notice a bit of a squealing noise coming from the rear hvac in the back right area. Only happens for a few seconds then usually about 10-30 seconds later a/c turns ice cold and stays that way the rest of the day. Lately it’s been struggling to get cold and sometimes gets ice cold for hours then starts cycling again.

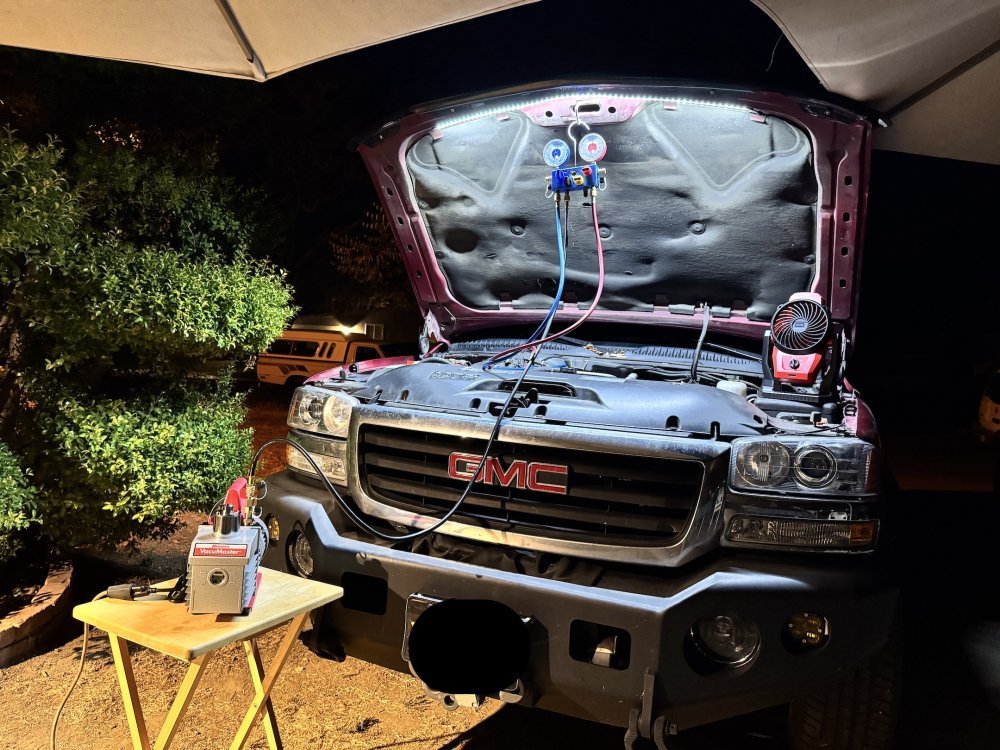
Anyways. I’m pretty sure the noise I’m hearing is the rear expansion valve. So I threw the gauges on it today and observed static pressures of about 72 hi/low with ambient temp around 78F. Started the truck turned on compressor and low pressure stayed at 72 but hi started climbing. No cool air inside. Hi side got to 400psi before I turned off the compressor. As the inside came back down the low side creeped up to around 80 and both seemed to stabilize around 80psi. Tried again and same thing. Lo side doesn’t move but inside starts building. Shut off compressor and lo comes up to around 90 and both hi and low stabilize there. Tried once more and same behavior and now both are stabilized around 100psi. I’m thinking I have a restriction somewhere. Blaming the rear expansion valve seems easy given the noise I had been hearing from that area.

Evacuated the system. Only pulled 2.31#. Capacity sticker shows 2.8#. I pulled the orifice tube out up front and some more refrigerant escape. Orifice tube was clean and was replaced last fall.
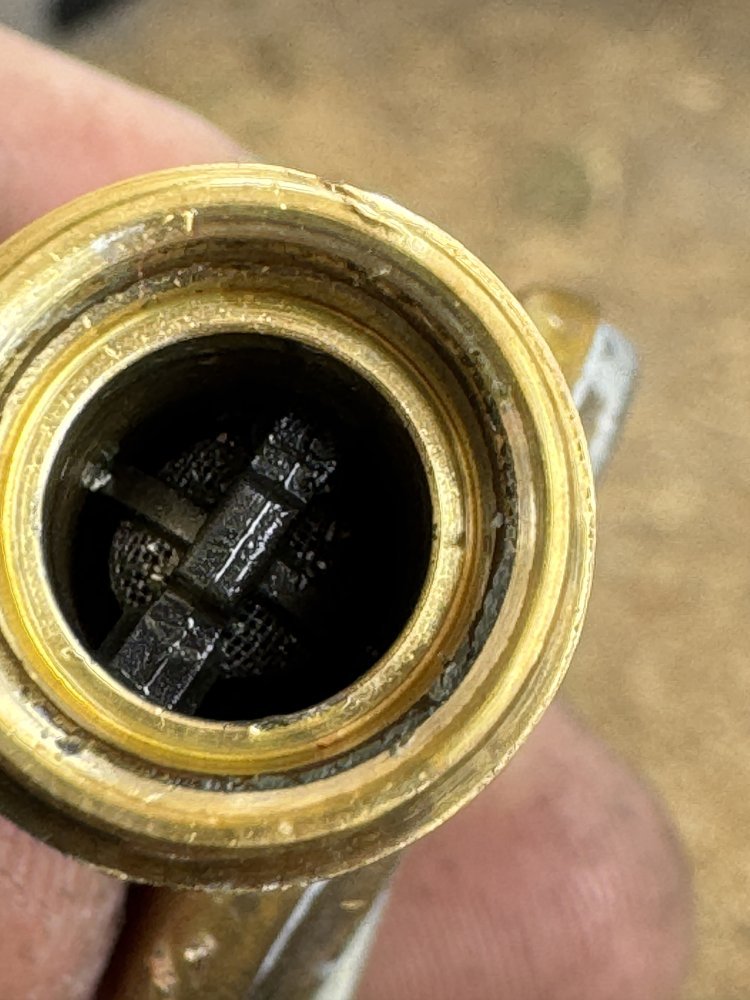
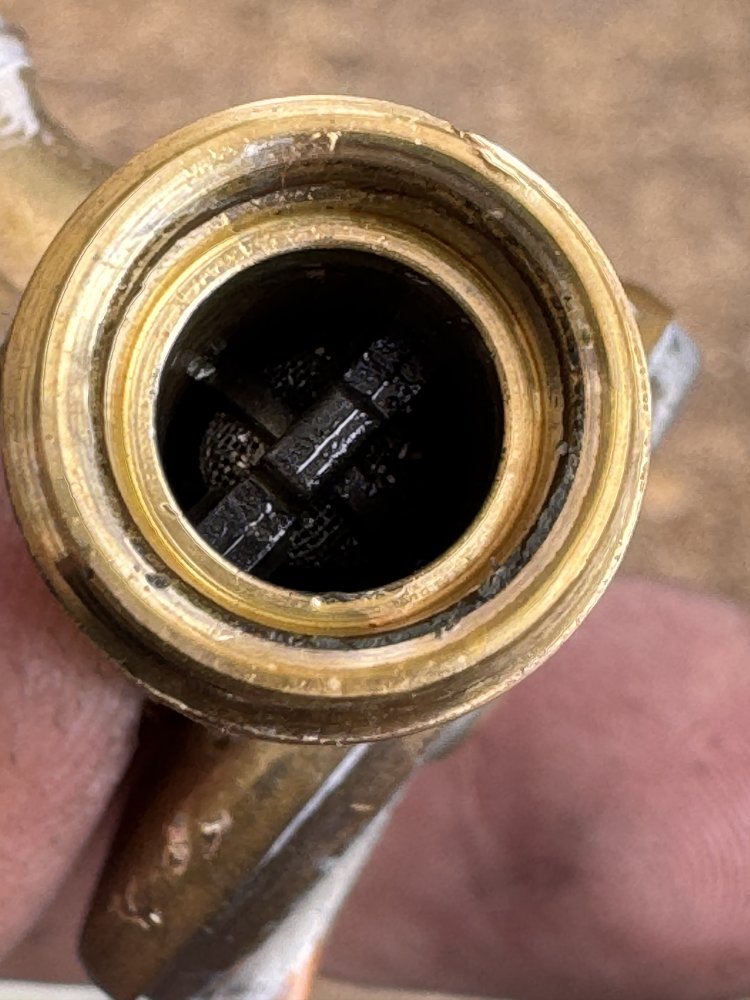
Rear into the rear hvac and when disconnecting the lines from the rear evaporator core some more refrigerant escaped. That expansion valve was really tight on the evaporator. But got it off. Looks a bit dark in there compared to the new one. Not sure how to check it but put the new one on after checking the evaporator core to make sure air could get through it.

IMG_1583.jpegIMG_1582.jpeg
 
If anyone has some insight I’m open to it. Planning to install the new expansion valve, vacuum the system for an hour and ensure it can hold vaccuum. Then recharge with 2.8#.

Last fall I cleaned out the cooling stack and replaced the fan clutch so I know there’s good airflow across there.

If it still has issues I guess I’ve gotta blame the front condenser 🤷‍♂️.
 
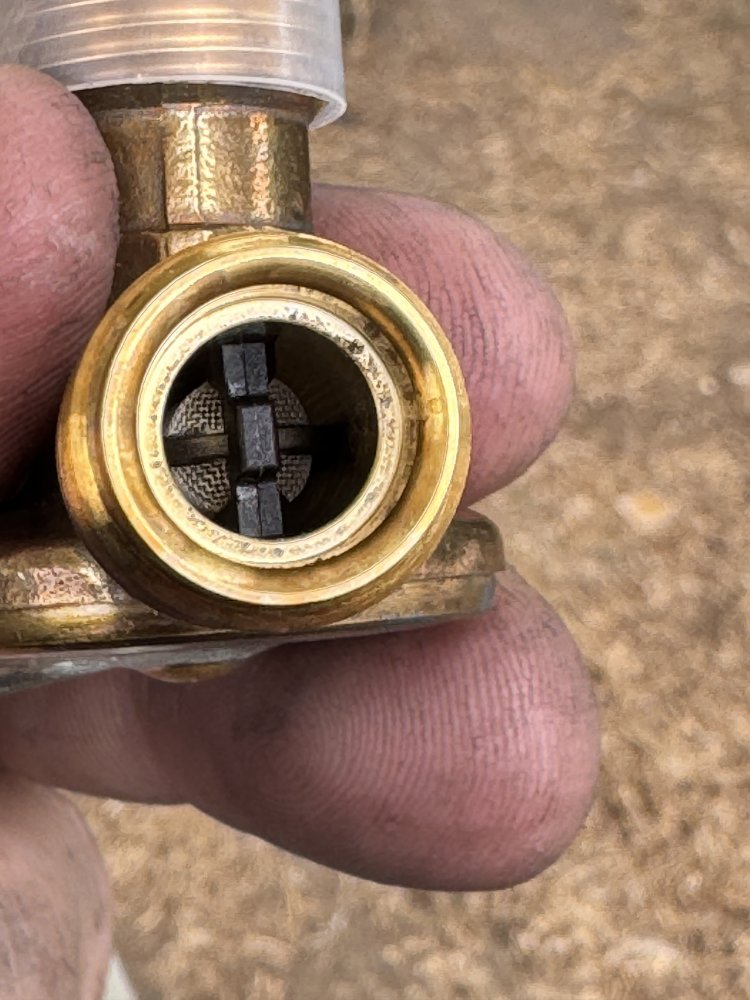
well got the the expansion valve changed. got the evaporator back in the box. had to go out and do some family stuff then came back and got the box back together, trim pieces back in place and ran the vacuum pump for ~1 hr. it held -29in for about 20 minutes. I left it sit overnight under vacuum so I'll check it in the morning to see if it holds.IMG_1605.JPG
IMG_1608.JPG
 
That black gunk in the expansion valve looks like what comes from the compressor piston seals. somehow I guess it avoided the front system and all collected in the back. from how your operating pressures were I would have said the entire system was clogged. low side not moving with the high up to 400 says both front and rear is plugged.

since you blew out the condenser and all be sure to add some oil when recharging. see what the system does a go from there. you might be replacing the compressor before too long.
 
So vaccuum held solid overnight.
Started adding refrigerant and only got about 0.5# in when the compressor kicked on and in about 30 seconds hi side was at 450 and lo was around 30-40 and the compressor was not kicking off. When I manually turned off the compressor they settled around 140-150 both hi and lo.
IMG_1610.jpeg
I haven’t blown out the condenser lines yet. Sorry for the confusion. I cleaned out the cooling stack between condenser, intercooler, radiator.

So looks like I might be pulling the condenser and check that for a restriction.
 
evacuate and disco the lines from the condenser. use your air blow gun on one end and cover the other end with a clean rag. blow through and see how well it flows. stop and look at the clean rag for debris in the oil that comes out. then do the same in reverse, when condensers start to plug, they all seem to only flow good in one direction. I would start blowing first in reverse of how the refrigerant normally floes. sometimes you get lucky and what ever is causing the block comes out!!
 
If that all checks out, inspect the high side hoses coming from the compressor to the condenser and there to the tee that splits off to the rear unit. the hose can be collapsed or kinked, sometimes GM uses those thin wall hoses that are easy to separate from the inside and collapse like front brake hoses do over time.
 
Alright so I disconnected the lines from the condenser. I can blow both directions through the condenser without issues. And I can blow both ways through the hoses that I disconnected from the condenser without much restriction. I assume with the way the rear ties in, this doesn’t rule out a restriction on the rear circuit.

So I should disconnect at one of the T’s and try blowing through the rear circuit to confirm no restriction through the rear lines also.
 
Well pulled the T tie in for the rear off what I believe to be the low side. I’m unable to blow air down that hose towards the rear which I believe to be ok if the expansion valve is a one way valve. but I’m totally guessing as to how the expansion valve works. If I blow up into the return line I do get flow out the hose coming from the rear but there’s some restriction. Not a lot but more than anywhere else. Again assuming the rear expansion valve is some spring loaded one way valve this is probably expected? So if I don’t appear to have a restriction in the lines do I need to just keep adding refrigerant till I get closer to capacity? Maybe charge it without the engine running for as long as it will charge?
 
I’m still leaning on maybe a pressure cutoff switch being stuck and not causing the compressor to shut off? Not sure how that works. I’m assuming the low and pressure switches control when the compressor turns on/off for its regular cycles
 
I changed hi pressure switch but after reading how it works I’m not convinced it’s my issue although it might be one issue. Put it back together. Vacuuming now then I’ll let it sit and try to get 2# in it and see how it does.
 
With the expansion valve in the loop you won't be able to blow through. I would pull it and blow through everything you can. rear evap, front evap, and all hoses. then replace the expansion valve, accumulator, and orifice tube, add the required amount of oil. Pull vacuum and recharge. I have seen expansion valves just get stuck for no reason even when there isn't any debris in the system.
 
With the expansion valve in the loop you won't be able to blow through. I would pull it and blow through everything you can. rear evap, front evap, and all hoses. then replace the expansion valve, accumulator, and orifice tube, add the required amount of oil. Pull vacuum and recharge. I have seen expansion valves just get stuck for no reason even when there isn't any debris in the system.
Thank you!

I just replaced the rear expansion valve so that’s clear. I replaced the orifice tube last fall and that’s still perfectly clear after I checked yesterday. Might be time for a new receiver dryer I’ll hopefully have one tomorrow. I’ll swap that and do a vaccuum and leak check again and see if I can get it charged properly. I’ve worked on a few other cars but this is the first time I’ve dealt with a parallel evaporator setup. Thanks for the guidance @dbrannon79. Gotta work on a few other things today then hopefully button up the ac tomorrow. Just in time to leave Wednesday for Glacier NP for 2 weeks.
 
oh yeah when your taking things part, if you see any grey or black residue like what was in the old expansion valve, you will need to flush the entire system out. you can use most any fast drying solvent, but keep it out of the new expansion valve and orifice tube. that residue is the viton piston seals from the compressor. you might want to pull the lines off the compressor and have a look in the ports. if the compressor is coating the system with that stuff, it won't last much longer.
 
Ok the details. I checked the lines at the compressor and no black sludge, just neon dye and assuming oil. so replaced orings there as well and closed it up. Come to find out the receiver dryer I ordered for a suburban is not the right one. apparently I have a pickup version with the suction line connection at a different angle and the stud in the wrong place. so After calling around to locate a pickup reciver/dryer to no avail, I decided to just run it with the one I have. Vacuum tested, then vacuumed it for a bit over an hour, then let it sit for about 2 hours and it held 29in. Up to this point I've basically replicated my steps I took last time.

Previously I opted to recharge with the refrigerant I evacuated and had hi pressure problems.
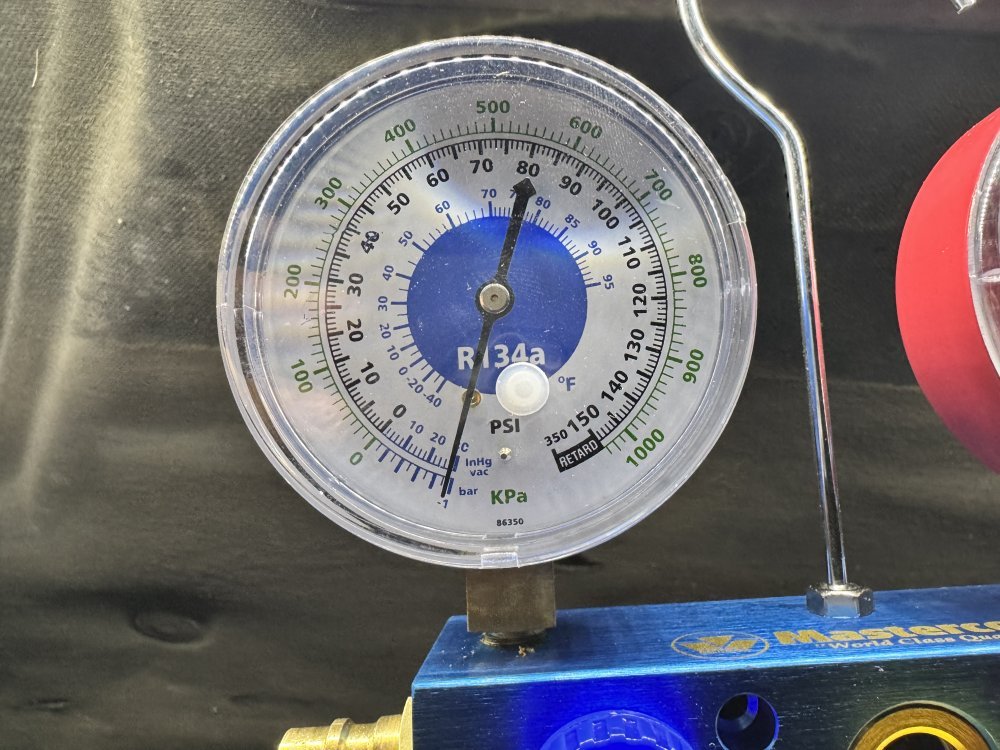
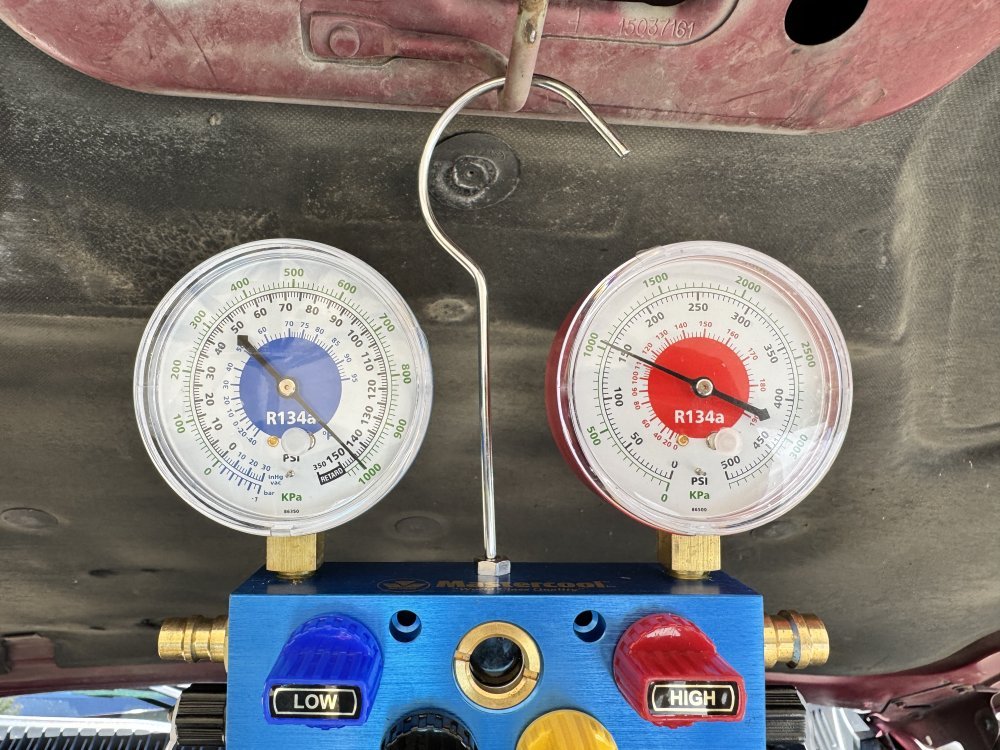
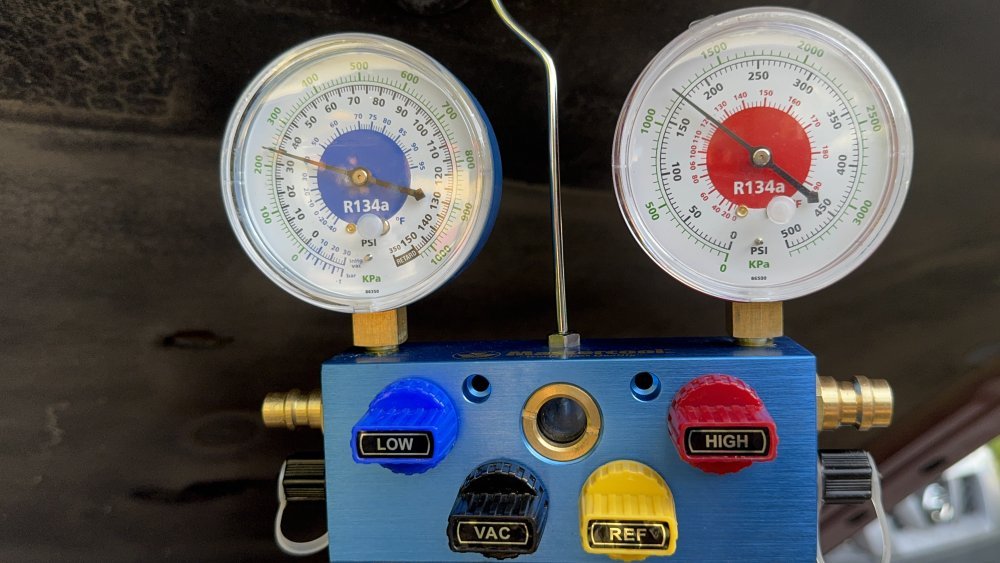
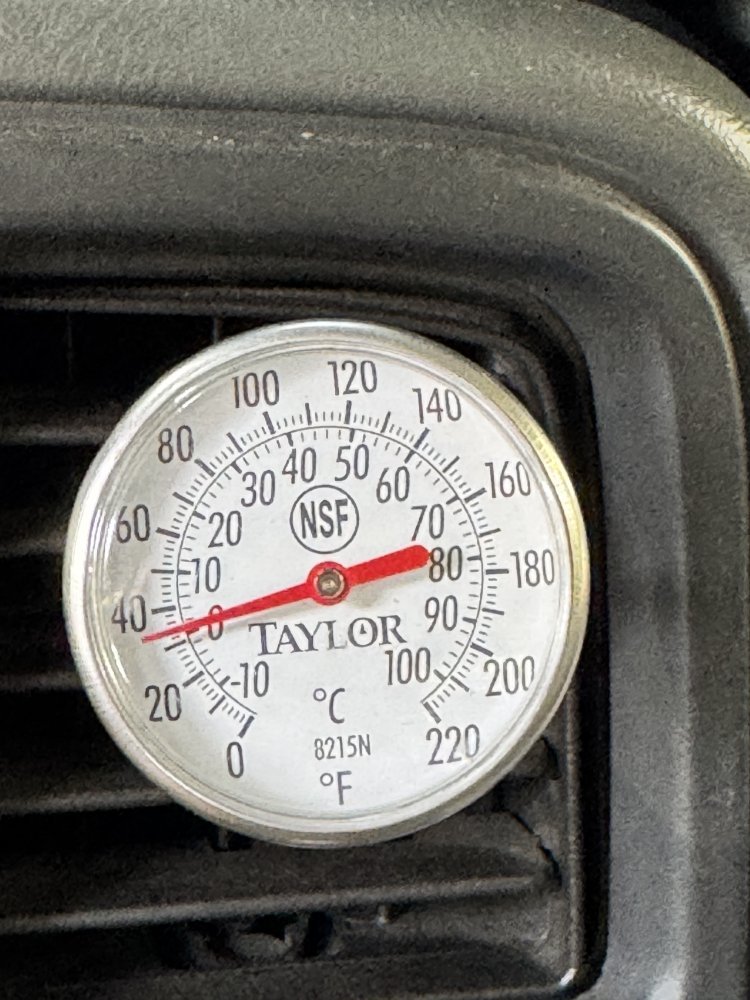
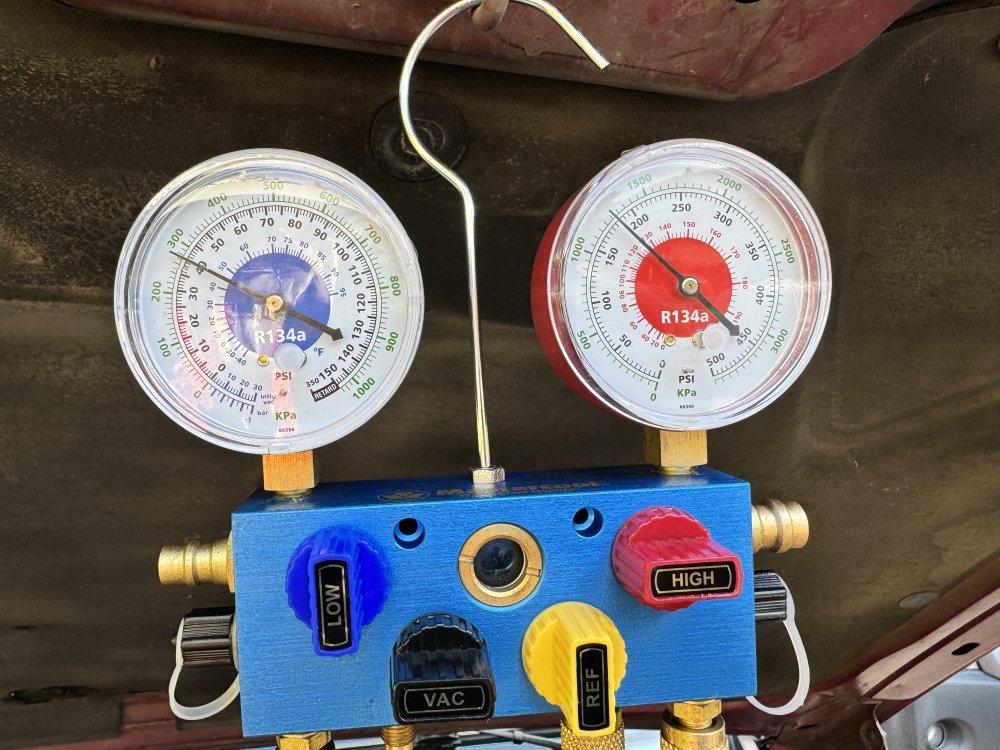
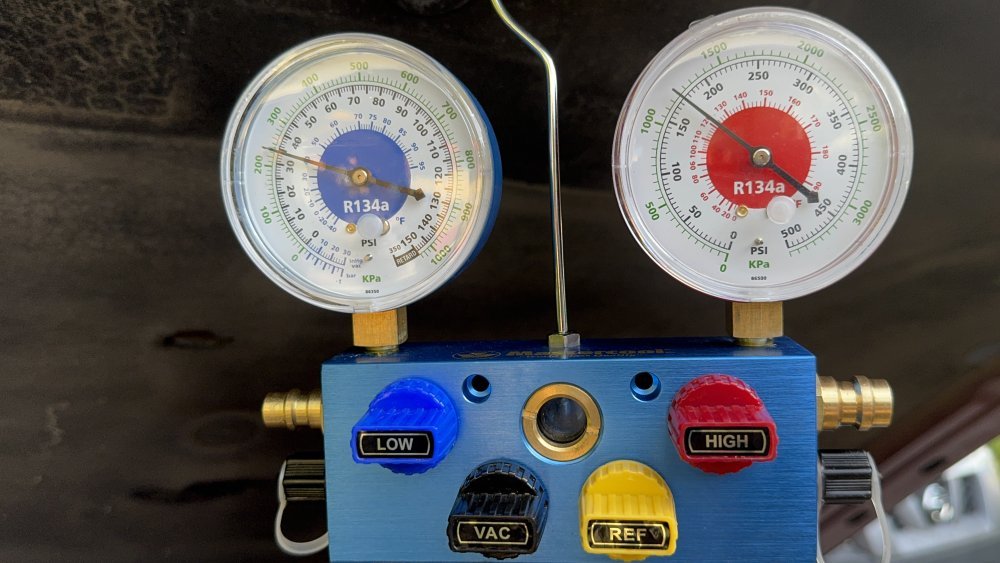
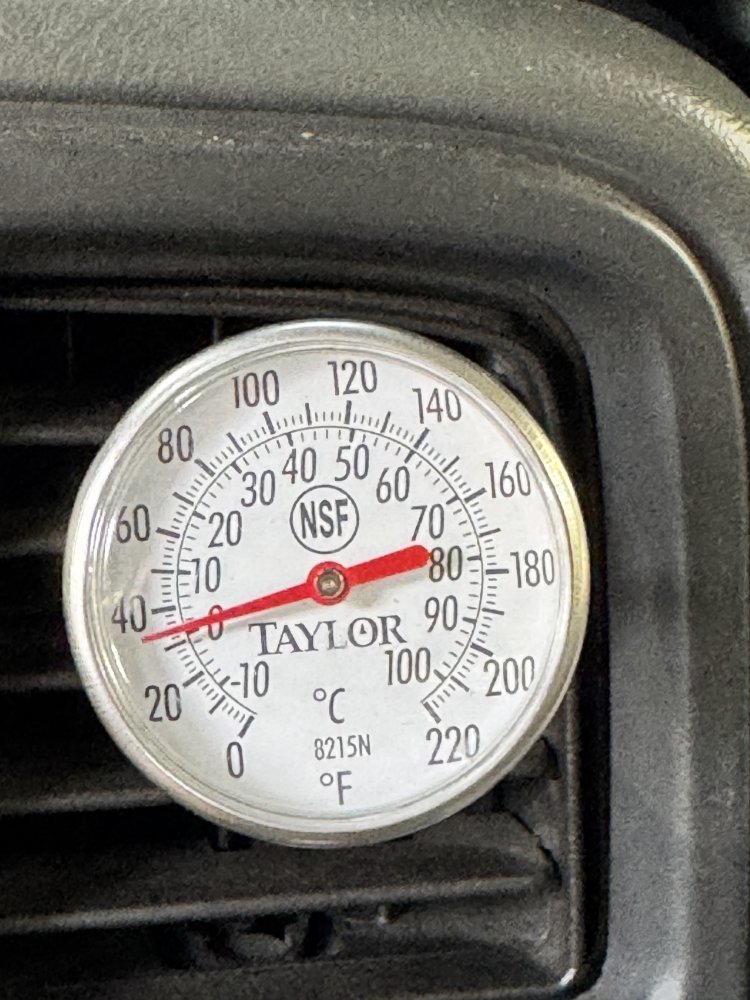
This time I opted to recharge with fresh 134a. It took a good hour or so to get 2.0# of 134a in, not sure if fitting was icing up or the compressor was having trouble pulling it in but finally got it to take exactly 2.8# as the system calls for. I noticed as the system got fully charged the hi side gauge needle started shaking pretty regularly. Not sure if this is something to be concerned about. And as shown above, then vent temps started dropping. with 2.8# charged, 80F ambient temps, in Park and holding idle at 1500-1700 RPM I was able to achieve ~35F center vent temp.
When I let it come back to idle, center vent temp increased to around 48F.
IMG_1626.JPG
IMG_1636.JPG
IMG_1634.JPG

Here are some video clips of...
The compressor short cycling at the beginning of charging:
Compressor cycling time increased and pressures started to come up after charging 2.0#'s over about 1 hour of time:
Compressor cycling stopped and things started to stabilize - Holding at 1500rpm:
Pressure readings at idle ~650rpm:

Looks like the wife won't melt on me on our trip up north in a couple days. 🫠
 
Hopefully this will get us through this season. After that Im probably going to plan on a new compressor, reciever/dryer and condenser and flush all the lines as @dbrannon79 suggested. This was the first time I've recovered refrigerant with the plan to recharge with it so maybe im doing something wrong, or the 134 I took out was contaminated... I'll have to look into that a bit more to determine if thats the case.

Thanks @dbrannon79 for all the help. I'm still learning.
 
Back
Top