• Welcome to The Truck Stop! We see you haven't REGISTERED yet.

    Your truck knowledge is missing!
    • Registration is FREE , all we need is your birthday and email. (We don't share ANY data with ANYONE)
    • We have tons of knowledge here for your diesel truck!
    • Post your own topics and reply to existing threads to help others out!
    • NO ADS! The site is fully functional and ad free!
    CLICK HERE TO REGISTER!

    Problems registering? Click here to contact us!

    Already registered, but need a PASSWORD RESET? CLICK HERE TO RESET YOUR PASSWORD!

1999 GMC Burb, Rust 'Find, Fix & Finish'

Paveltolz

Доверяй, но проверяй
Messages
3,073
Reaction score
2,898
Location
Saratoga Springs, UT
Picked up a 1999 GMC Burb which I intro'd here.
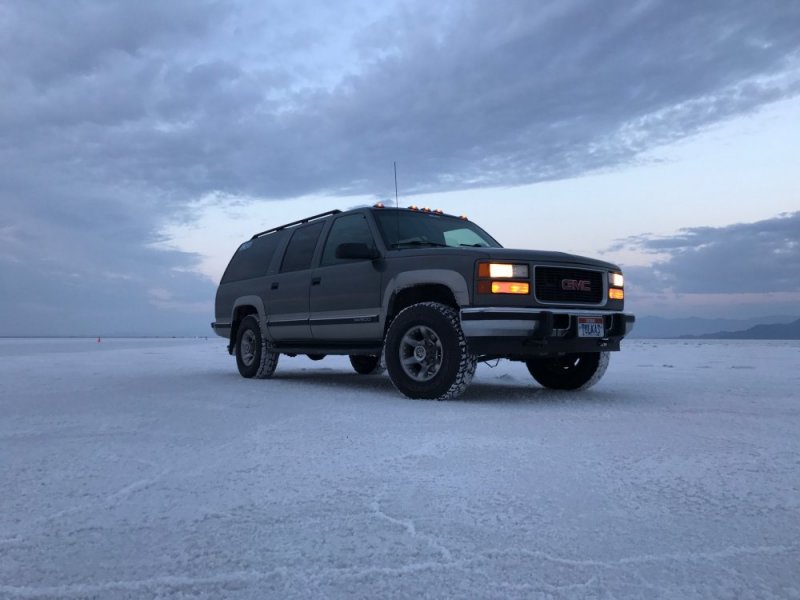
20170917 Salt Flat Sunrise2.JPG
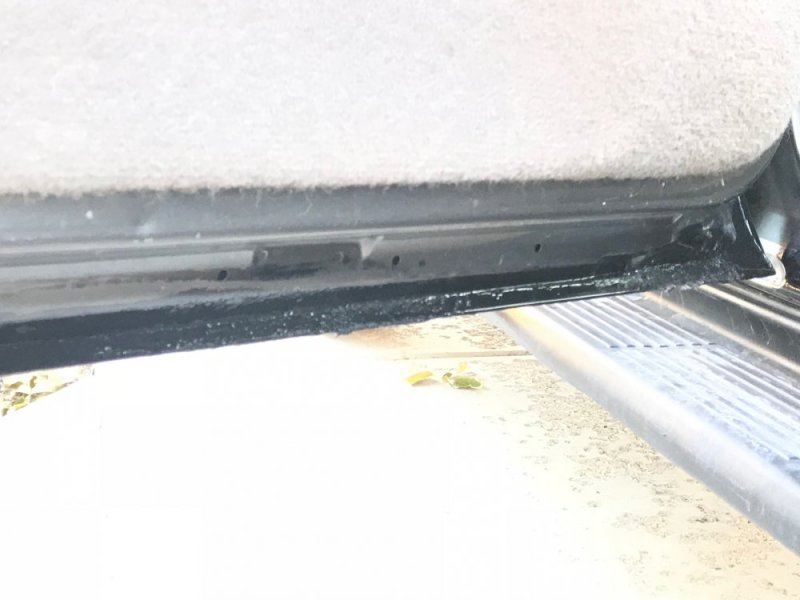
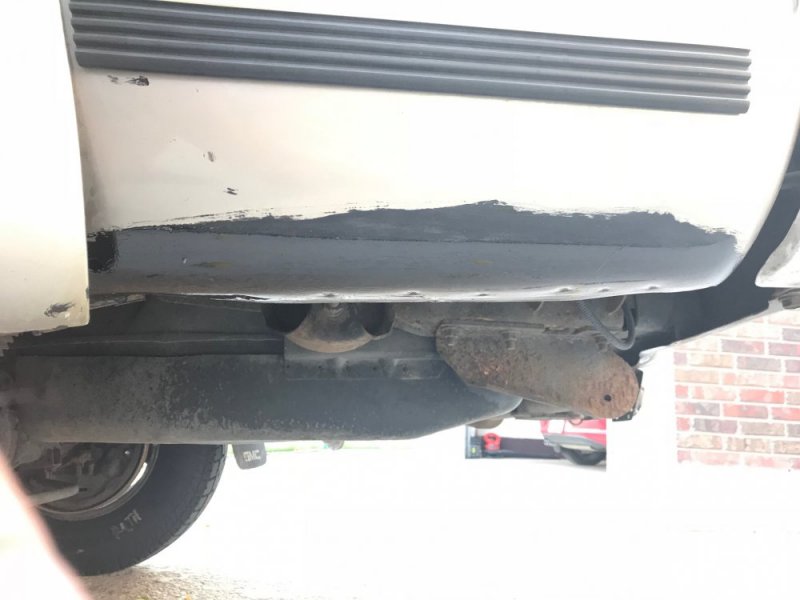
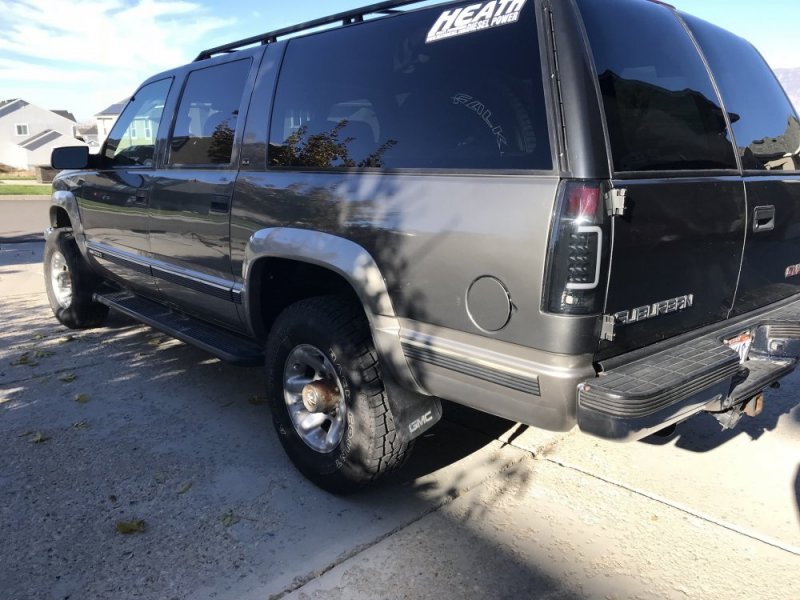
Great 'Soccer Mom' truck. Love the way it drives now that the brakes, tires and alignment are done. That and the removal of dirt, dog hair that remained in it after several years of sitting unused. I did note some rust bubbles along the lower edges of the quarter panels and a couple of the door edges. Not bad save for the driver's side back door. That one needs some real help.

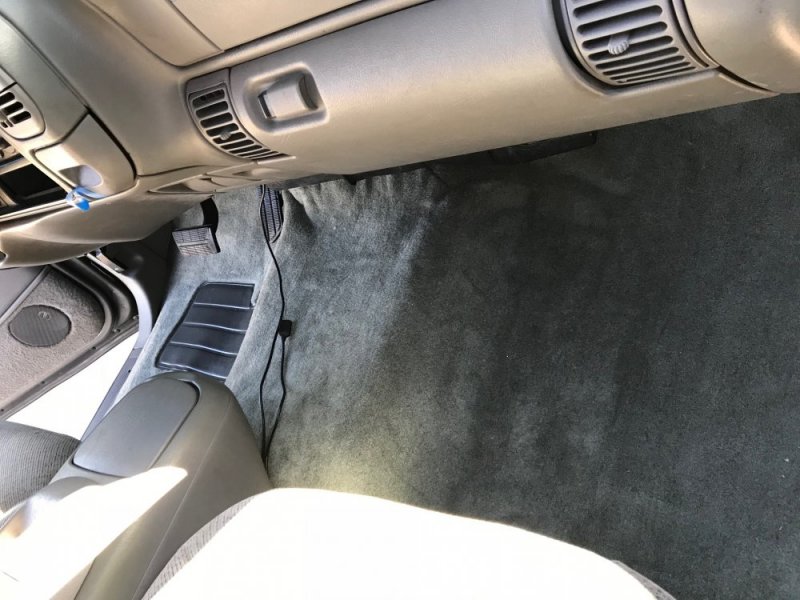
The carpets were cleaned and a new stereo w/backup camera installed on 19 SEP 17. Previous to that I was attempting to remove seats etc. to facilitate the cleaning. Spare Tire Cup bolts just spun as the welded nuts let go due to rusting underneath. One of the rear seat bolts was frozen after a few turns and wouldn't retighten. That nut eventually broke off but that wasn't from rust, rather, over torque application.
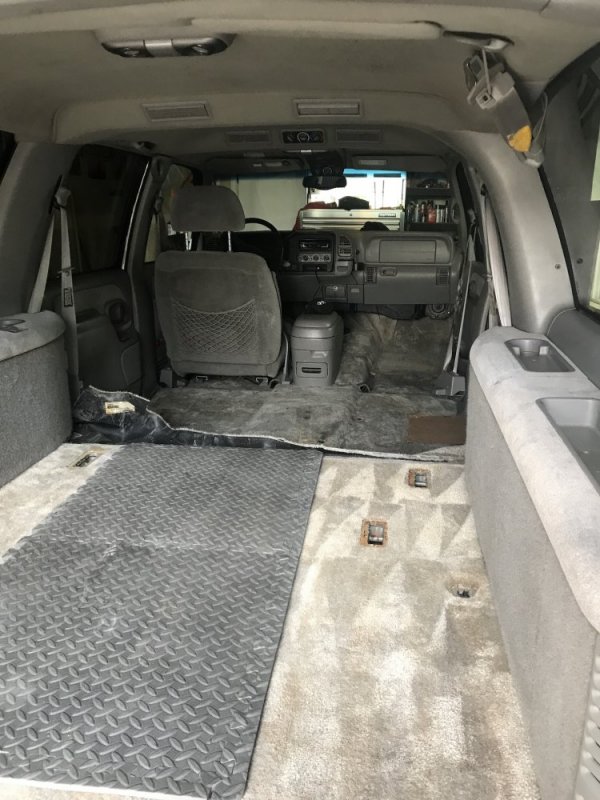
20170922 Rust1.JPG
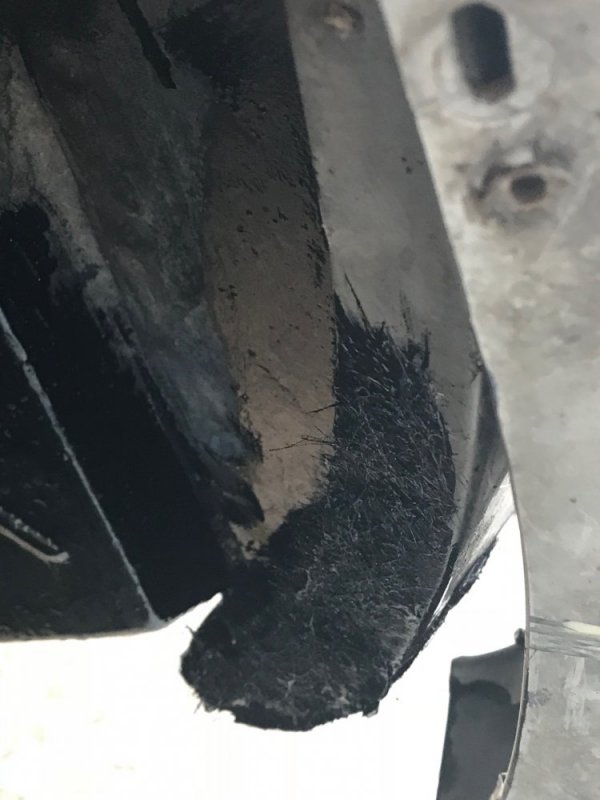
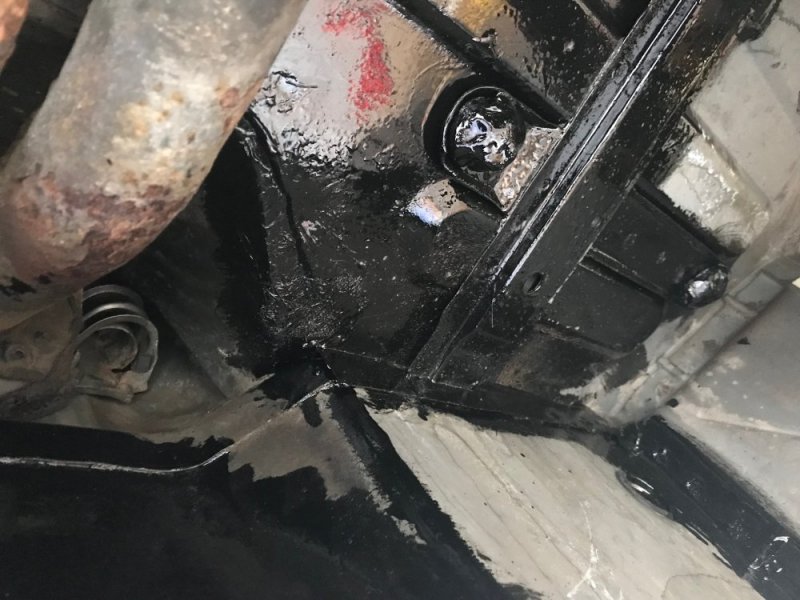
The day after the cleaning I was checking under the carpet to see if things had dried out any and noticed that: A) things weren't dry and, in fact, had been damp for a very long time; B) I discovered a lot of old dirt under the sills and behind kick panels where I hadn't cleaned earlier and C) there's a lot of surface rust on the floor pan from dirt and moisture wearing through the painted surface. 20170922 Rust2.JPG
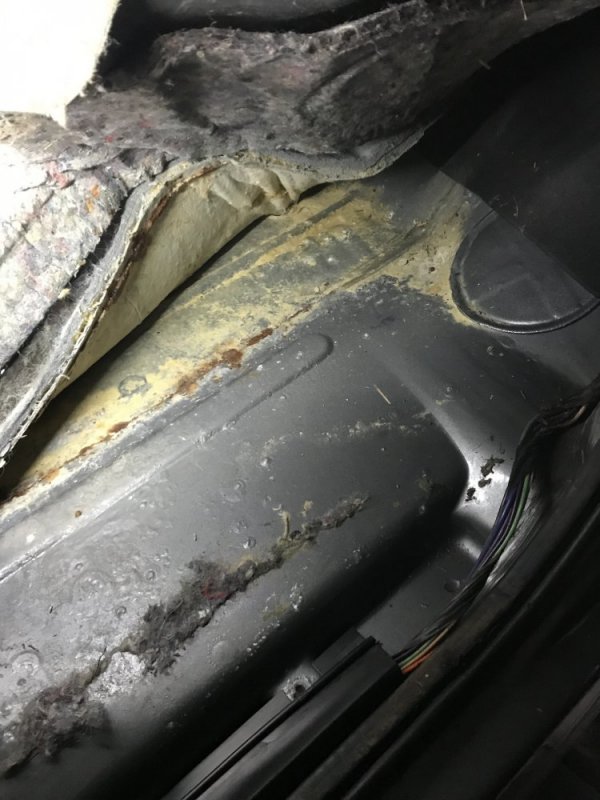
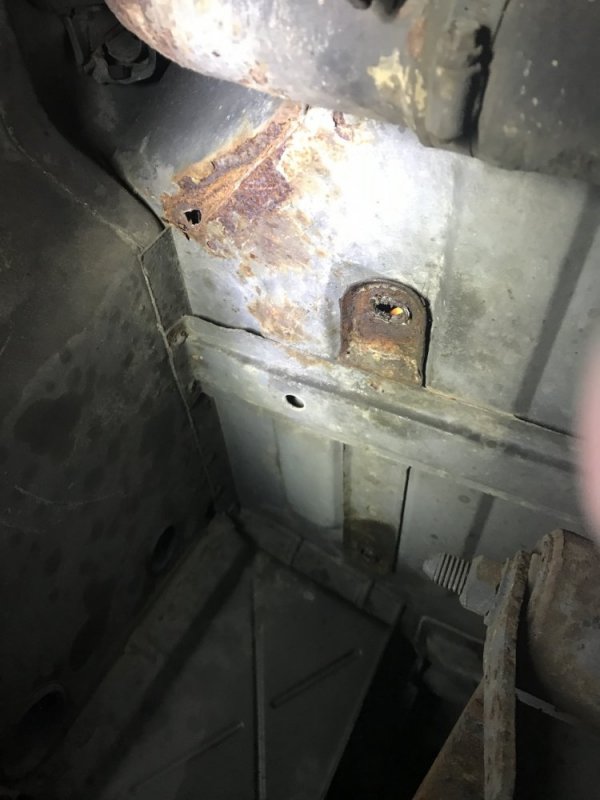
20170922 Rust3.JPG

20170922 Rust4.JPG
Search and destroy before winter:
Carpet comes out completely and replaced by LMC sourced product.
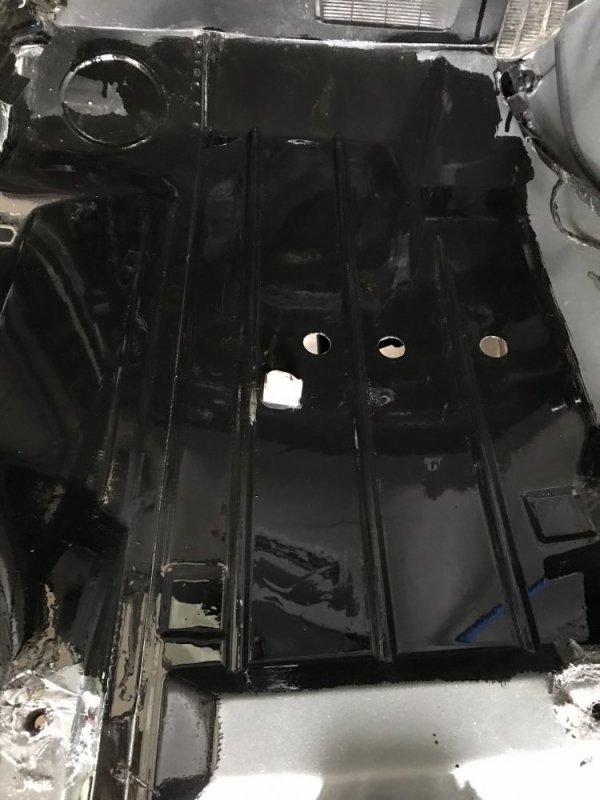
Remove all surface paint effected areas where rust is visible or presenting by paint bubbling on the floor pan 1st, door edges and quarter-panels, then address the underside back by the fuel filler lines where there's some issues developing. POR15 degrease, metal prep and coat with top coat the effected areas. Use POR-15 Filler and Sealer on one small hole by the Filler neck, underside.

Color match paint along quarter panel and door edges.

Replace weather stripping around doors to prevent their rubbing on the sill plates again.
 
You might pull the cowl cover/vent there along the windshield. Maybe some crud blocking the drains (or worse) causing the water intrusion.

Just a guess.

We know you have the burb standing tall soon.
 
Got the carpet out and most of the panels. The ones I can't get out won't effect the rust treatment effort or reinstallation of the carpet. Cleaned out most of all the dirt and stuff hiding in corners. The bolts holding down the seatbelts in the rear are not coming out with any tools I possess so, I just cut the carpet out and will reverse the process for the new stuff. Tomorrow I'll start the bubbled paint and rust stuff.
I did get the paint to top coat the POR15 on exterior surfaces. Paint costs a bit more than it did when i was doing this stuff in high school... Oh well, the price of admission I guess.
 
Spent the week, so far, removing the rest of the rest of the internal panels and the weather striping around the doors.
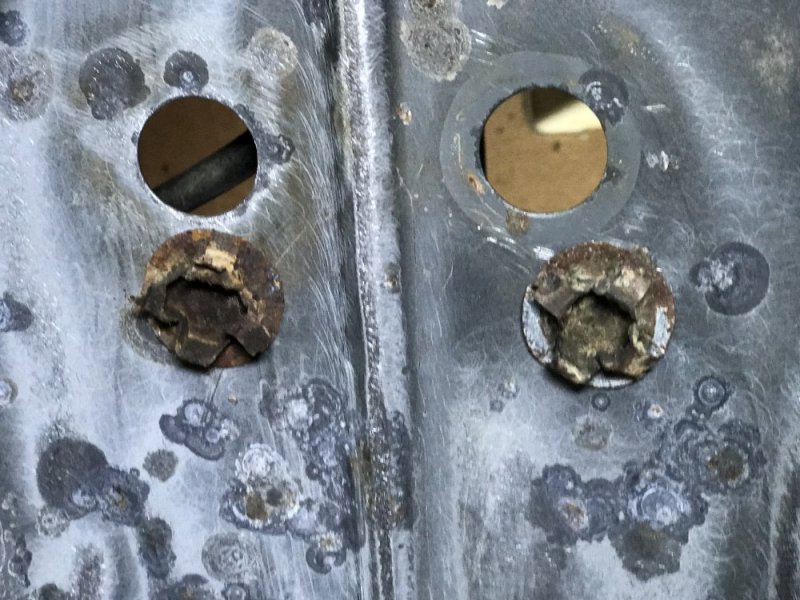
Then it was time to attack the rust and blistering paint using a wire wheel on the drill, DA Sander (60 grit) and small angle sander. On the driver's side, I found that a couple of the floor's drain plugs had rusted through.
20170928 POR15 Floor2.JPG
I found the replacements at the stealership but would need a week to get them shipped from Michigan and, oh yeah, $10 each. Yeah, RIGHT! I'll use a couple of piece of galvanized steel with POR15 sealant to patch those holes. $10 ea....
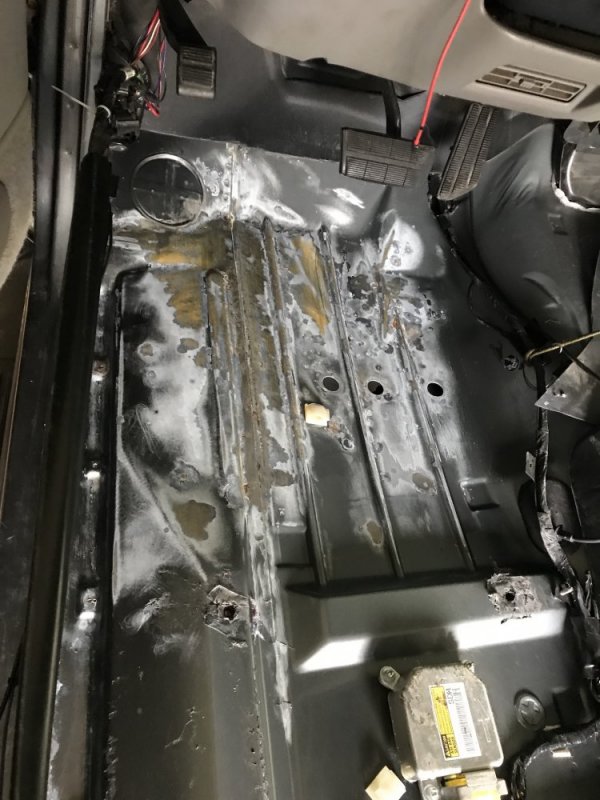
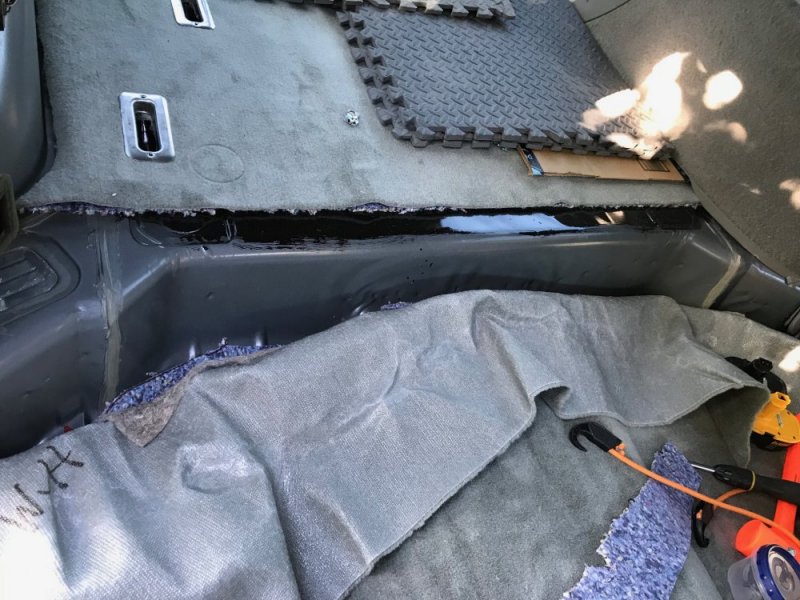
After sanding it was degreasing and then rinsing out with water. Then, treating the floors with POR15's Metal Prep (leaves a coat of Zinc on the bare metal for the POR15 Rust Preventative paint/solution/treatment...stuff to react and adhere too. More rinsing then air blasting the seams I removed factory caulk from (rust underneath) to get the water out followed by time with a propane torch going over the same. Left a space heater on 72*F overnight to make sure it was all 'bone dry' per instructions.
20170928 POR15 Floor4.JPG 20170928 POR15 Floor3.JPG

First coat went on in about an hour with second coat to go on w/in 5 hours. It's been three so I'm going to put the second one down in a few.

20170928 POR15 Floor7.JPG 20170928 POR15 Floor8.JPG
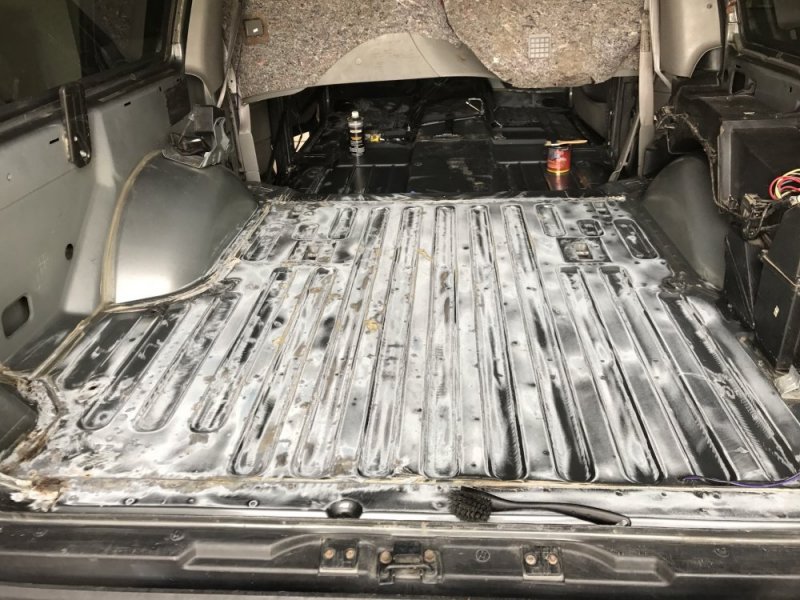
I have do the cargo area in two steps given the length of my arms and back doesn't allow me to do it all at once. Life
 
Spent the week, so far, removing the rest of the rest of the internal panels and the weather striping around the doors.
Then it was time to attack the rust and blistering paint using a wire wheel on the drill, DA Sander (60 grit) and small angle sander. On the driver's side, I found that a couple of the floor's drain plugs had rusted through.
View attachment 50940
I found the replacements at the stealership but would need a week to get them shipped from Michigan and, oh yeah, $10 each. Yeah, RIGHT! I'll use a couple of piece of galvanized steel with POR15 sealant to patch those holes. $10 ea....
After sanding it was degreasing and then rinsing out with water. Then, treating the floors with POR15's Metal Prep (leaves a coat of Zinc on the bare metal for the POR15 Rust Preventative paint/solution/treatment...stuff to react and adhere too. More rinsing then air blasting the seams I removed factory caulk from (rust underneath) to get the water out followed by time with a propane torch going over the same. Left a space heater on 72*F overnight to make sure it was all 'bone dry' per instructions.
View attachment 50942 View attachment 50941

First coat went on in about an hour with second coat to go on w/in 5 hours. It's been three so I'm going to put the second one down in a few.

View attachment 50943 View attachment 50944
I have do the cargo area in two steps given the length of my arms and back doesn't allow me to do it all at once. Life

Great work for sure, keep us updated. So you guys think the POR15 is a great product?
My truck is pretty good but there are some rust showing up on the underside of my truck bed. A friend of mine said POR15 was the stuff.
 
i've heard good and bad. if surface isn't prepped correctly it will flake off. and that it's very durable.
 
i've heard good and bad. if surface isn't prepped correctly it will flake off. and that it's very durable.
You and MrMarty51 are correct. Both the POR15 rep I spoke with and the local paint dealer said that if the surface isn't correctly prepared, you're in for a do over. That's why I did the job as I did. 'Follow the instructions.' I even went so far as to degrease the rubber floor mats I used to protect my old knees while in the back doing the cargo area...didn't want any floor residue from the shop ruining my prep work back there.

With all the water being used to rinse between degreaser and the metal prep, I dried everything with the shop vac, towels, air and ran a space heater over night. That also gave the metal prep time to work on the bare metal and develop the zinc coating and a little surface rust...all of which the POR15 needs to interact with in order to bond and treat. I could tell where the paint was unscuffed given a 'fish eye's' that showed up. I used a brush to lay it all down it flowed real well to fill in the stokes.

Additionally, POR15 is UV sensitive, even in the can it has to be kept cool, even refrigerated if possible. It only has a two year shelf life unopened; six weeks after opening. I tossed an unopened can that was 4 years old, kept in the window shelf of the garage and shaken, not stired...more $$ out the window). So, if the surface is exterior you need to apply a top coat to the POR15 Rust Preventative or it will break down and fail. Probably what contributed to the flaking off you've heard about. If you can time the job correctly (4-6 hrs between coats for the surface to get tacky/finger drag), you can apply the top coat to the tacky POR15. If it cures completely, you need to scuff with 320 before top coating. Since all this will get covered with carpet, no issues.

Yes there's some rust on the floor pan underneath as seen in post one. That corner underneath will get putty and seam sealer today. Then scuffed and hit with Rubber undercoating.

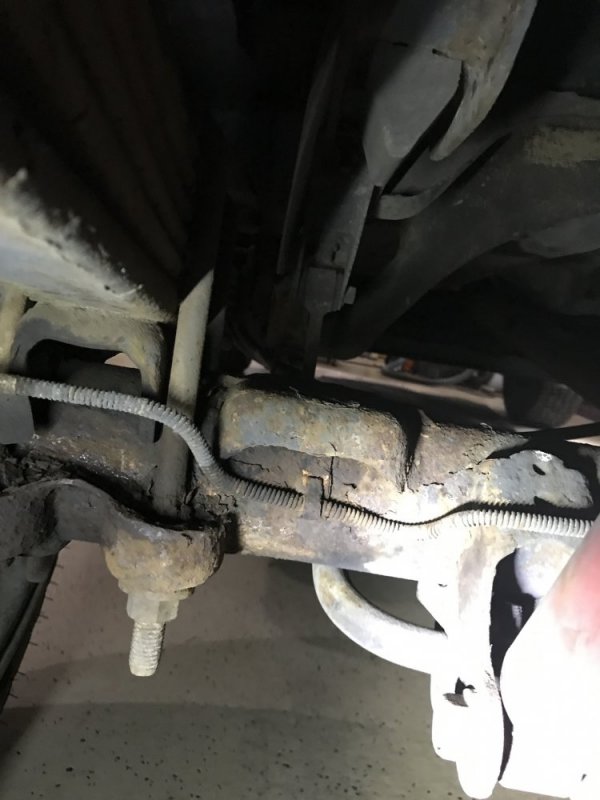
There's more rust on the lower edges of the quarter panels in addition to the lower edges of three or four of the six doors. It gets worse towards the back. The frame has some flaky rust that starts about where the quarter panel starts and gets worse toward the back. Even the fuel tank's vent tub is eight up with it. The trailer hitch is so shot to hell I'll just replace it rather than spend the time and $ to media blast it. I've yet to post pictures of that stuff as it is another job...exterior. This part is 'Interior.'
 
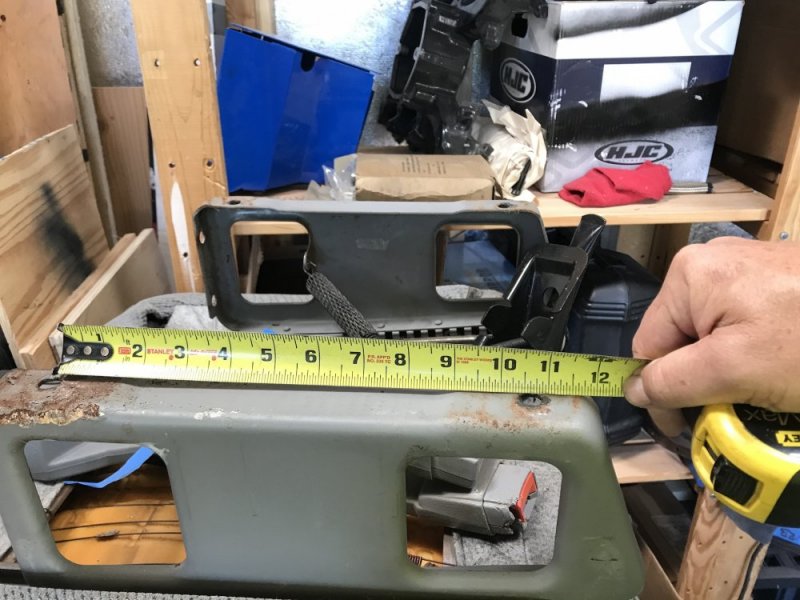
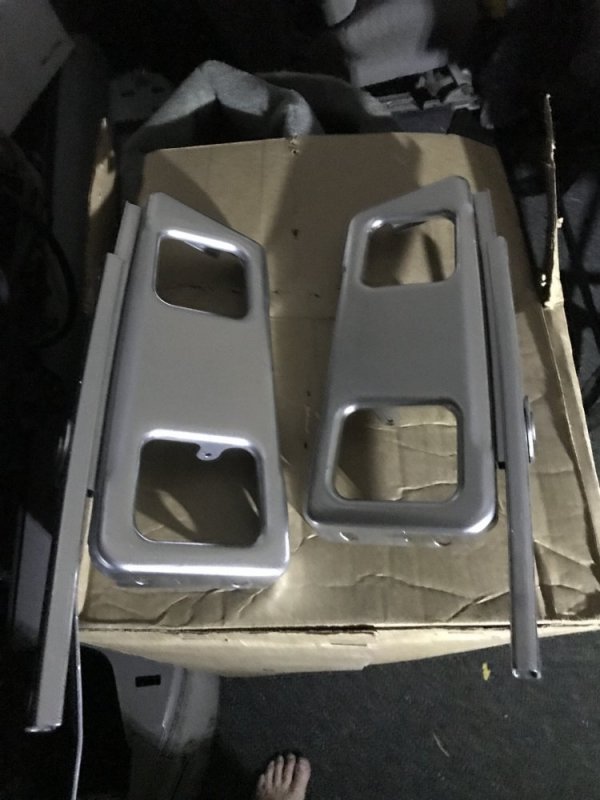
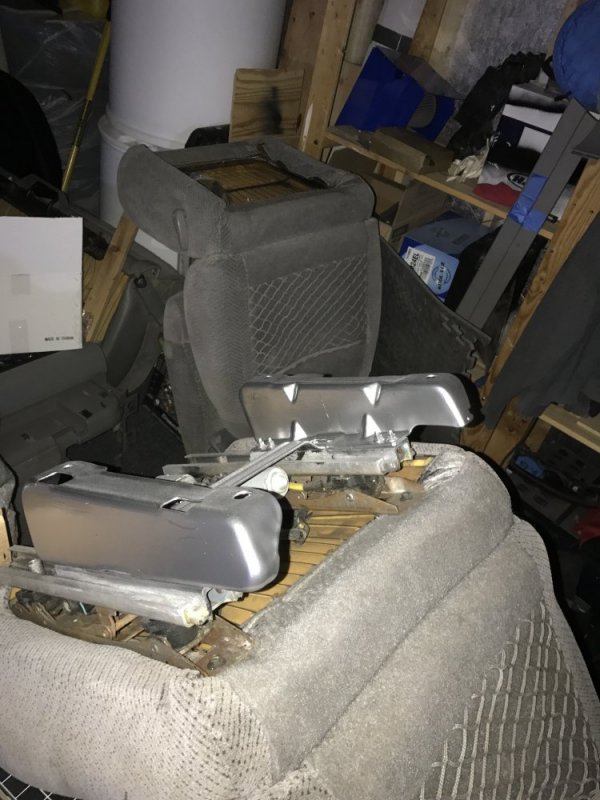
POR15s Sealer Putty (calk) arrived yesterday so today I went about seam sealing and when the fiberglass arrived this afternoon, it was just in time to do the small hole in the back by the filler neck. Worked like a charm and I ran out right at the end of the job. That's a minor miracle in and of itself. TTS Member 635 (Ted) called and said he had some grey seats, both 8 way power, that might fit so I sent him some specs just to be sure. Hate to look a gift horse in the mouth and all but, it can't hurt to do a little expectation management since these are out of ASTRO. While taking the measurements, I noticed that I had failed to address the rust on the bottom of the seat pedestals.
20170929 Seat Pedestal1.JPG

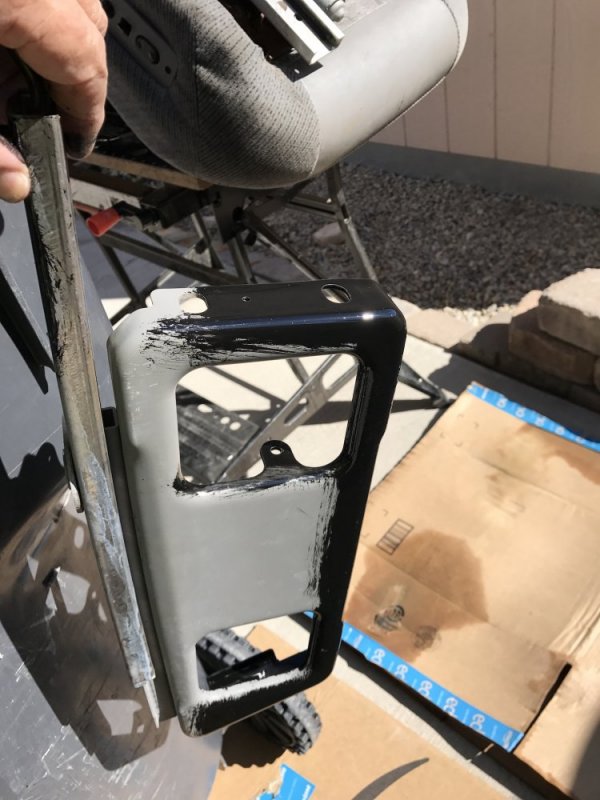
The driver's side was way worse. So, since I was stalled waiting on the sealer to cure I started preparing the pedestals for a little love themselves. Seems everything POR15 related isn't 15 minutes, its closer to 5-6 hours.
20170929 Seat Pedestal2.JPG

20170929 Seat Pedestal3.JPG

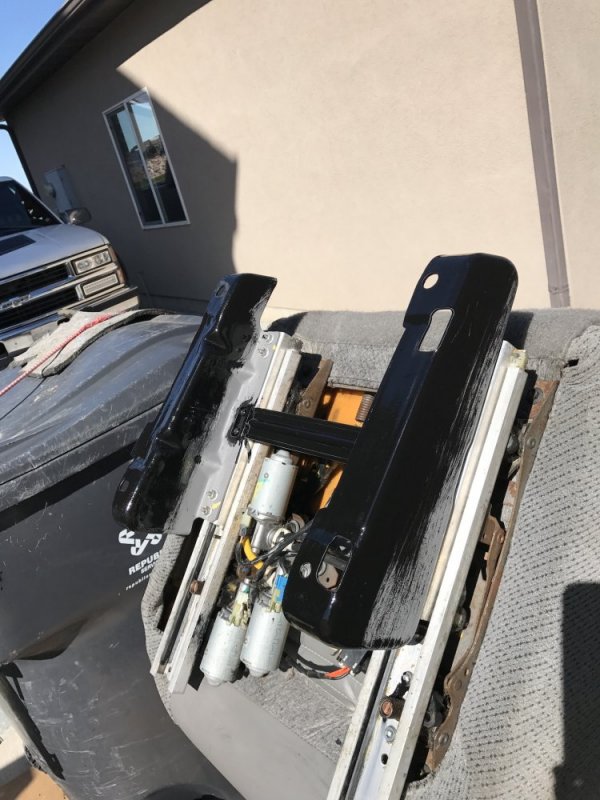
Then, since these will be visible and somewhat UV exposed, Top Coating is required. While waiting on the curing process to reach the 'tacky' stage I went to get paint. Couldn't find grey enamel so I picked up 'Aluminum' instead. Shiny!
20170929 Seat Pedestal4.JPG
20170929 Seat Pedestal5.JPG

Tomorrow, I'll do the RTV Sandwich of metal on both sides of the drain holes and maybe, just maybe, get started on putting Humpty Dumpty here back together again. At least, on the inside.
 
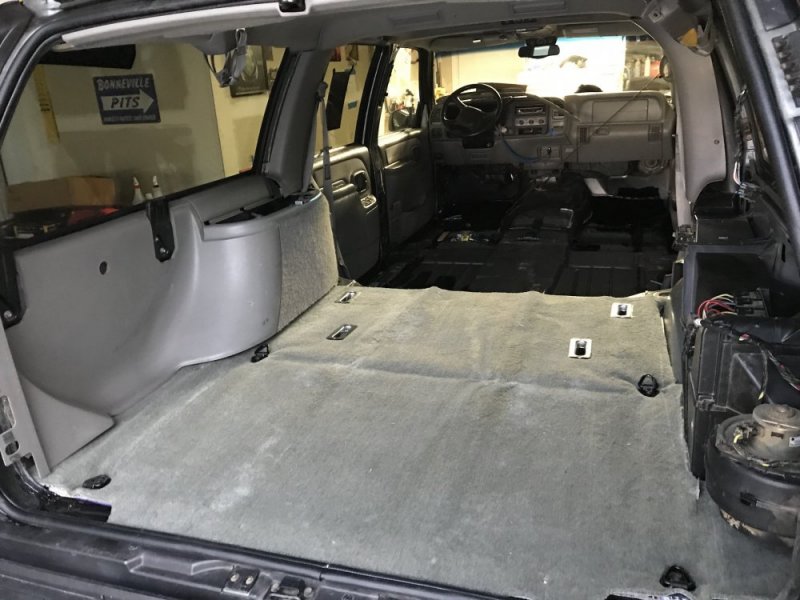
Cargo area carpet in. Still need to button down all the trip pieces but it fits. A little big but, it will do fine.
20170930 Cargo Carpet.jpg

Replaced the Driver's side and cargo door weather strips. Sure sounds better now when the doors close.
 
Got a call on Monday (2 OCT 17 [RIP Tom Petty]) from work asking if I'd come back full-time vs. the 'part-time on-call' I'd been doing for them since mid summer. Sure, I said. Just give me the week to at least finish getting the carpet in and the top coat on the POR15. "Sure thing" they said. Next day, got an email from the boss about 10am and it turns out the change took effect on Monday...the day before. I was a day late for the new job! Good thing I'd actually gotten up early and had been putting together the office and prepping since my mind was running in that direction vs. the Burb.

Ah, the Burb.
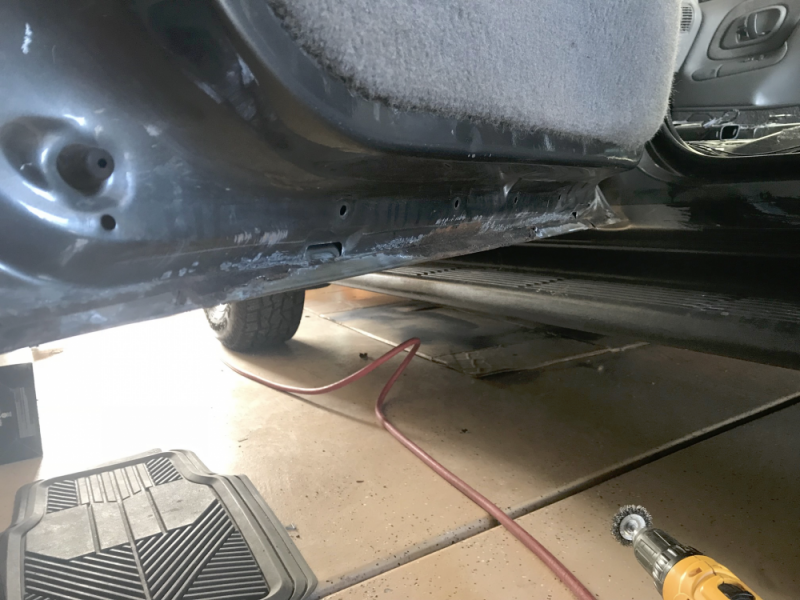
Monday, I did get the rust under the back the doors and the barn doors prepared and they all looked pretty much like this one.
upload_2017-10-6_8-51-36.png

Tuesday, my '2nd day of work' I woke up early with my head swimming with work stuff so, at 0400 I put on the first coat of POR15 to the doors, quarter panels. I did a couple of spots inside the rear fender wells along with the left rear fender edge itself. Some of the areas had actually rusted through so I applied some more fiberglass along the door and fender edge. Yes, I know. My fiberglass technique sucks.
IMG_9055.jpg

IMG_9056.jpg

IMG_9054.jpg

Here's the underside, back corner of the cargo area by the filler neck. That hole and seam came out good.
IMG_9053.jpg
I do have a new filler neck waiting to go in.

With a five-6 hour wait to apply the second coat, I was able to get the second one on during my 'Lunch' break at 1000hrs.
I work from home so I can start about anytime I want depending on what needs doing. Emails and research...0500 works well. Anyway, after work, since I would need to actually spray an exterior color 2s tage paint job, necessitating a lot of wet sanding and practice with a spray gun I haven't used in 30-40 years, I shelved that and started test fitting the carpet to the main cabin. What a PIA. First, there's no pre-drilled holes, the carpet is cut two sizes too large and it is CHEAP.
I was able to get both front seats in with the help of my son. I also put back most of the front trim on the driver's side. The front passenger side will have to wait for weather strip replacement.
IMG_9047.jpg

Back Seats go in today which will require more cutting of excess carpet, cutting holes, blah blah along with trim replacement.
IMG_9048.jpg
 
I probably would have taken it to a carwash or something similar to verify I didn't have any leaks before putting carpet in. Looking good though even cheap carpet looks good when done right. :)
It would have been a bad idea given the absence of weather stripping on a couple of the doors....

Yesterday, 6 OCT 17...
I did get the carpet fitted at the back, decided to replace all the trim and stretch, tuck etc. the carpet along the way. Lots of little pieces and I'm glad that I both labeled the containers with the screws and bolts as well as ID'd where the one "Long Screw" or 7mm screws went back. That and the quick turn around from start to finish helped me to remember just how things went back and where. Fun Puzzle and all things had to go back in a certain order or it was a do-over.

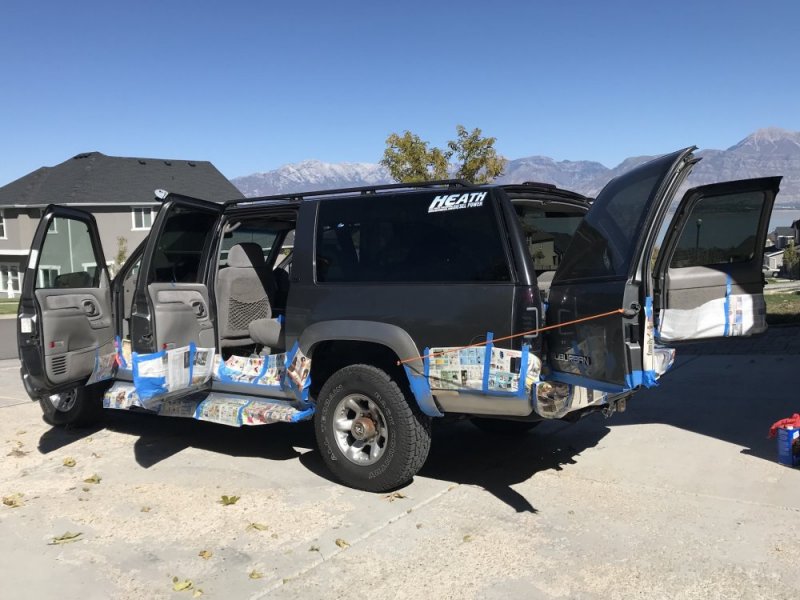
Carpet looks good even though it's obvious I'm no pro (and don't want to be). Sweetheart Ops came out to play a little and helped ID where the bolts holes for the seats should be cut out. I was underneath the truck with an awl while she was in the cab making circles with the top off a can of brake cleaner. Seats went back in with out a fuss and all the trim pieces are in with only a couple of extra screws(?). I had some energy and since the wife was off running errands (getting me some more GM11 Pewter Paint was one thing) and bringing home dinner was last on the list, I went ahead and started taping off the areas to be protected from the Top Coat overspray. It was a lot later than I had thought when I finished, just in time for dinner.

Today:
Big T and his wife came by and picked up the tires I saved so he can do the re-cap with them. He also brought bolts that I'll need later. We had a nice visit as always...catching up on projects, exchanging ideas and sounding out plans. Always a pleasure to see these two and their cool dogs.

Big T split before I could rope him into helping with the painting. Really, it was a one man job. My original plan was to do a full spray job on the bottom half but, I have a bit more work to finish off the fiberglassed and other areas. Som, I decided to just cover the POR15 and be done with it until spring when I'll be back to 'Part Time On Call.' So, a couple more cans of GM11 Pewter and after scuffing it all down with the recommended 320 grit, I went after it.
Lesson 1.
I learned that when using the black POR-15 and trying to top coat it with a lighter color, such as Pewter, one needs to prime it first because the Color Match paint wasn't covering the black at all. I had a feeling but thought I'd give it a try. No good! After two coats, the black was hardly covered at all. So, out with the grey primer, cover all the POR-15 areas under the five doors, door sills and lower quarter panels, let dry and try the top coat again. Worked!
20171007 Top Coat1.JPG

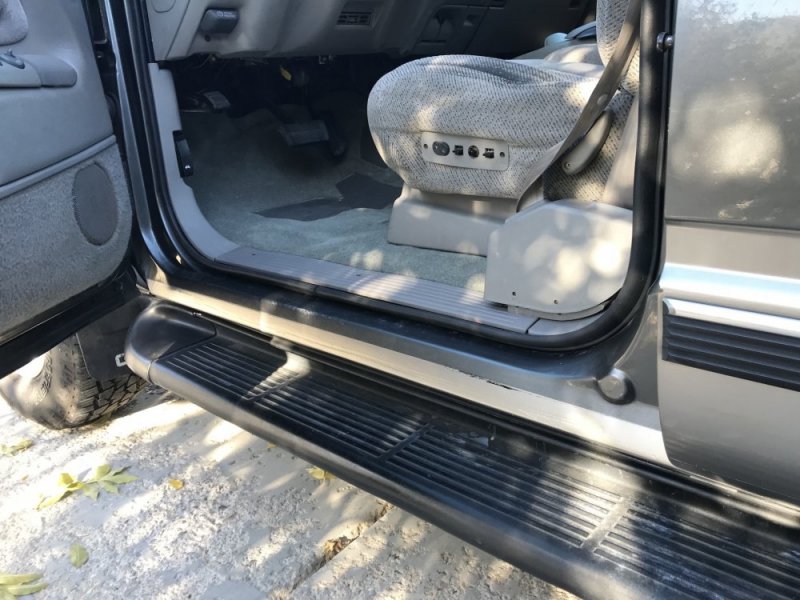
So, after it was 'done', all the sills looked pretty much like this one only I still need to go back and cover the black you see with 'Storm Grey.' Its just too soon to tape over the new paint and try again. I'd say 'meh' except the door sill behind this one has a few more spots than this to cover yet.
20171007 Top Coat4.JPG

The exterior of the door with the rust hole and fiber glass came out nice.
20171007 Top Coat3.JPG

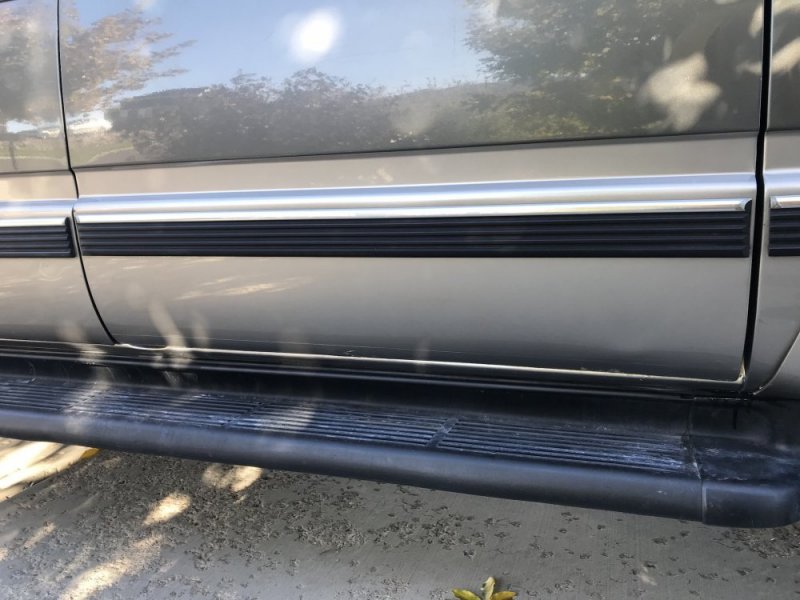
Quarter Panels came out looking like this one too.
20171007 Top Coat2.JPG

Yeah, I've got to feather out some edges come spring time but, that's fine. This is the 'end state' for the project, I'm pleased with it and 'that is that.'

Thanks for following along and for the encouragement.

Cheers,
Pavel
 
Last edited:
Back
Top