Navigation
Install the app
How to install the app on iOS
Follow along with the video below to see how to install our site as a web app on your home screen.
Note: This feature may not be available in some browsers.
More options
-
Welcome to The Truck Stop! We see you haven't REGISTERED yet.
Your truck knowledge is missing!
- Registration is FREE , all we need is your birthday and email. (We don't share ANY data with ANYONE)
- We have tons of knowledge here for your diesel truck!
- Post your own topics and reply to existing threads to help others out!
- NO ADS! The site is fully functional and ad free!
Problems registering? Click here to contact us!
Already registered, but need a PASSWORD RESET? CLICK HERE TO RESET YOUR PASSWORD!
You are using an out of date browser. It may not display this or other websites correctly.
You should upgrade or use an alternative browser.
You should upgrade or use an alternative browser.
1992 6.5TD Rescue
- Thread starter WarWagon
- Start date
Will L.
Well-Known Member
Ok, I suppose you're off the hook THIS TIME.  I just feel better knowing there is one guy out there breaking stuff at a similar rate to my history.
So while knocking the pistons out:
Bang! Bang! Ting! *$30THUMP!$30* FU%$!!!
Managed to have the tool slip off the rod bolt and smack a rod bearing. So the bearings are decent but the one that was impaled. So I am getting an entire set rather than just one. Ordered a HO Water pump and upgraded steel fan as well as some misc parts and tools.
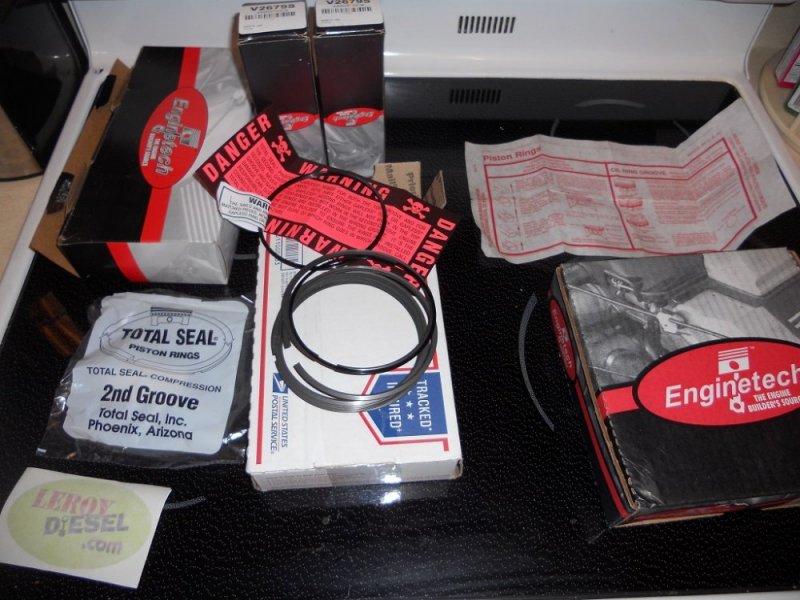
More parts arrived. Gapless rings, Timing set and couple valves. Supporting a vendor and trying out the Enginetech brand.
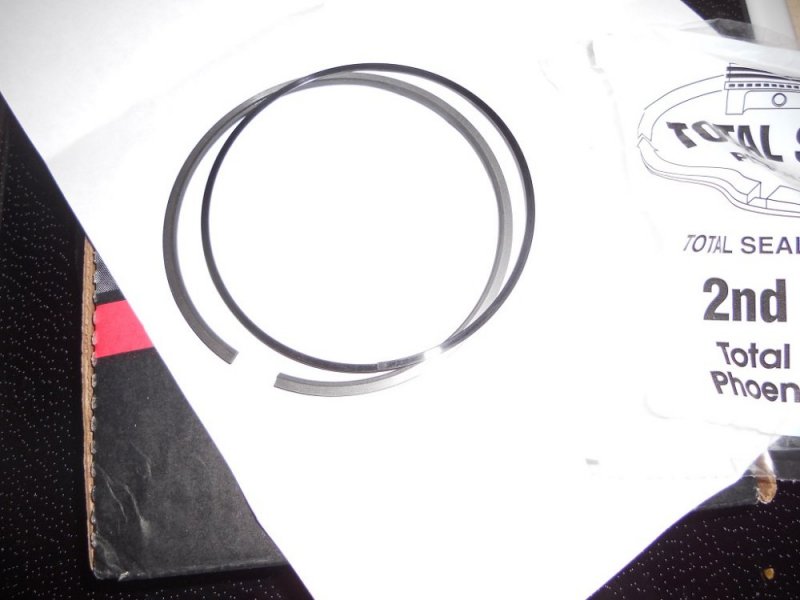
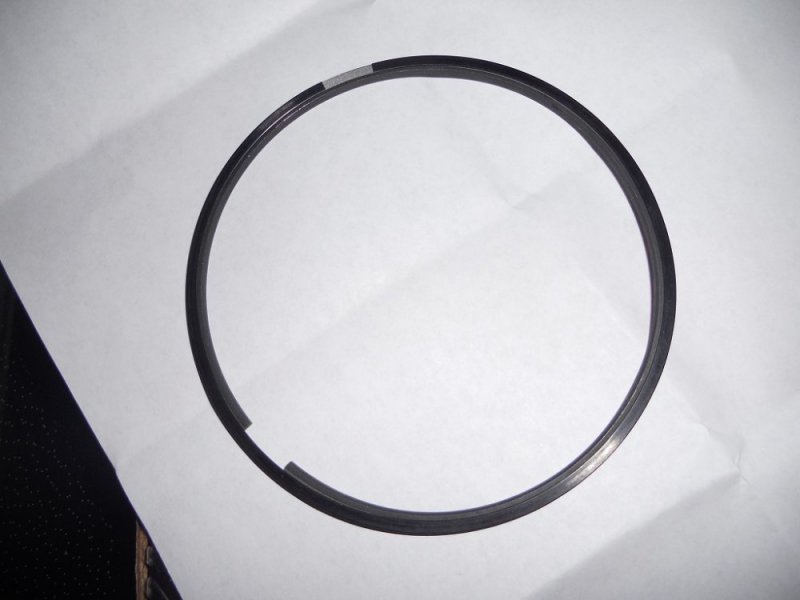
The Gapless rings are the 'made from another brand ring' (Enginetech) vs. the Real McCoy Total Seal set I put in Patch. So far it's a single ring with an expander for the oil control ring vs. the split rail Total Seal that I thought was a PIA 3 parts to install for 1 ring land. Not sure what the difference would be otherwise aside of more $$.
Gapless 2nd Ring
Progress:
Bang! Bang! Ting! *$30THUMP!$30* FU%$!!!
Managed to have the tool slip off the rod bolt and smack a rod bearing. So the bearings are decent but the one that was impaled. So I am getting an entire set rather than just one. Ordered a HO Water pump and upgraded steel fan as well as some misc parts and tools.
More parts arrived. Gapless rings, Timing set and couple valves. Supporting a vendor and trying out the Enginetech brand.
The Gapless rings are the 'made from another brand ring' (Enginetech) vs. the Real McCoy Total Seal set I put in Patch. So far it's a single ring with an expander for the oil control ring vs. the split rail Total Seal that I thought was a PIA 3 parts to install for 1 ring land. Not sure what the difference would be otherwise aside of more $$.

Gapless 2nd Ring


Progress:


Will L.
Well-Known Member
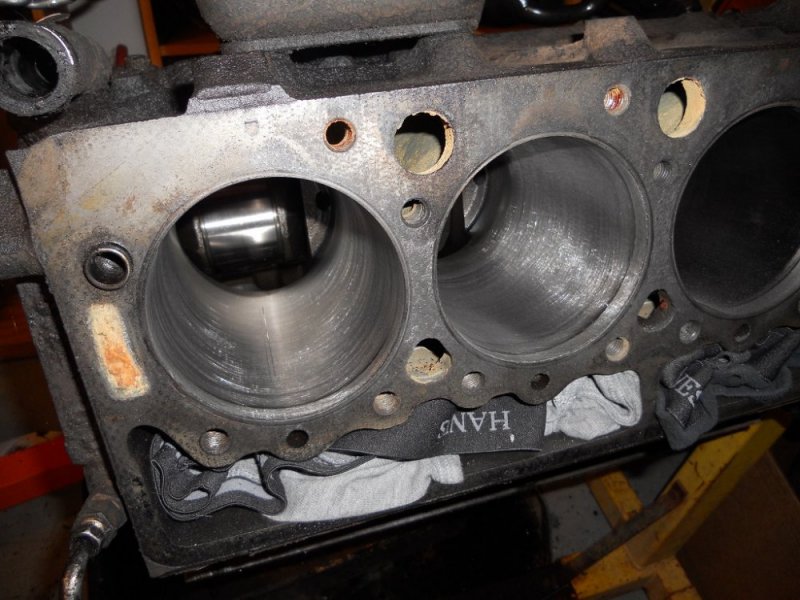
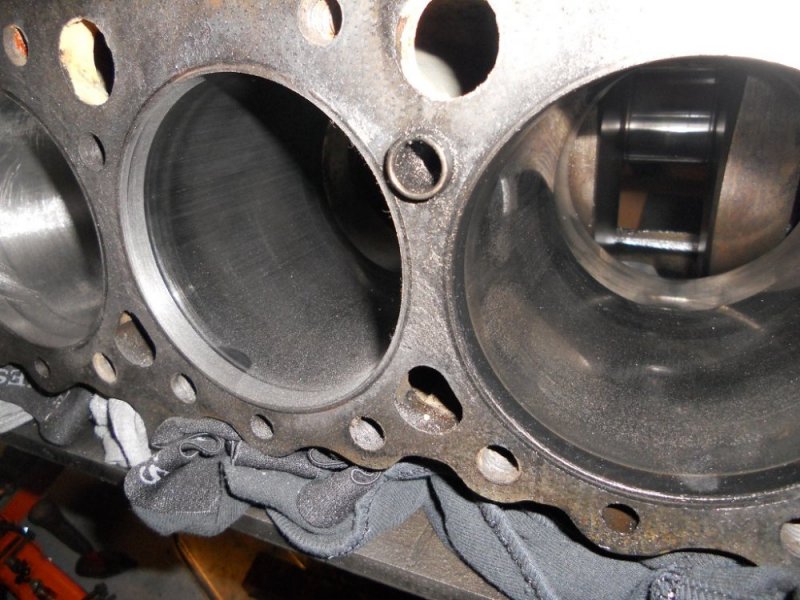
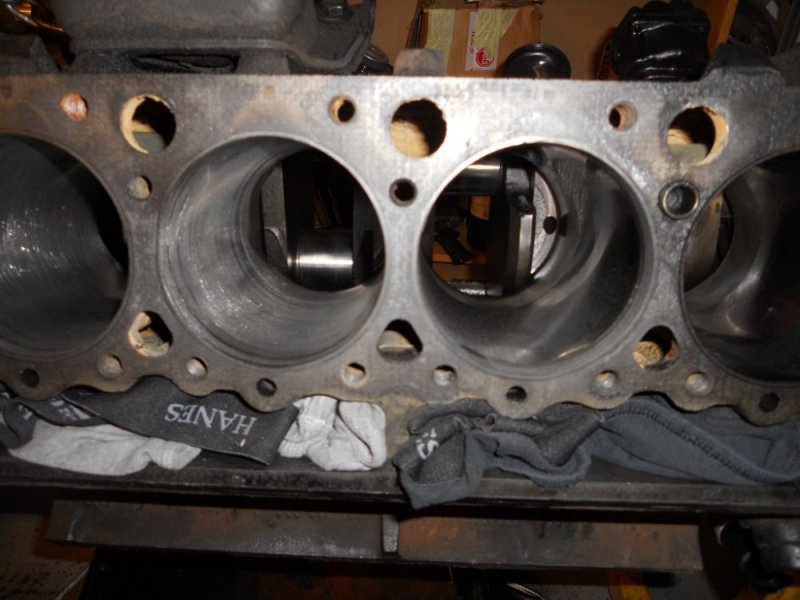
Im looking on a phone so I can't see good. Your cylinder walls look to me like you honed them, when finished you should have a 60 degree cross hatch.
Did you have to use a ridge cutter?
EngineTech uses good stuff. I used it in my last 599 build. Its basically like so many other companies that relabel parts. Like there oil pump says EngineTech on the box but, its a Mellings pump.
EngineTech uses good stuff. I used it in my last 599 build. Its basically like so many other companies that relabel parts. Like there oil pump says EngineTech on the box but, its a Mellings pump.
I thought an oxymoron was the guy that fills my oxygen/acetylene tanks.
More progress. I will have to check the ring lands for excessive wear. The top ring was thinned out leaving a sharp raised edge on the part that was out of the ring land. Only one 2nd ring was "stuck" and had to be pried out.
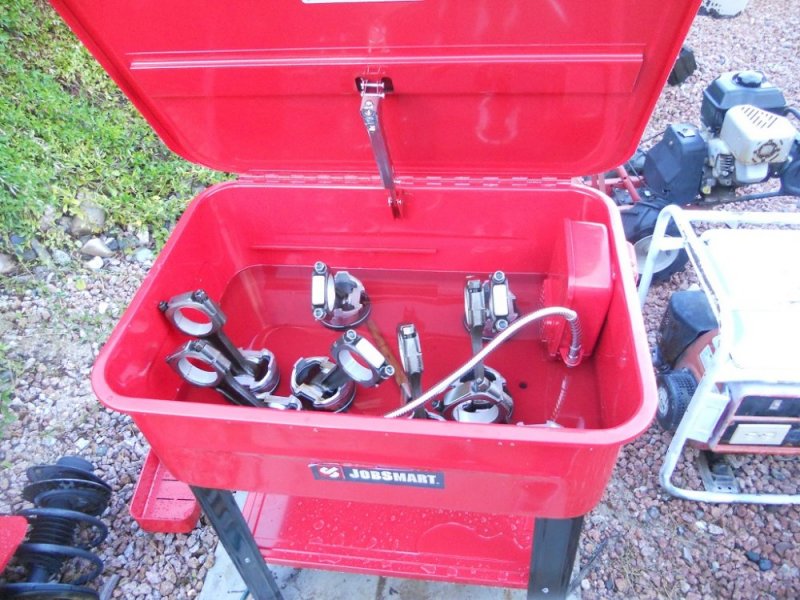
Cleaning the pistons in ATF.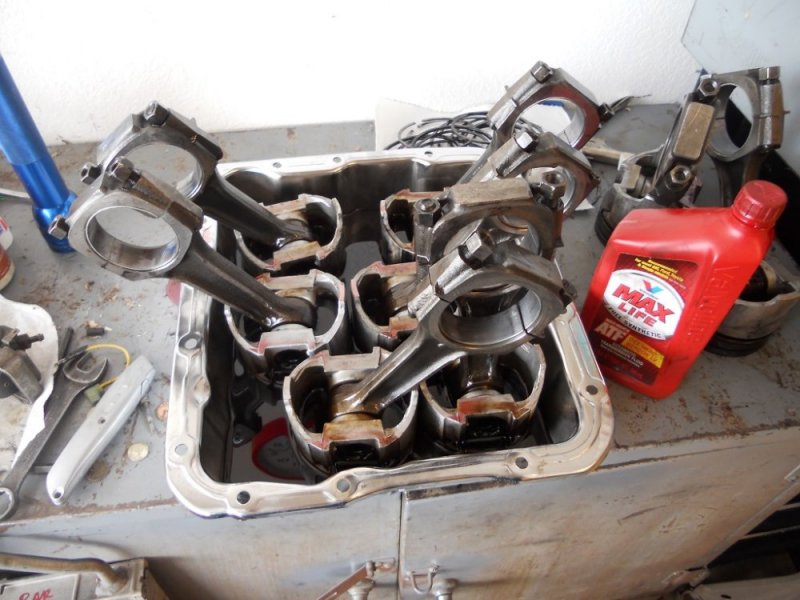
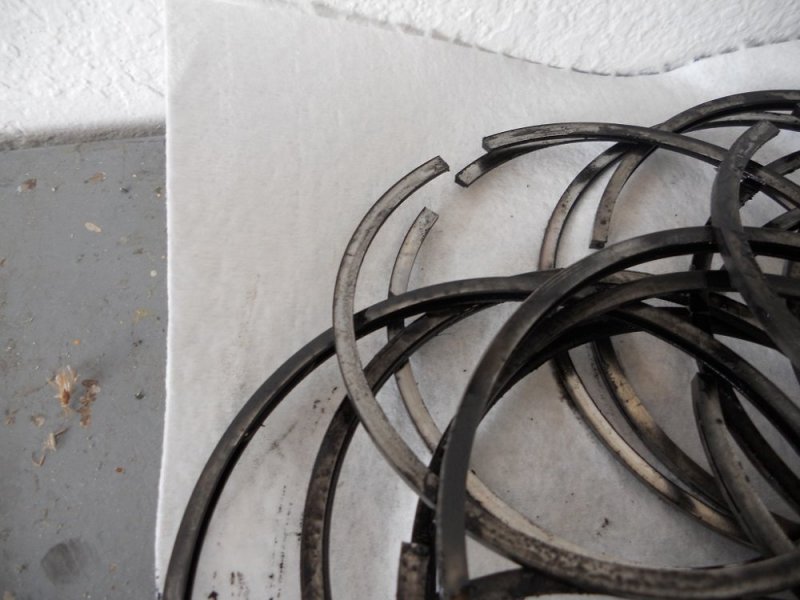
What's left of the rings. And no that's not carbon on the two upper left rings - that's literally a "rail" showing side wear on the ring itself.
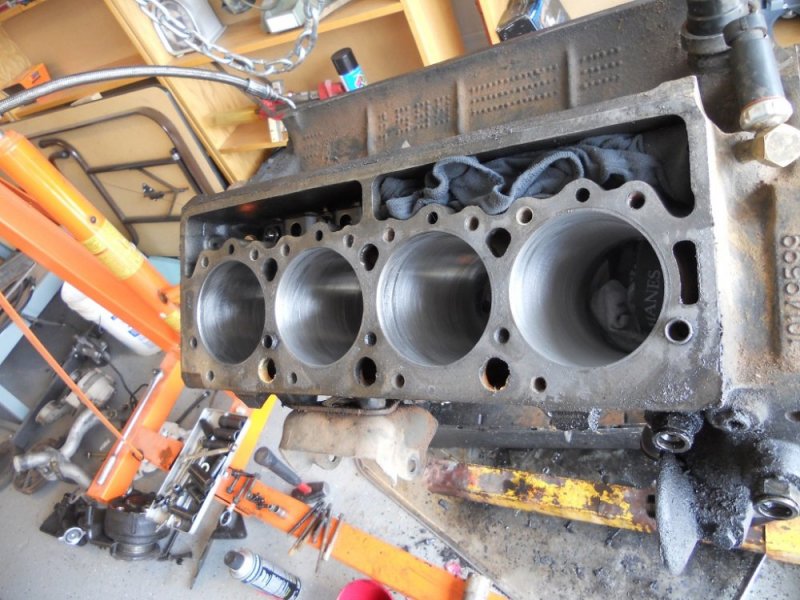
Not perfect. Perfect would be going the next oversize. +$1000.00
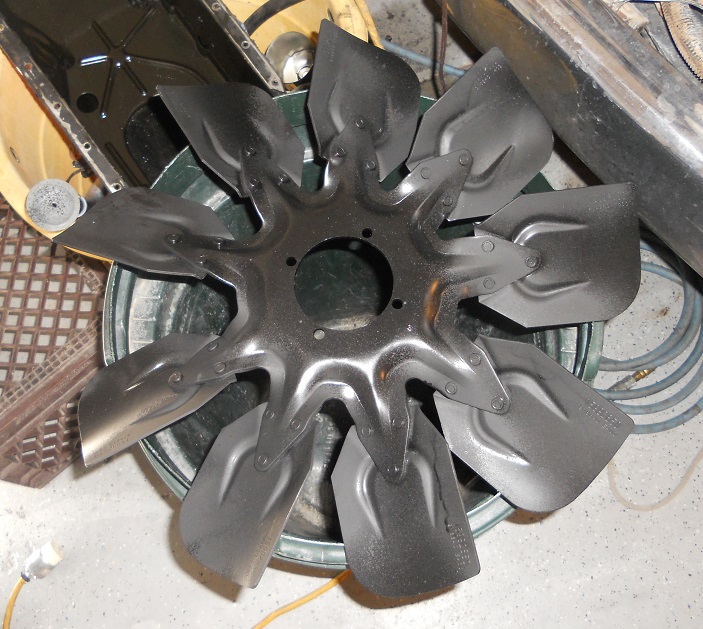
Even on the tightest budget GM's legendary cooling screw up is being fixed. The need for "Cold" AC was the ultimate tipping point. A KD low temp clutch will also be put on with the HO water pump.
Cleaning the pistons in ATF.

What's left of the rings. And no that's not carbon on the two upper left rings - that's literally a "rail" showing side wear on the ring itself.

Not perfect. Perfect would be going the next oversize. +$1000.00

Even on the tightest budget GM's legendary cooling screw up is being fixed. The need for "Cold" AC was the ultimate tipping point. A KD low temp clutch will also be put on with the HO water pump.

How much does that fan blade weigh? Im comparing the weight to a Dmax blade and can't find my steel blade around here.
Got all the rings on. Only had to clean 3 ring lands including the one the ring was stuck in. Used Rislone to help clean those two pistons more. Still had to use a busted old ring to scrape the carbon out.
Progress on the heads. Got 1 head done with new seals and cleaned intake valves. Unreal the coke buildup, over 1/16". Replaced 2 of 3 exhaust valves as the other one with tip fatigue is on the other head. Note the drinking straw install 'tool'.
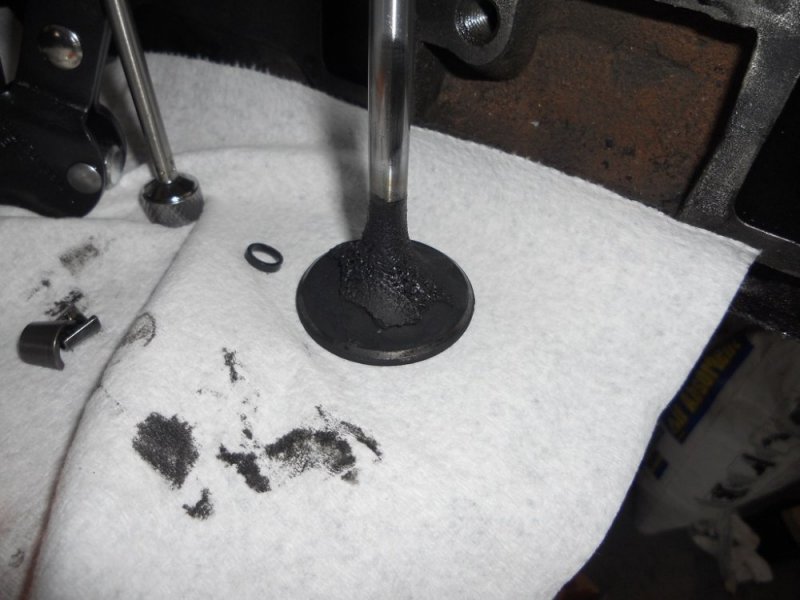
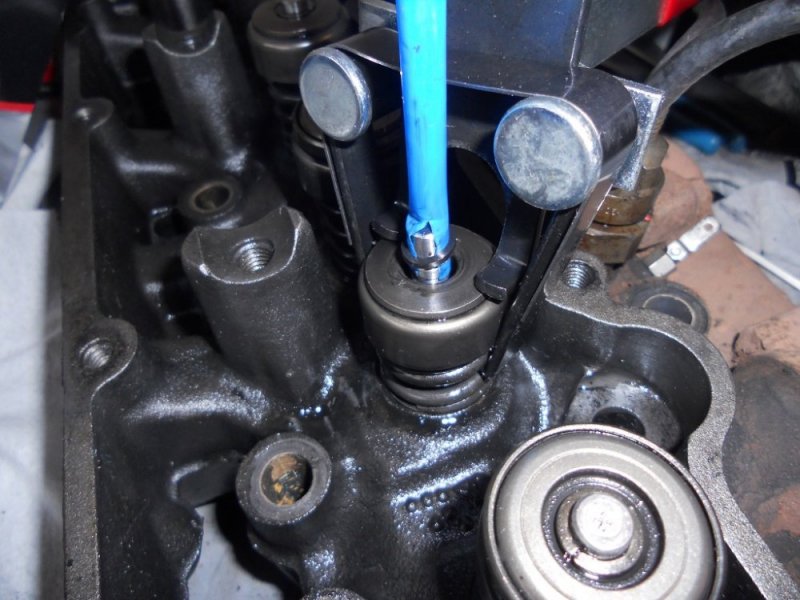
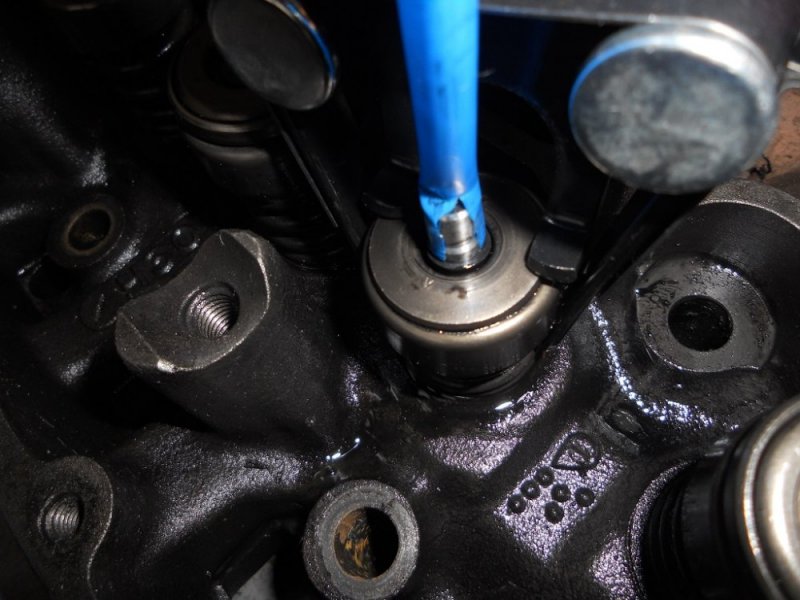
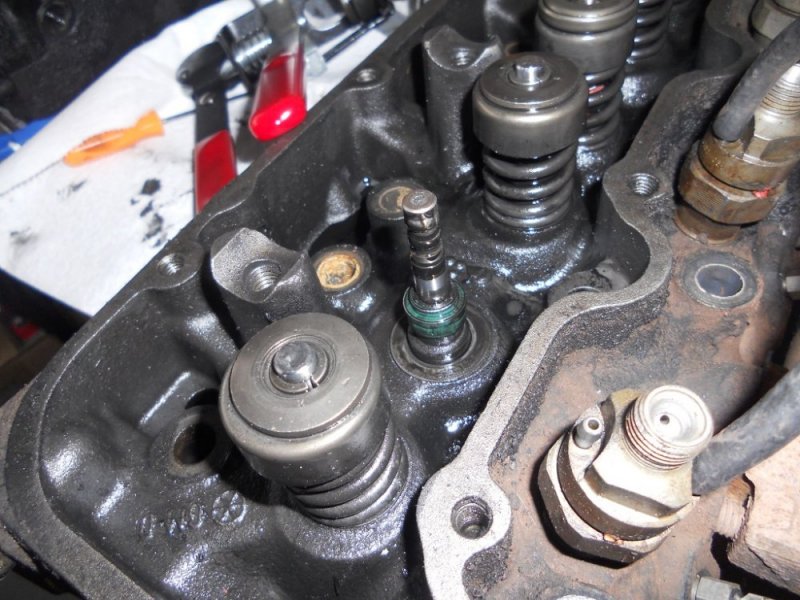
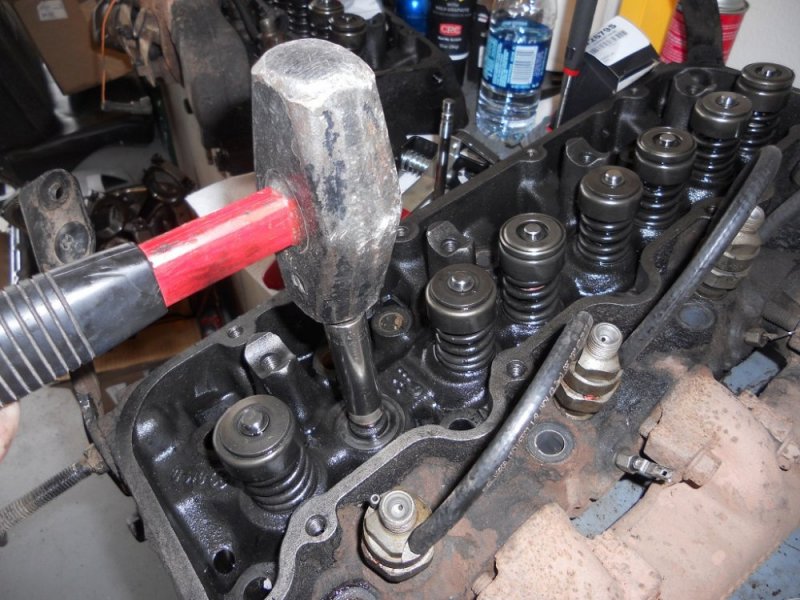
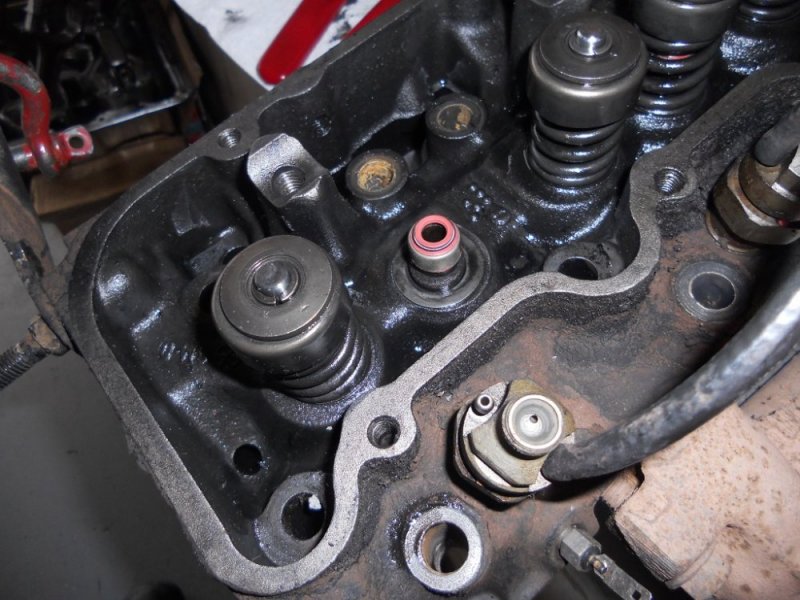
Progress on the heads. Got 1 head done with new seals and cleaned intake valves. Unreal the coke buildup, over 1/16". Replaced 2 of 3 exhaust valves as the other one with tip fatigue is on the other head. Note the drinking straw install 'tool'.


n8in8or
I never met a project I didn’t like
Just reading this thread. More and more I'm liking the 2 headlight front end trucks. I'm liking this project, looks like fun!Got all the rings on. Only had to clean 3 ring lands including the one the ring was stuck in. Used Rislone to help clean those two pistons more. Still had to use a busted old ring to scrape the carbon out.
Progress on the heads. Got 1 head done with new seals and cleaned intake valves. Unreal the coke buildup, over 1/16". Replaced 2 of 3 exhaust valves as the other one with tip fatigue is on the other head. Note the drinking straw install 'tool'.
View attachment 46536 View attachment 46537 View attachment 46538 View attachment 46539 View attachment 46540 View attachment 46541
Uh-oh, have I been doing valves seals wrong?? I have been putting the o-ring seal on and then installing the retainer and clips. I always thought it would probably push the seal out of the groove when I compressed the spring, but figured it would pop back in or whatever.... Is this the intended order or is this just what you do because you like it?
Chevypoor
Active Member
That is alot of crud on the valve. I wish I had taken pictures. Had a 305 gasser once that had the same crud about a 1/4-3/8 thick on the valve all the way to the seat cut! The same 305 broke a piston skirt because the drain back holes in the heads were packed with crud. I had golf ball sized chunks from under the intake!!! It still ran though- amazing what a motor will take and still run!
Looking good!
Looking good!
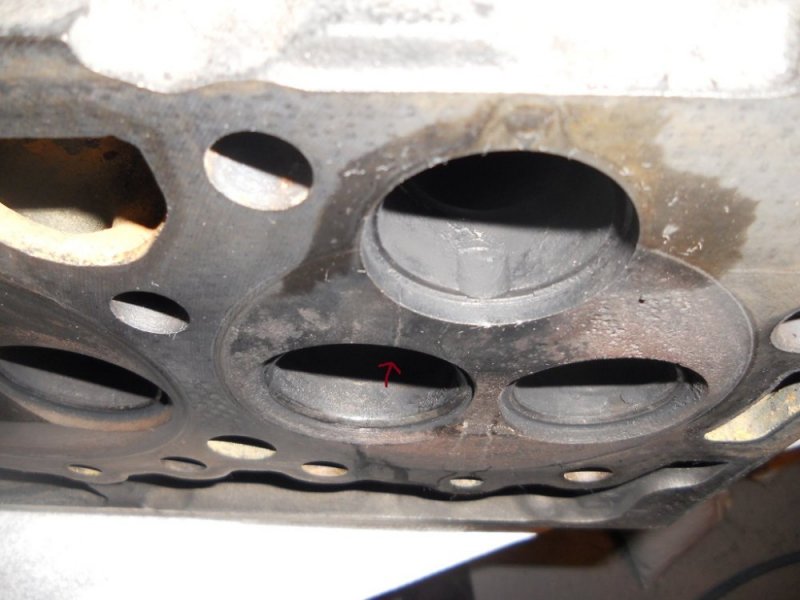
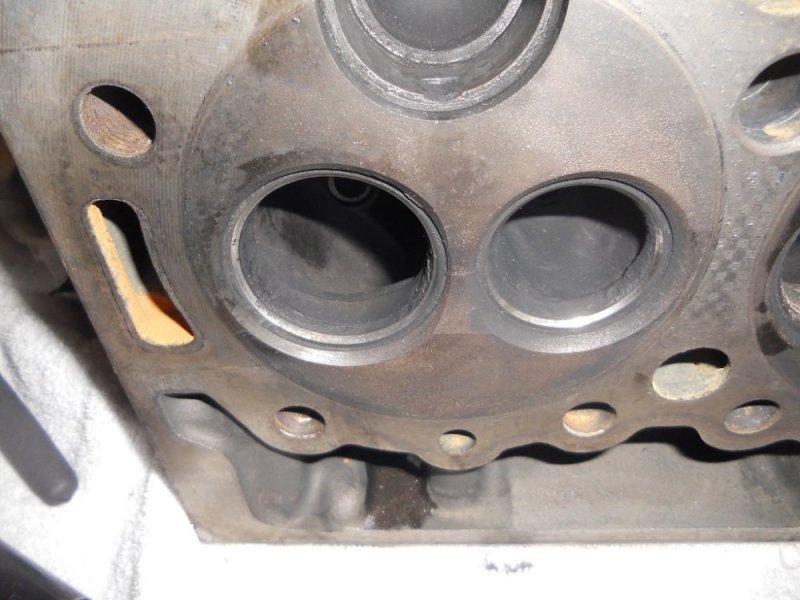
So I picked up the project lately. Cleaned the sludge out of the parts washer from washing a lot of truck project parts and new solvent. Figured I would clean the heads in it. Wound up knocking the pour it in head sealer they used off the # 7 cylinder and off the #1. Explains the hole in the radiator cap. Of the two heads I picked to change the valve stem seals I picked the bad one. Found it before I dropped it back on the engine at least.
#7 shown. #1 typical bridge crack between the valves. IMO both causing problems. It's run a long time with the crack with all the pitting on the head.
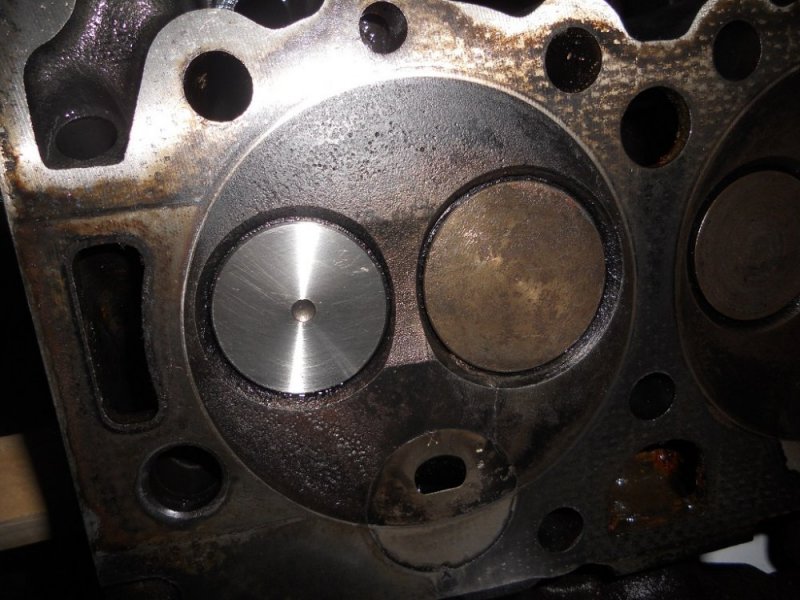
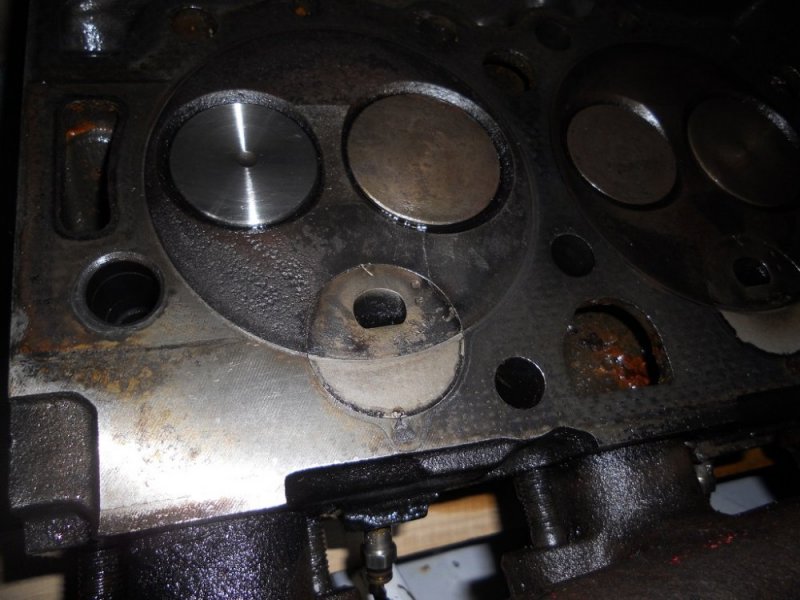
#7 shown. #1 typical bridge crack between the valves. IMO both causing problems. It's run a long time with the crack with all the pitting on the head.


tanman_2006
Just a farm kid...
Time for a set NEW heads maybe?
Couple more pics of the two head cracks.
#1 Bridge crack.
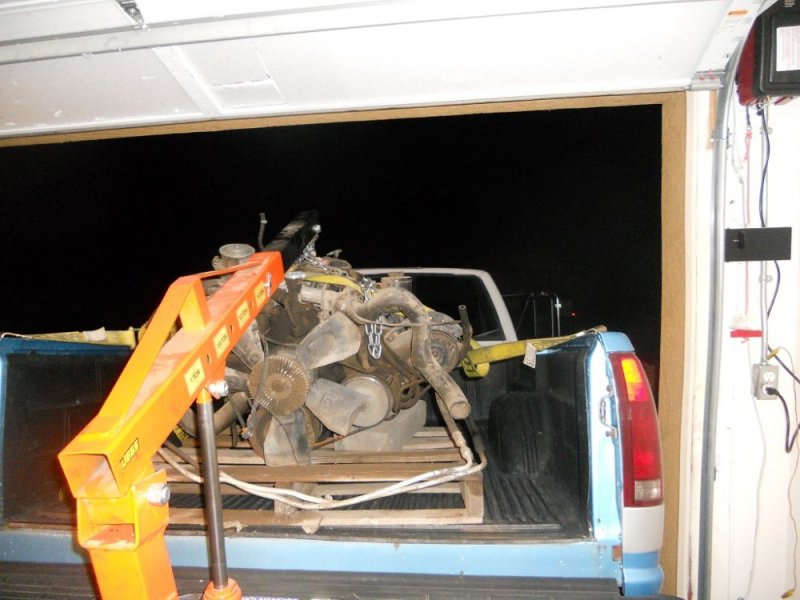
So I picked up a set of new used heads. Bolted on a 6.2... Ok, so 10% grade or more on this driveway to a flat garage. Concern over one strap holding the engine in the back, yes. 4x4 Low, yes. Finally got around to greasing the tailgate... And my coworkers wonder why I drive a 3/4t pickup? I'd like to see this is the trunk of a small car!
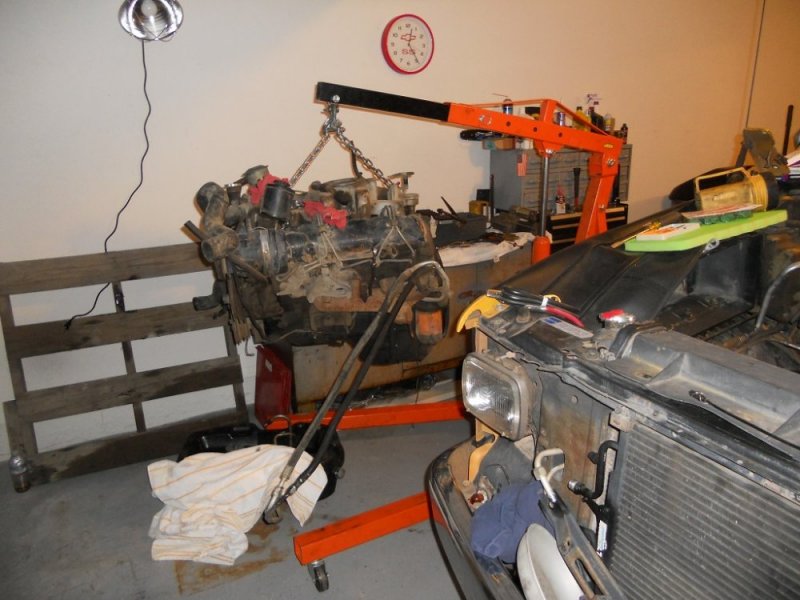
1986 the year I somehow get hold of the most per the air cleaner emissions label. 599 block. I am really considering going NA for a MPG truck and even keeping the v-belt drive by making new AC hoses and finding an alternator for the tach. On the other hand we are way over budget and way behind schedule.

#1 Bridge crack.

So I picked up a set of new used heads. Bolted on a 6.2... Ok, so 10% grade or more on this driveway to a flat garage. Concern over one strap holding the engine in the back, yes. 4x4 Low, yes. Finally got around to greasing the tailgate... And my coworkers wonder why I drive a 3/4t pickup? I'd like to see this is the trunk of a small car!


1986 the year I somehow get hold of the most per the air cleaner emissions label. 599 block. I am really considering going NA for a MPG truck and even keeping the v-belt drive by making new AC hoses and finding an alternator for the tach. On the other hand we are way over budget and way behind schedule.
Last edited:
tanman_2006
Just a farm kid...
The thought to 6.x swap my 94 C3500 350 is becoming very real. Then watch out fuel mizer work rig

