Navigation
Install the app
How to install the app on iOS
Follow along with the video below to see how to install our site as a web app on your home screen.
Note: This feature may not be available in some browsers.
More options
-
Welcome to The Truck Stop! We see you haven't REGISTERED yet.
Your truck knowledge is missing!
- Registration is FREE , all we need is your birthday and email. (We don't share ANY data with ANYONE)
- We have tons of knowledge here for your diesel truck!
- Post your own topics and reply to existing threads to help others out!
- NO ADS! The site is fully functional and ad free!
Problems registering? Click here to contact us!
Already registered, but need a PASSWORD RESET? CLICK HERE TO RESET YOUR PASSWORD!
You are using an out of date browser. It may not display this or other websites correctly.
You should upgrade or use an alternative browser.
You should upgrade or use an alternative browser.
Savana Camper project II
- Thread starter SplitSsss
- Start date
JayTheCPA
Well-Known Member
Am sure that better experts will chime-in shortly. From what I had read, swapping the compressor wheel is supposedly easy, but then again had read that it does need proper balancing for long term health of the bearing.
Removing the compressor housing is definitely easy as it is just a matter of loosening one bolt and then sliding off the assembly. IIRC, it is either a 10 or 8mm socket for the job. Even a bean-counter like myself can do this part
One thing I would consider is to heat treat the up-pipes for both efficiency and preventing the heat from baking components around them.
royunion
Active Member
Looks like the thread ran outta room! So glad you guys are weighing in on my project!
So to continue this thread I started this new one.
Q: How hard is it to install a wicked wheel? . . . Any special tools
I have this engine - you take off the cross over by the six bolts - three each side - and then take off the intake and exhaust piping. You then hold the turbine shaft with the socket and take off the nut on the compressor side - which is left hand and put on the new one.
so . . . it is not hard at all . . . but if you are going that far in . . . rebuild the Turbo by replacing the cartridge here is a source => https://www.rockauto.com/en/moreinfo.php?pk=5784879&cc=1153325&jsn=526 $459 for the guts complete and then swap the wheel wheel on. OR . . . you could get a rebuild kit for about $26 - do it your self and then put on the wicked wheel instead of the stock compressor wheel. If it were me I would replace the turbine shaft and wheel just because I am in there that far if you do not but a complete cartridge
There are several videos on the web
One site here => says some things about the wicked wheel I tend to think defy the laws of physics but . . . anyway . . . https://www.dieselsite.com/wickedwheel6.5L.aspx
You could split the housing and replace only the compressor wheel - but you would be sorry if later you find the turbo needs a rebuild after you put it all back together - like it sprays a lot of oil out the bearings
Typical turbine shaft side pictured below. It would take a 12 point socket
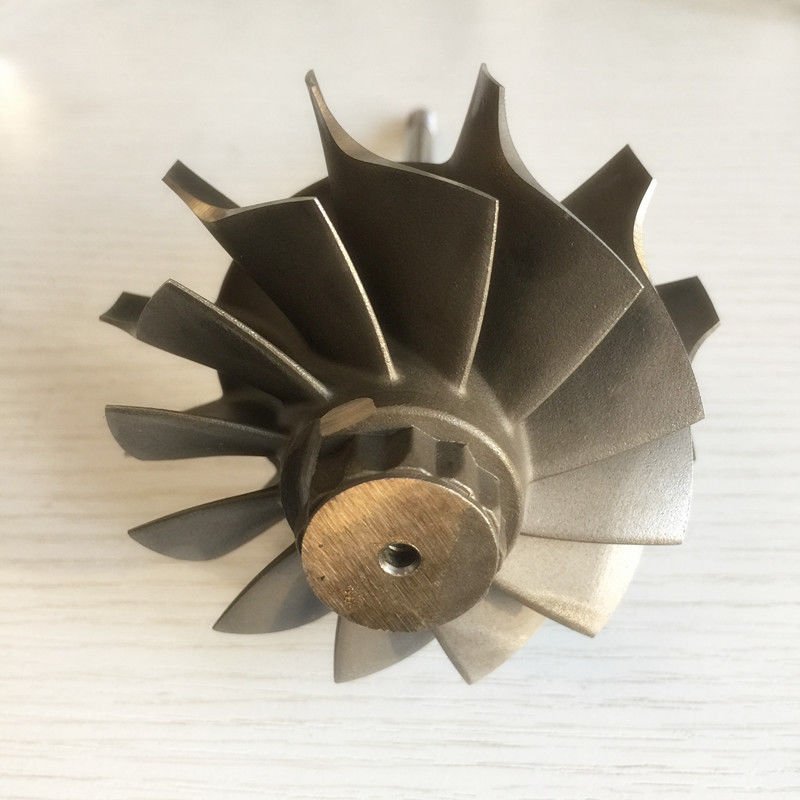
SplitSsss
Member
Great advise thanks.I have this engine - you take off the cross over by the six bolts - three each side - and then take off the intake and exhaust piping. You then hold the turbine shaft with the socket and take off the nut on the compressor side - which is left hand and put on the new one.
so . . . it is not hard at all . . . but if you are going that far in . . . rebuild the Turbo by replacing the cartridge here is a source => https://www.rockauto.com/en/moreinfo.php?pk=5784879&cc=1153325&jsn=526 $459 for the guts complete and then swap the wheel wheel on. OR . . . you could get a rebuild kit for about $26 - do it your self and then put on the wicked wheel instead of the stock compressor wheel. If it were me I would replace the turbine shaft and wheel just because I am in there that far if you do not but a complete cartridge
There are several videos on the web
One site here => says some things about the wicked wheel I tend to think defy the laws of physics but . . . anyway . . . https://www.dieselsite.com/wickedwheel6.5L.aspx
You could split the housing and replace only the compressor wheel - but you would be sorry if later you find the turbo needs a rebuild after you put it all back together - like it sprays a lot of oil out the bearings
Typical turbine shaft side pictured below. It would take a 12 point socket
View attachment 54827
SplitSsss
Member
ThanksAm sure that better experts will chime-in shortly. From what I had read, swapping the compressor wheel is supposedly easy, but then again had read that it does need proper balancing for long term health of the bearing.
Removing the compressor housing is definitely easy as it is just a matter of loosening one bolt and then sliding off the assembly. IIRC, it is either a 10 or 8mm socket for the job. Even a bean-counter like myself can do this part
One thing I would consider is to heat treat the up-pipes for both efficiency and preventing the heat from baking components around them.
royunion
Active Member
Great advise thanks.
Oooopppss forget the part where you split the turbo housing -
SplitSsss
Member
Thanks
Any links to the turbo rebuild kit you mention?
SplitSsss
Member
Q: Anyone use duel lift pumps in parallel and just switch from A to B
Electricly? Just for backup?
Electricly? Just for backup?
SplitSsss
Member
Any recommendations for fuel pressure gauge. Brand name etc.
I like the idea of digital with duel selection. Lp and ip selection.
I like the idea of digital with duel selection. Lp and ip selection.
ak diesel driver
6.5 driver
Dual LPs have been done. My opinion is that I would put in a good aftermarket LP in. Do it in such a way that you can revert back to stock easily so if on a road trip you can get parts easily. I put in a raptor LP and didn't cut any stock fuel lines. If interested I have a write up in a thread here somewhere.
ak diesel driver
6.5 driver
royunion
Active Member
Any links to the turbo rebuild kit you mention?
Ecrater and eBay - trader Greg on Ecrater - search 6.5 turbo rebuild kit
royunion
Active Member
Any recommendations for fuel pressure gauge. Brand name etc.
I like the idea of digital with duel selection. Lp and ip selection.
I use a pressure transducer at the
If you put on the "Feed the Beast mod - you loose it though.
The old post continued - and a bad advice disagreement went on there about the FTB mod I am about through with from Will L who has a mechanical injection Hummer which does not apply to what you are doing really
If you ever have to get service from a dealer - you stand a good chance of being denied if have that FTB mod and / or a custom burn on the PCM. You never know when you need a scanner put on to read Extended PID info only readable by a Modus, Tech 2. GM MDI etc
I have exactly what you are trying to build - minus the wicked wheel, and I have high output dual alternators at 240 amps, a 40 amp inverter, a fresh water pressurized system in a high top van, with 400 watts of solar power potential and interior and exterior starting batteries/ If it cant crank at least 200 rpm it will never start - it wont inject
Look for other posts by me - and you will good info - and the FTB argument from Will L also. You be the judge. I will send a PM to you
Jaryd
Extremely Deplorable
I used a boost guage for a fuel pressure gauge so I can see if it ever pulls into a vacuum. The fuel pressure guage is well worth the investment. It already saved me a IP.
@royunion got any pictures of your rig? Start a thread with pictures and go through all the mods you have done like the water mist system you have. I think some of it could be interesting.
@royunion got any pictures of your rig? Start a thread with pictures and go through all the mods you have done like the water mist system you have. I think some of it could be interesting.
Will L.
Well-Known Member
I have to start by saying I apologized to Roy and SplitSsss for my bad choice in how I handled the disagreement. My response(s) on this thread are not to continue disagreement but at the request of SplitSsss.
The rotory switch and multiple sensors is a great idea. I had a similar one of 2 sensors and a toggle switch- yours is a better idea. Please do a dedicated thread and post the link here too for the op
@SplitSsss you sent me the PM and mentioned your budget. Not my place to say it publicly, but if you choose to I think that would help everyone tailor the most and least important components accordingly.
I suggest showing your wish list including brand names where applicable so others can share their best input.
I do not suggest the idea of dual LP. Added expense, low value. Factory flow on fail pump design was so the ip could pull through a non working LP. The original one wasn’t in a medium duty application and a crash/ deaths resulted and gm changed it in the medium duties with voluntary recall and had that pump in use before the pickups and vans hit the street.
If you choose a pump that doesn’t have flow on fail capacity, 2 tees and 2 one way valves are a simple work around. The factory design sux.
If $ isn’t available now, I suggest adding at least a ‘Tee’ in the plunbing that is capped off until a gauge or gauge system can be afforded. $ better spent on one good pump than 2 mediocre.
Man, don’t speed in that van, it’s kinda noticeable.
royunion
Active Member
I used a boost guage for a fuel pressure gauge so I can see if it ever pulls into a vacuum.
I drilled a hole in the underside of the fuel cap through the first layer of plastic where it always is at the top when I put it back on. Those caps are notorious for the vent feature plugging.
I also used a transducer on the same digital readout to tell me boost and vacuum of the engine but I also have a hard line tubed unit - that I really use most often
royunion
Active Member
I have to start by saying I apologized to Roy and SplitSsss for my bad choice in how I handled the disagreement. My response(s) on this thread are not to continue disagreement but at the request of SplitSsss.
@SplitSsss you sent me the PM and mentioned your budget.
It is all good.
If you have a budget - look at my post to how to do the lift pump yourself - which should save at least $100 for the same rotary vane LP set up
There is actually gm dual lp wiring also - but if you use two fuel tanks - you can use either a rv solenoid to switch which tank to draw from - or set up an OEM lift pump as a transfer pump to put fuel in the tank with the gauge.
Remember -if you do not know if you do not use the other one of the tanks religiously algae could begin to grow from condensation if it is not at least kept full
SplitSsss
Member
Dual LPs have been done. My opinion is that I would put in a good aftermarket LP in. Do it in such a way that you can revert back to stock easily so if on a road trip you can get parts easily. I put in a raptor LP and didn't cut any stock fuel lines. If interested I have a write up in a thread here somewhere.
Yes please if you can direct me to it.d
It is all good.
If you have a budget - look at my post to how to do the lift pump yourself - which should save at least $100 for the same rotary vane LP set up
There is actually gm dual lp wiring also - but if you use two fuel tanks - you can use either a rv solenoid to switch which tank to draw from - or set up an OEM lift pump as a transfer pump to put fuel in the tank with the gauge.
Remember -if you do not know if you do not use the other one of the tanks religiously algae could begin to grow from condensation if it is not at least kept full
I had planned on using the extra fuel tank since I have two identical 30g tanks. Problem is it would need to go where the exhust runs unless I ran vertical stacks. Figured that would be too loud though. I might get a Super Duty tank which is perfect fit behind the rear diff.
Not sure about that yet since I’d also like a water tank and a compressor and tank. Still looking for deals!
So here is the current plan so far.
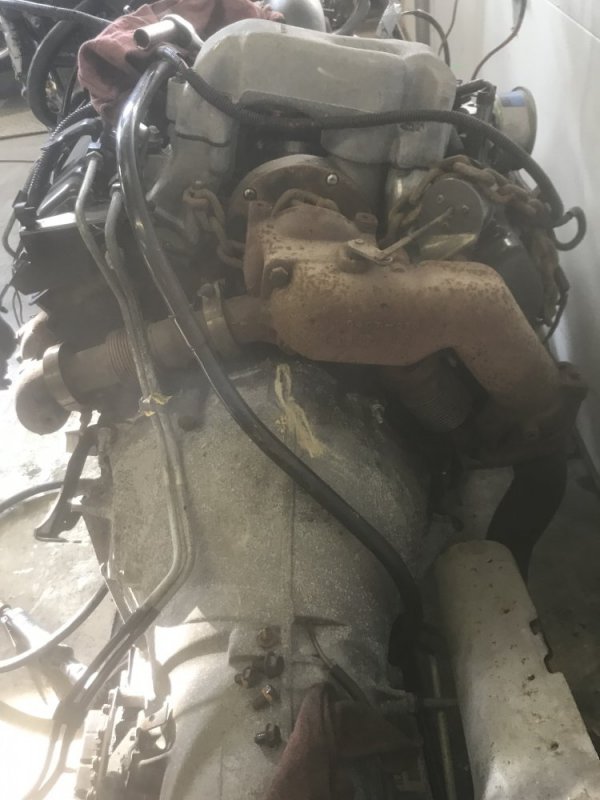
Right now the box is off. The cab is stripped down to the shell. Engine compartment has been repaired. Needed rt fender well replaced. Stole it from donor cab. See pics.
Wiring harness and dash swap in progress and almost done.
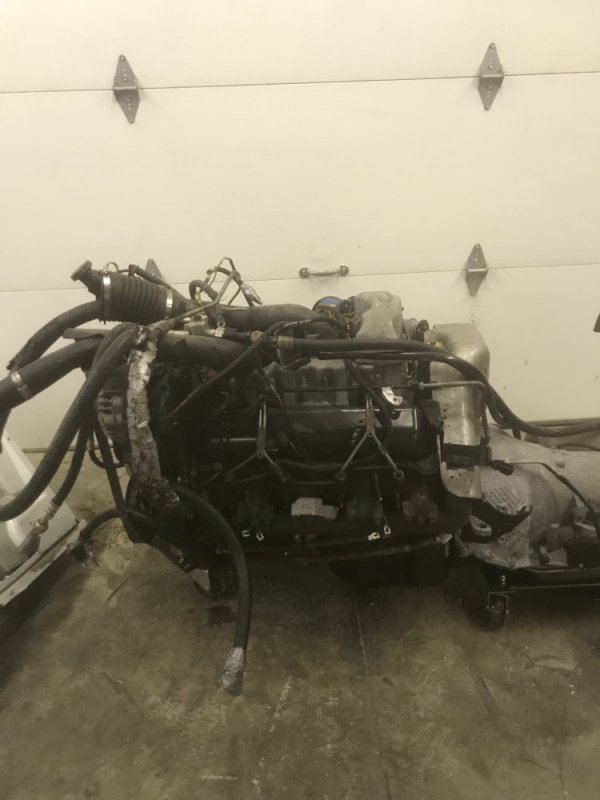
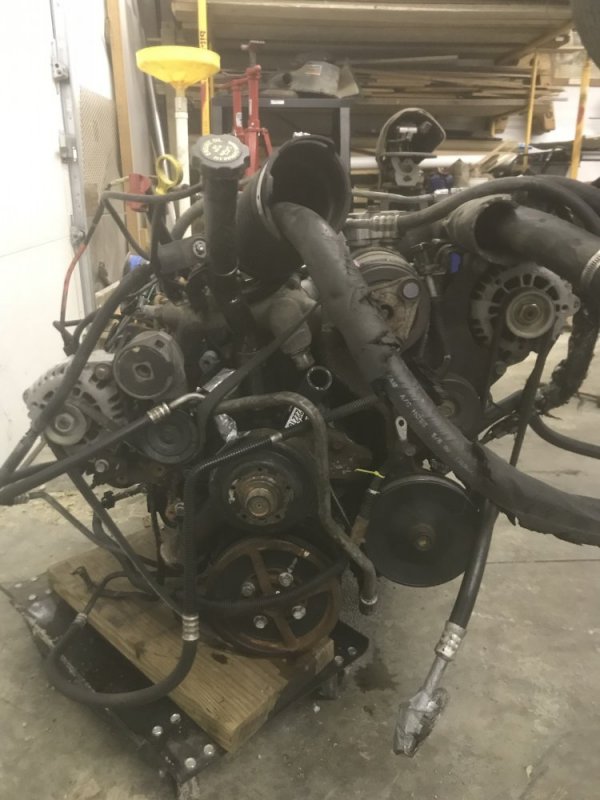
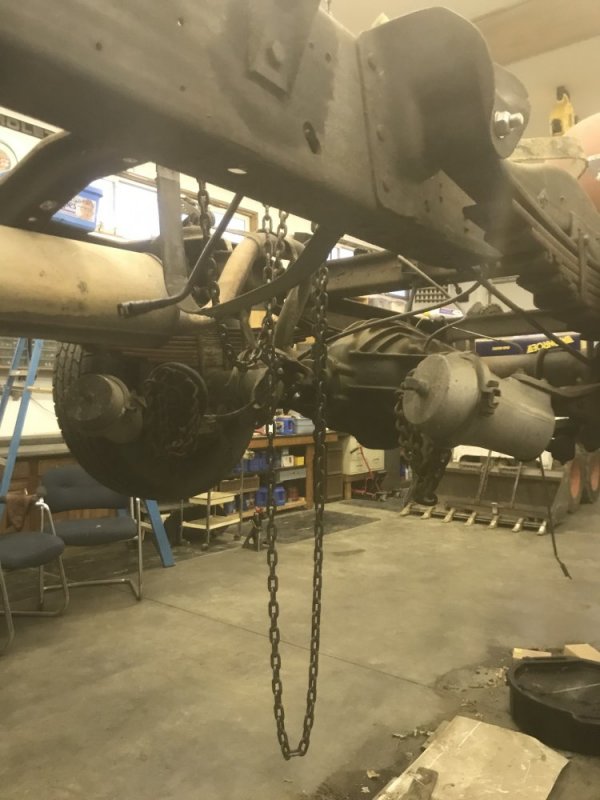
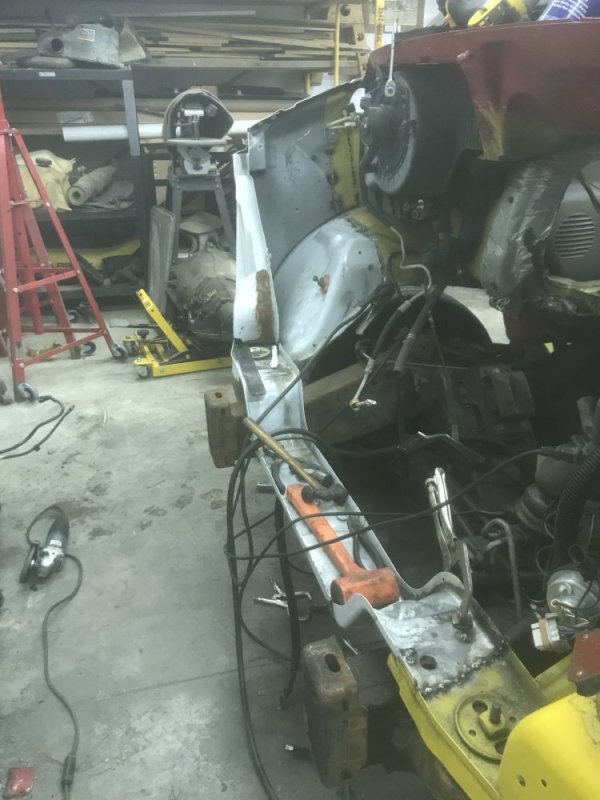
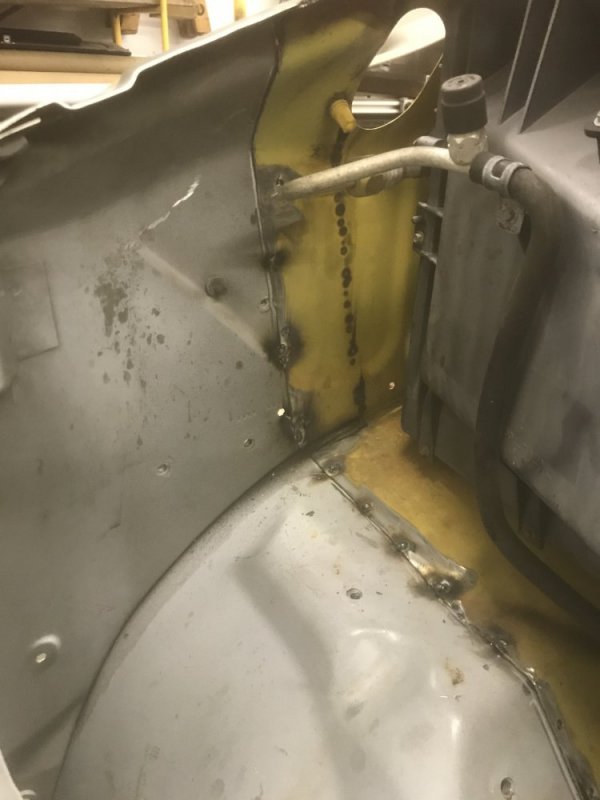
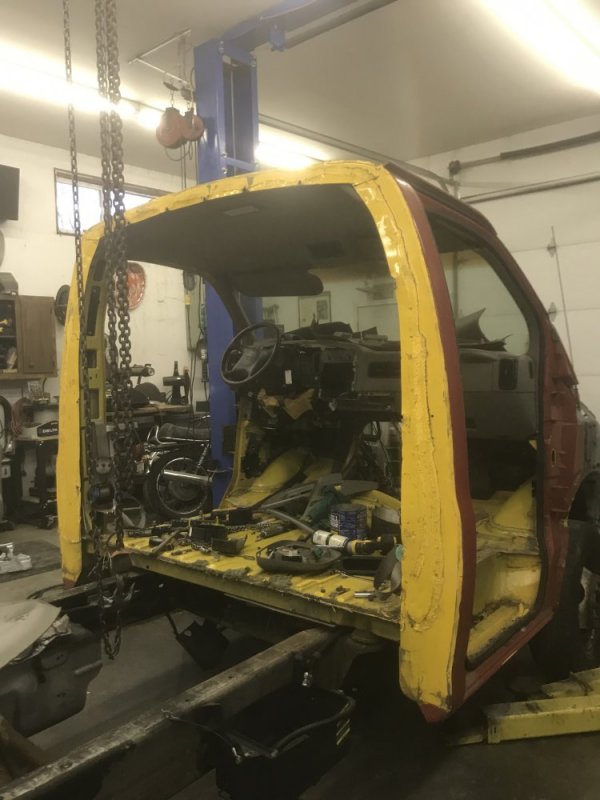
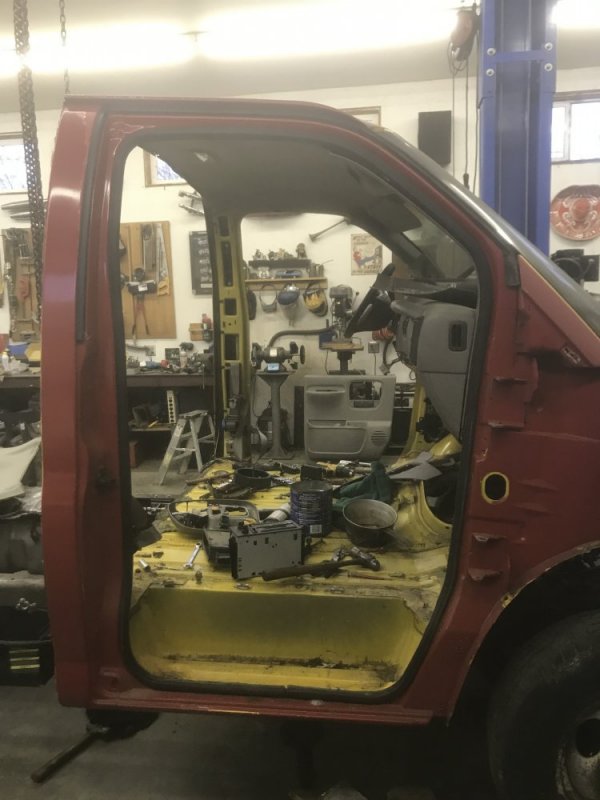
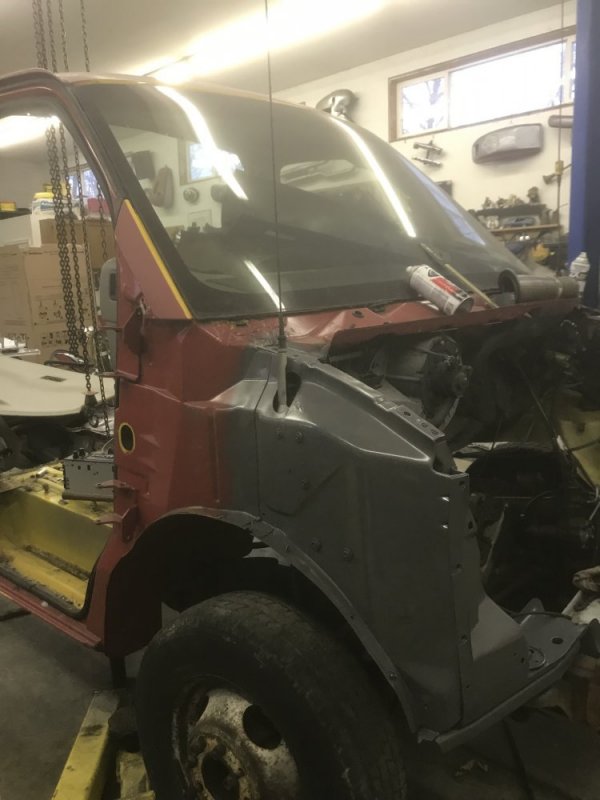
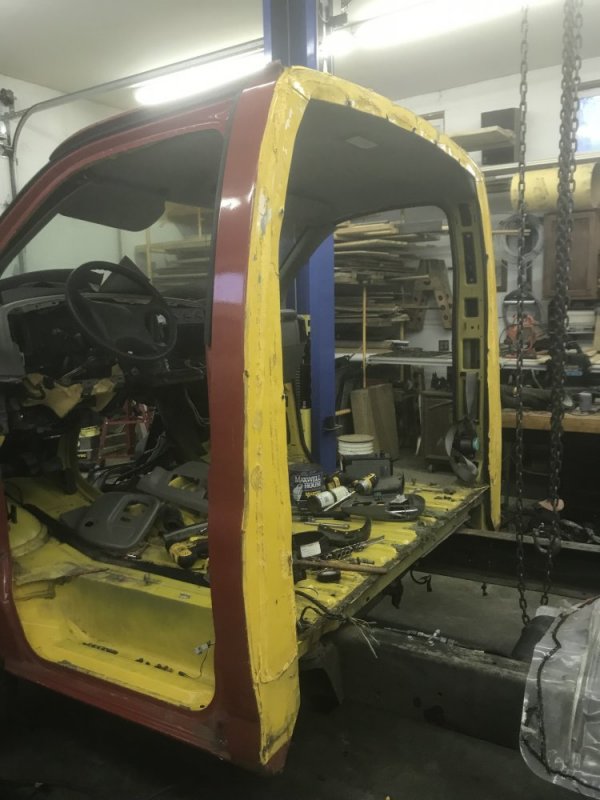


Engine is waiting for parts. Injectors, timing gears, wicked wheel2, hoses, fluids etc.
water pump appears to have been replaced recently. I’ll look at it when I pull it to do the Leroy’s timing gears upgrade. Also the bypass mod. Glow plugs came out real easy and had never seize on them. I’m guessing they too were replaced. Injectors most likely as well but gonna put new ones in anyway while it’s easy!
AC Delco balancer and Leroy’s pulley. Since I’ll only be putting less then 7-10k on the rig a year, I’ll pass on the expense balancer.
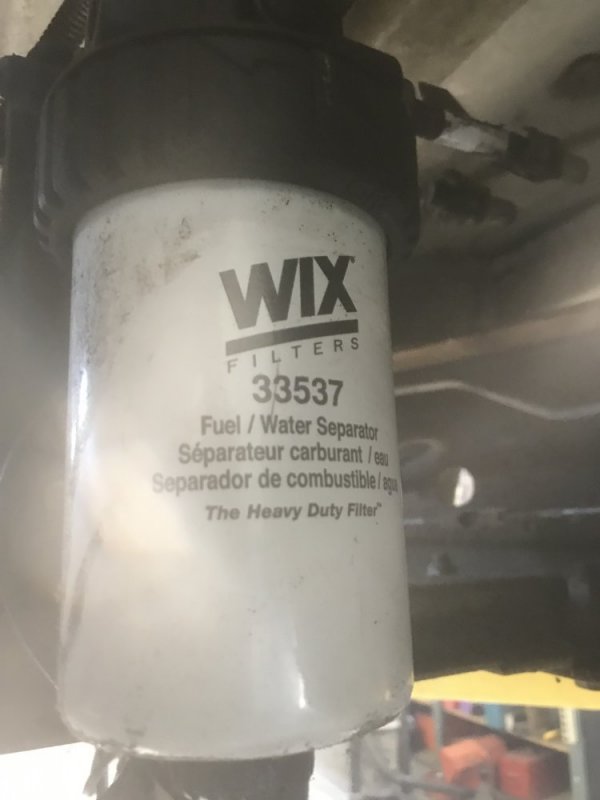
Carter lift pump and harness from Leroy’s. I added a pre filter and once I get the new LP I’ll run new fuel lines too. What Wix number is a good pre filter! (Prefilter housing has the smaller thread on size) See pic of old pre filter.
Figured I’d clean the FFM as well and replace filter and screen. (Thoughts here?)
I have two radiators both in very good shape. Might send one out for coating someday. We will see.
Still not sure about which stats to run. I’ve read here both sides. Probably start with 195 and see what kind of baseline that gives me.
I can swap easily enough if need be.
Wicked wheel2 seems like a nice upgrade Algonquin with a turbo rebuild kit. Diamond Eye 4” pipes and a custom down tube will be needed. Diamond Eye has all the bends and straights I need to fab my own. I’ll seriously look into coating this since it will be a huge pain later.
Rig has two 240amp alternators so an inverter would be nice. (Suggestions for a good one?)
Compressor suggestions too.
Rig will need a fridge and heater. It has a 110v rv air conditioner on the roof already. Box is insulated and has windows.
Budget is about $2000 for mechanical mods. $2000 for paint and graphics. $1000 for creature comforts. Money to be spent in that order. Box cost me $1000 bucks and Amblance donor was $4500.
Two good trannys and rears. Lots of wheels but not betting on old tires. Timed out mostly.
This rig will carry my Suzuki Samurai and Harley as well as serve as my camper. Lots of hills and hot weather. I need torque! I’ll need a tuner, just not sure which one.
Keep in mind this is my FIRST diesel project and I’m a babe in the woods, so be gentle and patient with me. Hell, half of the acronyms here have to be decoded!
So there you have it. My plan as it stands now.


ak diesel driver
6.5 driver
What diameter fan and how many blades does your cooling fan have?
Will L.
Well-Known Member
On the fuel tank situation if you can get by with one that is less expensive and less weight to haul. 30 gallons, estimate 10 mpg so 300 miles between fillups. If you do need both, I am adding the auxiliary tank with just the roll over breather valve and 1 line out to a factory lift pump to refill the main tank as I need it. Probably not going to even bother with fuel gauge. However my aux is not as big as the main. 2 the same size could bite you doing it my way if you aren’t watching close.
I LOVE stacks and they would be cool looking on your van. However I wouldn’t suggest it. Not for the rv use-
I say run the exhaust down the back & all the way out.
The oil cooler lines are a definate. If they fail the engine is toast. Either Leroy or a hydraulic hose shop near you.
Examine your up pipes for leaking and damage when you yank the turbo. They are known to fail easy and a pain to seal. If they are bad, ebay has some aftermarket ones that don’t have the accordion design and are thinker metal. Reports on those are good for flow and holding up better.
Iirc you said going db2. Not sure what you’ll need wastegate control wise from what you have. Vacuum control system when controlled with ds4 is better mpg. Home made mechanical wastegate, aka turbomaster is easy at home job. Leroy sells them too if $ allows.
What is the transmission control looing like?
The ip return line that is 1/4” about 6” long - get clear tubing from a hardware store and 2 new screw style clamps. You will have to replace the hose about every 3 years or so but worth the 5 minutes and $5. This allows you instant diagnostic from starting the first time on. The rest of the fuel line should be sae30r9 to deal wih modern diesel fuel. Do it now while easy to access. If you have to replace any solid line, stainless steel only. No nonferrous fittings.
A/C situation:
With the twin alternators and the roof mount rv a/c unit- idk if I would bother with the dash/ van a/c. I was a Mac Tools guy in Las Vegas heat in a non insulated big van. The dash a/c didn’t work because needed a charge when I bought it. I had the freon, gauges, etc and never bothered. Only the 13,500 btu units on the roof. WAY better than factory a/c.
I had an Onan Generator running them, interior lighting, my computer, etc. but it worked so well, I seriously tried a way to figure the rv roof a/c and a honda 2,000 now the eu2200 which was bumped specifically to run 1 rv unit for my Hummer.
If you could run that of an inverter and the twin alternators— to a couple group 31 semi batteries maybe something to think about.

