• Welcome to The Truck Stop! We see you haven't REGISTERED yet.

    Your truck knowledge is missing!
    • Registration is FREE , all we need is your birthday and email. (We don't share ANY data with ANYONE)
    • We have tons of knowledge here for your diesel truck!
    • Post your own topics and reply to existing threads to help others out!
    • NO ADS! The site is fully functional and ad free!
    CLICK HERE TO REGISTER!

    Problems registering? Click here to contact us!

    Already registered, but need a PASSWORD RESET? CLICK HERE TO RESET YOUR PASSWORD!

Help a Brother Out #2

I agree but the problem I'm going to run into is I don't own a power bleeder and from what I've been told it's pretty much necessary to not get any air in the ABS.
Tube in a bottle of brake fluid. Keep the reservior filled. It is a pia.

I have bled brakes backwards from the bleeder with an electric fuel pump and sucking out the reservior. Not sure if that works with these.
 
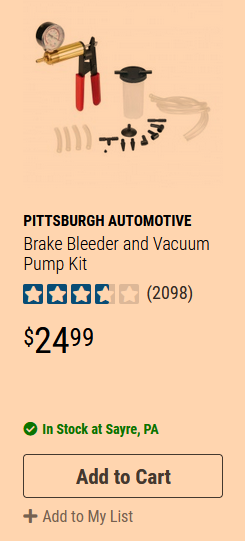
By "power bleeder", do you mean not doing the brake fluid by the gravity flow/pump the pedal while assistant opens and closes each bleeder method? If so, Harbor Freight has a relatively cheap hand-held vacuum pump (~$20) with a fluid reservoir (similar to a Mite-E-Vac, but ½ the cost) that makes a 1-person brake fluid change pretty easy as long as you keep the MC reservoir level above the ports at the bottom so you don't suck air into the brake system.
 
Plus, you now have a vacuum pump to check things like the wastegate pull off, wastegate solenoid and other vacuum-actuated systems on other vehicles (like some HVAC systems' blend door actuators, etc.).
 
Don't forget a new set of pads and shoes with that order. If you indeed had a leaking rear axle seal then the shoes on that side are gear oil contaminated and are shot. If you were having caliper lock-up issues, the pads have been well heated and are more than likely glazed. Also, a new set of the updated design caliper pins for each side would be a good idea, too. When you do the rears, take the adjusters and disassemble them and wire brush the begeebers out of the part that threads into the housing, use a shotgun cleaning kit brush to clean the inside of the adjuster and make sure you have any corrosion/brake dust gunk off of them so the parts are bright and shiny and check for any deep pitting of the adjuster screw threads from corrosion, then when you go to screw the adjuster back in, liberally apply anti-seize to the threads as you screw it back in, then wipe off the excess when it's bottomed out. This will keep the adjuster from hanging up. Also, don't forget a light schmeer/dab of high-temp moly grease where the brake shoes rest against the backing plate pivot dimple. Are you installing a new parking brake cable at this time, I can't remember if you cut the old one? If so, now's the time to do it and before installation, pull the cable out from the sheath as far as it goes, grease up the cable really well and move it in and out several times regreasing it each time. Do that at every end of the sheath. After install wipe off grease from the exposed cable with a clean rag/paper towel. This will not only greatly extend the life of the E-brake cable, but will make applying/releasing the E-brake much easier and smoother in the future.

I know, this is probably the umpteenth time you've probably changed out shoes/pads through this whole fiasco, but you should make sure that you have fresh friction material if your going through all of this if for nothing else, safety's sake.
 
Well, if you're going to all this trouble to correct your brake issues by firing the parts cannon, you might as well do it right the first time and eliminate all issues. It sure would suck to go through all of this and then have a caliper get hung up on a bent/corroded caliper pin, heat up, cook the brake fluid, glaze the pads and warp a rotor and there you'd be - right back where you started from with braking issues and ruined new parts.
 
Back
Top