• Welcome to The Truck Stop! We see you haven't REGISTERED yet.

    Your truck knowledge is missing!
    • Registration is FREE , all we need is your birthday and email. (We don't share ANY data with ANYONE)
    • We have tons of knowledge here for your diesel truck!
    • Post your own topics and reply to existing threads to help others out!
    • NO ADS! The site is fully functional and ad free!
    CLICK HERE TO REGISTER!

    Problems registering? Click here to contact us!

    Already registered, but need a PASSWORD RESET? CLICK HERE TO RESET YOUR PASSWORD!

HE351VE with functional VGT on 1997 6.5L

Yes you did mention you used the 2nd gen radiator with your intercooler, but I want to use the stock radiator. There are two coolant ports on my radiator not on the cummins one, and the transmission cooler, and I'm not sure how much the cooling system would like having two caps.
Yes the upper port is the steam line and the other is to the accumulator.....so it would be modify the CAC.
 
My plan is to cut the inlet off near the end tank, angle it upward to clear the lower radiator hose, then reattach.
That is the path of less resistance and in the end a good sized CAC for that beast.

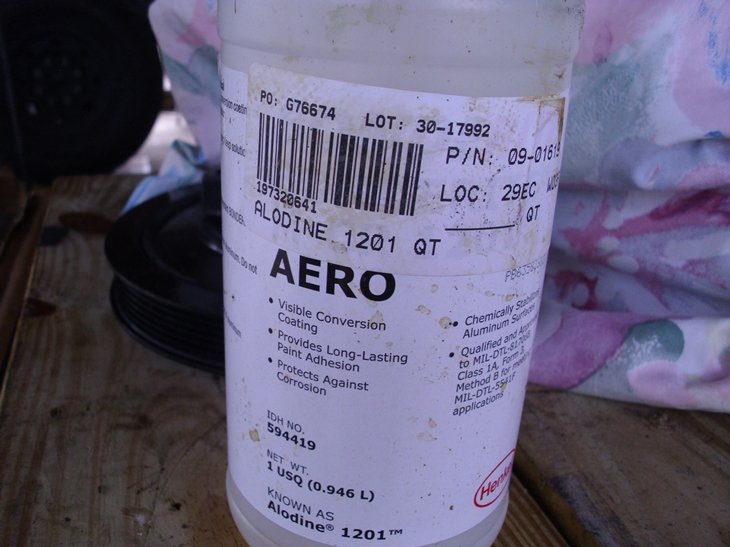
On another note Dodge had powder coated their CAC's not such a good idea from efficiency but beats back corrosion what I did with mine was to completely strip it then used aviation grade coating that eliminates corrosion then a light coat of paint however; the paint is not needed I just like black on my CAC bottom image is finished CAC.
DSCI0006.JPGDSCI0001.JPG
 
I have a couple of friends who've worked over at Duncan Aviation for 20+ years, one in the paint shop, the other in Install. They both swear by Alodine as a primer before painting. The one who works in Install did a frame-off restoration of his '70 340 Six-pack Challenger. After bead blasting the bare frame, he used Anoline on the frame and suspension as a primer before painting them and also used it on the underside of the body, floor pan, firewall, inner and out fender well surfaces and trunk floor before painting the body.

My buddy since High School who works in their paint shop put it simply, "Hey it sticks to 600 mph Citations (private jets, not Chevrolets) going through a rainstorm without coming off!"
 
I just hit some of the spots around the CAC with some black paint to cover them up. Maybe I'll strip it and cover it like you did, get some more efficiency and life out of it.

In theory, angling the inlet up should help with inner fender clearance as well, so maybe I will modify both sides so I dont have to trim inner fenders at all.
 
Make all the modifications to it first, then ship it to TSP for coating. 1/3 more heat rejection is no joke. Almost none of the racing teams put up their results for coating, ut one you can find on YouTube is an aluminum innercooler that 33% more is what they got on theres.

Since you are keeping your radiator the stock design, you could buy one of his radiators and just have it coated by him before he ships it.

I am doing my entire cooling stack. Want 1/3 “bigger” cac, radiator, a/c condensor, engine oil cooler and for me power steering cooler—coat it.

Compared to a can of spray paint, it is expensive. But paint hurts and coating helps at a literal unfair racing advantage. Thats why Nascar amongst other racing groups banned it. Stupid to ban it imo. That kind of innovation is exactly how racing can help the rest of the automotive world.
 
I have a couple of friends who've worked over at Duncan Aviation for 20+ years, one in the paint shop, the other in Install. They both swear by Alodine as a primer before painting. The one who works in Install did a frame-off restoration of his '70 340 Six-pack Challenger. After bead blasting the bare frame, he used Anoline on the frame and suspension as a primer before painting them and also used it on the underside of the body, floor pan, firewall, inner and out fender well surfaces and trunk floor before painting the body.

My buddy since High School who works in their paint shop put it simply, "Hey it sticks to 600 mph Citations (private jets, not Chevrolets) going through a rainstorm without coming off!"
I swear by it too.....
 
Just thinking here, how would things fit if you turned the cooler upside down, I'm not their looking at it but wouldn't there be more room with the outlets at the top?
 
Just thinking here, how would things fit if you turned the cooler upside down, I'm not their looking at it but wouldn't there be more room with the outlets at the top?

There would be a lot of room if I turned the CAC upside down, but then it will interfere with the headlights. I purchased LED marker lights to try to help them clear the CAC down low because they seem to be thinner than the stock housings, but I think I will still need to trim them a little bit.
 
If you have a fabricator good with aluminum a simple notch where needed wouldn't work and save the trouble tiring to cram so much piping towards the bottom?
 
If you have a fabricator good with aluminum a simple notch where needed wouldn't work and save the trouble tiring to cram so much piping towards the bottom?

Even with the inlet/outlet down low, I may still need to trim some off of the headlight adjuster brackets. By angling the inlet up, the radiator relief will give enough room to where lower radiator hose should fit. Trimming an inch or so from the end of the radiator hose as well should tuck the 90 degree turn in there nicely.
 
Even with the inlet/outlet down low, I may still need to trim some off of the headlight adjuster brackets. By angling the inlet up, the radiator relief will give enough room to where lower radiator hose should fit. Trimming an inch or so from the end of the radiator hose as well should tuck the 90 degree turn in there nicely.
Then perhaps run the pass/side CAC outlet forward and down then run that CAC pipe (oval perhaps) under the chassis rail then up into wheel well into wheel well housing to the intake "This how the between chassis CAC for the GMT400 series was routed and would save you lots of aggravation too."

Consider, using the 2nd gen Cummins radiator and install a nipple at the top of the pass/side just under the radiator cap then use a "Y" fitting to connect steam line and line from accumulator tank, as for the two cap issue find a cap for the 2nd gen that is higher PSI than accumulator tank cap.......
 
I came across a 5.9L radiator today for $40. Cheap enough not to pass up and see how it fits. If it works, I'll just have to replumb the transmission cooler to remove the stock radiator cooler from the circuit and figure out what to do with the coolant hoses.
 
I came across a 5.9L radiator today for $40. Cheap enough not to pass up and see how it fits. If it works, I'll just have to replumb the transmission cooler to remove the stock radiator cooler from the circuit and figure out what to do with the coolant hoses.
Ram Cummins uses a fluid to fluid heat exchanger to reduce torque converter heat and in colder regions it helps heat trans fluids then a transcooler on the right 1/4th to 1/3rd of radiator surface with the condensor residing on remaining radiator surface or use what you have.
Have a higher stall than peak torque rpm then the heat exchanger plumbed into cooling lines after fluid exits trans is required.
 
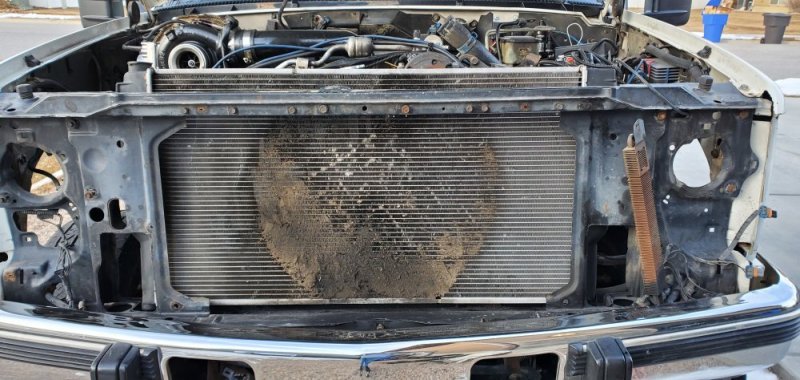
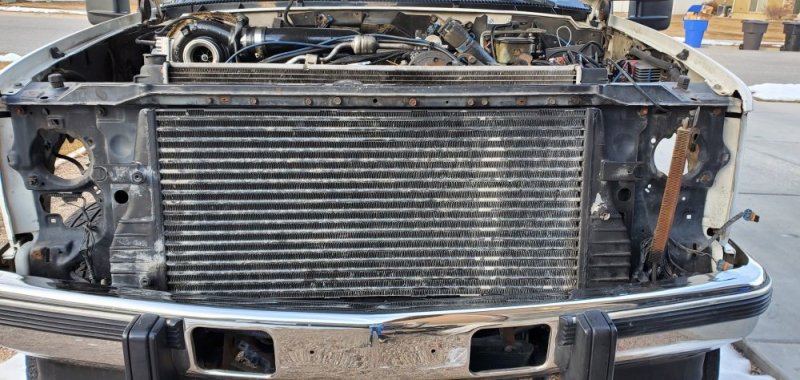
I started trimming and fitting for the Cummins radiator today, it's mostly in. It is slightly wider than the stock radiator, but still fits without major cutting. The intercooler inlet won't be a problem at all now. Need to drill holes in the bottom of the core support for the bottom rubber isolators, then notch the upper radiator brackets slightly and it will be secure.

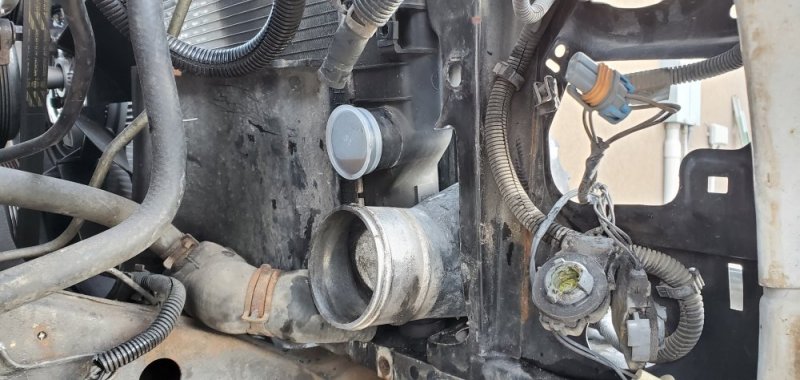
I'm going to drill and tap a hole for barb fitting for the heater core return and steam vent just below the neck in the end tank, and epoxy the hell out of it to seal, then redo the transmission cooler lines.
20200110_161328.jpg
20200110_161450.jpg
20200110_161500.jpg
 
I started trimming and fitting for the Cummins radiator today, it's mostly in. It is slightly wider than the stock radiator, but still fits without major cutting. The intercooler inlet won't be a problem at all now. Need to drill holes in the bottom of the core support for the bottom rubber isolators, then notch the upper radiator brackets slightly and it will be secure.

I'm going to drill and tap a hole for barb fitting for the heater core return and steam vent just below the neck in the end tank, and epoxy the hell out of it to seal, then redo the transmission cooler lines.
View attachment 59101
View attachment 59102
View attachment 59103
SEE: you are almost there and will like the results too.
 
Since it's snowing outside and I'm not that motivated to go out and work on anything, I'll summarize what I have done and what still needs to be done to make the 2nd gen (1994-2002) cummins radiator and intercooler fit in the 1997 K3500 core support:

1. Cutting out sections of the core support for radiator and intercooler fitment - cutting holes on both sides of the large center opening for the intercooler inlet and outlet, trimming back sheet metal on the top of the core support for radiator clearance. I don't have exact dimensions yet, but I'll will get them and detailed pictures before reassembly. I chose to cut the mounting flanges off of the side of the radiator instead of cutting out more of the core support. The upper radiator brackets look like they will work with the cummins radiator also, with some minor relief cuts for the end tank crimp. I can either drill holes in the bottom of the core support for the existing radiator insulators, or cut them off and try to use the stock rubber radiator saddles.

2. Radiator hoses and caps - upper hose works, no issues. The lower hose has an ID of 2.125", the Cummins lower radiator port is 2.25". I'm going to try to force it to work with the stock lower hose. There is no barb for the heater core return, so I'm going to attempt to add one by drilling and tapping a hole in the plastic end tank for the barb fitting, then slobbering epoxy all over it and hope it seals and holds pressure. There is also no steam vent barn for the hose back to the accumulator tank, so I may cap it off at the tank and delete the hose. There will also now be two radiator caps in the system, I think I'm going to find a high pressure rated cap for the radiator and forget about it. The accumulator tank is still the high point in the system, so it's best to fill from there.

3. Transmission cooler - my truck used both the internal radiator cooler and an external cooler behind the grill. I'm going to remove all of that, and replace it with 6AN hose and a larger aftermarket cooler, similar to what is done with the oil cooler hose upgrade.

4. Intercooler pipes - I'm going to buy a universal 3" intercooler kit and fab up the pipes from turbo to CAC, and CAC to intake. The CAC inlet and outlet are 3.5" OD, so reducing couplers will be needed, probably 45 degree ones. I have both down or front exit compressor housings, and I have a stubby upper intake from Quadstar. The rest is filling in the gaps with 3" tube.

5. Marker lights - the marker lights in the grill will need to be trimmed to clear the CAC end tanks. I purchased a set of LED lights because the seem to be more shallow than the stock marker light housings.

I wish I could make more progress, but it's all weather permitting right now. Here in about 4 weeks, I will get 6 weeks away from work for the birth of my third child, so all this may not be wrapped up until then. I still have to finish the battery relocation also, but I have everything ready for that.
 
Yep, that cold can bite hard congrats on the 3rd child.

I kept both batteries in place but had to modify the drivers side of the composite tray by trimmimg it so battery can slide closer to fender & well then smacked the inner fender well with hammer at the rear most area to get the battery too slide over towards drivers side more then I made a spacer about 1" wide to sit in the inner side of the tray to keep battery from sliding back and hitting radiator inlet.

On another note there are some crazy powerful batteries that fit either tray and would allow using just one instead of two.
 
Back
Top