• Welcome to The Truck Stop! We see you haven't REGISTERED yet.

    Your truck knowledge is missing!
    • Registration is FREE , all we need is your birthday and email. (We don't share ANY data with ANYONE)
    • We have tons of knowledge here for your diesel truck!
    • Post your own topics and reply to existing threads to help others out!
    • NO ADS! The site is fully functional and ad free!
    CLICK HERE TO REGISTER!

    Problems registering? Click here to contact us!

    Already registered, but need a PASSWORD RESET? CLICK HERE TO RESET YOUR PASSWORD!

Air Setup in the Shop, Finally!

Ed HD

Formerly: Dad's 05 LLY
Messages
3,152
Reaction score
363
Location
Chuck Town, Iowa
So we are finally getting around to plumbing our shop with compressed air, because this spring we bought a large compressor (~80 gallon tank, dual cylinder/stroke 7.5 HP compressor). We decided to go with a setup using polyurethane air tubing and push to connect fittings, due to the cost and ease of running. This whole setup is gonna cost $650-ish, metal pipe or other tubing would be expensive, and harder to cut/run/deal with, and the plastic isn't really affected by weather changes. I'll be sure to throw up pictures of the whole deal as we go.

The plan is to have 250' of tubing with 8 drops, 2 to reels, 6 to fittings inside the shop over benches and to key areas, 1 out front and 1 into the shed behind the shop, with valves to prevent freezing/exploding on the outside/shed ones. Tubing is 1/2" OD and will be run with 1/4 NPT fittings. We don't need any larger for our use. We are going to have to run the tubing into a small section of metal pipe at the end for the drops that don't go to reels, as the tubing and fittings won't be able to support the weight of a hose and quick connect fitting, no matter what kind of attachment we use on them. Metal pipe will be able to be firmly attached and hold the weight. Might look odd, but it should work great.

Tubing: http://www.lubromation.com/product.php?id=2434
 
I've got a recommendation for your new air system. Make an "air dryer" for your system, on the cheap.

Get an extra air tank, a 10 gallon tank from an old portable works good. Run the air line out from the new compressor straight up to the ceiling (the higher the better) and straight down into the extra tank. Then go back up to the ceiling again, then you can go to wherever you need from there. Just make sure the extra tank has a good drain on the bottom of the tank.

The first up line will keep a lot of the moisture in your compressor tank. Then the drop into the extra tank and back up to the ceiling will keep a lot of any remaining moisture in the extra tank. This is not as good as an air drier, but many times cheaper, and unless you require very dry air (cabinet shop, or?) should be more than adequate.

This does work quite well. One place where I worked (pallet shop) we were having a lot of moisture gumming up the nail guns. After this mod the moisture problems with the nail guns was almost totally gone. This was the wet side of Oregon (yes, I mean wet side) where winter rains put a lot of moisture everywhere, even in unheated buildings with several large roll-up doors like we had.

Don
 
This is just for mechanic stuff, probably not going to ever have a nail gun or anything on it, just impacts and ratchets. I think we're going to get a dessicant dryer for it. We have a small one now, but we will probably get a bigger one. I do appreciate the info, though.
 
We ran our air with 1" PEX tubing. And ran all drops with black pipe. Its not very traditional but is working good and was cheaper than other methods and safer than PVC.
 
I've got a recommendation for your new air system. Make an "air dryer" for your system, on the cheap.

Get an extra air tank, a 10 gallon tank from an old portable works good. Run the air line out from the new compressor straight up to the ceiling (the higher the better) and straight down into the extra tank. Then go back up to the ceiling again, then you can go to wherever you need from there. Just make sure the extra tank has a good drain on the bottom of the tank.

The first up line will keep a lot of the moisture in your compressor tank. Then the drop into the extra tank and back up to the ceiling will keep a lot of any remaining moisture in the extra tank. This is not as good as an air drier, but many times cheaper, and unless you require very dry air (cabinet shop, or?) should be more than adequate.

This does work quite well. One place where I worked (pallet shop) we were having a lot of moisture gumming up the nail guns. After this mod the moisture problems with the nail guns was almost totally gone. This was the wet side of Oregon (yes, I mean wet side) where winter rains put a lot of moisture everywhere, even in unheated buildings with several large roll-up doors like we had.

Don

That is a very interesting idea that I haven't seen before.

Any removal of moisture is good for any air tools, even "just" ratchets and impacts.
 
Ok, finally got the parts and got it installed.

FWIW, handcannon: The compresor came with a catch filter, so that's all taken care of. I just forgot about it, lol.

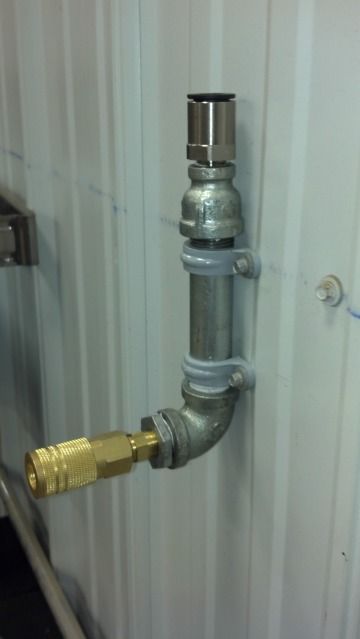
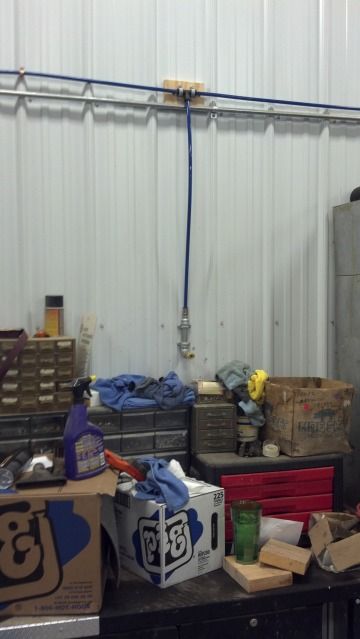
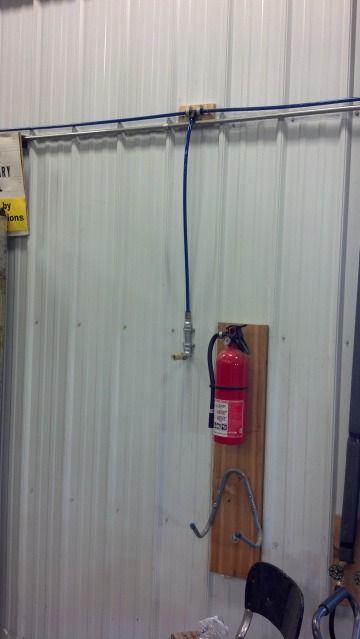
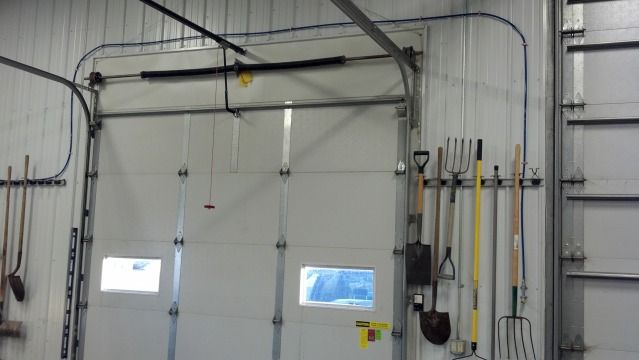
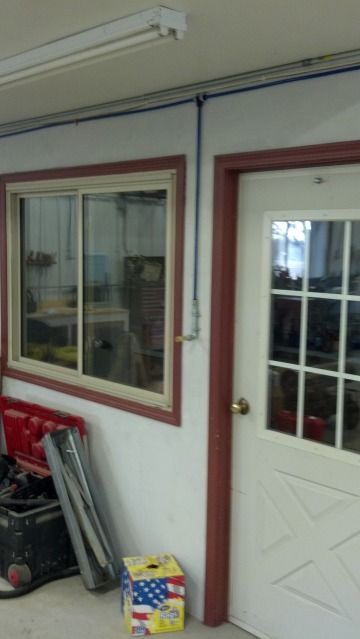
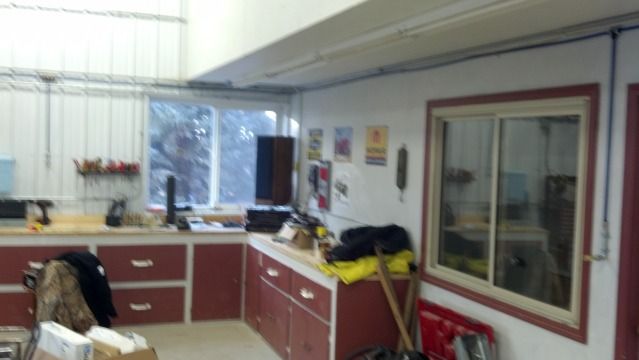
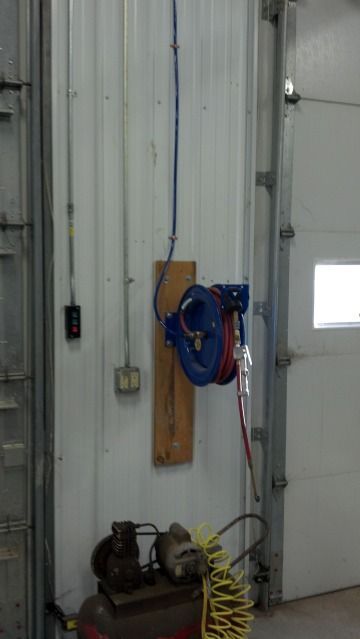
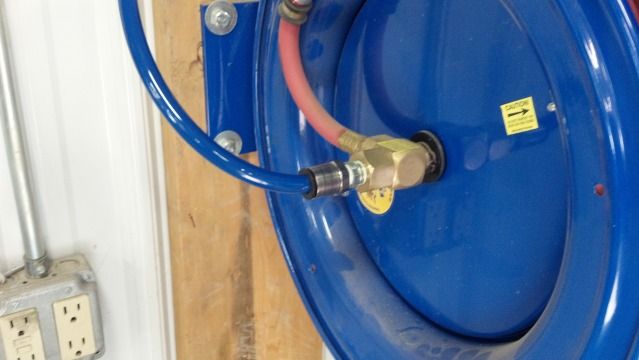
All the tubing is 1/2" outside diameter blue polyurethane, with matching push-to-lock t-fittings and tubing to 1/4" NPT adapters, which were plumbed into 1/2" steel pipe nipples with elbows that adapted to female "Milton" style quick-couplings. We have 8 drops, with one branch going from the compressor heading west, to 3 quick connect drops and terminating at the hose reel on the south wall, with the doors on it. The other branch heads down the east wall to 1 drop which leads into the back shed for access there for tools/tire filling, etc and then 4 drops, with the final terminating between the doors. That line will eventually host another reel that will be for access to the lift and that half of the shop.

This project went really well, other than having to find clamps that fit the tubing. Ended up having to get copper pipe straps, which worked perfectly. Took us about 5 hours to do, not including parts runs and lunch, lol. I am extremely pleased, this should serve us for a long time.

My only concern with the size of the tubing is that it could potentially hold back a very large impact or sandblaster, which would require us to probably run a larger line and 3/8" fittings anyways, which would be a ways off no matter what.

Enough blabbering, pics!
Close up of the end section of the "drops:
2012-02-24_18-21-21_669.jpg

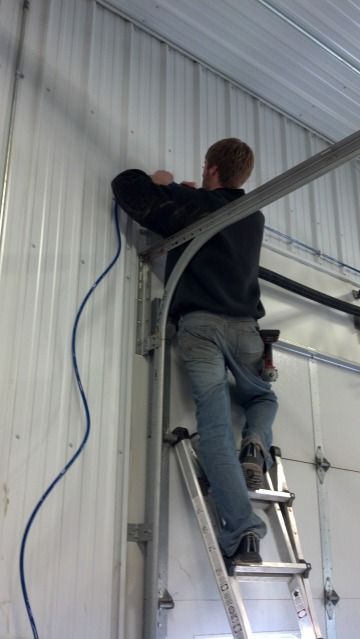
My Buddy Chad on the ladder, running the line over the door:
2012-02-25_11-35-30_930.jpg

Phone camera doesn't do panoramic shots well, will probably get some better pictures tomorrow, but you get the idea, they're strategically placed everywhere:
2012-02-25_16-36-56_753.jpg

2012-02-25_16-37-38_499.jpg

2012-02-25_16-37-57_502.jpg

2012-02-25_16-39-11_43.jpg

2012-02-25_16-39-05_447.jpg

2012-02-25_16-40-17_141.jpg

2012-02-25_16-40-27_584.jpg

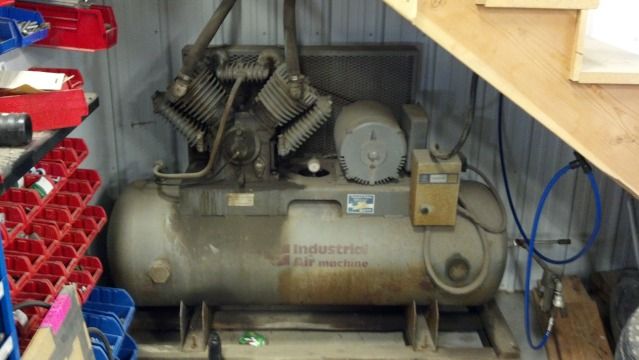
The compressor that makes this all work, a 7.5 HP Industrial Air compresor with a 2-stage, 2 cylinder compressor pump and 88 gallon body. This compressor can and will shut off while sandblasting.
2012-02-25_16-38-48_847.jpg


Overall it works great. Once we got the few leaks figured out (one loose fitting, and we had to space the T's off the wall to allow the lines to fit tight) it's quiet and awesome. The best part is it's expandable and super easy to see, work on and fix.
 
Back
Top