• Welcome to The Truck Stop! We see you haven't REGISTERED yet.

    Your truck knowledge is missing!
    • Registration is FREE , all we need is your birthday and email. (We don't share ANY data with ANYONE)
    • We have tons of knowledge here for your diesel truck!
    • Post your own topics and reply to existing threads to help others out!
    • NO ADS! The site is fully functional and ad free!
    CLICK HERE TO REGISTER!

    Problems registering? Click here to contact us!

    Already registered, but need a PASSWORD RESET? CLICK HERE TO RESET YOUR PASSWORD!
Where'd you buy it?

Shark skin underlayment

We used SharkSkin Ultra SA and purchased from a local place in the city (Superior Roof Metals in San Jose, CA). Its heavily used by those going with metal roofs, but it is fully compatible with any roof material (metal, comp, etc). We used a combination of rolled comp on the front and back deck (2/12 pitch) and comp shingles over the 15/12 pitch. Ran sharkskin under all of it.
 
Last edited:
I need something to hide the rust on our Jeep
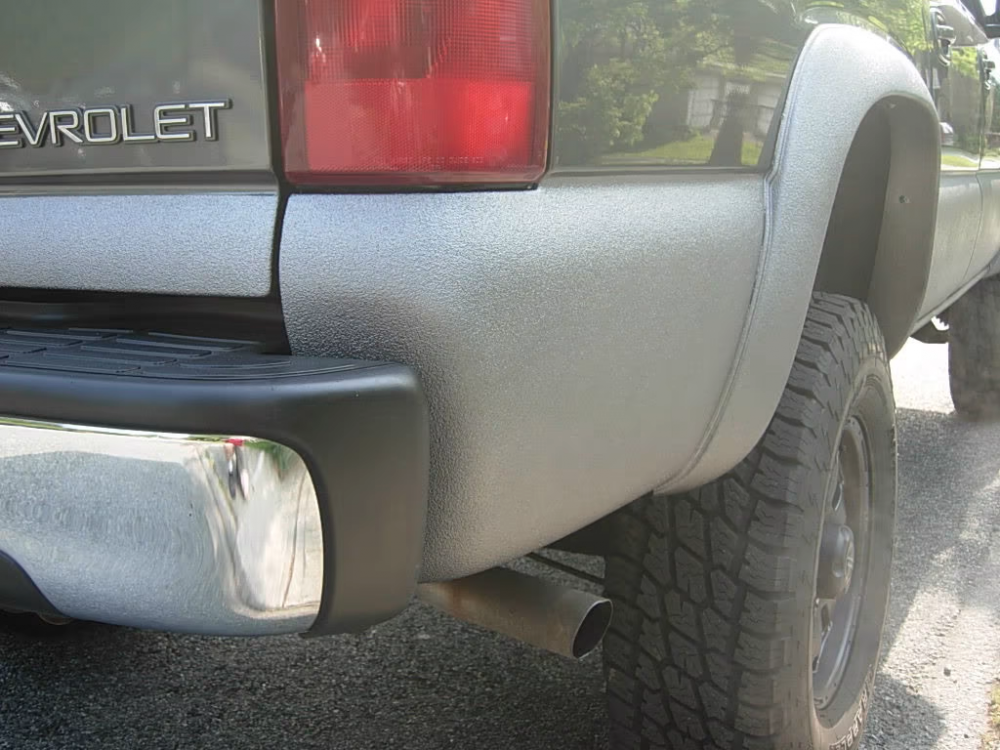
Line-x is pretty expensive. Its great for keeping it from rusting, not sure how it would do over rust. Might look at something a bit cheaper. Although maybe the linex will hold it together when the rust eats all the metal away :happy:

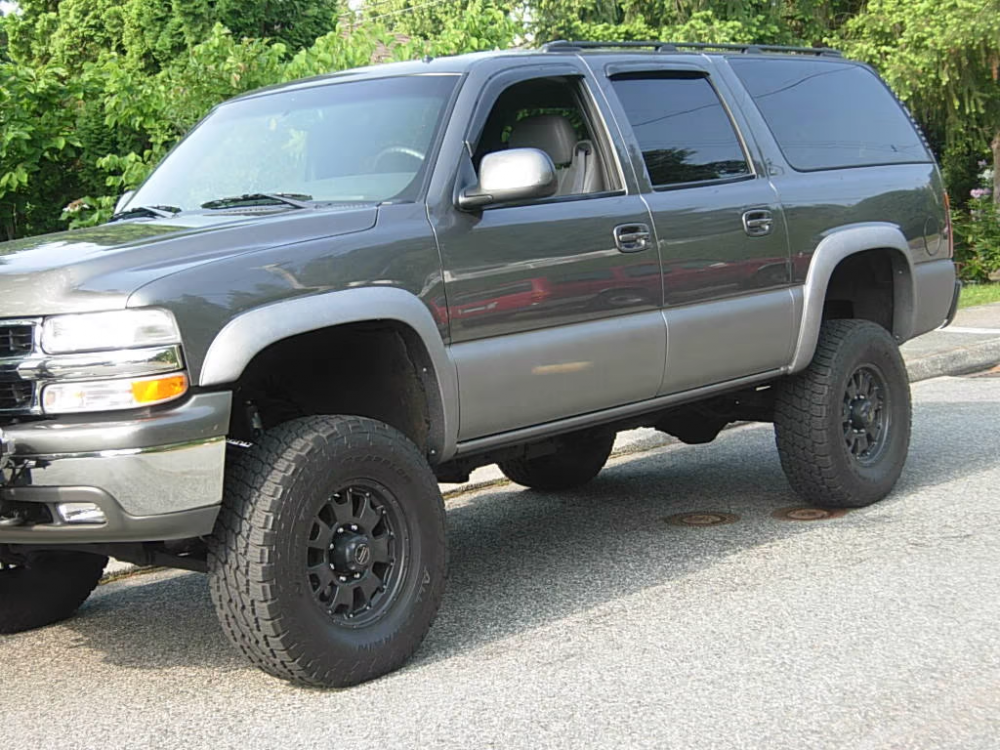
Btw, this guy got my attention recently. Not planning on two tone necessarily and they newer armor coating looks even smoother than this one.

1660176945797.png
1660176963909.png
 
I been trying to get ahold of a guy in vegas and have him send me pics of his bronco. He did rhino line. It was a rust bucket. He built a tube frame and all suspension is new and amazing. But the body looks like Swiss cheese.
He had his f250 done on the lower part similar to above pic. He came down to that shop in his bronco to see how it was going & the owner talked him into doing the bronco.

He seriously put duct tape over the back of the holes. He shot a little at first to fill in the holes during a different project, then used a grinder to get it to normal shape. Then shot the whole thing. It turned out amazingly well. There is a couple little spots that aren’t perfect but nothing like the shotgun target it used to be.

I keep considering doing my Hummer, but the other Hummer guys keep saying not to because the value of hummers becoming collectors is going up and that will lower it.
I like the look, and it is perfect for off-road. No scratches, stops small dents. The only drawback is if you ever have to remove it- it is much harder than paint.

I have seen several of the diy ones around here- DONT DO IT. 1/4 time it comes out bad right from the beginning, or It is good new then a couple years later is horrible. Maybe 3/10 diy turns out ok a few years later. Either Rhinoline or LineX done by a pro.
A friend and an excellent body man, paint is perfect.
He wanted a Dodge one ton dually crew cab. Dodge did not make a CC back then so He took two regular cabs abd built him one.
He used some kind of a rhino liner material and did it in red with yellow flames. Man that thing looked nice.
I seen it a month or so ago. The liner material had faded and the flames were totally faded out.
He loaded this truck down with fire fighting equipment and is a member of the local volunteer firefighters association. He is always ready to go and is always first on the line to fight a fire.
His old home made CC Dodge diesel might look like crap but it never fails him.
 
I been trying to get ahold of a guy in vegas and have him send me pics of his bronco. He did rhino line. It was a rust bucket. He built a tube frame and all suspension is new and amazing. But the body looks like Swiss cheese.
He had his f250 done on the lower part similar to above pic. He came down to that shop in his bronco to see how it was going & the owner talked him into doing the bronco.

He seriously put duct tape over the back of the holes. He shot a little at first to fill in the holes during a different project, then used a grinder to get it to normal shape. Then shot the whole thing. It turned out amazingly well. There is a couple little spots that aren’t perfect but nothing like the shotgun target it used to be.

I keep considering doing my Hummer, but the other Hummer guys keep saying not to because the value of hummers becoming collectors is going up and that will lower it.
I like the look, and it is perfect for off-road. No scratches, stops small dents. The only drawback is if you ever have to remove it- it is much harder than paint.

I have seen several of the diy ones around here- DONT DO IT. 1/4 time it comes out bad right from the beginning, or It is good new then a couple years later is horrible. Maybe 3/10 diy turns out ok a few years later. Either Rhinoline or LineX done by a pro.
How would I find a place to do it?
Any idea on cost?
 
Search for “installers” in your area. The price is why so many try diy. 1.25 times price of a paint job here.

This is a -because you are willing to invest- not to save money.
Sounds like more than I'd be willing to invest.
I got a price of $1500 just to fix and paint the roof several years ago.

I've seen rust free Jeeps that needed my drivetrain. For as low as $100. But I can't make the swap and wouldn't have a clue on hiring anyone. I'd have no more success at that than fixing the Tahoe or the truck. Or most anything else around here.
Get the book and a set of basic hand tools. It is all nuts and bolts.
Figure the matter with the components of the good body. Engine, transmission, etc. swap over those components from Your unit.
See how it runs and drives from there. Might not need to go any farther.
If it does okay then pull your components from the rusted hulk and stow them, differentials, T-Case, etc and have spare parts for years to come.
It's not that
I just can't do much. Time is very limited and I have to pick and choose what I try to get done.

If I could hire some things done, I would.
 
It's not that
I just can't do much. Time is very limited and I have to pick and choose what I try to get done.

If I could hire some things done, I would.
We need to start a truckstop commune. Take several of us thats retired, travel around the country, using what time it takes to help out members. Get their vehicles in shape and running, or scrapped if its too bad, packing the components removed from the real bad ones for donor parts for something on down the road.
Maybe even pull or pack along a camper for living quarters. Camp out, fish along the way, snare a squirrel or ten to keep the bean pot supplied.
Get a person up and run ing and move on to the next person.
Rotate off members while traveling so that no one gets tired of hanging out with a couple of other people.
I would not be much good for anything right now but in about ten months to a year I could rip some @s.
 
Get the book and a set of basic hand tools. It is all nuts and bolts.
Figure the matter with the components of the good body. Engine, transmission, etc. swap over those components from Your unit.
See how it runs and drives from there. Might not need to go any farther.
If it does okay then pull your components from the rusted hulk and stow them, differentials, T-Case, etc and have spare parts for years to come.
I'm willing to hire things done, I just don't have much luck with that.

I thought I had somebody hired to replace the header over the west toolshed door, but it still needs to be replaced.
 
this is Gonna be long.....

So a bit of an update. Started a few projects that I've been eyeing and working through in my head the past year or two.
Since the current OnStar VCIM is gonna be completely defunct this month, I decided to do something with the onstar hardware in the truck. Recently read an article about people swapping the VCIM from a 2008-2009 traiblazer to get built in bluetooth phone call functionality with the factory stereo/hardware. After looking into it more I found that a VCIM from 2010 C6 Corvettes should also work, same Class 2 data, but has bluetooth functionality added. I pulled my VCIM and swapped in the C6 module. At first it didnt seem happy (onstar error on stereo display) but I hooked up the tech2 to see if I could do anything to fix it. connected it and didnt see much other than it could read the data from the vcim. Disconnected tech 2 restarted the truck and it started working. was able to pair my iphone and it functions with the factory steering wheel and mirror buttons. Cool.

Next I wanted to figure out bluetooth music/audio. I had been using a Dual Aux input unit from iSimple for quite some time with a headphone jack plugged into my phone. add the charging cable for my phone with the iphone adapter for lightning because they got rid of the headphone jack on the phone it became a mess of cables that I got tired of really quick. So, I found a USB powered bluetooth audio receiver by AudioEngine (B1). I was able to stuff this under the cup holders in the center console and connect the output from the this box to the input on the isimple aux box and put a 4 circuit fuse box under the cup holders as well thats powered from the SEO upfitter plugs under the dash that is powered up with ignition in Acc/Run. so now I have a magnetic phone holder that holds and charges my phone, bluetooth audio for music through the AudioEngine B1, and bluetooth phone calls through the Corvette Onstar VCIM module. I feel like I moved into the year 2010.

While I was at it, I hardwired my dash cam to the same ignition switched fuse block under the cup holders. I'm loving the clean stock look but having the full functionality.

After that I started work on getting a "house" battery setup for the ARB fridge that I keep in the back cargo area. I originally planned to add the GMC savanna van battery tray under the passenger floorboard along the frame rail, but the more I thought about it, I wasnt too thrilled with having a battery that low on the chassis in the event I need to traverse water or hit some flooded roadway, etc. So I remembered that in 2003 GM moved the factory bose sub from the right rear cargo area to under the center console. This opened up some space behind the side trim panel in the right rear corner of the cargo area. So I got in there and started measuring and figured out that I can fit a 100ah Battleborn lithium battery in there as well as a 50 amp Redarc DC to DC charger and associated fuses/breakers etc to connect the fridge and a battery monitor shunt. I learned alot about this stuff when I upgraded the batteries and electrical on our travel trailer last year. I decided to use a marine solenoid under the hood to trigger with ignition on to connect the DC to DC charger which will then charge/isolate the "house" battery in the rear cargo space and keep it completely separate from the trucks stock electrical system. I'm still tidying up the rear area and finishing mounting a few things, but once I do I'll get some pics up of that.

one other things I'm hoping to do is add a 2nd stock alternator in factory form to have dual alternators controlled via the ECM as it is done from the factory.

I think the final thing is to finally install my high idle switch that I bought for the dually that never got installed. So that will be nice. I'll update with some more pics when I get them. but here's a few for now.

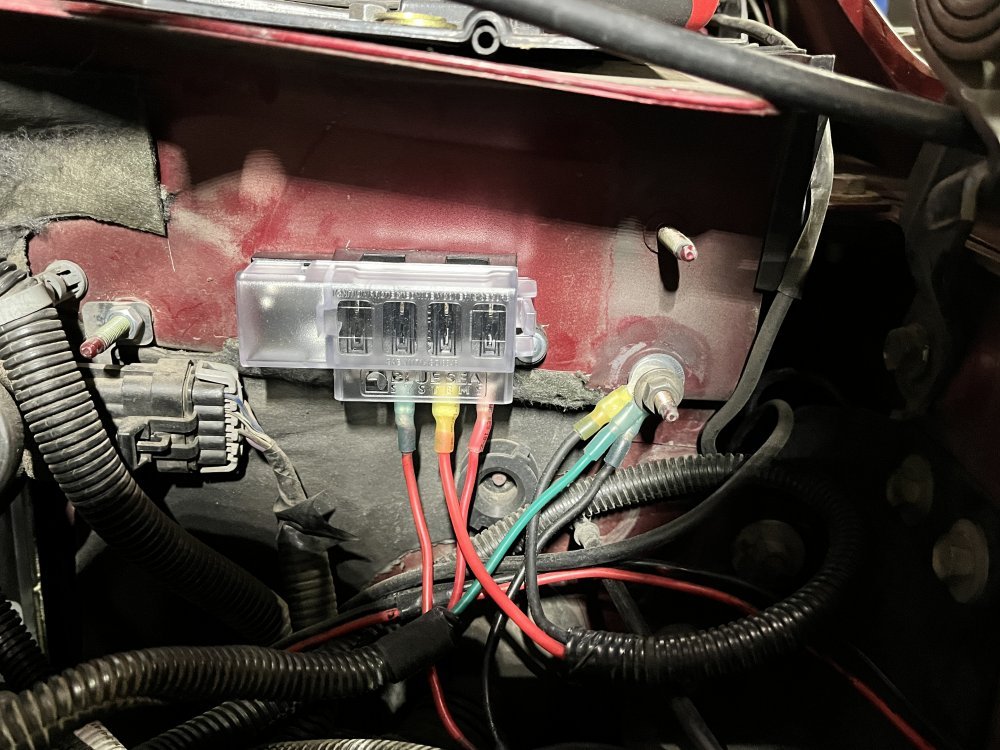
New fuse box and ground stud under hood (hot at all times). Currently used for 2m radio, AMP steps controller, and power feed to FASS lift pump relay:
IMG_0054.JPG

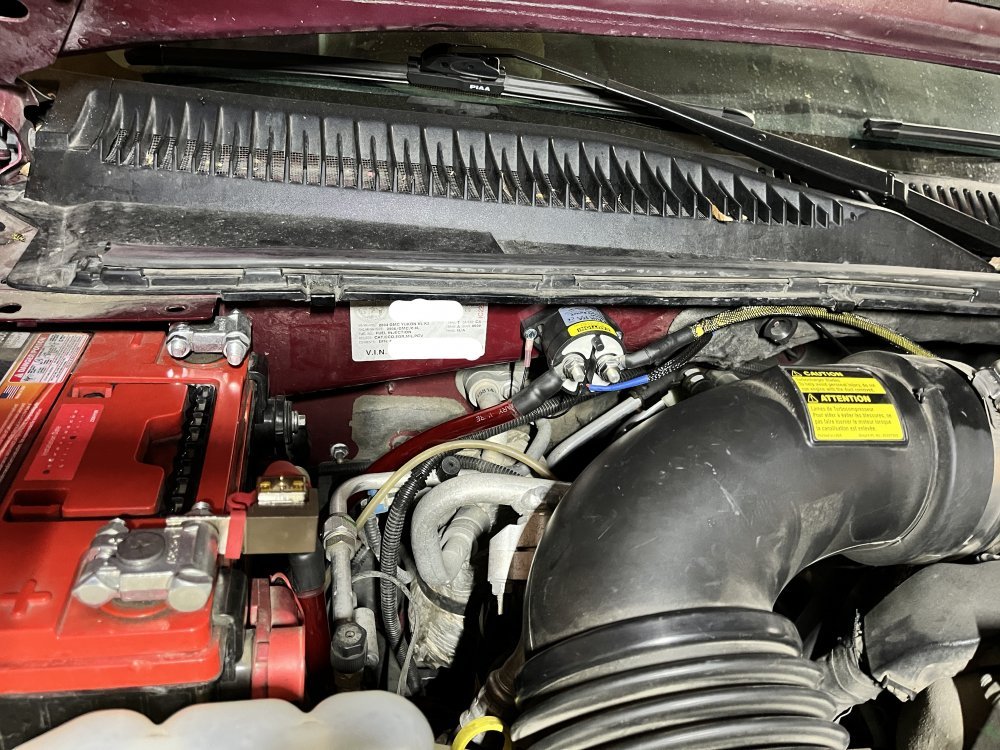
New solenoid controlled by SEO connection to trigger when ignition is in RUN/Crank. This sends power to the rear DC to DC charger via a 2awg cable:
IMG_0175_clean.jpg


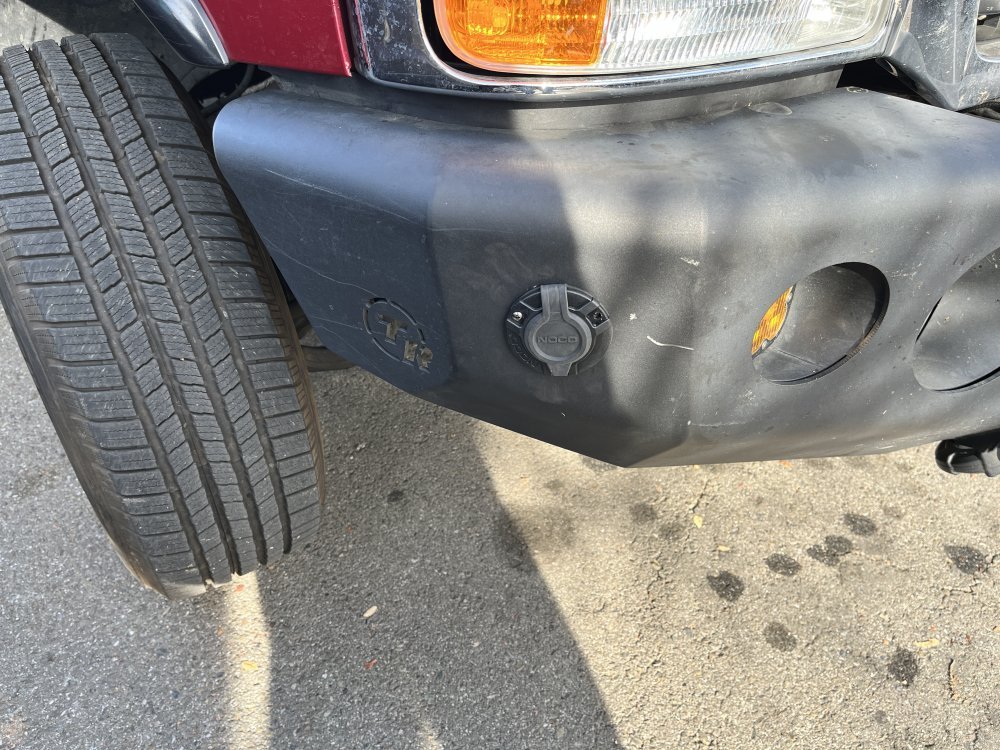
Noco bumper plug to connect onboard charger maintainer for truck start batteries, a 12v power supply to allow DC to DC charger to charger/maintain the "house" battery in back, as well as the engine block heater (with a switch) for when its needed in cold weather. All conveniently connected with a single extension cord connection without popping the hood:
69074593654__95E411DD-0FE0-4157-85BF-95F236E7EB81.JPG

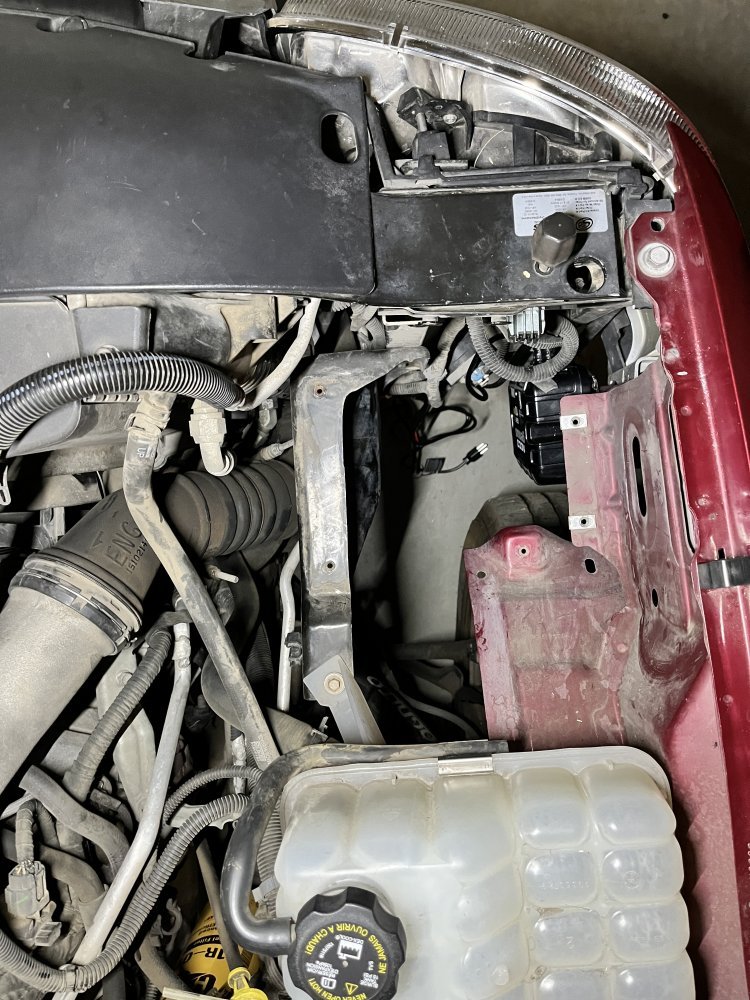
Both the Noco onboard charger and power supply for the rear DC to DC charger are mounted under the air box in front of the front passenger wheel well. Both are IP68 rated and fully submersible by Noco:
IMG_0095.JPG

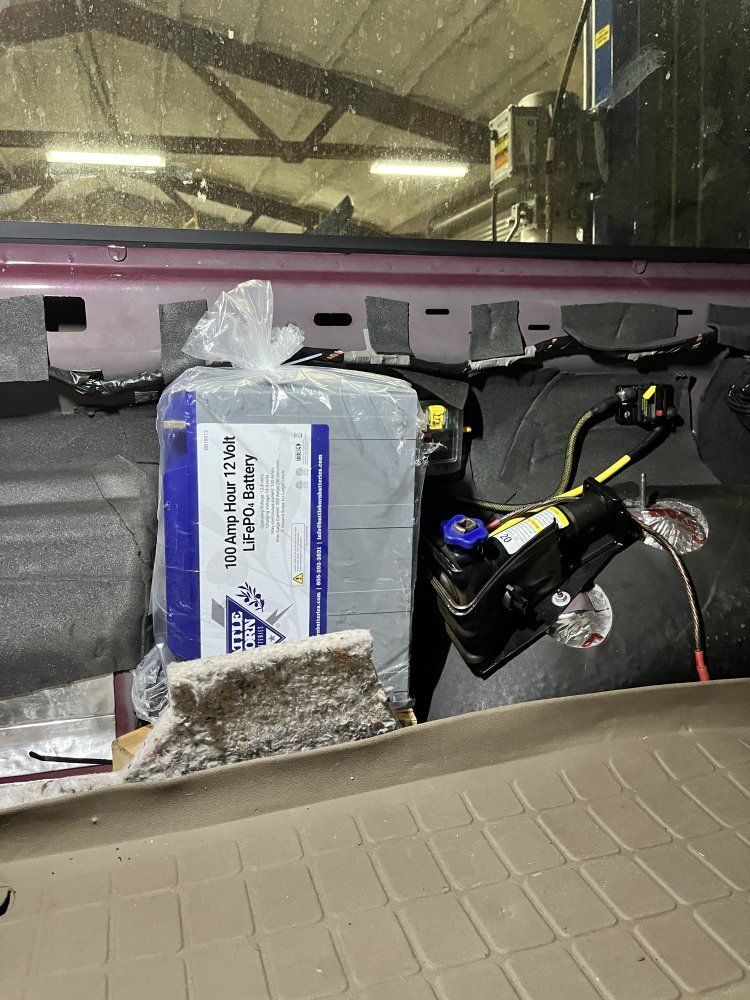
Test fitting the battery in the rear space behind the side trim panel. The goal is to keep it all hidden and out of the way of the rear cargo area:
IMG_0175.JPG


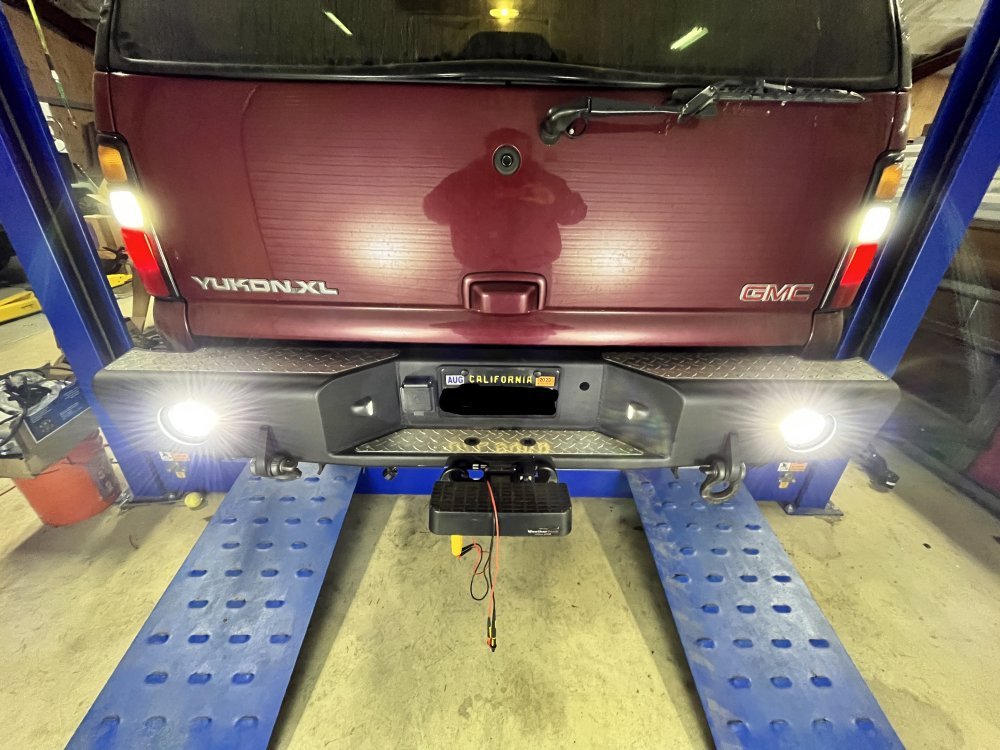
oh and almost forgot, I finally got my rear bumper reverse lights wired:
reverse_lights.jpg

Thats all for now. I'll have some more pics in the next week.
 
Back
Top