• Welcome to The Truck Stop! We see you haven't REGISTERED yet.

    Your truck knowledge is missing!
    • Registration is FREE , all we need is your birthday and email. (We don't share ANY data with ANYONE)
    • We have tons of knowledge here for your diesel truck!
    • Post your own topics and reply to existing threads to help others out!
    • NO ADS! The site is fully functional and ad free!
    CLICK HERE TO REGISTER!

    Problems registering? Click here to contact us!

    Already registered, but need a PASSWORD RESET? CLICK HERE TO RESET YOUR PASSWORD!

1989 R1500 Suburban w/rear AC Orifice Size

Bubba Blaster

Member
Messages
11
Reaction score
28
Hi there,

Seeing various answers regarding the orifice tube size recommended for the older squarebody suburbans with rear AC when doing a R134a conversion. I purchased a .067" but haven't installed yet and am seeing @THEFERMANATOR, who I greatly respect, now recommend a .062". Is it worth ditching the .067" that I have and ordering that one? This is the family hauler and live in OK so I need COLD AC.

I am doing a fully stock R1500, replacing with new 4 Seasons R4 compressor (I know), parallel flow condenser, accumulator, TXV (newer design as recommended), high side pressure switch, adding a 14" pusher condenser fan to the driver side, leaving the stock mechanical radiator fan in place but replacing the HD clutch with a new one.

Thanks!
 
Yes I would go for the smaller orifice since swapping refrigerant.

Now let me spend your money and help on the ac a bit…
Check with @Twisted Steel Performance on if he can do the TLTD Techline coating on your condenser and evaporator(s). He (no one can) can’t guarantee the improvement level- but all the independent testing I have seen people do with it gets from 30% to 35% better efficiency of heat dispersion.

If he can't then call Techline and find an applicator near you. The TLTD is a kiln cure only product and works better than the newer air cure they made. But having the air cure is still gonna increase by around 30% heat transfer.

All your charge pressures, volumes, etc. remains the same - but it basically is like having 1/3 more sized coils- and that is serious improvements.

Im in Vegas- had a couple rigs done before like my 69 Camaro. The difference was quite noticeable.
Part of the work I am having done while my hummer is all ripped apart- my entire cooling stack will be done.
 
Hi there,

Seeing various answers regarding the orifice tube size recommended for the older squarebody suburbans with rear AC when doing a R134a conversion. I purchased a .067" but haven't installed yet and am seeing @THEFERMANATOR, who I greatly respect, now recommend a .062". Is it worth ditching the .067" that I have and ordering that one? This is the family hauler and live in OK so I need COLD AC.

I am doing a fully stock R1500, replacing with new 4 Seasons R4 compressor (I know), parallel flow condenser, accumulator, TXV (newer design as recommended), high side pressure switch, adding a 14" pusher condenser fan to the driver side, leaving the stock mechanical radiator fan in place but replacing the HD clutch with a new one.

Thanks!
Have You recently had contact with @THEFERMANATOR
If so how is He doing ?
Sure miss Him in here.
 
Thanks Will L. - bummer I already painted the condenser.

I have not been in contact with him, just read his posts in various threads on the subject. I'm hoping he'll chime in here! His latest post recommends the .062 but has recommended the .067 previously, so being my first time with this and having a .067 on hand I'm curious as to his thoughts - especially since I'm running the R4 compressor and don't want to give it too much head pressure by going too small an orifice.
 
Doesn’t matter about already painted- they come new that way. They have to get etched (micro sand blasted) for the proper texture to be coated.
With everything already together- run what ya have but know that if you take the time to rip them out and coat them- it will improve it a lot.
If you’re old enough to remember the magic of how r12 felt vs 134a- it is exactly that thermal difference…
We haven’t seen thefermanator here in a little while-
Hoping he is doing okay. He is one of our local superstars for a lot of info. Not to mention just a really cool guy.
 
Is @WarWagon still around? Still trying to decide on a final word on .067' (blue) vs .062 (red) to use in a square body suburban with rear AC.

I hear higher head pressures on the R4 compressors are at least something to keep in mind if going all the way down to .062", but otherwise gives slightly colder temps at idle. The .067" does a little better on highway than the .062" supposedly, but I don't know. An old time mechanic friend who runs a shop said to try the .067" first to see how it goes. Am I splitting hairs?
 
Honestly, I'm leaning on the side of the .067", to be the nicest I can be to the R4. Someone tell me I'm being way too OCD and need to just throw a .062" in it like good ol' @THEFERMANATOR recommends!
GM switched to a .062 in 96 after all the compressor failures running r-134 in dual air units. I have one in mine now and it does the job.
 
OK @THEFERMANATOR, another question for you. In the past you mention changing out the TXV to the newer style - I bought one for a 96 suburban and discovered the threaded fittings are not the same - this is true for 94 and up till at least 99. Also the capillary tube/probe doesn't have the coil at the end and isn't long enough to reach the main inlet manifold tube the previous one was attached to.

Can you advise on which expansion valve fits and the best place to attach that copper probe?

Thanks!
GM used sae threads on R12 vehicles and metric on r134 so you couldn't intermix parts. There was an updated txv for 94/95 suv's to deal with liquid slugging in the rear ac. I don't know of any updated valves for r12 units. The slugging problem only happens when you run the ac with the rear blower fan off. So long as you make certain to keep the blower fan on whenever the ac is running, you're good.
 
GM used sae threads on R12 vehicles and metric on r134 so you couldn't intermix parts. There was an updated txv for 94/95 suv's to deal with liquid slugging in the rear ac. I don't know of any updated valves for r12 units. The slugging problem only happens when you run the ac with the rear blower fan off. So long as you make certain to keep the blower fan on whenever the ac is running, you're good.
Dang Man, You sure know a LOT OF STUFF ! ! ! !
Happy to see You jumping in from time to time and posting answers.
 
Thanks for the reply Ferm, I really appreciate it!

I ended up going back to using a new TXV correct for that vehicle, and took the coiled probe and mounted on the evaporator outlet manifold, in a vertical orientation with the probe pointing down as required. I used two pipe clamps to get it good and mounted tight and then insulated in pipe insulation.

As far as the rest of the AC conversion, I was going to put the .062" GM orifice tube in as you recommended, but it is slightly different in build and didn't fit (and this is with the orifice tube going in the bottom inlet port of the evaporator). I had the 0.67" Ford blue tube on hand, so I ended up using that.

I mounted an updated parallel flow condenser that RockAuto listed for this vehicle (had to modify the mounts since it is not nearly as wide as the original condenser, but that wasn't too bad). I then put in a 14-in pusher fan and mounted on the right side of the condenser (looking at the vehicle from the front). I had to create my own mounts using brackets and 1/4" thick rubber washers. This worked out really solid, but since the fan is so big it couldn't mount flush to the condenser, which I found out with an inch and a half of space between the two, I'm losing a lot of air flow out to the sides. Someday I might go back and get too small fans and mount on opposite corners of the condenser (top right and bottom left) that can mount flush. I then used a relay powered by the hot wire to the low pressure cutoff switch. By doing this it was a real easy wire to get to and turns the fan on whenever the AC is called for.

I flushed and flushed and flushed some more, buttoned everything up using new O rings coated in PAG 150, then I put 10 oz of PAG 150 oil in, after dumping what came in the compressor. I put half in the compressor, 3 oz in the accumulator, and the rest in the evaporator inlet. I then evacuated using a friend's vacuum pump for two or three hours. I let it sit for 3 days and it didn't drop vacuum at all (I I would have vacuumed down for an hour and let it sit for an hour to check for leaks, but this is just how it worked out in my schedule).

An interesting tidbit I learned with the accumulator. I didn't hear a whoosh or sound of pressure or vacuum loss when cracking open the new accumulator, which made me concerned that maybe the accumulator seal had been broken and could be bad. I contacted Four Seasons, who said that it's fine because the decadent material doesn't activate until oil gets in it. Very interesting. Not sure if this applies to all accumulator brands these days or not.

I charged the system on an 88 degree day, following the directions on the r134a cans from Walmart. The vacuum within the system or the pressure from the can got the compressor going without me needing to adjust or jump the low pressure cutoff switch. Since mine is the original adjustable r12 switch, I adjusted it down to 28 lbs. Just to keep the compressor going while I filled it. I ended up leaving it there as it worked out to be perfect that way. The key here was being very patient while waiting to empty each can, every once in a while wetting down the condenser with a hose, which brought the pressures down quite a bit (shake the system up to see where it settles basically). I did this while keeping the engine at idle. By being patient and slow, I was able to empty each can and watch the pressures stabilize and always know where I was on the high and low sides. After 4x 12 ounce cans, both inlet and outlet sides of the evaporator got cold and sweaty and the system didn't really want to change much as I continued to charge so I stopped there. Ended up at about 35-40 psi on the low side and 225-250 psi on the high side right within the range called for by the AC charts I looked up. Might be a tad on the low side, but I didn't want to push it since this was my first time. With windows all closed other than the driver's window AC set on max with the rear fan on high, temps taken from the middle vent were 48° at idle. Driving down the road they will hit 42° and that is just too cold! You can't hear the fan from the inside, and the new Four Seasons R4 compressor isn't too bad of a drag on the engine.

I am very happy with the outcome and so is the family, as it is now our daily driver.

Thanks again for your time and expertise! I plan on selling my other assorted vehicles and getting down to two '80s suburbans for this seven member family of mine. Life is too short to not drive something with character that carries with it a bygone era that I and the wife appreciate the heritage of.
 

Attachments

  • IMG20231001132311.jpg
    IMG20231001132311.jpg
    130 KB · Views: 1
Thanks for the reply Ferm, I really appreciate it!

I ended up going back to using a new TXV correct for that vehicle, and took the coiled probe and mounted on the evaporator outlet manifold, in a vertical orientation with the probe pointing down as required. I used two pipe clamps to get it good and mounted tight and then insulated in pipe insulation.

As far as the rest of the AC conversion, I was going to put the .062" GM orifice tube in as you recommended, but it is slightly different in build and didn't fit (and this is with the orifice tube going in the bottom inlet port of the evaporator). I had the 0.67" Ford blue tube on hand, so I ended up using that.

I mounted an updated parallel flow condenser that RockAuto listed for this vehicle (had to modify the mounts since it is not nearly as wide as the original condenser, but that wasn't too bad). I then put in a 14-in pusher fan and mounted on the right side of the condenser (looking at the vehicle from the front). I had to create my own mounts using brackets and 1/4" thick rubber washers. This worked out really solid, but since the fan is so big it couldn't mount flush to the condenser, which I found out with an inch and a half of space between the two, I'm losing a lot of air flow out to the sides. Someday I might go back and get too small fans and mount on opposite corners of the condenser (top right and bottom left) that can mount flush. I then used a relay powered by the hot wire to the low pressure cutoff switch. By doing this it was a real easy wire to get to and turns the fan on whenever the AC is called for.

I flushed and flushed and flushed some more, buttoned everything up using new O rings coated in PAG 150, then I put 10 oz of PAG 150 oil in, after dumping what came in the compressor. I put half in the compressor, 3 oz in the accumulator, and the rest in the evaporator inlet. I then evacuated using a friend's vacuum pump for two or three hours. I let it sit for 3 days and it didn't drop vacuum at all (I I would have vacuumed down for an hour and let it sit for an hour to check for leaks, but this is just how it worked out in my schedule).

An interesting tidbit I learned with the accumulator. I didn't hear a whoosh or sound of pressure or vacuum loss when cracking open the new accumulator, which made me concerned that maybe the accumulator seal had been broken and could be bad. I contacted Four Seasons, who said that it's fine because the decadent material doesn't activate until oil gets in it. Very interesting. Not sure if this applies to all accumulator brands these days or not.

I charged the system on an 88 degree day, following the directions on the r134a cans from Walmart. The vacuum within the system or the pressure from the can got the compressor going without me needing to adjust or jump the low pressure cutoff switch. Since mine is the original adjustable r12 switch, I adjusted it down to 28 lbs. Just to keep the compressor going while I filled it. I ended up leaving it there as it worked out to be perfect that way. The key here was being very patient while waiting to empty each can, every once in a while wetting down the condenser with a hose, which brought the pressures down quite a bit (shake the system up to see where it settles basically). I did this while keeping the engine at idle. By being patient and slow, I was able to empty each can and watch the pressures stabilize and always know where I was on the high and low sides. After 4x 12 ounce cans, both inlet and outlet sides of the evaporator got cold and sweaty and the system didn't really want to change much as I continued to charge so I stopped there. Ended up at about 35-40 psi on the low side and 225-250 psi on the high side right within the range called for by the AC charts I looked up. Might be a tad on the low side, but I didn't want to push it since this was my first time. With windows all closed other than the driver's window AC set on max with the rear fan on high, temps taken from the middle vent were 48° at idle. Driving down the road they will hit 42° and that is just too cold! You can't hear the fan from the inside, and the new Four Seasons R4 compressor isn't too bad of a drag on the engine.

I am very happy with the outcome and so is the family, as it is now our daily driver.

Thanks again for your time and expertise! I plan on selling my other assorted vehicles and getting down to two '80s suburbans for this seven member family of mine. Life is too short to not drive something with character that carries with it a bygone era that I and the wife appreciate the heritage of.
You have to trim the fins off of the GM orifice tube as it sounds like you got the condenser mount style, there is an evap mount style as well that doesn't have the fins on the back. Most use the Ford orifice tubes for the evap mount. 41 degrees sounds about right for a 28 psi cutoff. Most r134 switches cut off at 22 at the accumulator which gives a 24-26 degree liquid temp. The only thing I see is I would have put 11-12 onces of oil in it, 10 is cutting it a little close with r134 and a dual air system.
 
Ah, OK, makes sense on the orifice - might try the Ford Red (.62") tube if I ever take it apart again.

On the low cut off pressure you mention, I'm curious here because the low side never gets so low that it kicks the compressor off - at least when at idle or stopped at a light. Maybe it does after a time while driving and haven't noticed - but it's on when I stop at a light. So what would cause this? It stopped cycling after the first or second 12 oz can, and it didn't get cold enough until close to the full 48 oz. amount I ended with. I figured it just hadn't gotten cold enough in the cab/cold enough outside to start cycling.

On the oil amount, I took that number straight from Four Season's chart for this vehicle (my factory sticker doesn't list oil amount). Are they figuring this because they assume I need to add on top of the 3 oz. that came in the compressor? I drained 2 oz. out of it (all I could get out of it) as I didn't trust what it came with and figured with the 10 I put in that gives me a total of 10-11 oz.
 
Thanks for the reply Ferm, I really appreciate it!

I ended up going back to using a new TXV correct for that vehicle, and took the coiled probe and mounted on the evaporator outlet manifold, in a vertical orientation with the probe pointing down as required. I used two pipe clamps to get it good and mounted tight and then insulated in pipe insulation.

As far as the rest of the AC conversion, I was going to put the .062" GM orifice tube in as you recommended, but it is slightly different in build and didn't fit (and this is with the orifice tube going in the bottom inlet port of the evaporator). I had the 0.67" Ford blue tube on hand, so I ended up using that.

I mounted an updated parallel flow condenser that RockAuto listed for this vehicle (had to modify the mounts since it is not nearly as wide as the original condenser, but that wasn't too bad). I then put in a 14-in pusher fan and mounted on the right side of the condenser (looking at the vehicle from the front). I had to create my own mounts using brackets and 1/4" thick rubber washers. This worked out really solid, but since the fan is so big it couldn't mount flush to the condenser, which I found out with an inch and a half of space between the two, I'm losing a lot of air flow out to the sides. Someday I might go back and get too small fans and mount on opposite corners of the condenser (top right and bottom left) that can mount flush. I then used a relay powered by the hot wire to the low pressure cutoff switch. By doing this it was a real easy wire to get to and turns the fan on whenever the AC is called for.

I flushed and flushed and flushed some more, buttoned everything up using new O rings coated in PAG 150, then I put 10 oz of PAG 150 oil in, after dumping what came in the compressor. I put half in the compressor, 3 oz in the accumulator, and the rest in the evaporator inlet. I then evacuated using a friend's vacuum pump for two or three hours. I let it sit for 3 days and it didn't drop vacuum at all (I I would have vacuumed down for an hour and let it sit for an hour to check for leaks, but this is just how it worked out in my schedule).

An interesting tidbit I learned with the accumulator. I didn't hear a whoosh or sound of pressure or vacuum loss when cracking open the new accumulator, which made me concerned that maybe the accumulator seal had been broken and could be bad. I contacted Four Seasons, who said that it's fine because the decadent material doesn't activate until oil gets in it. Very interesting. Not sure if this applies to all accumulator brands these days or not.

I charged the system on an 88 degree day, following the directions on the r134a cans from Walmart. The vacuum within the system or the pressure from the can got the compressor going without me needing to adjust or jump the low pressure cutoff switch. Since mine is the original adjustable r12 switch, I adjusted it down to 28 lbs. Just to keep the compressor going while I filled it. I ended up leaving it there as it worked out to be perfect that way. The key here was being very patient while waiting to empty each can, every once in a while wetting down the condenser with a hose, which brought the pressures down quite a bit (shake the system up to see where it settles basically). I did this while keeping the engine at idle. By being patient and slow, I was able to empty each can and watch the pressures stabilize and always know where I was on the high and low sides. After 4x 12 ounce cans, both inlet and outlet sides of the evaporator got cold and sweaty and the system didn't really want to change much as I continued to charge so I stopped there. Ended up at about 35-40 psi on the low side and 225-250 psi on the high side right within the range called for by the AC charts I looked up. Might be a tad on the low side, but I didn't want to push it since this was my first time. With windows all closed other than the driver's window AC set on max with the rear fan on high, temps taken from the middle vent were 48° at idle. Driving down the road they will hit 42° and that is just too cold! You can't hear the fan from the inside, and the new Four Seasons R4 compressor isn't too bad of a drag on the engine.

I am very happy with the outcome and so is the family, as it is now our daily driver.

Thanks again for your time and expertise! I plan on selling my other assorted vehicles and getting down to two '80s suburbans for this seven member family of mine. Life is too short to not drive something with character that carries with it a bygone era that I and the wife appreciate the heritage of.
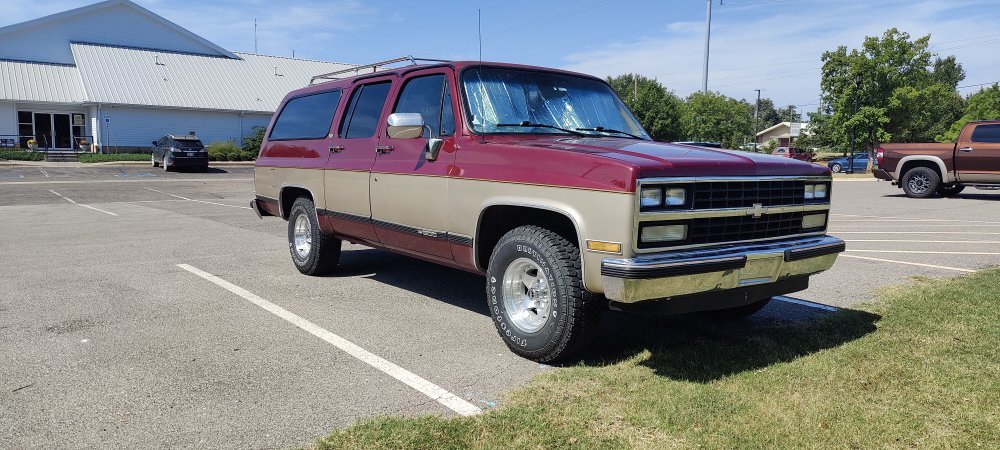
Our 89 was one of our favorites.
It was missing a few creature comforts our 96 and 98 had.
The 89 style seemed a lot more prone to rust than the GMT400's.
In the 2000's the rust issue was worse again
 
Ah, OK, makes sense on the orifice - might try the Ford Red (.62") tube if I ever take it apart again.

On the low cut off pressure you mention, I'm curious here because the low side never gets so low that it kicks the compressor off - at least when at idle or stopped at a light. Maybe it does after a time while driving and haven't noticed - but it's on when I stop at a light. So what would cause this? It stopped cycling after the first or second 12 oz can, and it didn't get cold enough until close to the full 48 oz. amount I ended with. I figured it just hadn't gotten cold enough in the cab/cold enough outside to start cycling.

On the oil amount, I took that number straight from Four Season's chart for this vehicle (my factory sticker doesn't list oil amount). Are they figuring this because they assume I need to add on top of the 3 oz. that came in the compressor? I drained 2 oz. out of it (all I could get out of it) as I didn't trust what it came with and figured with the 10 I put in that gives me a total of 10-11 oz.
It's only going to cycle when it gets down to the pressure your switch cuts off at. You can find the r134 pressure to temperature chart, find your switches cutoff pressure, and that is the temp of the low side at the pressure switch that it will cutoff at if the system is charged properly. Most dual systems will not cycle off at idle unless your fans are on low, it's cool out, and your cab is cooled off, BUT it should cycle going down the road to prevent it from freezing the coil up.

As for the oil capacity, I just downloaded the 4 seasons guide, and it says 11 ounces of oil for a dual AC 90-91 square body Suburban, 10 for 89, and only 9 for 88. The refrigerant capacity was 84 for 90-91, only 60 for 89, but 88 was 84. I couldn't find any real differences between the years, so I can only assume GM was trying different things, and settled on the 90-91 amounts. Keep in mind you only charge to 75-80% of the R12 amount when using R134, and going to a parallel flow condenser will reduce the charge amount 1-1.5 lbs. Personally I wouldn't use less than 11 for a dual AC system using flooded evaps. Mine has 11 of pag 46 in it(H6 uses light oil, R4 can ONLY use pag 150), and another ounce of ice 32(ester based oil). I would rather error on the side of safety than on the edge of compressor death.
 
Great perspective and info, thank you very much! I'll be monitoring temps and listening to hear it cycle as it gets cooler.

I must say, when you're wife comes back from errands saying the AC is too cold, it puts a smile on you're face!

Thanks again for all the expert advise and guidance! God Bless!
 
With the cooler weather coming in, I've noticed it start cycling, and it does seem set a little high - you can tell the AC wants to cool down a little bit more before it switches off. I'll be fixing that one of these days...
 
Back
Top